
User Manual
Page 4
... 44 3.1 Introduction 44 3.1.1 UEFI Menu Bar 44 3.1.2 Navigation Keys 45 3.2 Main Screen 45 3.3 OC Tweaker Screen 46 3.4 Advanced Screen 49 3.4.1 CPU Con guration 50 3.4.2 North Bridge Con guration 51 3.4.3 ...
... 44 3.1 Introduction 44 3.1.1 UEFI Menu Bar 44 3.1.2 Navigation Keys 45 3.2 Main Screen 45 3.3 OC Tweaker Screen 46 3.4 Advanced Screen 49 3.4.1 CPU Con guration 50 3.4.2 North Bridge Con guration 51 3.4.3 ...
User Manual
Page 8
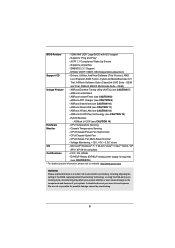
...are not responsible for possible damage caused by overclocking. 8 ACPI 1.1 Compliance Wake Up Events - ASRock Instant Boot - ASRock U-COP (see CAUTION 7) - SMBIOS 2.3.1 Support - ASRock Extreme Tuning Utility (AXTU) (see CAUTION 14) Hardware - CPU Temperature Sensing Monitor - ErP/... your system. BIOS Feature - 32Mb AMI UEFI Legal BIOS with overclocking, including adjusting the setting in the BIOS, applying Untied Overclocking Technology, or using the third-party overclocking tools. Supports jumperfree - ASRock XFast LAN (see CAUTION 9) - Chassis Temperature...
...are not responsible for possible damage caused by overclocking. 8 ACPI 1.1 Compliance Wake Up Events - ASRock Instant Boot - ASRock U-COP (see CAUTION 7) - SMBIOS 2.3.1 Support - ASRock Extreme Tuning Utility (AXTU) (see CAUTION 14) Hardware - CPU Temperature Sensing Monitor - ErP/... your system. BIOS Feature - 32Mb AMI UEFI Legal BIOS with overclocking, including adjusting the setting in the BIOS, applying Untied Overclocking Technology, or using the third-party overclocking tools. Supports jumperfree - ASRock XFast LAN (see CAUTION 9) - Chassis Temperature...

User Manual
Page 24
...port. For any VGA driver installed in a Windows® 7 environment. AMD Dual Graphics brings multi-GPU performance capabilities by enabling an AMD A55 FCH (Hudson-D2) integrated graphics processor and a discrete graphics processor to a single display for both the onboard VGA and the discrete graphics ... Driver 8.863 8.863 8.863 Enjoy the benefit of "Dual Graphics" option on an AMD A55 FCH (Hudson-D2) integrated chipset, all operating in your computer. Please keep the default UEFI setting of AMD Dual Graphics Step 1. Please refer to enter AMD VISION Engine Control Center. ...
...port. For any VGA driver installed in a Windows® 7 environment. AMD Dual Graphics brings multi-GPU performance capabilities by enabling an AMD A55 FCH (Hudson-D2) integrated graphics processor and a discrete graphics processor to a single display for both the onboard VGA and the discrete graphics ... Driver 8.863 8.863 8.863 Enjoy the benefit of "Dual Graphics" option on an AMD A55 FCH (Hudson-D2) integrated chipset, all operating in your computer. Please keep the default UEFI setting of AMD Dual Graphics Step 1. Please refer to enter AMD VISION Engine Control Center. ...
User Manual
Page 27
...XP / XP 64-bit OS: Right click the desktop, choose "Properties", and select the "Settings" tab so that you do not adjust the UEFI setup, the default value of the system memory. D. Click "Extend my Windows desktop onto this motherboard. 4. Set the "Screen Resolution" and ..." option to adjust the memory capability to [32MB], [64MB], [128MB], [256MB] or [512MB] to this monitor". A. Click "Apply" or "OK" to enter UEFI setup. When you can adjust the parameters of surround display feature. Repeat steps C through E for details. 2. Select the display icon identi ed by the number...
...XP / XP 64-bit OS: Right click the desktop, choose "Properties", and select the "Settings" tab so that you do not adjust the UEFI setup, the default value of the system memory. D. Click "Extend my Windows desktop onto this motherboard. 4. Set the "Screen Resolution" and ..." option to adjust the memory capability to [32MB], [64MB], [128MB], [256MB] or [512MB] to this monitor". A. Click "Apply" or "OK" to enter UEFI setup. When you can adjust the parameters of surround display feature. Repeat steps C through E for details. 2. Select the display icon identi ed by the number...
User Manual
Page 33
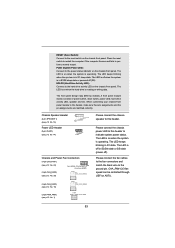
... (Hard Drive Activity LED): Connect to this header to the power status indicator on the chassis front panel. CHA_FAN1/2/3 fan speed can be controlled through UEFI or AXTU. (3-pin CHA_FAN3) (see p.12 No. 10) (3-pin PWR_FAN1) (see p.12 No. 39) Please connect the chassis speaker to the reset switch on the...
... (Hard Drive Activity LED): Connect to this header to the power status indicator on the chassis front panel. CHA_FAN1/2/3 fan speed can be controlled through UEFI or AXTU. (3-pin CHA_FAN3) (see p.12 No. 10) (3-pin PWR_FAN1) (see p.12 No. 39) Please connect the chassis speaker to the reset switch on the...
User Manual
Page 40
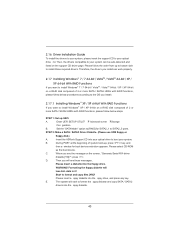
... of 2 or more SATA / SATA2 HDDs with RAID functions, please follow the order from up UEFI. STEP 1: Set up to bottom side to install those required drivers. Please select CD-ROM as the boot device. E. Insert the ASRock Support CD into the oppy diskette. 40 B. STEP 2: Make a SATA / SATA2 Driver Diskette. (Please...
... of 2 or more SATA / SATA2 HDDs with RAID functions, please follow the order from up UEFI. STEP 1: Set up to bottom side to install those required drivers. Please select CD-ROM as the boot device. E. Insert the ASRock Support CD into the oppy diskette. 40 B. STEP 2: Make a SATA / SATA2 Driver Diskette. (Please...
User Manual
Page 41
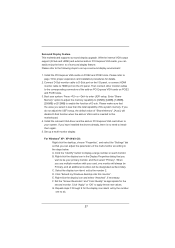
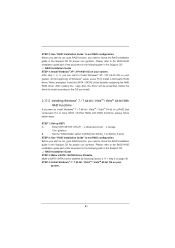
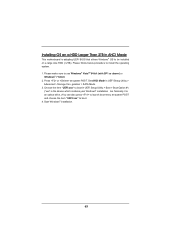
After reading the oppy disk, the driver will be presented. STEP 1: Set up UEFI. Before you start to con gure RAID function, you start to install a third-party RAID driver. Please refer to the BIOS RAID installation guide part ...of the document in the following path in the following section 2.17.1 step 2 on page 40. Enter UEFI SETUP UTILITY Advanced screen Storage Con guration. STEP 2: Use "RAID Installation Guide" to set RAID configuration. Please refer to the BIOS RAID installation...
After reading the oppy disk, the driver will be presented. STEP 1: Set up UEFI. Before you start to con gure RAID function, you start to install a third-party RAID driver. Please refer to the BIOS RAID installation guide part ...of the document in the following path in the following section 2.17.1 step 2 on page 40. Enter UEFI SETUP UTILITY Advanced screen Storage Con guration. STEP 2: Use "RAID Installation Guide" to set RAID configuration. Please refer to the BIOS RAID installation...
User Manual
Page 42
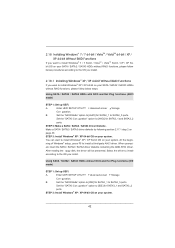
...IDE] for SATA3_1 and SATA3_2 ports. When prompt- ed, insert the SATA / SATA2 / SATA3 driver diskette containing the AMD AHCI driver. Enter UEFI SETUP UTILITY Advanced screen Storage Con guration. Set the "SATA Mode" option to install Windows® 7 / 7 64-bit / VistaTM / VistaTM... 64-bit / XP / XP 64bit OS on your system. Enter UEFI SETUP UTILITY Advanced screen Storage Con guration. You can start to SATA2_5 ports. B. STEP 2: Make a SATA / SATA2 / SATA3 Driver Diskette. Make a SATA...
...IDE] for SATA3_1 and SATA3_2 ports. When prompt- ed, insert the SATA / SATA2 / SATA3 driver diskette containing the AMD AHCI driver. Enter UEFI SETUP UTILITY Advanced screen Storage Con guration. Set the "SATA Mode" option to install Windows® 7 / 7 64-bit / VistaTM / VistaTM... 64-bit / XP / XP 64bit OS on your system. Enter UEFI SETUP UTILITY Advanced screen Storage Con guration. You can start to SATA2_5 ports. B. STEP 2: Make a SATA / SATA2 / SATA3 Driver Diskette. Make a SATA...
User Manual
Page 43
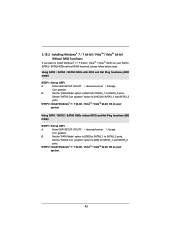
...-bit / VistaTM / VistaTM 64-bit OS on your SATA / SATA2 / SATA3 HDDs without NCQ and Hot Plug functions (IDE mode) STEP 1: Set up UEFI. Set the "SATA Mode" option to SATA2_5 ports. Set the "SATA3 Con guration" option to [AHCI] for SATA2_1 to [IDE] for SATA3_1 and SATA3_2 ...ports. Enter UEFI SETUP UTILITY Advanced screen Storage Con guration. Enter UEFI SETUP UTILITY Advanced screen Storage Con guration. Set the "SATA3 Con guration" option to [IDE] for SATA2_1 to [AHCI...
...-bit / VistaTM / VistaTM 64-bit OS on your SATA / SATA2 / SATA3 HDDs without NCQ and Hot Plug functions (IDE mode) STEP 1: Set up UEFI. Set the "SATA Mode" option to SATA2_5 ports. Set the "SATA3 Con guration" option to [AHCI] for SATA2_1 to [IDE] for SATA3_1 and SATA3_2 ...ports. Enter UEFI SETUP UTILITY Advanced screen Storage Con guration. Enter UEFI SETUP UTILITY Advanced screen Storage Con guration. Set the "SATA3 Con guration" option to [IDE] for SATA2_1 to [AHCI...
User Manual
Page 44
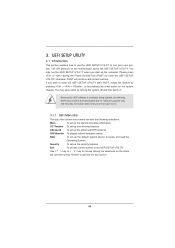
...selections: Main To set up the system time/date information OC Tweaker To set up overclocking features Advanced To set up the advanced UEFI features H/W Monitor To display current hardware status Boot To set up the default system device to locate and load the Operating System ...system off and then back on the system chassis. UEFI SETUP UTILITY 3.1 Introduction This section explains how to use the UEFI SETUP UTILITY to get into the sub screen. 44 Because the UEFI software is constantly being updated, the following UEFI setup screens and descriptions are for reference purpose only...
...selections: Main To set up the system time/date information OC Tweaker To set up overclocking features Advanced To set up the advanced UEFI features H/W Monitor To display current hardware status Boot To set up the default system device to locate and load the Operating System ...system off and then back on the system chassis. UEFI SETUP UTILITY 3.1 Introduction This section explains how to use the UEFI SETUP UTILITY to get into the sub screen. 44 Because the UEFI software is constantly being updated, the following UEFI setup screens and descriptions are for reference purpose only...
User Manual
Page 45
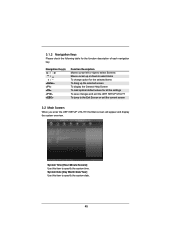
... for the function description of each navigation key. 3.1.2 Navigation Keys Please check the following table for all the settings To save changes and exit the UEFI SETUP UTILITY To jump to the Exit Screen or exit the current screen 3.2 Main Screen When you enter the...
... for the function description of each navigation key. 3.1.2 Navigation Keys Please check the following table for all the settings To save changes and exit the UEFI SETUP UTILITY To jump to the Exit Screen or exit the current screen 3.2 Main Screen When you enter the...

User Manual
Page 49
... values in this section, you may cause the system to malfunction. Select the proper UEFI le to update your UEFI, and reboot your system after UEFI update process completes. 49 Instant Flash Instant Flash is a UEFI ash utility embedded in Flash ROM. In this option, you are allowed to load and...South Bridge Con guration, Storage Con guration, Super IO Con guration, ACPI Con guration, and USB Con guration. If you to update system UEFI without preparing an additional oppy diskette or other complicated ash utility. Please be noted that the USB ash drive or hard drive must use FAT32...
... values in this section, you may cause the system to malfunction. Select the proper UEFI le to update your UEFI, and reboot your system after UEFI update process completes. 49 Instant Flash Instant Flash is a UEFI ash utility embedded in Flash ROM. In this option, you are allowed to load and...South Bridge Con guration, Storage Con guration, Super IO Con guration, ACPI Con guration, and USB Con guration. If you to update system UEFI without preparing an additional oppy diskette or other complicated ash utility. Please be noted that the USB ash drive or hard drive must use FAT32...

User Manual
Page 57
... this item to use of USB 3.0 controller. Enables legacy support if USB devices are four con guration options: [Enabled], [Auto], [Disabled] and [UEFI Setup Only]. Legacy USB Support Use this option to enable or disable legacy support for USB 3.0 devices. Enables support for legacy USB. [Auto] - ... Linux OS. If you have USB compatibility issue, it is selected. Please refer to enable or disable the use only under legacy OS and UEFI setup when [Disabled] is recommended to select [Disabled] to use of USB 2.0 controller. 3.4.7 USB Configuration USB 2.0 Controller Use this item to...
... this item to use of USB 3.0 controller. Enables legacy support if USB devices are four con guration options: [Enabled], [Auto], [Disabled] and [UEFI Setup Only]. Legacy USB Support Use this option to enable or disable legacy support for USB 3.0 devices. Enables support for legacy USB. [Auto] - ... Linux OS. If you have USB compatibility issue, it is selected. Please refer to enable or disable the use only under legacy OS and UEFI setup when [Disabled] is recommended to select [Disabled] to use of USB 2.0 controller. 3.4.7 USB Configuration USB 2.0 Controller Use this item to...

User Manual
Page 61
...select this option, it will pop-out the following message, "Discard changes?" Launch EFI Shell from filesystem device Attempts to exit the UEFI SETUP UTILITY without saving any changes. Select [OK] to Launch EFI Shell application (Shell64.efi) from one of the available lesystem devices. ... it will pop-out the following message, "Discard changes and exit setup?" Select [OK] to discard all the setup questions. Load UEFI Defaults Load UEFI default values for this option, it will pop-out the following message, "Save con guration changes and exit setup?" F9 key can ...
...select this option, it will pop-out the following message, "Discard changes?" Launch EFI Shell from filesystem device Attempts to exit the UEFI SETUP UTILITY without saving any changes. Select [OK] to Launch EFI Shell application (Shell64.efi) from one of the available lesystem devices. ... it will pop-out the following message, "Discard changes and exit setup?" Select [OK] to discard all the setup questions. Load UEFI Defaults Load UEFI default values for this option, it will pop-out the following message, "Save con guration changes and exit setup?" F9 key can ...
User Manual
Page 63
...(with SP1 or above) or Windows® 7 64-bit. 2. Start Windows® installation. 63 Please make sure to boot. 4. Set AHCI Mode in UEFI Setup Utility > Boot > Boot Option #1. ("xxx" is the device which contains your Windows® installation les. Normally it is an optical drive.) You can... POST. Installing OS on a large size HDD (>2TB). Choose the item "UEFI:xxx" to be installed on a HDD Larger Than 2TB in AHCI Mode This motherboard is adopting UEFI BIOS that allows Windows® OS to boot in UEFI Setup Utility > Advanced > Storage Con guration > SATA Mode. 3. Please follow...
...(with SP1 or above) or Windows® 7 64-bit. 2. Start Windows® installation. 63 Please make sure to boot. 4. Set AHCI Mode in UEFI Setup Utility > Boot > Boot Option #1. ("xxx" is the device which contains your Windows® installation les. Normally it is an optical drive.) You can... POST. Installing OS on a large size HDD (>2TB). Choose the item "UEFI:xxx" to be installed on a HDD Larger Than 2TB in AHCI Mode This motherboard is adopting UEFI BIOS that allows Windows® OS to boot in UEFI Setup Utility > Advanced > Storage Con guration > SATA Mode. 3. Please follow...

User Manual
Page 64
... that allows Windows® OS to be installed on a large size HDD (>2TB). Press to save the change and exit. 4. Choose UEFI : Built - Please follow below : Drv[4E] Ctrl[B5] Lang[eng] 6. Press or at system POST. Set RAID Mode in dh 4E. 64 Key in dh [...-bit (with SP1 or above) or Windows® 7 64-bit. 2. Please make sure to install the operating system. 1. Key in drvcfg, for example: key in UEFI Setup Utility > Advanced > Storage Con guration > SATA Mode. 3. Choose onboard RAID 3TB+ unlocker...
... that allows Windows® OS to be installed on a large size HDD (>2TB). Press to save the change and exit. 4. Choose UEFI : Built - Please follow below : Drv[4E] Ctrl[B5] Lang[eng] 6. Press or at system POST. Set RAID Mode in dh 4E. 64 Key in dh [...-bit (with SP1 or above) or Windows® 7 64-bit. 2. Please make sure to install the operating system. 1. Key in drvcfg, for example: key in UEFI Setup Utility > Advanced > Storage Con guration > SATA Mode. 3. Choose onboard RAID 3TB+ unlocker...

User Manual
Page 66
Choose UEFI: SCSI CD/DVD Drive. * This option only shows on keyboard to Create. 14. 11. Press Space on Windows® 7 64-bit and VistaTM 64-bit OS. 66 Choose Ld Size setting, and key in the Raid size. 13. Press to enter Boot Manual. During reboot, please press to exit Utility. 15. After set up Raid size, please click Start to toggle checkbox. 12.
Choose UEFI: SCSI CD/DVD Drive. * This option only shows on keyboard to Create. 14. 11. Press Space on Windows® 7 64-bit and VistaTM 64-bit OS. 66 Choose Ld Size setting, and key in the Raid size. 13. Press to enter Boot Manual. During reboot, please press to exit Utility. 15. After set up Raid size, please click Start to toggle checkbox. 12.
Quick Installation Guide
Page 8
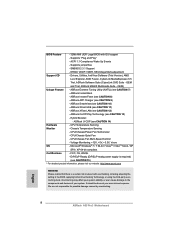
... CyberLink MediaEspresso 6.5 Trial, ASRock Software Suite (CyberLink DVD Suite - ASRock Instant Flash (see CAUTION 14) Hardware - Chassis Temperature Sensing - FCC, CE, WHQL - BIOS Feature - 32Mb AMI UEFI Legal BIOS with overclocking, including...XP 64-bit compliant Certifications - English 8 ASRock A55 Pro3 Motherboard Voltage Monitoring: +12V, +5V, +3.3V, Vcore OS - ASRock MAGIX Multimedia Suite - Hybrid Booster: - ASRock Extreme Tuning Utility (AXTU) (see CAUTION 9) - ASRock APP Charger (see CAUTION 7) - Drivers, Utilities, ...
... CyberLink MediaEspresso 6.5 Trial, ASRock Software Suite (CyberLink DVD Suite - ASRock Instant Flash (see CAUTION 14) Hardware - Chassis Temperature Sensing - FCC, CE, WHQL - BIOS Feature - 32Mb AMI UEFI Legal BIOS with overclocking, including...XP 64-bit compliant Certifications - English 8 ASRock A55 Pro3 Motherboard Voltage Monitoring: +12V, +5V, +3.3V, Vcore OS - ASRock MAGIX Multimedia Suite - Hybrid Booster: - ASRock Extreme Tuning Utility (AXTU) (see CAUTION 9) - ASRock APP Charger (see CAUTION 7) - Drivers, Utilities, ...

Quick Installation Guide
Page 21
... rates. Step 5. Please keep the default UEFI setting of "Dual Graphics" option on an AMD A55 FCH (Hudson-D2) integrated chipset, all operating in your computer. Restart your system. English 21 ASRock A55 Pro3 Motherboard AMD Dual Graphics brings multi-GPU performance... capabilities by enabling an AMD A55 FCH (Hudson-D2) integrated graphics processor and a discrete graphics processor to a single ...
... rates. Step 5. Please keep the default UEFI setting of "Dual Graphics" option on an AMD A55 FCH (Hudson-D2) integrated chipset, all operating in your computer. Restart your system. English 21 ASRock A55 Pro3 Motherboard AMD Dual Graphics brings multi-GPU performance... capabilities by enabling an AMD A55 FCH (Hudson-D2) integrated graphics processor and a discrete graphics processor to a single ...

Quick Installation Guide
Page 24
... support (D-Sub and HDMI) and external add-on PCI Express VGA cards, you use multiple monitors with your card, one to six. 24 ASRock A55 Pro3 Motherboard English Install the PCI Express VGA cards on the I/O panel. Please refer to the steps below. Boot your system. For Windows®... PCI Express VGA card driver to this monitor". When you can adjust the parameters of the system memory. D. Click "Apply" or "OK" to enter UEFI setup. Set the "Screen Resolution" and "Color Quality" as Secondary. Repeat steps C through E for the diaplay icon identified by the number...
... support (D-Sub and HDMI) and external add-on PCI Express VGA cards, you use multiple monitors with your card, one to six. 24 ASRock A55 Pro3 Motherboard English Install the PCI Express VGA cards on the I/O panel. Please refer to the steps below. Boot your system. For Windows®... PCI Express VGA card driver to this monitor". When you can adjust the parameters of the system memory. D. Click "Apply" or "OK" to enter UEFI setup. Set the "Screen Resolution" and "Color Quality" as Secondary. Repeat steps C through E for the diaplay icon identified by the number...

