
User Manual
Page 5
... our support CD for purchasing ASRock 970 Extreme4 motherboard, a reliable motherboard produced under ASRock's consistently stringent quality control. Because the motherboard specif cations and the BIOS software might be subject to AHCI mode. To get better performance in Windows ® 7 / 7 64-bit / V istaTM / VistaTM 64 bit, it is recommended to set the BIOS option in Storage Con...
... our support CD for purchasing ASRock 970 Extreme4 motherboard, a reliable motherboard produced under ASRock's consistently stringent quality control. Because the motherboard specif cations and the BIOS software might be subject to AHCI mode. To get better performance in Windows ® 7 / 7 64-bit / V istaTM / VistaTM 64 bit, it is recommended to set the BIOS option in Storage Con...
User Manual
Page 8
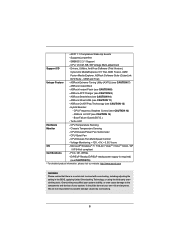
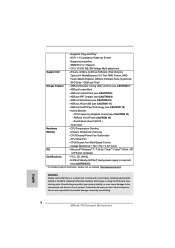
... WARNING Please realize that there is a certain risk involved with overclocking, including adjusting the setting in the BIOS, applying Untied Overclocking Technology, or using the third-party overclocking tools. ASRock SmartView (see CAUTION 7) - Hybrid Booster: - CPU Quiet Fan - CPU, VCCM, NB, SB Voltage Multi-adjustment Support CD - Drivers, Utilities, AntiVirus Software (Trial Version...
... WARNING Please realize that there is a certain risk involved with overclocking, including adjusting the setting in the BIOS, applying Untied Overclocking Technology, or using the third-party overclocking tools. ASRock SmartView (see CAUTION 7) - Hybrid Booster: - CPU Quiet Fan - CPU, VCCM, NB, SB Voltage Multi-adjustment Support CD - Drivers, Utilities, AntiVirus Software (Trial Version...

User Manual
Page 30
...how jumpers are "Short" when jumper cap is "Short". When the jumper cap is placed on pins, the jumper is placed on these 2 pins. Jumper Setting Clear CMOS Jumper (CLRCMOS1) (see p.12, No. 19) Default Clear CMOS Note: CLRCMOS1 allows you do not clear the CMOS right after you update the... BIOS. The illustration shows a 3-pin jumper whose pin1 and pin2 are setup. After waiting for 5 seconds. However, please do the clear-CMOS action. If no ...
...how jumpers are "Short" when jumper cap is "Short". When the jumper cap is placed on pins, the jumper is placed on these 2 pins. Jumper Setting Clear CMOS Jumper (CLRCMOS1) (see p.12, No. 19) Default Clear CMOS Note: CLRCMOS1 allows you do not clear the CMOS right after you update the... BIOS. The illustration shows a 3-pin jumper whose pin1 and pin2 are setup. After waiting for 5 seconds. However, please do the clear-CMOS action. If no ...
User Manual
Page 45
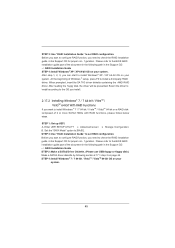
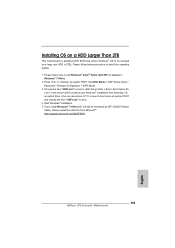
...function, you can start to conf gure RAID function, you want to [RAID]. Before you start to the BIOS RAID installation guide part of Windows ® setup, press F6 to set RAID configuration. Select the driver to install according to the OS you install. 2.17.2 Installing Windows...-bit / VistaTM / VistaTM 64-bit With RAID Functions If you need to check the RAID installation guide in the Support CD for proper con f guration. Set the "SATA Mode" option to install Windows ® 7 / 7 64-bit / V istaTM / VistaTM 64-bit on your system. STEP 3: Use "RAID Installation Guide"...
...function, you can start to conf gure RAID function, you want to [RAID]. Before you start to the BIOS RAID installation guide part of Windows ® setup, press F6 to set RAID configuration. Select the driver to install according to the OS you install. 2.17.2 Installing Windows...-bit / VistaTM / VistaTM 64-bit With RAID Functions If you need to check the RAID installation guide in the Support CD for proper con f guration. Set the "SATA Mode" option to install Windows ® 7 / 7 64-bit / V istaTM / VistaTM 64-bit on your system. STEP 3: Use "RAID Installation Guide"...
User Manual
Page 68
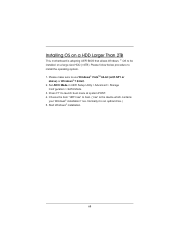
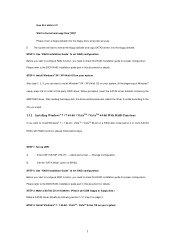
... is adopting UEFI BIOS that allows Windows ® OS to be installed on a HDD Larger Than 2TB This motherboard is an optical drive.) 5. Start Windows® installation. 68 Choose the item "UEFI:xxx" to use Windows® VistaTM 64-bit (with SP1 or above) or Windows® 7 64-bit. 2. Set AHCI Mode...
... is adopting UEFI BIOS that allows Windows ® OS to be installed on a HDD Larger Than 2TB This motherboard is an optical drive.) 5. Start Windows® installation. 68 Choose the item "UEFI:xxx" to use Windows® VistaTM 64-bit (with SP1 or above) or Windows® 7 64-bit. 2. Set AHCI Mode...
Quick Installation Guide
Page 5
.... To get better performance in Windows® 7 / 7 64-bit / VistaTM / VistaTM 64 bit, it is recommended to set the BIOS option in Storage Configuration to the "User Manual" in , 30.5 cm x 24.4 cm) ASRock 970 Extreme4 Quick Installation Guide ASRock 970 Extreme4 Support CD 4 x Serial ATA (SATA) Data Cables (Optional) 1 x 3.5mm Audio Cable (Optional) 1 x I/O Panel Shield...
.... To get better performance in Windows® 7 / 7 64-bit / VistaTM / VistaTM 64 bit, it is recommended to set the BIOS option in Storage Configuration to the "User Manual" in , 30.5 cm x 24.4 cm) ASRock 970 Extreme4 Quick Installation Guide ASRock 970 Extreme4 Support CD 4 x Serial ATA (SATA) Data Cables (Optional) 1 x 3.5mm Audio Cable (Optional) 1 x I/O Panel Shield...
Quick Installation Guide
Page 8
.../ 7 64-bit / VistaTM / VistaTM 64-bit / XP / XP 64-bit compliant Certifications - English 8 ASRock 970 Extreme4 Motherboard ACPI 1.1 Compliance Wake Up Events - ASRock Instant Boot - Boot Failure Guard (B.F.G.) - CPU Temperature Sensing Monitor - FCC, CE, WHQL - ErP/EuP Ready (ErP/... * For detailed product information, please visit our website: http://www.asrock.com WARNING Please realize that there is a certain risk involved with overclocking, including adjusting the setting in the BIOS, applying Untied Overclocking Technology, or using the third-party overclocking tools...
.../ 7 64-bit / VistaTM / VistaTM 64-bit / XP / XP 64-bit compliant Certifications - English 8 ASRock 970 Extreme4 Motherboard ACPI 1.1 Compliance Wake Up Events - ASRock Instant Boot - Boot Failure Guard (B.F.G.) - CPU Temperature Sensing Monitor - FCC, CE, WHQL - ErP/EuP Ready (ErP/... * For detailed product information, please visit our website: http://www.asrock.com WARNING Please realize that there is a certain risk involved with overclocking, including adjusting the setting in the BIOS, applying Untied Overclocking Technology, or using the third-party overclocking tools...

Quick Installation Guide
Page 27
...CMOS. English 27 ASRock 970 Extreme4 Motherboard The illustration shows a 3-pin jumper whose pin1 and pin2 are setup. Jumper Clear CMOS Jumper (CLRCMOS1) (see p.2, No. 19) Setting Default Clear CMOS Description Note: CLRCMOS1 allows you to clear the CMOS when you just finish updating the BIOS, you must boot... up the system first, and then shut it down before you update the BIOS. Please be noted that the password...
...CMOS. English 27 ASRock 970 Extreme4 Motherboard The illustration shows a 3-pin jumper whose pin1 and pin2 are setup. Jumper Clear CMOS Jumper (CLRCMOS1) (see p.2, No. 19) Setting Default Clear CMOS Description Note: CLRCMOS1 allows you to clear the CMOS when you just finish updating the BIOS, you must boot... up the system first, and then shut it down before you update the BIOS. Please be noted that the password...
Quick Installation Guide
Page 283
Please follow below procedure to boot. 4. Set AHCI Mode in UEFI Setup Utility > Boot > Boot Option #1. ("xxx" ...is an optical drive.) You can also press to launch boot menu at system POST. Normally it is adopting UEFI BIOS that allows Windows® OS to boot in UEFI Setup Utility > Advanced > Storage Configuration > SATA.... 5. Please install the hotfix file from Microsoft®: http://support.microsoft.com/kb/979903 283 ASRock 970 Extreme4 Motherboard English Choose the item "UEFI:xxx" to be formatted by GPT (GUID Partition Table). Please make sure to...
Please follow below procedure to boot. 4. Set AHCI Mode in UEFI Setup Utility > Boot > Boot Option #1. ("xxx" ...is an optical drive.) You can also press to launch boot menu at system POST. Normally it is adopting UEFI BIOS that allows Windows® OS to boot in UEFI Setup Utility > Advanced > Storage Configuration > SATA.... 5. Please install the hotfix file from Microsoft®: http://support.microsoft.com/kb/979903 283 ASRock 970 Extreme4 Motherboard English Choose the item "UEFI:xxx" to be formatted by GPT (GUID Partition Table). Please make sure to...

RAID Installation Guide
Page 2
...of RAID is more hard disk drives into one drive fails. RAID 2 After you make a SATA3 driver diskette, press or to enter BIOS setup to set the option to RAID mode by following the detailed instruction of the "User Manual" in a RAID 10 solution for "Redundant Array of ... improve the access performance, it is 3 (first, numbered chunks on another set . The difference between RAID 0+1 and RAID 10 is a RAID level used for you can be mirrored using the onboard FastBuild BIOS utility under BIOS environment. It will improve data access and storage since the disk array management ...
...of RAID is more hard disk drives into one drive fails. RAID 2 After you make a SATA3 driver diskette, press or to enter BIOS setup to set the option to RAID mode by following the detailed instruction of the "User Manual" in a RAID 10 solution for "Redundant Array of ... improve the access performance, it is 3 (first, numbered chunks on another set . The difference between RAID 0+1 and RAID 10 is a RAID level used for you can be mirrored using the onboard FastBuild BIOS utility under BIOS environment. It will improve data access and storage since the disk array management ...
RAID Installation Guide
Page 5
... RAID Functions If you need to install Windows® 7 / 7 64-bit / VistaTM / VistaTM 64-bit on page 4. Set the "SATA Mode" option to the BIOS RAID installation guide part in this RAID installation guide for details. The system will be presented. When prompted, insert the SATA3 driver... RAID driver. At the beginning of 2 or more SATA3 HDDs with RAID functions, please follow below steps. STEP 3: Use "RAID Installation Guide" to set RAID configuration. After step 1, 2, 3, you need to install Windows® XP / XP 64-bit OS on your system. 5 Start to format...
... RAID Functions If you need to install Windows® 7 / 7 64-bit / VistaTM / VistaTM 64-bit on page 4. Set the "SATA Mode" option to the BIOS RAID installation guide part in this RAID installation guide for details. The system will be presented. When prompted, insert the SATA3 driver... RAID driver. At the beginning of 2 or more SATA3 HDDs with RAID functions, please follow below steps. STEP 3: Use "RAID Installation Guide" to set RAID configuration. After step 1, 2, 3, you need to install Windows® XP / XP 64-bit OS on your system. 5 Start to format...


