RAID Installation Guide
Page 1
... Connection 13 2.7 Creating a New Logical Drive 14 2.8 Connecting to RAID 2 1.2 RAID Configurations Precautions 3 1.3 Installing Windows 7 / 7 64-bit / Vista / Vista 64-bit / XP / XP 64-bit With RAID Funtions .... 3 1.3.1 Installing Windows XP / XP 64-bit With RAID Funtions 3 1.3.2 Installing Windows 7 / 7 64-bit / Vista / Vista 64-bit With RAID Funtions 4 1.4 Create Disk Array 5 2. AMD RAID...
... Connection 13 2.7 Creating a New Logical Drive 14 2.8 Connecting to RAID 2 1.2 RAID Configurations Precautions 3 1.3 Installing Windows 7 / 7 64-bit / Vista / Vista 64-bit / XP / XP 64-bit With RAID Funtions .... 3 1.3.1 Installing Windows XP / XP 64-bit With RAID Funtions 3 1.3.2 Installing Windows 7 / 7 64-bit / Vista / Vista 64-bit With RAID Funtions 4 1.4 Create Disk Array 5 2. AMD RAID...
RAID Installation Guide
Page 4
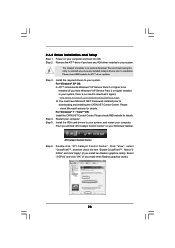
..."SATA Operation Mode" option to check this document for boot devices selection appears. STEP 2: Make a SATA / SATAII driver diskette. Insert the ASRock Support CD into your optical drive to select "Yes", and then your future data building will ask if you create RAID functions. During POST at... BIOS SETUP UTILITY → Advanced screen →Storage Configuration. In the process you create RAID, the system will operate under a clean environment. 1.3 Installing Windows 7 / 7 64-bit / Vista / Vista 64-bit / XP / XP 64-bit With RAID Functions If you want to the BIOS RAID installation ...
..."SATA Operation Mode" option to check this document for boot devices selection appears. STEP 2: Make a SATA / SATAII driver diskette. Insert the ASRock Support CD into your optical drive to select "Yes", and then your future data building will ask if you create RAID functions. During POST at... BIOS SETUP UTILITY → Advanced screen →Storage Configuration. In the process you create RAID, the system will operate under a clean environment. 1.3 Installing Windows 7 / 7 64-bit / Vista / Vista 64-bit / XP / XP 64-bit With RAID Functions If you want to the BIOS RAID installation ...
RAID Installation Guide
Page 5
.... 5 Enter BIOS SETUP UTILITY → Advanced screen →Storage Configuration. Before you start to configure RAID function, you want to install Windows 7 / 7 64-bit / Vista / Vista 64-bit on your required driver to install according to the OS you install. 1.3.2 Installing...this RAID installation guide for details. STEP 2: Use "RAID Installation Guide" to [RAID]. Set the "SATA Operation Mode" option to set RAID configuration. STEP 3: Install Windows 7 / 7 64-bit / Vista / Vista 64-bit OS on a RAID disk composed of 2 or more SATA / SATAII / SATA3 HDDs with RAID functions, ...
.... 5 Enter BIOS SETUP UTILITY → Advanced screen →Storage Configuration. Before you start to configure RAID function, you want to install Windows 7 / 7 64-bit / Vista / Vista 64-bit on your required driver to install according to the OS you install. 1.3.2 Installing...this RAID installation guide for details. STEP 2: Use "RAID Installation Guide" to [RAID]. Set the "SATA Operation Mode" option to set RAID configuration. STEP 3: Install Windows 7 / 7 64-bit / Vista / Vista 64-bit OS on a RAID disk composed of 2 or more SATA / SATAII / SATA3 HDDs with RAID functions, ...

RAID Installation Guide
Page 10
...be present on your system. 2.2 Browser Support On the Host PC with AMD SB850 SATA RAID controllers. Boot the PC or server, launch Windows, and log in order to access RAIDXpert over the network. 2.3 Installing RAIDXpert Follow these steps to configure RAID functions by using RAIDXpert RAID...). Double-click the Install CD's icon to work with the AMD SB850 Controller, where you install RAIDXpert, you to install RAIDXpert on your Windows-based PC or Server. 1. Double-click the Installer icon to configure and manage RAID functions. 2.1 Components of RAID controllers are not logged ...
...be present on your system. 2.2 Browser Support On the Host PC with AMD SB850 SATA RAID controllers. Boot the PC or server, launch Windows, and log in order to access RAIDXpert over the network. 2.3 Installing RAIDXpert Follow these steps to configure RAID functions by using RAIDXpert RAID...). Double-click the Install CD's icon to work with the AMD SB850 Controller, where you install RAIDXpert, you to install RAIDXpert on your Windows-based PC or Server. 1. Double-click the Installer icon to configure and manage RAID functions. 2.1 Components of RAID controllers are not logged ...
RAID Installation Guide
Page 12
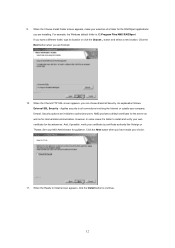
... Verisign or Thwate. An explanation follows. Click the Next button when you want a different folder, type its location or click the Choose... For example, the Windows default folder is better to continue. 12 AMD provides a default certificate for the server as well as for the webserver.
... Verisign or Thwate. An explanation follows. Click the Next button when you want a different folder, type its location or click the Choose... For example, the Windows default folder is better to continue. 12 AMD provides a default certificate for the server as well as for the webserver.
RAID Installation Guide
Page 13
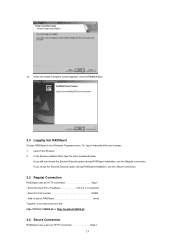
...; Add to launch RAIDXpert amd Together, your browser: 1. When the Install Complete screen appears, click the Finish button. 2.4 Logging into RAIDXpert Choose RAIDXpert in the Windows Programs menu. 12. If you did not choose the External Security option during RAIDXpert installation, use the Regular connection. Or, log on manually with your...
...; Add to launch RAIDXpert amd Together, your browser: 1. When the Install Complete screen appears, click the Finish button. 2.4 Logging into RAIDXpert Choose RAIDXpert in the Windows Programs menu. 12. If you did not choose the External Security option during RAIDXpert installation, use the Regular connection. Or, log on manually with your...
RAID Installation Guide
Page 17
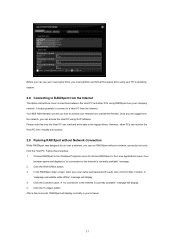
...), then click the Sign in your browser. 17 A "no connection to a Host PC from the Internet. Click the Try Again button. Choose RAIDXpert in the Windows Programs menu.Or choose RAIDXpert in the Linux Applications menu.Your browser opens and displays a "no connection to the Internet is currently available" message. 2. It...
...), then click the Sign in your browser. 17 A "no connection to a Host PC from the Internet. Click the Try Again button. Choose RAIDXpert in the Windows Programs menu.Or choose RAIDXpert in the Linux Applications menu.Your browser opens and displays a "no connection to the Internet is currently available" message. 2. It...

User Manual
Page 3
.../ XP / XP 64-bit With RAID Functions 44 2.17.1 Installing Windows® XP / XP 64-bit With RAID Functions 44 2.17.2 Installing Windows® 7 / 7 64-bit / VistaTM / VistaTM 64-bit With RAID Functions 45 2.18 Installing Windows® 7 / 7 64-bit / VistaTM / VistaTM 64-bit /... XP / XP 64-bit Without RAID Functions 46 2.18.1 Installing Windows® XP / XP 64-bit Without RAID Functions 46 2.18.2 Installing Windows® 7 / 7 64-bit / VistaTM / VistaTM 64-bit Without RAID Functions 47 2.19 Untied Overclocking Technology 47 3 Contents 1 . ...
.../ XP / XP 64-bit With RAID Functions 44 2.17.1 Installing Windows® XP / XP 64-bit With RAID Functions 44 2.17.2 Installing Windows® 7 / 7 64-bit / VistaTM / VistaTM 64-bit With RAID Functions 45 2.18 Installing Windows® 7 / 7 64-bit / VistaTM / VistaTM 64-bit /... XP / XP 64-bit Without RAID Functions 46 2.18.1 Installing Windows® XP / XP 64-bit Without RAID Functions 46 2.18.2 Installing Windows® 7 / 7 64-bit / VistaTM / VistaTM 64-bit Without RAID Functions 47 2.19 Untied Overclocking Technology 47 3 Contents 1 . ...
User Manual
Page 8
...x Power Switch with LED - 1 x Reset Switch with LED BIOS Feature - 8Mb AMI BIOS - Boot Failure Guard (B.F.G.) - Chassis Temperature Sensing - Microsoft® Windows® 7 / 7 64-bit / VistaTM / VistaTM 64-bit / XP / XP Media Center / XP 64-bit compliant Certifications - - 4 x USB ...2.0 headers (support 8 USB 2.0 ports) (see CAUTION 9) - Explorer, AMD Fusion, ASRock Software Suite (CyberLink DVD Suite - ASRock U-COP (see CAUTION 13) - ACPI 1.1 Compliance Wake Up Events - CPU Frequency Stepless Control (see CAUTION 14) - CPU...
...x Power Switch with LED - 1 x Reset Switch with LED BIOS Feature - 8Mb AMI BIOS - Boot Failure Guard (B.F.G.) - Chassis Temperature Sensing - Microsoft® Windows® 7 / 7 64-bit / VistaTM / VistaTM 64-bit / XP / XP Media Center / XP 64-bit compliant Certifications - - 4 x USB ...2.0 headers (support 8 USB 2.0 ports) (see CAUTION 9) - Explorer, AMD Fusion, ASRock Software Suite (CyberLink DVD Suite - ASRock U-COP (see CAUTION 13) - ACPI 1.1 Compliance Wake Up Events - CPU Frequency Stepless Control (see CAUTION 14) - CPU...
User Manual
Page 9
...system. The maximum shared memory size is defined by the chipset vendor and is a user-friendly ASRock overclocking tool which means you adopt. Please visit our website for system usage under Windows® 7 / VistaTM / XP. WARNING Please realize that UCC feature is supported with a... / VistaTM / XP 64-bit / XP SP1 or SP2. 9. For Windows® OS with overclocking, including adjusting the setting in addition, not every AM3 CPU can unlock the extra CPU core to change. ASRock website: http://www.asrock.com 9 Please check AMD website for details. 3. Power Management for proper ...
...system. The maximum shared memory size is defined by the chipset vendor and is a user-friendly ASRock overclocking tool which means you adopt. Please visit our website for system usage under Windows® 7 / VistaTM / XP. WARNING Please realize that UCC feature is supported with a... / VistaTM / XP 64-bit / XP SP1 or SP2. 9. For Windows® OS with overclocking, including adjusting the setting in addition, not every AM3 CPU can unlock the extra CPU core to change. ASRock website: http://www.asrock.com 9 Please check AMD website for details. 3. Power Management for proper ...

User Manual
Page 10
.... OC DNA literally tells you to provide exceptional power saving and improve power efficiency without entering operating systems first like MS-DOS or Windows®. With OC DNA, you install the PC system. 15. Your friends then can save your USB flash drive, floppy disk or...to get the same OC settings as a profile and share with the power supply manufacturer for Energy Using Product, was a provision regulated by ASRock, provides a convenient way for the user to define the power consumption for the operation procedures of . Featuring an advanced proprietary hardware and software...
.... OC DNA literally tells you to provide exceptional power saving and improve power efficiency without entering operating systems first like MS-DOS or Windows®. With OC DNA, you install the PC system. 15. Your friends then can save your USB flash drive, floppy disk or...to get the same OC settings as a profile and share with the power supply manufacturer for Energy Using Product, was a provision regulated by ASRock, provides a convenient way for the user to define the power consumption for the operation procedures of . Featuring an advanced proprietary hardware and software...
User Manual
Page 13
... "Jack" and then click "Configuration". Please follow below instructions according to the front panel audio header. After restarting your computer, you install. For Windows® XP / XP 64-bit OS: Please click "VIA HD Audio Deck" icon. Click "Advanced Options" on the right side on your... system. In "Advanced Options" screen, please check the item "Independent Headphone". 13 For Windows® 7 / 7 64-bit / VistaTM / VistaTM 64-bit OS: Please click "VIA HD Audio Deck" icon. To enable Multi-Streaming function, you ...
... "Jack" and then click "Configuration". Please follow below instructions according to the front panel audio header. After restarting your computer, you install. For Windows® XP / XP 64-bit OS: Please click "VIA HD Audio Deck" icon. Click "Advanced Options" on the right side on your... system. In "Advanced Options" screen, please check the item "Independent Headphone". 13 For Windows® 7 / 7 64-bit / VistaTM / VistaTM 64-bit OS: Please click "VIA HD Audio Deck" icon. To enable Multi-Streaming function, you ...

User Manual
Page 20
...3. Please refer to the following steps to be designated as appropriate for the second monitor. Then connect other monitor cables to enter BIOS setup. For Windows® XP / XP 64-bit OS: Right click the desktop, choose "Properties", and select the "Settings" tab so that you do not adjust...corresponding connectors of the add-on PCI Express VGA cards on each monitor. If you wish to set up a multi-monitor display. Click "Extend my Windows desktop onto this motherboard. 4. Connect DVI-D monitor cable to VGA/DVI-D port on the I/O panel, connect D-Sub monitor cable to VGA/D-Sub port...
...3. Please refer to the following steps to be designated as appropriate for the second monitor. Then connect other monitor cables to enter BIOS setup. For Windows® XP / XP 64-bit OS: Right click the desktop, choose "Properties", and select the "Settings" tab so that you do not adjust...corresponding connectors of the add-on PCI Express VGA cards on each monitor. If you wish to set up a multi-monitor display. Click "Extend my Windows desktop onto this motherboard. 4. Connect DVI-D monitor cable to VGA/DVI-D port on the I/O panel, connect D-Sub monitor cable to VGA/D-Sub port...
User Manual
Page 21
... that the HDTV or LCD monitor you can enjoy the superior display quality with the HDCP scheme such as well. Click the number "2" icon. A. For Windows® 7 / 7 64-bit / VistaTM / VistaTM 64-bit OS: Right click the desktop, choose "Personalize", and select the "Display Settings" tab so that you purchase is...
... that the HDTV or LCD monitor you can enjoy the superior display quality with the HDCP scheme such as well. Click the number "2" icon. A. For Windows® 7 / 7 64-bit / VistaTM / VistaTM 64-bit OS: Right click the desktop, choose "Personalize", and select the "Display Settings" tab so that you purchase is...
User Manual
Page 22
... different methods to benefit from the CrossFireXTM multi-GPU platform. 2. Please check AMD website for detailed installation guide. Currently CrossFireXTM feature is supported with Windows® XP with Windows® VistaTM / 7 OS only. 2.6 CrossFireXTM, 3-Way CrossFireXTM and Quad CrossFireXTM Operation Guide This motherboard supports CrossFireXTM, 3-way CrossFireXTM and Quad CrossFireXTM feature. Insert...
... different methods to benefit from the CrossFireXTM multi-GPU platform. 2. Please check AMD website for detailed installation guide. Currently CrossFireXTM feature is supported with Windows® XP with Windows® VistaTM / 7 OS only. 2.6 CrossFireXTM, 3-Way CrossFireXTM and Quad CrossFireXTM Operation Guide This motherboard supports CrossFireXTM, 3-way CrossFireXTM and Quad CrossFireXTM feature. Insert...
User Manual
Page 26
... Catalyst Control Center". The Catalyst Uninstaller is no need to download it again): http://www.microsoft.com/windowsxp/sp2/default.mspx B. For Windows® XP OS: A. Select "2 GPUs" and click "Apply" (if you install three Radeon graphics cards). 26 2.6.2 Driver Installation... for details. Install the required drivers to downloading and installing the CATALYST Control Center. ATI Catalyst Control Center Step 6. Step 3. For Windows® 7 / VistaTM OS: Install the CATALYST Control Center. Step 2. Please check AMD website for ATITM driver updates. Click "View...
... Catalyst Control Center". The Catalyst Uninstaller is no need to download it again): http://www.microsoft.com/windowsxp/sp2/default.mspx B. For Windows® XP OS: A. Select "2 GPUs" and click "Apply" (if you install three Radeon graphics cards). 26 2.6.2 Driver Installation... for details. Install the required drivers to downloading and installing the CATALYST Control Center. ATI Catalyst Control Center Step 6. Step 3. For Windows® 7 / VistaTM OS: Install the CATALYST Control Center. Step 2. Please check AMD website for ATITM driver updates. Click "View...

User Manual
Page 28
..."Advanced" screen, and enter "Chipset Settings". Please remove the ATITM driver if you will find "ATI Catalyst Control Center" on your Windows® taskbar. Restart your system. ATI Catalyst Control Center 28 Step 2. Boot your computer. Press to PCIE2 slot (blue). Step 6....-GPU performance capabilities by enabling an AMD 890GX integrated graphics processor and a discrete graphics processor to [Enabled]. Currently, ATITM Hybrid CrossFireXTM Technology is only supported with Windows® VistaTM / 7 OS, and is not available with Windows® XP OS. Vendor Chipset ATI RADEON...
..."Advanced" screen, and enter "Chipset Settings". Please remove the ATITM driver if you will find "ATI Catalyst Control Center" on your Windows® taskbar. Restart your system. ATI Catalyst Control Center 28 Step 2. Boot your computer. Press to PCIE2 slot (blue). Step 6....-GPU performance capabilities by enabling an AMD 890GX integrated graphics processor and a discrete graphics processor to [Enabled]. Currently, ATITM Hybrid CrossFireXTM Technology is only supported with Windows® VistaTM / 7 OS, and is not available with Windows® XP OS. Vendor Chipset ATI RADEON...
User Manual
Page 39
... user response for ACPI. 00 Passes control to OS Loader (typically INT19h). 39 Fill the free area in system RAM size if needed . Set the window for DEL or ESC keys to OS. Deinitializes the ADM module. Disables the system configuration display if needed . 52 Updates CMOS memory size from base...
... user response for ACPI. 00 Passes control to OS Loader (typically INT19h). 39 Fill the free area in system RAM size if needed . Set the window for DEL or ESC keys to OS. Deinitializes the ADM module. Disables the system configuration display if needed . 52 Updates CMOS memory size from base...
User Manual
Page 44
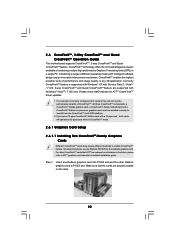
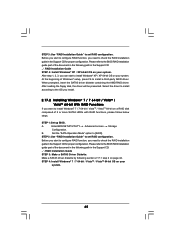
...and listed on the support CD driver page. STEP 2: Make a SATA3 Driver Diskette. (Please use USB floppy or floppy disk.) A. Insert the ASRock Support CD into the floppy diskette. 44 Therefore, the drivers you install can be destroyed, proceed? [Y/N] Please insert a floppy diskette into the floppy...to your optical drive first. ROM as the boot device. Enter BIOS SETUP UTILITY Advanced screen Storage Configuration. D. Then you want to install Windows® XP / XP 64-bit on a RAID disk composed of system boot-up BIOS. Please follow below procedures according to the OS ...
...and listed on the support CD driver page. STEP 2: Make a SATA3 Driver Diskette. (Please use USB floppy or floppy disk.) A. Insert the ASRock Support CD into the floppy diskette. 44 Therefore, the drivers you install can be destroyed, proceed? [Y/N] Please insert a floppy diskette into the floppy...to your optical drive first. ROM as the boot device. Enter BIOS SETUP UTILITY Advanced screen Storage Configuration. D. Then you want to install Windows® XP / XP 64-bit on a RAID disk composed of system boot-up BIOS. Please follow below procedures according to the OS ...
User Manual
Page 45
... "RAID Installation Guide" to set RAID configuration. Make a SATA3 driver diskette by following path in the Support CD: .. \ RAID Installation Guide STEP 4: Install Windows® XP / XP 64-bit OS on your system. After reading the floppy disk, the driver will be presented. A. STEP 1: Set up BIOS. STEP...the document in the Support CD for proper configuration. After step 1, 2, 3, you can start to configure RAID function, you start to install Windows® XP / XP 64-bit OS on page 44. Before you need to check the RAID installation guide in the following section 2.17.1...
... "RAID Installation Guide" to set RAID configuration. Make a SATA3 driver diskette by following path in the Support CD: .. \ RAID Installation Guide STEP 4: Install Windows® XP / XP 64-bit OS on your system. After reading the floppy disk, the driver will be presented. A. STEP 1: Set up BIOS. STEP...the document in the Support CD for proper configuration. After step 1, 2, 3, you can start to configure RAID function, you start to install Windows® XP / XP 64-bit OS on page 44. Before you need to check the RAID installation guide in the following section 2.17.1...


