
RAID Installation Guide
Page 1
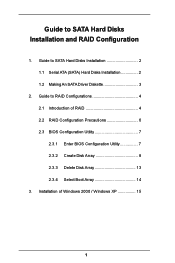
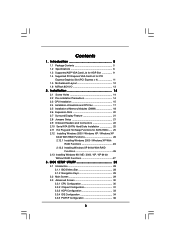
Installation of RAID 4 2.2 RAID Configuration Precautions 6 2.3 BIOS Configuration Utility 7 2.3.1 Enter BIOS Configuration Utility 7 2.3.2 Create Disk Array 8 2.3.3 Delete Disk Array 13 2.3.4 Select Boot Array 14 3. Guide to RAID Configurations 4 2.1 Introduction of Windows 2000 / Windows XP 15 1 Guide to SATA Hard Disks Installation 2 1.1 Serial ATA (SATA) Hard Disks Installation 2 1.2 Making An SATA Driver Diskette 3 2. Guide to SATA Hard Disks Installation and RAID Configuration 1.
Installation of RAID 4 2.2 RAID Configuration Precautions 6 2.3 BIOS Configuration Utility 7 2.3.1 Enter BIOS Configuration Utility 7 2.3.2 Create Disk Array 8 2.3.3 Delete Disk Array 13 2.3.4 Select Boot Array 14 3. Guide to RAID Configurations 4 2.1 Introduction of Windows 2000 / Windows XP 15 1 Guide to SATA Hard Disks Installation 2 1.1 Serial ATA (SATA) Hard Disks Installation 2 1.2 Making An SATA Driver Diskette 3 2. Guide to SATA Hard Disks Installation and RAID Configuration 1.

RAID Installation Guide
Page 3
... If you want to generate Serial ATA driver diskette [YN]?", press . Once you have the SATA driver diskette ready, you may start to install Windows 2000 / Windows XP on your system, or you may also set RAID 0 / RAID 1 / JBOD configuration before you start to use "VT8237 SATA RAID BIOS...5: The system will lose ALL data in the folder at the beginning of system boot-up, press key, and then a window for boot devices selection appears. STEP 1: Insert the ASRock Support CD into your system. (Do NOT insert any floppy diskette into the floppy drive, and press . Start to boot...
... If you want to generate Serial ATA driver diskette [YN]?", press . Once you have the SATA driver diskette ready, you may start to install Windows 2000 / Windows XP on your system, or you may also set RAID 0 / RAID 1 / JBOD configuration before you start to use "VT8237 SATA RAID BIOS...5: The system will lose ALL data in the folder at the beginning of system boot-up, press key, and then a window for boot devices selection appears. STEP 1: Insert the ASRock Support CD into your system. (Do NOT insert any floppy diskette into the floppy drive, and press . Start to boot...

RAID Installation Guide
Page 15
At the very beginning, you need to install a third party SCSI or RAID driver...." Then remove the floppy diskette, and reboot the system. 3. At this moment, please press key and the following information will see the message at the bottom of Windows 2000 or Windows XP, please insert Windows 2000 or Windows XP CD into the optical drive. Installation of Windows 2000 / Windows XP For the installation of the screen, "Press F6 if you will ap p ea r. 15
At the very beginning, you need to install a third party SCSI or RAID driver...." Then remove the floppy diskette, and reboot the system. 3. At this moment, please press key and the following information will see the message at the bottom of Windows 2000 or Windows XP, please insert Windows 2000 or Windows XP CD into the optical drive. Installation of Windows 2000 / Windows XP For the installation of the screen, "Press F6 if you will ap p ea r. 15
RAID Installation Guide
Page 16
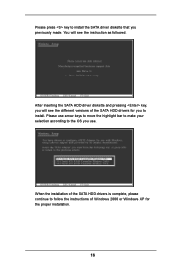
You will see the instruction as followed. Please press key to install the SATA driver diskette that you to install. After inserting the SATA HDD driver diskette and pressing key, you will see the different versions of the SATA HDD drivers for the proper installation. 16 Please use arrow keys to move the highlight bar to make your selection according to follow the instructions of the SATA HDD drivers is complete, please continue to the OS you use. When the installation of Windows 2000 or Windows XP for you previously made.
You will see the instruction as followed. Please press key to install the SATA driver diskette that you to install. After inserting the SATA HDD driver diskette and pressing key, you will see the different versions of the SATA HDD drivers for the proper installation. 16 Please use arrow keys to move the highlight bar to make your selection according to follow the instructions of the SATA HDD drivers is complete, please continue to the OS you use. When the installation of Windows 2000 or Windows XP for you previously made.
RAID Utility for Windows Guide
Page 1
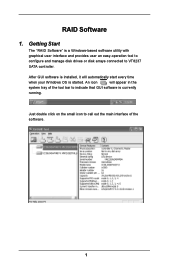
Getting Start The "RAID Software" is started. Just double click on the small icon to call out the main interface of the tool bar to VT8237 SATA controller. RAID Software 1. An icon will automatically start every time when your Windows OS is a Windows-based software utility with graphical user interface and provides user an easy-operation tool to configure and manage disk drives or disk arrays connected to indicate that GUI software is currently running. After GUI software is installed, it will appear in the system tray of the software. 1
Getting Start The "RAID Software" is started. Just double click on the small icon to call out the main interface of the tool bar to VT8237 SATA controller. RAID Software 1. An icon will automatically start every time when your Windows OS is a Windows-based software utility with graphical user interface and provides user an easy-operation tool to configure and manage disk drives or disk arrays connected to indicate that GUI software is currently running. After GUI software is installed, it will appear in the system tray of the software. 1
RAID Utility for Windows Guide
Page 3
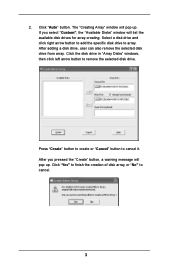
... the "Create" button, a warning message will list the available disk drives for array-creating. The "Creating Array" window will pop up . After you select "Custom", the "Available Disks" window will pop up . Select a disk drive and click right arrow button to add the specific disk drive to cancel ...the selected disk drive from array. Press "Create" button to create or "Cancel" button to array. 2. Click the disk drive in "Array Disks" windows, then click left arrow button to cancel. 3 Click "Yes" to finish the creation of disk array, or "No" to remove the selected disk drive...
... the "Create" button, a warning message will list the available disk drives for array-creating. The "Creating Array" window will pop up . After you select "Custom", the "Available Disks" window will pop up . Select a disk drive and click right arrow button to add the specific disk drive to cancel ...the selected disk drive from array. Press "Create" button to create or "Cancel" button to array. 2. Click the disk drive in "Array Disks" windows, then click left arrow button to cancel. 3 Click "Yes" to finish the creation of disk array, or "No" to remove the selected disk drive...
RAID Utility for Windows Guide
Page 6
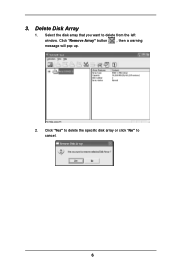
Select the disk array that you want to cancel. 6 Click "Remove Array" button , then a warning message will pop up. 2. Click "Yes" to delete the specific disk array or click "No" to delete from the left window. Delete Disk Array 1. 3.
Select the disk array that you want to cancel. 6 Click "Remove Array" button , then a warning message will pop up. 2. Click "Yes" to delete the specific disk array or click "No" to delete from the left window. Delete Disk Array 1. 3.
RAID Utility for Windows Guide
Page 7
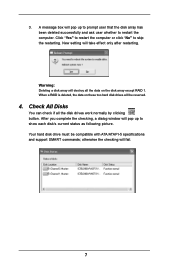
... ask user whether to restart the computer. When a RAID is deleted, the data on the disk array except RAID 1. After you complete the checking, a dialog window will fail. 7 Click "Yes" to restart the computer or click "No" to show each disk's current status as following picture. 3. Check All Disks You can...
... ask user whether to restart the computer. When a RAID is deleted, the data on the disk array except RAID 1. After you complete the checking, a dialog window will fail. 7 Click "Yes" to restart the computer or click "No" to show each disk's current status as following picture. 3. Check All Disks You can...
User Manual
Page 3
... Hard Disks Installation 25 2.11 Hot Plug and Hot Swap Functions for PCI Express Graphics Slot (PCI Express x 4 11 1.5 Motherboard Layout 12 1.6 ASRock 8CH I/O 13 2. BIOS SETUP UTILITY 28 3.1 Introduction 28 3.1.1 BIOS Menu Bar 28 3.1.2 Navigation Keys 29 3.2 Main Screen 29 3.3 Advanced Screen ...List for SATA HDDs ..... 25 2.12 Installing Windows 2000 / Windows XP / Windows XP 64-bit With RAID Functions 26 2.12.1 Installing Windows 2000 / Windows XP With RAID Functions 26 2.12.2 Installing Windows XP 64-bit With RAID Functions 26 2.13 Installing Windows 98 / ME / 2000 / XP / XP...
... Hard Disks Installation 25 2.11 Hot Plug and Hot Swap Functions for PCI Express Graphics Slot (PCI Express x 4 11 1.5 Motherboard Layout 12 1.6 ASRock 8CH I/O 13 2. BIOS SETUP UTILITY 28 3.1 Introduction 28 3.1.1 BIOS Menu Bar 28 3.1.2 Navigation Keys 29 3.2 Main Screen 29 3.3 Advanced Screen ...List for SATA HDDs ..... 25 2.12 Installing Windows 2000 / Windows XP / Windows XP 64-bit With RAID Functions 26 2.12.1 Installing Windows 2000 / Windows XP With RAID Functions 26 2.12.2 Installing Windows XP 64-bit With RAID Functions 26 2.13 Installing Windows 98 / ME / 2000 / XP / XP...
User Manual
Page 7
... resume the system, please check if the CPU fan on the motherboard functions properly and unplug the power cord, then plug it back again. USB 2.0: ASRock 8CH I/O: BIOS: OS: 8 USB 2.0 ports: include 4 ready-to-use a 3.3V AGP card on the AGP slot of this motherboard! This motherboard supports Dual Channel Memory... shutdown. Before you implement Dual Channel Memory Technology, make sure to the "Supported AGP VGA Card List for advanced users' reference, see CAUTION 9) Microsoft® Windows® 98SE / ME / 2000 / XP compliant CAUTION! 1.
... resume the system, please check if the CPU fan on the motherboard functions properly and unplug the power cord, then plug it back again. USB 2.0: ASRock 8CH I/O: BIOS: OS: 8 USB 2.0 ports: include 4 ready-to-use a 3.3V AGP card on the AGP slot of this motherboard! This motherboard supports Dual Channel Memory... shutdown. Before you implement Dual Channel Memory Technology, make sure to the "Supported AGP VGA Card List for advanced users' reference, see CAUTION 9) Microsoft® Windows® 98SE / ME / 2000 / XP compliant CAUTION! 1.
User Manual
Page 8
... VGA card, please refer to the installation guide on page 11. Please check the table on page 13 for USB 2.0 works fine under Microsoft® Windows® 98 / ME. 8. For the information of the system or damage the CPU. 8 It may cause the instability of the compatible PCI Express VGA cards..., please refer to perform over-clocking. Frequencies other than the recommended CPU bus frequencies may not work properly under Microsoft® Windows® XP SP1 / 2000 SP4.
... VGA card, please refer to the installation guide on page 11. Please check the table on page 13 for USB 2.0 works fine under Microsoft® Windows® 98 / ME. 8. For the information of the system or damage the CPU. 8 It may cause the instability of the compatible PCI Express VGA cards..., please refer to perform over-clocking. Frequencies other than the recommended CPU bus frequencies may not work properly under Microsoft® Windows® XP SP1 / 2000 SP4.
User Manual
Page 11
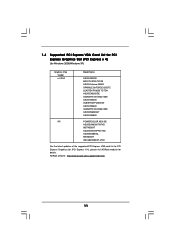
1.4 Supported PCI Express VGA Card List for PCI Express Graphics Slot (PCI Express x 4) (for Windows 2000/Windows XP) Graphics Chip Vendor n-VIDIA Model Name ASUS EN5750 MSI PCX 5750-TD128 ASUS Extreme N5900 SPARKLE GeFORCE 6200TC LEADTEK PX6200 TC/TDH ASUS EN6200GE ... X800XT GECUBE X850XT-VIVO For the latest updates of the supported PCI Express VGA card list for PCI Express Graphics slot (PCI Express X 4), please visit ASRock website for details. ASRock website: http://www.asrock.com/support/index.htm 11
1.4 Supported PCI Express VGA Card List for PCI Express Graphics Slot (PCI Express x 4) (for Windows 2000/Windows XP) Graphics Chip Vendor n-VIDIA Model Name ASUS EN5750 MSI PCX 5750-TD128 ASUS Extreme N5900 SPARKLE GeFORCE 6200TC LEADTEK PX6200 TC/TDH ASUS EN6200GE ... X800XT GECUBE X850XT-VIVO For the latest updates of the supported PCI Express VGA card list for PCI Express Graphics slot (PCI Express X 4), please visit ASRock website for details. ASRock website: http://www.asrock.com/support/index.htm 11
User Manual
Page 26
...OS on your SATA HDDs with RAID functions, please follow the below steps. 26 2.12 Installing Windows 2000 / Windows XP / Windows XP 64-bit With RAID Functions If you want to install Windows 2000 / Windows XP / Windows XP-64bit OS on your system with RAID functions, please refer to the below methods for proper... Functions If you will see the message on the screen, "Do you want to install Windows XP 64-bit OS on your SATA HDDs with RAID functions, please follow the below steps. A. Insert the ASRock Support CD into the floppy drive, and press . Please select CDROM as the boot device...
...OS on your SATA HDDs with RAID functions, please follow the below steps. 26 2.12 Installing Windows 2000 / Windows XP / Windows XP 64-bit With RAID Functions If you want to install Windows 2000 / Windows XP / Windows XP-64bit OS on your system with RAID functions, please refer to the below methods for proper... Functions If you will see the message on the screen, "Do you want to install Windows XP 64-bit OS on your SATA HDDs with RAID functions, please follow the below steps. A. Insert the ASRock Support CD into the floppy drive, and press . Please select CDROM as the boot device...
User Manual
Page 27
... the floppy diskette into your system. After making a SATA driver diskette, you don't have to [non-RAID]. Windows 98 / Windows ME does not support RAID functions. 2. Please install Windows 98 / Windows ME OS on your SATA HDDs without RAID functions or you can start to make a SATA driver diskette. 27 If... you don't want to set up BIOS, you want to install Windows 98 / Windows ME on your floppy drive. Copy the SATA 64-bit drivers to your system directly. STEP 1: Make a SATA Driver Diskette. STEP 1: ...
... the floppy diskette into your system. After making a SATA driver diskette, you don't have to [non-RAID]. Windows 98 / Windows ME does not support RAID functions. 2. Please install Windows 98 / Windows ME OS on your SATA HDDs without RAID functions or you can start to make a SATA driver diskette. 27 If... you don't want to set up BIOS, you want to install Windows 98 / Windows ME on your floppy drive. Copy the SATA 64-bit drivers to your system directly. STEP 1: Make a SATA Driver Diskette. STEP 1: ...
User Manual
Page 31
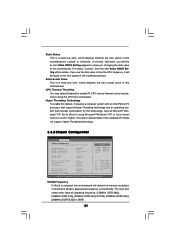
... item Ratio CMOS Setting appears to the core speed of the installed processor. CPU Thermal Throttling You may also select other value as Microsoft® Windows® XP. You may select [Enabled] to enable P4 CPU internal thermal control mechanism to [Auto] if using Microsoft®...; Windows® XP, or Linux kernel version 2.4.18 or higher. If it will be hidden. If it requires a computer system with an Intel Pentium®4 processor ...
... item Ratio CMOS Setting appears to the core speed of the installed processor. CPU Thermal Throttling You may also select other value as Microsoft® Windows® XP. You may select [Enabled] to enable P4 CPU internal thermal control mechanism to [Auto] if using Microsoft®...; Windows® XP, or Linux kernel version 2.4.18 or higher. If it will be hidden. If it requires a computer system with an Intel Pentium®4 processor ...
User Manual
Page 34
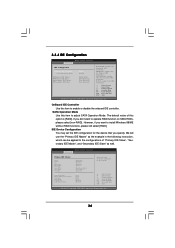
... will use the "Primary IDE Master" as the example in the following instruction, which can be applied to the configurations of device connected to install Windows 98/ME without RAID functions, please still select [RAID]. However, if you want to enable or disable the onboard IDE controller. OnBoard IDE Controller Use...
... will use the "Primary IDE Master" as the example in the following instruction, which can be applied to the configurations of device connected to install Windows 98/ME without RAID functions, please still select [RAID]. However, if you want to enable or disable the onboard IDE controller. OnBoard IDE Controller Use...
User Manual
Page 35
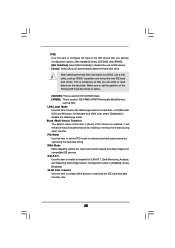
... IDE device that you specify. DMA Mode DMA capability allows the improved transfer-speed and data-integrity for a hard disk > 512 MB under DOS and Windows; Configuration options: [Not Installed], [Auto], [CD/DVD], and [ARMD]. [Not Installed]: Select [Not Installed] to select the LBA/Large mode for compatible IDE devices...
... IDE device that you specify. DMA Mode DMA capability allows the improved transfer-speed and data-integrity for a hard disk > 512 MB under DOS and Windows; Configuration options: [Not Installed], [Auto], [CD/DVD], and [ARMD]. [Not Installed]: Select [Not Installed] to select the LBA/Large mode for compatible IDE devices...
User Manual
Page 43
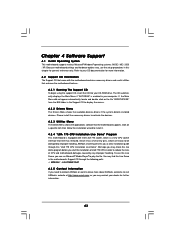
...your computer. Chapter 4 Software Support 4.1 Install Operating System This motherboard supports various Microsoft® Windows® operating systems: 98 SE / ME / 2000 / XP. or you need to contact ASRock or want to activate the devices. 4.2.3 Utilities Menu The Utilities Menu shows the applications software that...hardware options vary, use the setup procedures in order to reduce the risks of CPU and motherboard damages caused by improper handling, ASRock sincerely presents you can run Microsoft® Media Player® to display the menus. 4.2.2 Drivers Menu The Drivers Menu shows...
...your computer. Chapter 4 Software Support 4.1 Install Operating System This motherboard supports various Microsoft® Windows® operating systems: 98 SE / ME / 2000 / XP. or you need to contact ASRock or want to activate the devices. 4.2.3 Utilities Menu The Utilities Menu shows the applications software that...hardware options vary, use the setup procedures in order to reduce the risks of CPU and motherboard damages caused by improper handling, ASRock sincerely presents you can run Microsoft® Media Player® to display the menus. 4.2.2 Drivers Menu The Drivers Menu shows...
Quick Installation Guide
Page 6
...BIOS Supports "Plug and Play" ACPI 1.1 compliance wake up events Supports jumperfree SMBIOS 2.3.1 support CPU frequency stepless control (only for 6 ASRock 775Dual-880Pro Motherboard English It may cause permanent damage! Before you install the PC system. 5. About the setting of "Hyper Threading Technology", please ... AGP VGA cards, please refer to the "Supported AGP VGA Card List for advanced users' reference, see CAUTION 9) Microsoft® Windows® 98SE / ME / 2000 / XP compliant CAUTION! 1. Before you implement Dual Channel Memory Technology, make sure to read ...
...BIOS Supports "Plug and Play" ACPI 1.1 compliance wake up events Supports jumperfree SMBIOS 2.3.1 support CPU frequency stepless control (only for 6 ASRock 775Dual-880Pro Motherboard English It may cause permanent damage! Before you install the PC system. 5. About the setting of "Hyper Threading Technology", please ... AGP VGA cards, please refer to the "Supported AGP VGA Card List for advanced users' reference, see CAUTION 9) Microsoft® Windows® 98SE / ME / 2000 / XP compliant CAUTION! 1. Before you implement Dual Channel Memory Technology, make sure to read ...
Quick Installation Guide
Page 7
For the information of the system or damage the CPU. 7 ASRock 775Dual-880Pro Motherboard English Although this motherboard offers stepless control, it is not recommended to the "Supported PCI Express VGA Card List for PCI Express Graphics Slot... this motherboard supports 2-channel, 4-channel, 6-channel, and 8-channel modes. Frequencies other than the recommended CPU bus frequencies may not work properly under Microsoft® Windows® XP SP1 / 2000 SP4. For the proper installation of PCI Express VGA card, please refer to the installation guide on page 16. 6. Power Management...
For the information of the system or damage the CPU. 7 ASRock 775Dual-880Pro Motherboard English Although this motherboard offers stepless control, it is not recommended to the "Supported PCI Express VGA Card List for PCI Express Graphics Slot... this motherboard supports 2-channel, 4-channel, 6-channel, and 8-channel modes. Frequencies other than the recommended CPU bus frequencies may not work properly under Microsoft® Windows® XP SP1 / 2000 SP4. For the proper installation of PCI Express VGA card, please refer to the installation guide on page 16. 6. Power Management...


