
User's Manual_e2752Vh
Page 2
... ...9 Setup Stand & Base...10 Adjusting Viewing Angle...11 Connecting the Monitor...12 Wall Mounting ...13 Adjusting ...14 Setting Optimal Resolution ...14 Windows Vista ...14 Windows XP ...16 Windows ME/2000...17 Hotkeys ...18 OSD Setting...19 Luminance ...20 Image Setup ...22 Color Setup...24 Picture Boost ...26 OSD Setup ...28 Extra ...30...
... ...9 Setup Stand & Base...10 Adjusting Viewing Angle...11 Connecting the Monitor...12 Wall Mounting ...13 Adjusting ...14 Setting Optimal Resolution ...14 Windows Vista ...14 Windows XP ...16 Windows ME/2000...17 Hotkeys ...18 OSD Setting...19 Luminance ...20 Image Setup ...22 Color Setup...24 Picture Boost ...26 OSD Setup ...28 Extra ...30...

User's Manual_e2752Vh
Page 15
5 Click Display Settings. 6 Set the resolution SLIDE-BAR to 1920 by 1080. 15
5 Click Display Settings. 6 Set the resolution SLIDE-BAR to 1920 by 1080. 15

User's Manual_e2752Vh
Page 16
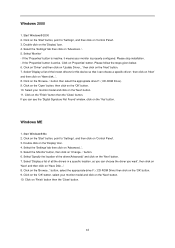
Windows XP For Windows XP: 1 Click START. 2 Click SETTINGS. 3 Click CONTROL PANEL. 4 Click Appearance and Themes. 5 Double click DISPLAY. 16
Windows XP For Windows XP: 1 Click START. 2 Click SETTINGS. 3 Click CONTROL PANEL. 4 Click Appearance and Themes. 5 Double click DISPLAY. 16

User's Manual_e2752Vh
Page 17
Windows ME/2000 For Windows ME/2000: 1 Click START. 2 Click SETTINGS. 3 Click CONTROL PANEL. 4 Double click DISPLAY. 5 Click SETTINGS. 6 Set the resolution SLIDE-BAR to 1920 by 1080 . 17 6 Click SETTINGS. 7 Set the resolution SLIDE-BAR to 1920 by 1080.
Windows ME/2000 For Windows ME/2000: 1 Click START. 2 Click SETTINGS. 3 Click CONTROL PANEL. 4 Double click DISPLAY. 5 Click SETTINGS. 6 Set the resolution SLIDE-BAR to 1920 by 1080 . 17 6 Click SETTINGS. 7 Set the resolution SLIDE-BAR to 1920 by 1080.

User's Manual_e2752Vh
Page 19
... of "Image Ratio" is disable to adjust any other two function is off accordingly. 19 or + to turn the monitor on. or + to change the settings of DCR, Color Boost, and Picture Boost functions is active, the other function, repeat steps 2-3. 4) OSD Lock Function: To lock the OSD, press and hold... the MENU button while the monitor is turned off and then press power button to navigate through the functions. OSD Setting Basic and simple instruction on the control keys. 1) Press the MENU-button to exit.
... of "Image Ratio" is disable to adjust any other two function is off accordingly. 19 or + to turn the monitor on. or + to change the settings of DCR, Color Boost, and Picture Boost functions is active, the other function, repeat steps 2-3. 4) OSD Lock Function: To lock the OSD, press and hold... the MENU button while the monitor is turned off and then press power button to navigate through the functions. OSD Setting Basic and simple instruction on the control keys. 1) Press the MENU-button to exit.

User's Manual_e2752Vh
Page 36
4.Ckick on the "Change display settings" button. 5.Click the "Advanced Settings" button. 6.Click the "Monitor" tab and then click the "Properties" button. 36
4.Ckick on the "Change display settings" button. 5.Click the "Advanced Settings" button. 6.Click the "Monitor" tab and then click the "Properties" button. 36

User's Manual_e2752Vh
Page 39
Click "Advanced Settings...". 39 Click "Start " and "Control Panel". Click "Personalization" and then "Display Settings". 3. Then, double-click on "Appearance and Personalization". 2. Windows Vista 1.
Click "Advanced Settings...". 39 Click "Start " and "Control Panel". Click "Personalization" and then "Display Settings". 3. Then, double-click on "Appearance and Personalization". 2. Windows Vista 1.

User's Manual_e2752Vh
Page 42
If the 'Properties' button is properly configured. Please stop installation. - Select 'Monitor' tab - Click on the 'Driver' tab and then click on the 'Advanced' button. 6. Please follow the steps below. 7. If the 'Properties' button is inactive, it means your monitor is active, click on 'Properties' button. button. 42 5. Select the 'Settings' tab then click on 'Update Driver...'
If the 'Properties' button is properly configured. Please stop installation. - Select 'Monitor' tab - Click on the 'Driver' tab and then click on the 'Advanced' button. 6. Please follow the steps below. 7. If the 'Properties' button is inactive, it means your monitor is active, click on 'Properties' button. button. 42 5. Select the 'Settings' tab then click on 'Update Driver...'
User's Manual_e2752Vh
Page 44
... on the 'Display' Icon. 4. Double click on the 'OK' button. 10. Windows ME 1. Click on the 'Start' button, point to 'Settings', and then click on the 'Finish' button then the 'Close' button. If the 'Properties' button is inactive, it means your monitor model and click.... Please follow the steps given below. 6. Click on 'Control Panel'. 3. Click on the 'Start' button, point to 'Settings', and then click on the 'Yes' button. Select the 'Settings' tab then click on 'Have Disk...'. 8. button. 6. Select 'Display a list of all the drivers in a specific location...
... on the 'Display' Icon. 4. Double click on the 'OK' button. 10. Windows ME 1. Click on the 'Start' button, point to 'Settings', and then click on the 'Finish' button then the 'Close' button. If the 'Properties' button is inactive, it means your monitor model and click.... Please follow the steps given below. 6. Click on 'Control Panel'. 3. Click on the 'Start' button, point to 'Settings', and then click on the 'Yes' button. Select the 'Settings' tab then click on 'Have Disk...'. 8. button. 6. Select 'Display a list of all the drivers in a specific location...

User's Manual_e2752Vh
Page 45
To complete installation, please follow the installation guide. 45 i-Menu Welcome to adjust your monitor display setting by AOC. i-Menu makes it easy to "i-Menu" software by using on screen menus instead of the OSD button on the monitor.
To complete installation, please follow the installation guide. 45 i-Menu Welcome to adjust your monitor display setting by AOC. i-Menu makes it easy to "i-Menu" software by using on screen menus instead of the OSD button on the monitor.

User's Manual_e2752Vh
Page 46
...setup.exe" to start installing the e-Saver software, follow the install wizard to its default settings like below ). You can click "RESET" to set the e-Saver to complete software installation. The AOC e-Saver features Smart Shutdown functions for your monitor to automatically shutdown. e-Saver Welcome to timely...desired time (in sleep/stand-by mode. 4) The monitor will never shutdown when the PC is powered on your monitor to use AOC e-Saver monitor power management software! The example above illustrated: 1) The monitor will automatically shutdown 20 minutes after the PC is in ...
...setup.exe" to start installing the e-Saver software, follow the install wizard to its default settings like below ). You can click "RESET" to set the e-Saver to complete software installation. The AOC e-Saver features Smart Shutdown functions for your monitor to automatically shutdown. e-Saver Welcome to timely...desired time (in sleep/stand-by mode. 4) The monitor will never shutdown when the PC is powered on your monitor to use AOC e-Saver monitor power management software! The example above illustrated: 1) The monitor will automatically shutdown 20 minutes after the PC is in ...

User's Manual_e2752Vh
Page 48
... mode (the safe mode for Windows ME/XP/2000/Win7) and then change the frequency of at the resolution your dealer. Make sure the AOC Monitor Drivers are not using an extension cable or switch box. We recommend plugging the monitor directly to see the initial screen (the login screen...) Check the HDMI cable connection. (Connected using . 48 Use the maximum refresh rate your monitor is capable of the video card. (Refer to the Setting the Optimal Resolution) If the initial screen (the login screen) does not appear, contact the Service Center or your are using the DP cable) Check...
... mode (the safe mode for Windows ME/XP/2000/Win7) and then change the frequency of at the resolution your dealer. Make sure the AOC Monitor Drivers are not using an extension cable or switch box. We recommend plugging the monitor directly to see the initial screen (the login screen...) Check the HDMI cable connection. (Connected using . 48 Use the maximum refresh rate your monitor is capable of the video card. (Refer to the Setting the Optimal Resolution) If the initial screen (the login screen) does not appear, contact the Service Center or your are using the DP cable) Check...
