Ricoh Aficio MP C4502 Support Question
Ricoh Aficio MP C4502 Support Question
Find answers below for this question about Ricoh Aficio MP C4502.Need a Ricoh Aficio MP C4502 manual? We have 2 online manuals for this item!
Question posted by Carjb999 on March 31st, 2014
How To Change Scanner Settings On Aficio C4502a
The person who posted this question about this Ricoh product did not include a detailed explanation. Please use the "Request More Information" button to the right if more details would help you to answer this question.
Current Answers
Answer #1: Posted by freginold on June 4th, 2014 3:11 AM
freginold

Member since:
December 20th, 2011 Points: 23,253,885

Member since:
December 20th, 2011 Points: 23,253,885
Hi, depending on what it is that you want to change, you can either change scanner settings right from the Scanner screen, or through User Tools > Scanner Features.
If you are making changes on the Scanner screen and you want to make those changes permanent, follow the instructions in this article:
- How to configure the default scan settings on a Ricoh MP series copier
If you are making changes on the Scanner screen and you want to make those changes permanent, follow the instructions in this article:
- How to configure the default scan settings on a Ricoh MP series copier
Related Ricoh Aficio MP C4502 Manual Pages
General Settings Guide - Page 5
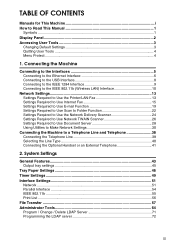
... Use Scan to Folder Function 22 Settings Required to Use the Network Delivery Scanner 24 Settings Required to Use Network TWAIN Scanner 26 Settings Required to Use Document Server 28 Using Utilities to Make Network Settings 30
Connecting the Machine to Read This Manual 1
Symbols ...1 Display Panel...2 Accessing User Tools 3
Changing Default Settings 3 Quitting User Tools ...4 Menu Protect...
General Settings Guide - Page 7

... Code 199 Changing a User Code 200 Deleting a User Code 201 Displaying the Counter for Each User 202 Printing the Counter for Each User 203 Printing the Counter for All Users 204 Clearing the Number of Prints 205
Fax Destination 206 Fax Destination ...208 IP-Fax Destination 214
v Scanner Features
Scan Settings ...181 Destination...
General Settings Guide - Page 10
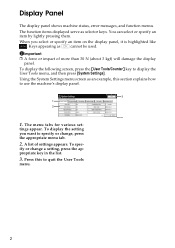
... the {User Tools/Counter} key to use the machine's display panel. To spec- ify or change , press the appropriate menu tab.
2. Press this section explains how to display the User Tools menu, and then press [System Settings]. Display Panel
The display panel shows machine status, error messages, and function menus. The function...
General Settings Guide - Page 11
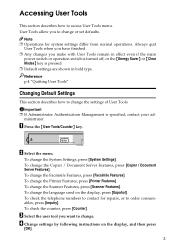
... quit
User Tools when you have finished. ❒ Any changes you to change the settings of User Tools.
To change the Facsimile Features, press [Facsimile Features]. To change the language used on the display, and then press
[OK].
3 ZCAS100N
B Select the menu. To change the Scanner Features, press [Scanner Features]. To check the telephone numbers to contact for...
General Settings Guide - Page 12
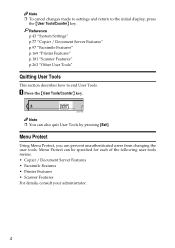
Menu Protect can prevent unauthenticated users from changing the user tools.
Note ❒ To cancel changes made to settings and return to end User Tools. A Press the {User Tools/Counter} key. Reference p.43 "System Settings" p.77 "Copier / Document Server Features" p.97 "Facsimile Features" p.169 "Printer Features" p.181 "Scanner Features" p.263 "Other User Tools"
Quitting User Tools...
General Settings Guide - Page 27

...
File Transfer
POP3 / IMAP4 Settings
As required
File Transfer
Administrator's E-mail Address
As required
File Transfer File Transfer
E-mail Communication Port
Program / Change / Delete E-mail Message
As required As required
File Transfer
Program / Change / Delete Subject
As required
File Transfer File Transfer
Scanner Recall Interval Time Number of Scanner Recalls
As required As...
General Settings Guide - Page 29
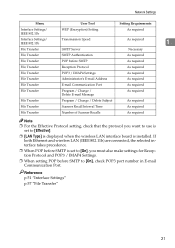
... Transfer
E-mail Communication Port
As required
File Transfer
Program / Change / Delete E-mail Message
As required
File Transfer
Program / Change / Delete Subject
As required
File Transfer
Scanner Recall Interval Time
As required
File Transfer
Number of Scanner Recalls
As required
Note ❒ For the Effective Protocol setting, check that the protocol you want to use is...
General Settings Guide - Page 62

..., you experience problems using a parallel interface. The default setting is On. The default setting is Invalid.
❖ Bidirectional Communication
Sets the printer's response mode to change this machine is High.
❖ Input Prime
Sets whether to be transferred smoothly. The default setting is installed with . If the speed is ACK Outside.
❖ Parallel Communication...
General Settings Guide - Page 72
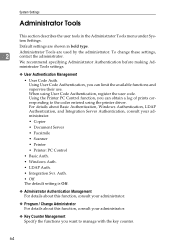
... Settings
Administrator Tools
This section describes the user tools in bold type. For details about this function, consult your administrator.
• Copier
• Document Server
• Facsimile
• Scanner
... default setting is Off.
❖ Administrator Authentication Management For details about this function, consult your administrator.
❖ Program / Change Administrator ...
General Settings Guide - Page 139
...On
Report
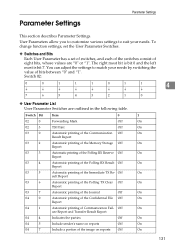
03
5
Automatic printing of bits between "0" and "1".
You can adjust the settings to suit your needs by switching the value of the Immediate TX Re- Off
On
...Parameters allow you to customize various settings to match your needs. To change function settings, set the User Parameter Switches.
❖ Switches and Bits
Each User Parameter has a set of switches, and each of ...
General Settings Guide - Page 184
... is 15 seconds.
5
Reference
p.3 "Accessing User Tools"
176
The default setting is not necessary to change this timeout period. Default settings are shown in bold type.
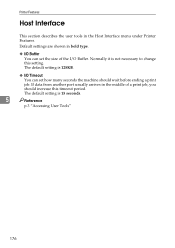
❖ I/O Buffer
You can set the size of a print job, you should wait before ending a print job. The default setting is 128KB.
❖ I /O Buffer.
If data from another port...
General Settings Guide - Page 190
... originals
are placed and the {Start} key is pressed.
• Changing the settings such as the scan settings
• Opening the upper cover of the following operations are performed
while...} key to be placed. Scanner Features
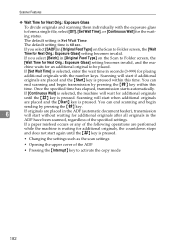
❖ Wait Time for Next Orig.: Exposure Glass
To divide originals and scanning them individually with the number keys.
If [Set Wait Time] is 60 sec...
General Settings Guide - Page 191
... {q} key is pressed.
6
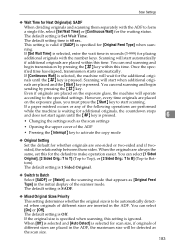
• Changing the settings such as [Original Feed Type] in the ADF, the maximum size will operate
according to start again until the {q} key is ignored. nals are placed
on the exposure glass, the machine will be automatically detected when originals of the scanner mode.
This setting is valid if [SADF...
General Settings Guide - Page 220
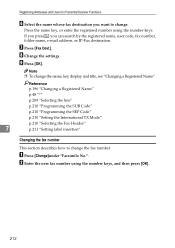
... [Fax Dest.]. I Press [OK]. B Enter the new fax number using the number keys.
H Change the settings. Note ❒ To change the fax number.
A Press [Change]under "Facsimile No.". Registering Addresses and Users for Facsimile/Scanner Functions
F Select the name whose fax destination you can search by the registered name, user code, fax number, folder name...
Manuals - Page 18
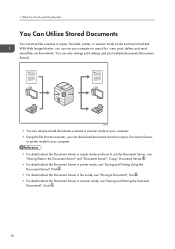
... on the machine's hard disk. CJQ603
• You can retrieve stored documents scanned in scanner mode to your computer to use your computer. • Using the file format converter, you can also change print settings and print multiple documents (Document Server). 1. You can use the Document Server, see
"Storing Data in the Document...
Manuals - Page 26
1. CJQ609
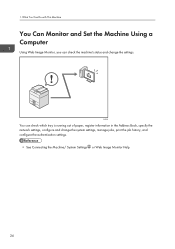
You can check the machine's status and change the system settings, manage jobs, print the job history, and configure the authentication settings.
• See Connecting the Machine/ System Settings or Web Image Monitor Help.
24 What You Can Do with This Machine
You Can Monitor and Set the Machine Using a Computer
Using Web Image Monitor...
Manuals - Page 126
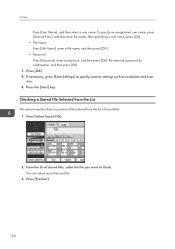
... the file you want to check. You can select more than one file.
3. Press [OK]. 8. If necessary, press [Scan Settings] to preview a file selected from the List
This section explains how to specify scanner settings such as resolution and scan size. 9. Press [Select Stored File].
2. Scan
Press [User Name], and then select a user...
Manuals - Page 175
... off the machine.
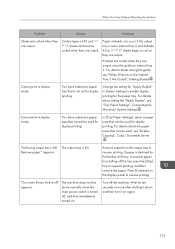
Wait for duplex printing. Paper misfeeds can be used , see "Tray Paper Settings", Connecting the Machine/ System Settings . You have selected a paper type that can become
curled when they are output. Change the setting for "Apply Duplex" in System Settings to suspend printing, and then remove the paper. If paper is not...
Manuals - Page 202
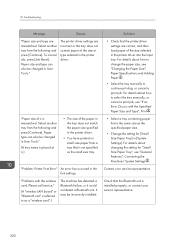
... that the Bluetooth unit is the same size as the specified paper size.
• Change the setting for "Small Size Paper Tray", see "General Features", Connecting the Machine/ System Settings . Paper size and type can also be changed in the font settings.
Solutions
• Check that is installed properly, or contact your service representative. For...
Manuals - Page 207
... Print file, or to enable duplex printing for the duplex function.
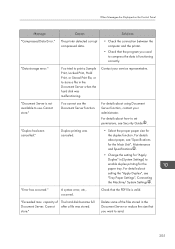
"Document Server is not available to set permissions, see "Specifications for the Main Unit", Maintenance and Specifications .
• Change the setting for "Apply Duplex" in [System Settings] to store a file in the Document Server or reduce the size that the program you want...
Similar Questions

How Do I Change The Input Tray Priority On My Ricoh Mp C4502
(Posted by Keigoshi 9 years ago)
How To Change Scanner Settings On A Aficio Mp C6501
(Posted by tiJi 9 years ago)

How To Change Scanner Settings On Ricoh Aficio Mp C4500
(Posted by audtj 9 years ago)
