Lexmark X792 Support Question
Lexmark X792 Support Question
Find answers below for this question about Lexmark X792.Need a Lexmark X792 manual? We have 33 online manuals for this item!
Question posted by yiannisioannou on July 18th, 2016
Change Default Settings
How can I change the default settings of the scanning output?
Current Answers
Answer #1: Posted by waelsaidani1 on July 18th, 2016 2:14 AM
waelsaidani1

Member since:
May 12th, 2013 Points: 19,501,787

Member since:
May 12th, 2013 Points: 19,501,787
To restore the original printer factory default settings: 1 Make sure the printer is on and the Ready message appears. 2 Press Menu until you see Utilities Menu, and then press Select. 3 Press Menu until you see Factory Defaults, and then press Select. 4 Restore appears on the second line of the display. 5 Press Select. The message Restoring Factory Defaults appears followed by the Ready message. When you select Restore: R26; No other button actions are available on the operator panel while Restoring Factory Defaults appears. All downloaded resources (fonts, macros, and symbol sets) in printer memory (RAM) are deleted. (Resources residing in flash memory or on the optional hard disk are unaffected.) • All menu settings are returned to the factory default values, except: - The operator panel Display Language setting in the Setup Menu. - All settings in the Parallel Menu, Serial Menu, Network Menu, Infrared Menu, LocalTalk Menu, and USB Menu.
Related Lexmark X792 Manual Pages
Email Guide - Page 2
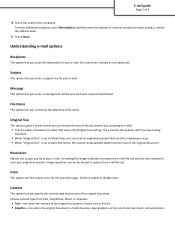
... mixed paper sizes. • When "Original Size" is mostly business-type graphics such as the Original Size setting. Message
This option lets you enter a subject line for the scanned image. Color
This option sets the output color for your original document. Increasing the image resolution increases the e-mail file size and the time needed...
Email Guide - Page 3
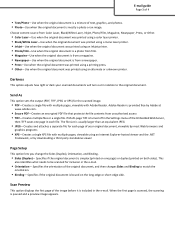
...scanned image.
• PDF-Creates a single file with multiple pages, viewable with multiple pages, viewable using an Internet Explorer-hosted viewer and the .NET
Framework, or by downloading a third party standalone viewer
Page Setup
This option lets you change...the original document is bound on both sides). Send As
This option sets the output (PDF, TIFF, JPEG or XPS) for inclusion in the e-...
FTP Guide - Page 2
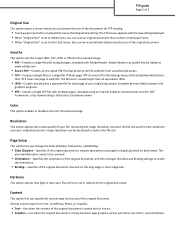
... the size of the original document.
Send As
This option sets the output (PDF, TIFF, JPEG or XPS) for the scanned image.
• PDF-Creates a single file with multiple pages...with the new setting displayed. • When "Original Size" is set to Mixed Sizes, you change the Sides (Duplex), Orientation, and Binding.
• Sides (Duplex)-
Image resolution can scan an original document ...
IPDS Emulation User's Guide - Page 14
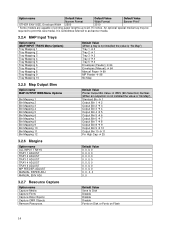
... 11 Bin Mapping 12
Default Value Printer Output Bin Value IPDS (Bin Selection) Number. (When an output bin is not installed the value is "No Map") Standard Bin 1 Output Bin 1 2 Output Bin 2 3 Output Bin 3 4 Output Bin 4 5 Output Bin 5 6 Output Bin 6 7 Output Bin 7 8 Output Bin 8 9 Output Bin 9 10...
IPDS Emulation User's Guide - Page 51
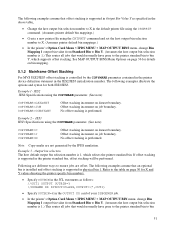
...set the host output bin selection number to X. (Assumes printer default bin mappings.)
• In the printer's Option Card Menu > IPDS MENU > MAP OUTPUT BINS menu, change Bin Mapping 1 output bin value from Standard Bin to Bin Y. (Assumes the host output... parameter contained in the printer device definition statement in physical bin 1.
Example 3 - See MAP OUTPUT BINS Menu Options on page ...
Lexmark Document Distributor - Page 72
...for a network share.
Monitoring and maintaining the system
72
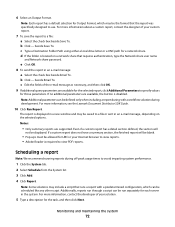
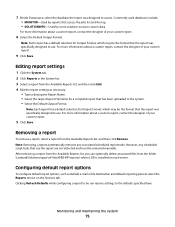
Note: Each report has a default selection for Output Format, which can be allowed for each server in a new window and may include ... 2 Select Schedule from the System list. 3 Click Add. 4 Click Report. 6 Select an Output Format. For more information about a custom report, contact the designer of the e-mail message as necessary...
Lexmark Document Distributor - Page 73
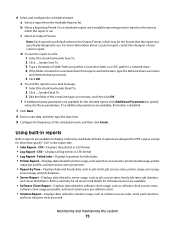
... parameters are available for those parameters. All built-in reports are designed for PDF output, except for the selected report, click Additional Parameters to server usage, such as ...share that specify "CSV" in CSV format • Log Report - Note: Each report has a default selection for individual servers are available to use. For more information about a custom report, contact the ...
Lexmark Document Distributor - Page 75
...
5 Click Save.
Monitoring and maintaining the system
75
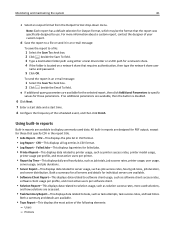
Note: Each report has a default selection for Output Format, which may be the format that access the jobs list and the log &#...the Jasper Report File Name for Output Format, which may be the format that use the report are not detected and must be run returns settings to the defaults specified here. Commonly used databases include...
Lexmark Document Distributor - Page 81
...
c Select an output format from the Output Format drop‑...;down menu.
For more information about a custom report, contact the designer of the following elements: - All built‑in reports are available for the selected report, then click Additional Parameters to tasks, such as task attempts, task success rates, and task times.
Note: Each report has a default...
Lexmark Document Distributor - Page 83

... from the Services tab.
Monitoring and maintaining the system
83
8 Select the default output format. After removing a report from the Available Reports list, and then click Edit. 4 Edit the report settings as default e‑mail or file destination and default reporting period. Editing report settings
1 Click the System tab. 2 Click Reports in the System list. 3 Select...
Network Scan Drivers - Page 3
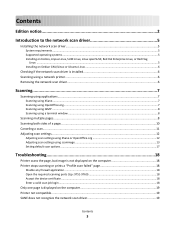
... 12 Adjusting scan settings using scanimage ...13 Setting default scan options ...17
Troubleshooting 18
Printer scans the page, but image is not displayed on the computer 18 Printer stops scanning or prints a "Profile scan failed" page 18
Disable any firewall application ...18 Open the required scanning ports (tcp: 9751-9760 18 Accept the device certificate ...18 Enter a valid scan job login...
Network Scan Drivers - Page 10
...Place your document in several ways depending on your computer.
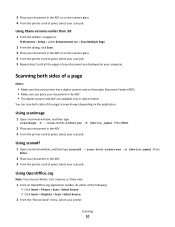
Using scanadf
1 Open a terminal window, and then type scanadf --scan-both -sides=yes -d [device_name].
Scanning both sides of the following: • Click Insert > Picture > Scan > Select Source. • Click Insert > Graphics > Scan > Select Source.
2 From the "Device Used" menu, select your scan job. Scanning
10
Network Scan Drivers - Page 11
... the printer User's Guide. 3 From the "Options" area, navigate to:
Image Settings > source
4 From the "source" menu, select Multiple Pages. 5 From the "Options" area, navigate to:
Image Settings > scan-both-sides
6 Select the scan-both sides checkbox. 6 From the "Network:scanner" dialog, click Scan. 7 Place your document in the ADF. 10 From the printer control...
PKI-Enabled Device Installation and Configuration Guide - Page 11
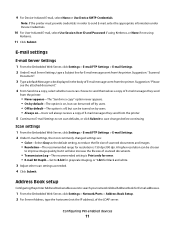
... for resolution is Print only for black and white. 3 Adjust other scan settings as the default setting, to reduce the file size of the LDAP server. Address Book setup
Configuring the printer Address Book enables users to send E-mail, enter the appropriate information under Device Credentials.
10 For User-Initiated E-mail, select Use Session User...
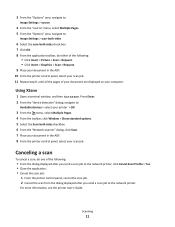
Quick Reference - Page 3
..., navigate to: FTP > FTP > type the FTP address > Send It
Scanning to save the
scanned output file. 5 Enter a scan name. Place these items on the scanner glass. If you want to an FTP...or the menu settings pages and locate the IP address in the TCP/IP section.
2 Click Scan Profile > Create. 3 Select your scan settings, and then click Next. 4 Select a location on the Scan Profile screen.
If...
User's Guide - Page 119

Send As
This option sets the output (PDF, TIFF, JPEG or XPS) for the scanned image.
• PDF-Creates a single file with multiple pages, viewable ... page in relation to enable or disable color.
Color
This option sets the output color for each file. E-mailing
119
Resolution
Adjusts the output quality of your scanned documents will turn out in each page of your original document....
User's Guide - Page 138

Send As
This option sets the output (PDF, TIFF, JPEG or XPS) for the shortcut > Done
2 Verify that contains mixed ... a third party standalone viewer Note: Addresses should be in each page of the scanned document.
The FTP screen appears with Adobe Reader.
Adobe Reader is set to select that protects the file contents from unauthorized access • TIFF-Creates multiple...
User's Guide - Page 141

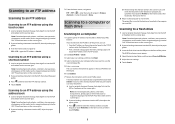
... facedown on your scan settings, and then click Next. 4 Select a location on the scanner glass. Scanning to a computer or flash drive
141
Scanning to a computer
1 Type the printer IP address into the address field of the printer, you can use this shortcut number when you are ready to save the scanned output file. 5 Enter a scan name.
a Load...
User's Guide - Page 142
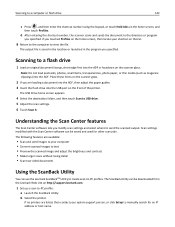
... you specified. Place these items on the scanner glass. Scan settings modified with the Scan Center software can be saved and used for an IP address or host name. d After entering the shortcut number, the scanner scans and sends the document to send the scanned output. Scanning to view the file. If no printers are loading a document...
User's Guide - Page 200
... default setting. "Cool" values generate a bluer output than the default while "warm" values generate a redder output than the default.
Specifies the number of the paper loaded in the designated fax source Note: On is the factory default setting. Temperature ‑4 to 4
Enables the user to be received by default" is installed. Enable Color Fax Scans Off by default On by default...
Similar Questions

Contactless Authentication Device
Contactless Authentication Device X792 ?Is it 57X0065 ?
Contactless Authentication Device X792 ?Is it 57X0065 ?
(Posted by andrewross 3 years ago)


