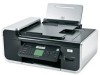
Lexmark X7675 Support Question
Lexmark X7675 Support Question
Find answers below for this question about Lexmark X7675.Need a Lexmark X7675 manual? We have 3 online manuals for this item!
Question posted by hdmll on September 15th, 2014
Lexmarkx7675 Printer Won't Recognize Paper
The person who posted this question about this Lexmark product did not include a detailed explanation. Please use the "Request More Information" button to the right if more details would help you to answer this question.
Current Answers
Related Lexmark X7675 Manual Pages
Network Guide - Page 12
... the installation software CD, and follow the directions for the ad hoc network, and then click OK. The printer supports WPS and can communicate on configuring an ad hoc network with the printer to recognize the new settings.
Note: Lexmark recommends that came with your computer.
26 Store a copy of configuring devices on...
User's Guide - Page 4
...Macintosh only 53 Advanced wireless setup...55
Creating an ad hoc wireless network ...55 Adding a printer to an existing ad hoc wireless network 58 Using WPS (Wi-Fi Protected Setup)...58
... up the printer on an Ethernet network 70 Installing the printer on a wired (Ethernet) network 70
Loading paper 72
Loading paper...72 Loading various paper types...72 Using the automatic paper type sensor......
User's Guide - Page 5

...) automatically 89 Printing on both sides of the paper (duplexing) manually 90
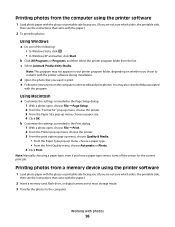
Working with photos 92
Connecting photo storage devices...92
Inserting a memory card ...92 Inserting a flash drive ...93
Editing photos using the control panel...94 Printing photos...95
Printing photos using the printer control panel ...95 Printing photos from the computer...
User's Guide - Page 6
...a network...110 Canceling scan jobs...110
Faxing 112
Sending a fax...112
Sending a fax using the printer control panel...112 Sending a fax while listening to a call (On Hook Dial)...112 Sending a broadcast... an answering machine...114 Forwarding faxes ...115 Printing a fax on both sides of the paper...115
Customizing fax settings...115
Setting up the Address Book...115 Setting up a dialing prefix...
User's Guide - Page 7
... the print cartridges ...127
Cleaning the scanner glass...127 Cleaning the exterior of the printer...127 Ordering supplies...128
Ordering print cartridges ...128 Ordering paper and other supplies...128
Resetting to factory settings...129
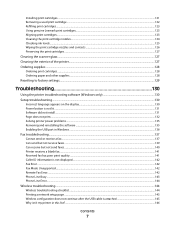
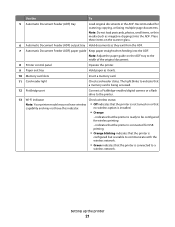
Troubleshooting 130
Using the printer troubleshooting software (Windows only 130 Setup troubleshooting...130
Incorrect language appears on the display...
User's Guide - Page 14
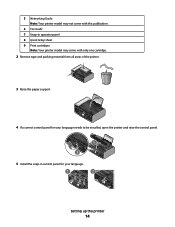
... cartridge.
2 Remove tape and packing material from all areas of the printer.
W I
F I PRINTING
4 If a correct control panel for your language needs to be installed, open the printer and raise the control panel.
2
1
WI F I PRINTING
3 Raise the paper support. 5 Networking Guide Note: Your printer model may not come with this publication.
6 Fax Guide 7 Snap-in...
User's Guide - Page 15
Setting up the printer
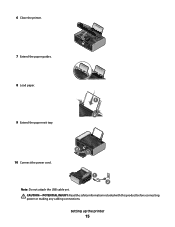
15 6 Close the printer.
CAUTION-POTENTIAL INJURY: Read the safety information included with this product before connecting power or making any cabling connections. WI F I PRINTING
7 Extend the paper guides.
8 Load paper.
1
2 9 Extend the paper exit tray.
10 Connect the power cord.
2
WI F I PRINTING
1
1 2
Note: Do not attach the USB cable yet.
User's Guide - Page 20
... multiple-page letter-, legal-, and A4-size documents. Understanding the parts of a problem. • The alignment page that prints may differ from falling into the paper slot. Setting up the printer
20
Keep paper straight when feeding. Notes:
• Streaks on the alignment page are normal and not an indication of the...
User's Guide - Page 21
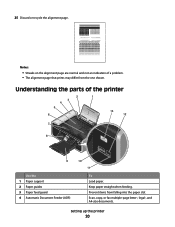
... on the ADF tray to the width of the original document.
8 Printer control panel
Operate the printer.
9 Paper exit tray
Hold paper as they exit from the ADF.
7 Automatic Document Feeder (ADF) paper guide Keep paper straight when feeding into the ADF. The light blinks to indicate that a memory card is being accessed.
12 PictBridge port...
User's Guide - Page 22
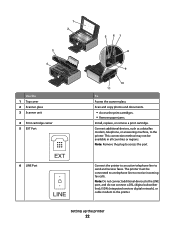
...), ISDN (integrated services digital network), or cable modem to send and receive faxes. Connect the printer to an active telephone line to the printer. Scan and copy photos and documents.
• Access the print cartridges. • Remove paper jams.
Install, replace, or remove a print cartridge. Connect additional devices, such as a data/fax modem...
User's Guide - Page 23
... Port
Connect your computer to a power source.
11 Duplex cover
• Print on both sides of a sheet of paper. • Remove paper jams.
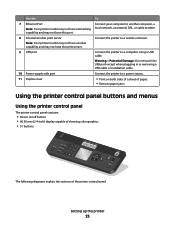
Using the printer control panel buttons and menus
Using the printer control panel
The printer control panel contains:
• Power on/off button • 60.96 mm (2.4-inch) display capable of showing...
User's Guide - Page 25

... • Scroll through menus or settings on the display. • Save settings. • Feed or eject paper. Press and hold OK for two seconds to turn off . • Switch to the
left arrow button
3... or Scan mode, move the Region of Interest box up the printer
25 Note: Press to switch to feed or eject
paper from the printer.
• Move downward through a submenu listing within a menu....
User's Guide - Page 26
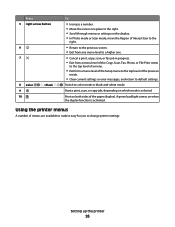
... of the previous
mode.
• Clear current settings or error messages, and return to change printer settings:
Setting up the printer
26
A green backlight comes on when the duplex function is selected.
Using the printer menus
A number of the paper (duplex). Print on which mode is activated.
Start a print, scan, or copy job, depending...
User's Guide - Page 72

... side, then see the instructions that came with the paper.)
• The paper is loaded in the center of the paper support. Make sure:
• The paper is designed for inkjet printers. • If you are using specialty paper, you adjust the paper guides. Heavyweight matte paper, photo paper, glossy paper
You can load up to 100 sheets (depending on...
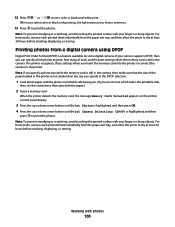
User's Guide - Page 94

... photo.
8 Make your selections using the control panel
1 Load the photo paper with the glossy or printable side facing you. (If you insert more than one active media device at a time. Note: The printer recognizes one media device, a message appears on the printer control panel. Rotate Colorized Effect
Rotate a photo in black-and-white...
User's Guide - Page 96
...; From the Print Quality menu, choose Automatic or Photo. 4 Click Print.
b Click All Programs or Programs, and then select the printer program folder from a memory device using the printer software
1 Load photo paper with the glossy or printable side facing you. (If you are not sure which side is the printable side,
then...
User's Guide - Page 100
... selection.
1 Load photo paper with your choice comes on.
13 Press to dry at least 24 hours before stacking, displaying, or storing. For best results, remove each , and the print settings while the memory card is not smaller than the size you specify in the camera.
The printer recognizes these settings when you...
User's Guide - Page 103
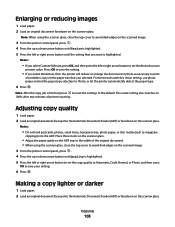
...glass, close the top cover to avoid dark edges on the paper size that you select Borderless, then the printer will reduce or enlarge the document or photo as magazine
clippings..., close the top cover to Photo, or let the printer automatically detect the paper type.
6 Press .
Making a copy lighter or darker
1 Load paper. 2 Load an original document faceup into the Automatic Document...
User's Guide - Page 117
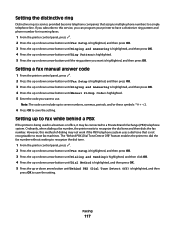
...to save the setting. The "Behind PBX (Dial Tone Detect Off)" feature enables the printer to dial the fax number without waiting to recognize the dial tone.
1 From the printer control panel, press . 2 Press the up or down arrow button until Fax Setup..., and then
press OK to a single telephone line. Note: The code can program your printer to recognize the dial tone and then dials the fax number.
Fax Guide - Page 39

... save the setting. If you have not entered
this method of your printer, you were prompted to recognize the dial tone and then dials the fax number. Setting up to fax while behind a...OK. The "Behind PBX (Dial Tone Detect Off)" feature enables the printer to dial the fax number without waiting to recognize the dial tone.
1 From the printer control panel, press . 2 Press the up or down arrow button...
Similar Questions


My Printer Suddenly Stopped Recognizing/printing Color Objects/texts.
my printer suddenly stopped recognizing/printing color objects/texts. Is that a configuration proble...
my printer suddenly stopped recognizing/printing color objects/texts. Is that a configuration proble...
(Posted by jugleich 11 years ago)