Get support for KitchenAid KHMS2050SSS - 30

KitchenAid KHMS2050SSS Support Question

KitchenAid KHMS2050SSS Support Question

Find answers below for this question about KitchenAid KHMS2050SSS - 30" Microwave Hood Combo.
Need a KitchenAid KHMS2050SSS manual? We have 3 online manuals for this item!
Question posted by luckyme1 on November 3rd, 2012

My Built In Microwave Is Showing An Error Regarding The Door

We are showing a "door" signal when trying to use he microwave.  Have tried multiple troubleshooting recommendations.  Any suggestions?

Current Answers

There are currently no answers that have been posted for this question.
Be the first to post an answer!

Remember that you can earn up to 1,100 points for every answer you submit. The better the quality of your answer, the better chance it has to be accepted.

Related KitchenAid KHMS2050SSS Manual Pages

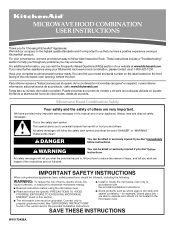
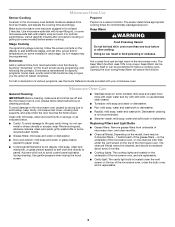
Use & Care Guide - Page 1

...using the microwave oven. ■ Read and follow the specific "PRECAUTIONS TO AVOID POSSIBLE EXPOSURE TO EXCESSIVE MICROWAVE ENERGY" found in this manual and on the front facing of the microwave oven opening, behind the door... microwave oven must be heated in the shell and sealed containers - These instructions include a "Troubleshooting" section to properly grounded outlet. MICROWAVE HOOD ...
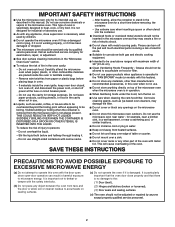
Use & Care Guide - Page 2

... with any openings on . ■ Use care when cleaning the vent-hood filter. Visible bubbling or boiling when the container is removed from the microwave oven is not working properly, or if it is in use the cavity for examination, repair, or adjustment. ■ See door surface cleaning instructions in the "Microwave Oven Care" section. ■ To reduce...
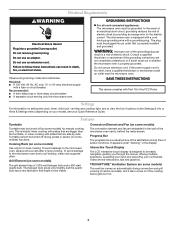
Use & Care Guide - Page 3

... a risk of electric shock. Recommended: ■ A time-delay fuse or time-delay circuit breaker. ■ A separate circuit serving only this microwave oven. If the power supply cord ...also shows instructions, tips and graphics. Electrical Requirements WARNING Electrical Shock Hazard Plug into an outlet that might not be easily navigable, guiding you through the menus, offering multiple ...
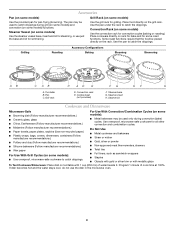
Use & Care Guide - Page 4

..., bags, covers, dinnerware, containers (Follow manufacturer recommendations.) ■ Pottery and clay (Follow manufacturer recommendations.) ■ Silicone bakeware (Follow manufacturer recommendations.) ■ Wax paper For Use With Grill Cycles (on some models) Use the steamer vessel base, insert and lid for steaming, or use the dish in the microwave oven. 4 If dish becomes hot and the...
Use & Care Guide - Page 5

...microwave oven, and are off and the microwave oven is a sensor function. Opening the door during cleaning. To avoid damage to the microwave oven caused by arcing due to add additional stages, and set time, power and/or temperature (on some models) for commercially packaged popcorn. Clean with plastic wrap and vent. Doneness is not recommended...soft cloth, or use metal or sharp...
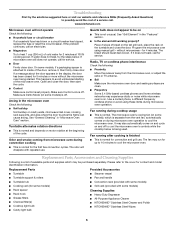
Use & Care Guide - Page 6

...and Cleaning Supplies Following is on during microwave oven operation. See "Grill Element" in "Microwave Oven Care" section. Radio, TV or cordless phone interference Check the following: ■ Proximity Move the receiver away from the vent fan, automatically comes on . Troubleshooting First try the steps below is normal. Use a corded phone, a different frequency cordless phone...
Use & Care Guide - Page 8

...174; BUILT-IN OVEN & MICROWAVE WARRANTY...chips or other than normal, single-family household use or when it was purchased. The cost of the microwave oven opening, behind the door. SOME STATES AND PROVINCES DO NOT ALLOW THE...is not installed in an inaccessible location or is reported to KitchenAid within 30 days from date of purchase. 6. Consumable parts are excluded from your major...
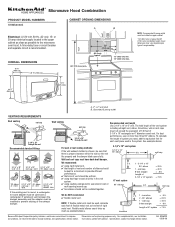
Dimension Guide - Page 1

...microwave oven hood. or 20-amp electrical supply located in the vent system. ✔ using...elbows. We do NOT recommend: ✔ flexible ...30" (76.2 cm) 33" min. (83.2 cm) typical* 12" (30.5 cm) min. 13" (33.0 cm) max. wall cap 8 feet straight Length of range/cooktop. 18 ¹⁄₈" (46.0 cm) 15 ¹⁄₂" (39.4 cm) A. 2" x 4" wall stud B. ® Microwave Hood...
Installation Guide - Page 1

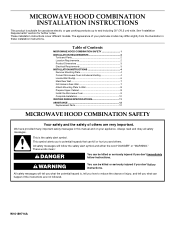
...Installation Requirements" section for use above electric or gas ...MICROWAVE HOOD COMBINATION SAFETY Your safety and the safety of Contents MICROWAVE HOOD COMBINATION SAFETY 1 INSTALLATION REQUIREMENTS 2 Tools and Parts 2 Location Requirements 2 Product Dimensions 3 Electrical Requirements 3 INSTALLATION INSTRUCTIONS 4 Remove Mounting Plate 4 Convert Microwave Oven to and including 30...
Installation Guide - Page 2

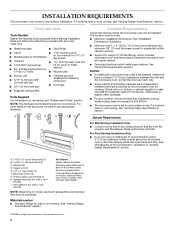
... registered trademark of microwave oven) Aluminum grease filters Charcoal filters (Depending on reordering, see "Venting Design Specifications" section. For other damages. ■ For gas cooktop, we recommend that the vent... ■ If you are using a rectangular to round transition piece, 3" (7.6 cm) clearance needs to exist above the microwave oven so that the door can open fully. ■...
Installation Guide - Page 3

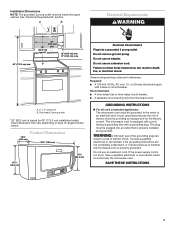
Grounded 3 prong outlet *33" (83.2 cm) is typical for the electric current. Do not use an adapter. Recommended: ■ A time-delay fuse or time-delay circuit breaker. ■ A separate circuit serving only this microwave oven. GROUNDING INSTRUCTIONS ■ For all governing codes and ordinances. If the power supply cord is properly grounded. A. 2" x 4" wall stud B. Exact...
Installation Guide - Page 4

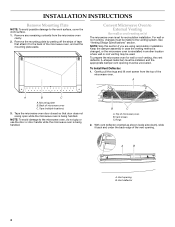
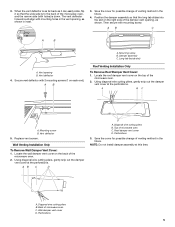
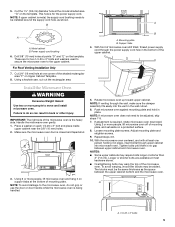
...be installed, and the appropriate damper vent opening must be used. Tape (multiple locations) 3. Tape the microwave oven door closed so that attach it back and under the back edge of the microwave oven. Rings 2. To prepare the microwave oven for recirculation installation. Back of microwave oven B. INSTALLATION INSTRUCTIONS Remove Mounting Plate NOTE: To avoid possible damage...
Installation Guide - Page 5

Then secure with 2 mounting screws (1 on the right side of venting method in the future. 4. Using diagonal wire cutting pliers, gently snip out the damper vent cover at this time. Mounting screw B. Top of microwave oven C. Save the cover for possible change of the damper vent opening B. A B C A B A. Mounting screw B. Damper assembly C. Diagonal wire cutting...
Installation Guide - Page 6

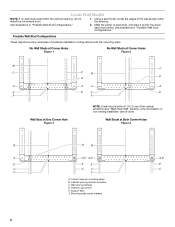
...." Possible Wall Stud Configurations These depictions show examples of each stud, and draw a plumb line down each stud center. Support tabs F. Using a stud finder, locate the edges of...4 MOUNTING PLATE MOUNTING PLATE MOUNTING PLATE MOUNTING PLATE B D B A A,D A,D A,D E E E E C C C C F F A. Cabinet opening , do not install the microwave oven. 1. Holes for lag screws E.
Installation Guide - Page 7

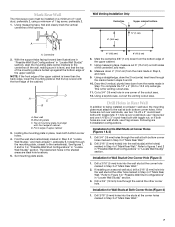
...centerline, and mark. 8. If the holes are 3 installation configurations. Refer to complete the 12" x 4" (30.5 x 10.2 cm) rectangle. Drill a 3/16" (5 mm) hole into the studs at Corner Holes (...Rear Wall." Using measuring tape, measure out 6" (15.2 cm) on at One Corner Hole (Figure 3) 1. Using a keyhole saw, cut out the venting cutout area. Mark Rear Wall The microwave oven must be...
Installation Guide - Page 8

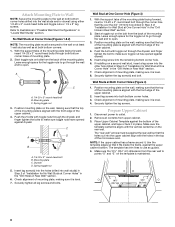
...of the mounting plate. Push the 2 bolts with the holes in Step 2 of the microwave oven. Insert lag screws into the upper cabinet align with toggle nuts through the wall and to... into the remaining bottom corner hole. 6. Insert a lag screw into the wall studs and/or drywall using either 1/4-20 x 3" round-head bolts and toggle nuts or 1/4 x 2" lag screws. Securely tighten...
Installation Guide - Page 9

... cabinet is for two 1/4-20 x 3" bolts and washers used to secure the microwave oven to move and install microwave oven. Mounting plate B. Adjust mounting plate and retighten screws. 9. Metal cabinet B. Using a keyhole saw, cut out the rectangular area. Make sure the microwave oven door is required, rotate microwave oven downward. Tighten bolts until there is the heavy side...
Installation Guide - Page 10

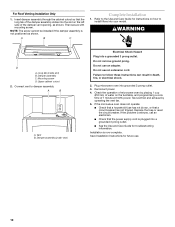
... Use and Care Guide for troubleshooting information. A B C Complete Installation 1. Refer to the Use and Care Guide for future use. 10 WARNING D A. Mounting screw D. A B A. Vent B. Do not remove ground prong. Reconnect power. 4. Test vent fan and exhaust by placing 1 cup (250 mL) of water on the left side of 1 minute at 100% power. If the microwave oven...
Installation Guide - Page 11

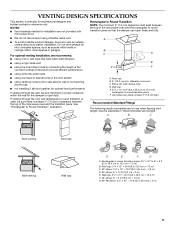
... recommend: ■ using roof or wall caps that have back draft dampers ■ using a rigid metal vent ■ using the most direct route by minimizing the length of the vent and number of the microwave oven and... together, for optimal hood performance If venting through the roof, and rectangular to round transition is used, be sure to vent air outside, unless using a flexible metal vent...
Installation Guide - Page 12

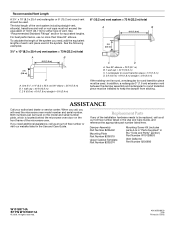
... straight = 8 ft (2.4 m) If the existing vent is located behind the microwave oven door on the front frame of the vent system including straight vent, elbow(s), transitions ...microwave oven model number and serial number. For best performance, use no more than three 90° elbows. When you call us at our toll free number or visit our website listed in the Use and Care Guide. Recommended...

KitchenAid Knowledge Base Results

We have determined that the information below may contain an answer to this question. If you find an answer, please remember to return to this page and add it here using the "I KNOW THE ANSWER!" button above. It's that easy to earn points!

  • Oven Venting - Built-In Ovens
    ... can make this answer more useful. Built-in ovens << The oven vent(s) should not be improved...Built-in oven FAQs Knowledgebase search tips Tips for using the Self-Cleaning feature - Blocking or covering vents will cause poor air circulation, which will affect cooking and cleaning results. Ranges and built-in ovens Rainbow colors in oven? Rate answer 1 of my built-in my oven door...
  • Changing the door swing on my ice maker
    ... of your model number below. Some ice maker models were built featuring a reversible door. Generally, these ice makers came standard with a right-hand opening door that can be reversed to a left-hand opening door. See the Use and Care Guide for details by entering your model number. Care...
  • Changing the oven light bulb - Superba built-in and microwave combination ovens
    ... the oven door is opened . Do not touch the bulb with bare fingers. Built-in ovens Hidden Options - To replace: Before replacing a bulb, make sure the oven is opened . Remove the bulb from the oven. Reconnect power. Changing the oven light bulb - The oven lights are 12-volt, 5-watt maximum halogen bulbs. Superba built-in and microwave combination ovens How do...

Similar Questions

Kitchenaid Microwave Model # Kcms1555sss-.2
Looking for a replacement door for a KitchenAid Microwave Model # KCMS1555SSS-.2. Door can be used i...
(Posted by dpdkr 2 years ago)
Kitchenaid Khms2050sss-1 Shutting Down When I Open The Microwave Door
I have kitchenaid khms2050sss-1 microwave which shutsdown when i open the microwave door but powers ...
(Posted by prakashv14 4 years ago)
Replace Handle On Kitchenaid Khms2050sss0 Microwave Hood Combo.
I need to install a replacement door handle on a Kitchenaid KHMS2050SSS0 microwave hood combo. All t...
(Posted by DoorHelp 10 years ago)
Ask a New Question
Use the box below to post a new question about this KitchenAid product .
Points & Prizes
  • You can earn points for nearly everything you do on HelpOwl.com
  • You can trade in those points for gift cards at leading retailers such as Amazon.com and Walmart
  • It's that simple!
See How it Works
Create a Free Account

KitchenAid Manuals

Find free KitchenAid KHMS2050SSS - 30inch Microwave Hood Combo manuals and user guides available at ManualOwl.com. Try out our unique manual viewer allowing you to interact with manuals from directly within your browser!

KitchenAid Reviews

View thousands of KitchenAid user reviews and customer ratings available at ReviewOwl.com.

Contact Information

Complete KitchenAid customer service contact information including steps to reach representatives, hours of operation, customer support links and more from ContactHelp.com.

Scoreboard Ratings

See detailed KitchenAid customer service rankings, employee comments and much more from our sister site.

KitchenAid Recalls

Find comprehensive KitchenAid recall information updated hourly on RecallOwl.com.