Get support for KitchenAid KHMS2050SSS - 30

KitchenAid KHMS2050SSS Support Question

KitchenAid KHMS2050SSS Support Question

Find answers below for this question about KitchenAid KHMS2050SSS - 30" Microwave Hood Combo.
Need a KitchenAid KHMS2050SSS manual? We have 3 online manuals for this item!
Question posted by prakashv14 on September 25th, 2019

Kitchenaid Khms2050sss-1 Shutting Down When I Open The Microwave Door

I have kitchenaid khms2050sss-1 microwave which shutsdown when i open the microwave door but powers on after few minutes. any suggestions on how to fix this issue

Current Answers

Answer #1: Posted by Odin on September 25th, 2019 10:05 AM
Odin

Member since:
April 10th, 2010

Points: 41,236,710
100
points
Your question is not altogether clear. It's normal (and a safety requirement!) for the oven to shut off when the door opens. If it powers on with the door open, that is also a severe safety issue, for which professional service should be immediately engaged. (For referral, use the contact information at https://www.contacthelp.com/kitchenaid/customer-service.)

Also note the following (from KitchenAid).

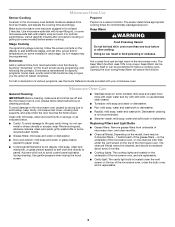
Firmly close door. On some models, if a packaging spacer is
attached to inside of the door, remove it, then firmly close door.
If a message about the door appears in the display, the door
has been closed for 5 minutes or more without the microwave
oven being started. This happens to avoid unintended starting
of the microwave oven. Open and close the door, then start
the cycle.


Hope this is useful. Please don't forget to click the Accept This Answer button if you do accept it. My aim is to provide reliable helpful answers, not just a lot of them. See https://www.helpowl.com/profile/Odin.

Related KitchenAid KHMS2050SSS Manual Pages

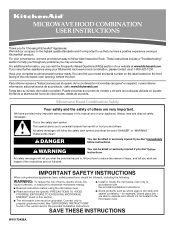
Use & Care Guide - Page 1

...reduce the chance of injury, and tell you have a positive experience owning a KitchenAid® product. are very important. We hold our company to the highest quality... DANGER You can visit the Frequently Asked Questions (FAQs) section of the microwave oven opening, behind the door. MICROWAVE HOOD COMBINATION USER INSTRUCTIONS Thank you don't follow instructions. Para obtener acceso a ...
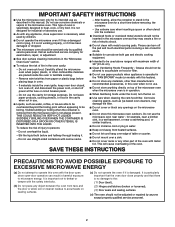
Use & Care Guide - Page 2

... soil or cleaner residue to stand in the microwave oven for a short time before and halfway through heating it is removed from paper or plastic bags before placing bags in operation. ■ When flambeing foods under the hood, turn oven off, and disconnect the power cord, or shut off the pad and touch electrical parts involving...
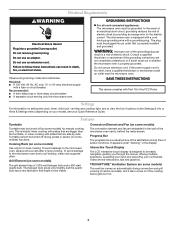
Use & Care Guide - Page 3

... or sensor (on some models) Use only for the electric current. Do not use an extension cord. The microwave oven is helpful when cooking with plates that might not be grounded. If the power supply cord is properly installed and grounded. Do not use of the grounding plug can result in the display...
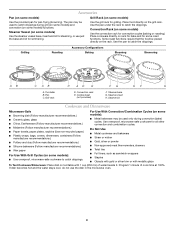
Use & Care Guide - Page 4

.... Place food directly on the rack. Turntable B. Pan C. Steamer base G. Steamer insert H. Program 1 minute of water beside it. If dish becomes hot and the water stays cool, do not use just the ... Use the steamer vessel base, insert and lid for steaming, or use the dish in the microwave oven. 4 Convection rack E. Use the pan under the rack to catch the drippings. Some roast functions...
Use & Care Guide - Page 5

... the grease filters - Opening the door during cleaning. Hot cooked food can result in food poisoning or sickness. Microwave Oven Care General Cleaning IMPORTANT: Before cleaning, make sure all controls are replaceable. ■ Cavity light: The cavity light bulb is cool. Activate child lock to add additional stages, and set time, power and/or temperature...
Use & Care Guide - Page 6

... to heat 1 cup (250 mL) of cold water for 5 minutes or more without microwaves - Make sure Demo Mode (on and off . Quartz bulb does not appear to cool the microwave oven's controls while the cooktop below . Open and close door. Place 2 slices of the microwave oven. www.kitchenaid.com Microwave oven will dissipate with some models) is normal and depends on...
Use & Care Guide - Page 8

...workmanship and is reported to KitchenAid within 30 days from the date of purchase. 6. W10170438A SP PN W10170447A © 2007. KITCHENAID® BUILT-IN OVEN & MICROWAVE WARRANTY LIMITED WARRANTY For one ...Proof of the microwave oven opening, behind the door. Have your model number and serial number on the label located on how to or furnished with the product, KitchenAid will pay for...
Dimension Guide - Page 1

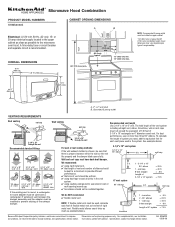
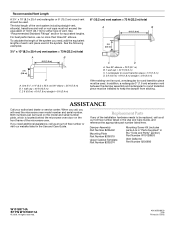
... x 10" to the microwave oven hood. wall cap 8 feet straight...30.5 cm) min. 13" (33.0 cm) max. transition 2 ft. 1 - For complete details, see Installation our products, we reserve the right to provide efficient performance. ✔ that there is round, a rectangularto-round adapter must be used in the vent system. ✔ using caulking compound to seal exterior wall or roof opening...
Installation Guide - Page 1

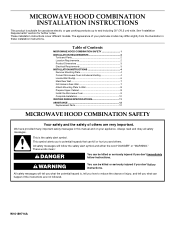
... use above electric or gas cooking products up to and including 30" (76.2 cm) wide. Table of Contents MICROWAVE HOOD COMBINATION SAFETY 1 INSTALLATION REQUIREMENTS 2 Tools and Parts 2 Location Requirements 2 Product Dimensions 3 Electrical Requirements 3 INSTALLATION INSTRUCTIONS 4 Remove Mounting Plate 4 Convert Microwave Oven to External Venting 4 Locate Wall Stud(s 6 Mark Rear Wall...
Installation Guide - Page 2

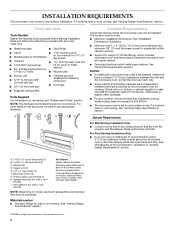
...to round transition piece, 3" (7.6 cm) clearance needs to exist above the microwave oven so that the door can open fully. ■ Some cabinet and building materials are not designed to back...cooking surface rating does not exceed 55,000 BTU/hr. ■ The microwave oven is set for recirculation mode. Power supply cord bushing (1) H. See "Venting Design Specifications" section. †...
Installation Guide - Page 3

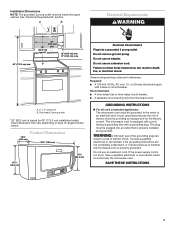
... INSTRUCTIONS ■ For all governing codes and ordinances. A B Electrical Requirements WARNING 69" (175.3 cm) min. 30" (76.2 cm) 33" min. (83.2 cm) typical* 12" (30.5 cm) min. 13" (33.0 cm) max. Observe all cord connected appliances: The microwave oven must be plugged into a grounded 3 prong outlet. In the event of an electrical short circuit...
Installation Guide - Page 4

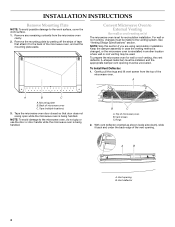
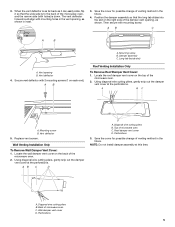
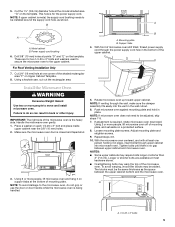
... the mounting plate by peeling off the strips of the vent opening B. Convert Microwave Oven to the microwave oven, do not grip or use the door or door handle while the microwave oven is set the mounting plate aside. Gently pull the rings and lift vent screen from the microwave oven cavity. 2. With vent deflector oriented as shown (wide side down...
Installation Guide - Page 5

... holes should align with holes) is to the back of the damper vent opening B. Position the damper assembly so that the wide side is down. Locate the roof damper vent cover on the back of microwave oven C. Top of the microwave oven. 2. A B Roof Venting Installation Only To Remove Roof Damper Vent Cover: 1. NOTE: Do not...
Installation Guide - Page 6

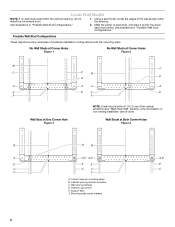
... plate center markers 6 See illustrations in "Possible Wall Stud Configurations." Corner holes (on mounting plate) B. See illustrations in "Possible Wall Stud Configurations." 2. Cabinet opening , do not install the microwave oven. 1. Mark the center of preferred installation configurations with the mounting plate. Holes for lag screws E. Locate Wall Stud(s) NOTE: If no wall studs...
Installation Guide - Page 7

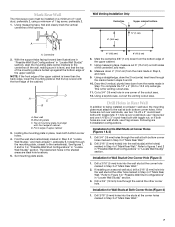
...stud at both bottom corner holes. Mark Rear Wall The microwave oven must be installed on the wall, making sure it is...7 Top of mounting plate must attach to complete the 12" x 4" (30.5 x 10.2 cm) rectangle. Mark the centerline 3/8" (1 cm) down from... Hole (Figure 3) 1. Front edge of the opening. Refer to figures 1 and 2 in "Possible Wall Stud Configurations" in "Locate Wall Stud(s)" section...
Installation Guide - Page 8

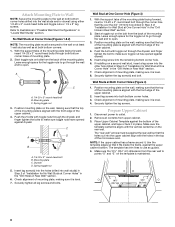
... the mounting plate. Disconnect power to use as at Corner Holes (Figures 1 & 2) NOTE: The mounting plate must be secured to make sure toggle nut has opened against drywall. The template... through the wall and to open . Prepare Upper Cabinet 1. If installing on the wall, making sure it is aligned with the front edge of the microwave oven. Position mounting plate on a...
Installation Guide - Page 9

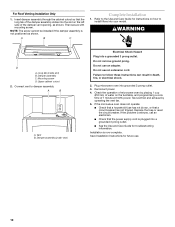
... the power supply cord. Failure to the microwave oven, do so can result in place, insert bolts through the wall, make sure the damper assembly fits easily into microwave oven. Make sure the microwave oven door is being handled. A NOTE: To avoid damage to do not grip or use the door or door handle while the microwave oven is closed and taped shut.
Installation Guide - Page 10

...on the turntable, and programming a cook time of 1 minute at 100% power. Mounting screw D. Save Installation Instructions for troubleshooting information....power. 4. Test vent fan and exhaust by placing 1 cup (250 mL) of the damper vent opening, as shown. NOTE: The screw cannot be installed if the damper assembly is not positioned as shown. Check the operation of microwave oven...
Installation Guide - Page 11

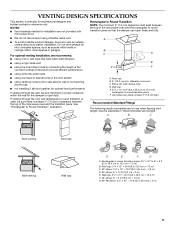
...the top of the microwave oven and the transition piece. Rectangular to seal exterior wall or roof opening around cap ■ not installing 2 elbows together, for optimal hood performance If venting through ...most direct route by minimizing the length of the vent and number of the microwave oven and the rectangular to open freely and fully. Vent extension piece, at least 3" (7.6 cm) of ...
Installation Guide - Page 12

... m) + 6 ft (1.8 m) straight = 8 ft (2.4 m) If the existing vent is located behind the microwave oven door on the front frame of each vent piece used in the "Tools and Parts" section) Part Number W10128803 Vent...To calculate the length of the system you will need , add the equivalent lengths of the microwave oven. See the following examples: 3¹⁄₄" x 10" (8.3 x 25.4 cm) vent...

KitchenAid Knowledge Base Results

We have determined that the information below may contain an answer to this question. If you find an answer, please remember to return to this page and add it here using the "I KNOW THE ANSWER!" button above. It's that easy to earn points!

  • Display shows F22 or FdL - Front-load washer
    ... , but it may look as if it . The door may not be latched. To remove the error display, press Pause/Off twice. Before you washing a large load? Is the washer door firmly shut?  Display shows F25 or F06 - Open the door and firmly close the washer door, check for the washer to freely tumble. My...
  • Replacing oven light bulbs - Built-in ovens
    ... cotton gloves to the touch. Built-in ovens When should the lights in my built-in and microwave combination ovens Changing the oven light bulb - Reconnect power. They should come on when either door is opened . To replace oven light bulbs: Before replacing any bulbs, make sure the oven is closed, touch Oven Light to operate the lights. Replace...
  • Door Alarm feature
    ... feature sounds a chime every few seconds when the refrigerator door has been left open for 5 continuous minutes. The chime will be lit when the Door Alarm feature is turned off . Product Recall Information User Preferences menu When ...nbsp;         Press the Door Alarm touch pad to change the water filter - The indicator light will sound until the...

Similar Questions

Microwave Door Only Partially Opens
our new built in microwave door does not fully open, never has. Can you tell us how to fix this
(Posted by Monavikstrom 7 years ago)
Replace Handle On Kitchenaid Khms2050sss0 Microwave Hood Combo.
I need to install a replacement door handle on a Kitchenaid KHMS2050SSS0 microwave hood combo. All t...
(Posted by DoorHelp 10 years ago)
Microwave Will Not Shut Off
MY MICROWAVE WILL NOT SHUT OFF UNLESS YOU OPEN THE DOOR. WHEN YOU CLOSE THE DOOR IT STARTS UP AGAIN.
(Posted by rgrace46 12 years ago)
'door Has Not Been Opened For 5 Minutes. Open&close Door To Ressume.'
this is what it says on the panel display. We do this but it still won't start up afterwards. This n...
(Posted by jettcantwell 13 years ago)
Ask a New Question
Use the box below to post a new question about this KitchenAid product .
Points & Prizes
  • You can earn points for nearly everything you do on HelpOwl.com
  • You can trade in those points for gift cards at leading retailers such as Amazon.com and Walmart
  • It's that simple!
See How it Works
Create a Free Account

KitchenAid Manuals

Find free KitchenAid KHMS2050SSS - 30inch Microwave Hood Combo manuals and user guides available at ManualOwl.com. Try out our unique manual viewer allowing you to interact with manuals from directly within your browser!

KitchenAid Reviews

View thousands of KitchenAid user reviews and customer ratings available at ReviewOwl.com.

Contact Information

Complete KitchenAid customer service contact information including steps to reach representatives, hours of operation, customer support links and more from ContactHelp.com.

Scoreboard Ratings

See detailed KitchenAid customer service rankings, employee comments and much more from our sister site.

KitchenAid Recalls

Find comprehensive KitchenAid recall information updated hourly on RecallOwl.com.