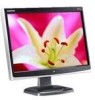
8512499 - eMachines Flat Panel Monitor User Guide
Page 3
Contents Using Your eMachines Flat-Panel Monitor 1 Unpacking the monitor 2 Connecting the monitor 3 Attaching the base 3 Connecting video inputs 4 Connecting power 5 Connecting a security cable 5 Setting up the optional stand 6 Attaching the USB stand 6 Adjusting monitor height tension 8 Adjusting monitor tilt tension ... bar 11 Starting the monitor 12 Adjusting monitor settings 13 Monitor buttons 13 On-screen display options 14 Changing Windows screen settings 17 Video modes 18 Power management 19 ENERGY STAR 19 Energy declaration 19 Maintaining 20 Troubleshooting 20 ...
8512499 - eMachines Flat Panel Monitor User Guide
Page 5
Using Your eMachines Flat-Panel Monitor • Connecting the monitor • Setting up the optional stand • Setting up the optional speaker bar • Starting the monitor • Adjusting monitor settings • Power management • Maintaining • Troubleshooting • Specifications 1
8512499 - eMachines Flat Panel Monitor User Guide
Page 6
For telephone numbers, see the label on the back of your monitor. 2 Using Your eMachines Flat-Panel Monitor Unpacking the monitor Your monitor box should contain the following items: • Monitor (with neck attached) • Base • This User Guide • VGA cable • Power cord If you are missing any items, call Customer Care.
8512499 - eMachines Flat Panel Monitor User Guide
Page 7
www.emachines.com Connecting the monitor Important To attach the optional USB stand instead of the base, complete the instructions in "Setting up the monitor, first attach the base, then make your cable connections. You may need to press the two buttons on the base to let the monitor slide on page 6. Base buttons 3 To set up the optional stand" on smoothly. Attaching the base To attach the base: • Place the monitor base on a table top, then slide the monitor neck down onto the base until it clicks into place.
8512499 - eMachines Flat Panel Monitor User Guide
Page 8
The DVI jack is turned off, then connect the other end of the video cable to the matching video port on the 19-inch model. In the United States, you can reach the back of your computer. 4 OR Connect the blue VGA video cable to the blue VGA ... connector under the back of your cable and connector may vary from www.gateway.com. - Using Your eMachines Flat-Panel Monitor Connecting video inputs To connect video sources to your monitor: 1 Position your computer and the monitor so you can buy a DVI video cable from that shown.) 3 Make sure that your computer is only...
8512499 - eMachines Flat Panel Monitor User Guide
Page 9
... the back, then connect the power cord to protect your monitor from that shown.) 2 Plug the power cord into a correctly grounded power outlet. www.emachines.com Connecting power To connect power: 1 Position your monitor so you can secure your monitor to your computer desk (or to the lock slot on ...the back of your cable and connector may vary from voltage spikes. Cable lock slot 5 We recommend using a surge protector to the power connector under the back of the monitor. (The ...
8512499 - eMachines Flat Panel Monitor User Guide
Page 10
...'s neck onto the base. 6 You can adjust the stand for height, tilt, and screen rotation. To attach the adjustable stand: 1 Make sure that the monitor is ideal. Save the four screws. When the stand is connected to the USB 2.0 ports on a stable, soft (non-marring) surface. A non-slip ...mat on a tabletop is turned off. 2 Place the monitor face-down over the edge of the LCD panel. Using Your eMachines Flat-Panel Monitor Setting up the optional stand Attaching the USB stand In the United States, you can connect up to four...
8512499 - eMachines Flat Panel Monitor User Guide
Page 12
... , then lower the neck into place and release the lever. You also need to change the stand's height tension. Screwdriver access cap 8 Using Your eMachines Flat-Panel Monitor 9 Slide the neck's bracket slot onto the bracket's mounting tab. 10 Press the bracket lever to the right and hold it does not stay... in place when you let go, you need to adjust the stand if the amounts of force required to raise and lower the monitor are not...
8512499 - eMachines Flat Panel Monitor User Guide
Page 13
... access hole cap. 6 For optimum viewing, adjust the height so the top of the monitor is correct for your monitor's tilt tension: • Adjust the tilt tension screw (on the back of the stand) so the monitor stays in place when you let go. Height tension screw 3 Adjust the height tension screw... in the slot above the USB In port). If the monitor changes its tilt angle when you let go, turn the screw clockwise one complete turn the tension screw clockwise two to four turns to increase the tension. www.emachines.com 2 Insert a Phillips screwdriver through the access hole in the base ...
8512499 - eMachines Flat Panel Monitor User Guide
Page 14
Using Your eMachines Flat-Panel Monitor Ergonomic guidelines The recommended screen positioning is tilted upward. This guideline places the center of your USB stand and to avoid screen glare when the ...
8512499 - eMachines Flat Panel Monitor User Guide
Page 16
... on the right side of the monitor to automatically adjust your monitor. Using Your eMachines Flat-Panel Monitor 6 Turn on page 20. 3 Adjust the tilt of the monitor for the display image to adjust other monitor settings. Starting the monitor To start the monitor: 1 Press the power button on...ideal settings. 5 Use the on page 13. Allow about 10 seconds for the best viewing angle. 4 After you do not see "Adjusting monitor settings" on -screen display (OSD) to appear. For more information, see a display image, check the connections. For more troubleshooting information, ...
8512499 - eMachines Flat Panel Monitor User Guide
Page 17
...vary from that lets you adjust contrast, brightness, and other settings for the monitor. www.emachines.com Adjusting monitor settings Use the monitor controls (located on page 17. The monitor saves changes you make to the previous menu. Monitor buttons This monitor features an on-screen display (OSD) that shown.) Input button Auto button... • Input OSD active: Press to move up through menus and adjust OSD options. OSD inactive: Press to automatically optimize the monitor's image position, clock, and phase. • / (brightness) OSD active: Press to open a menu or setting.
8512499 - eMachines Flat Panel Monitor User Guide
Page 18
... all adjustments, press the Menu button at the Main Menu to the ideal settings for your current screen resolution. 2 Press the Menu button. Using Your eMachines Flat-Panel Monitor On-screen display options Adjusting OSD settings To adjust the OSD settings: Tip While the OSD is automatically adjusted to exit. 14
8512499 - eMachines Flat Panel Monitor User Guide
Page 19
.... 15 Advanced-Opens the Advanced menu, where you can adjust color balance, change the OSD language, and display information about current monitor settings. Picture-Opens the Picture menu, where you can adjust brightness, contrast, and gamma. Geometry-Opens the Geometry menu, where ... Gamma-Customizes the gamma level. www.emachines.com OSD menus OSD Menu Main menu Main Menu Auto Picture Geometry Advanced Reset Description Auto-Automatically adjusts your monitor to its factory settings. Reset-Resets the monitor to readjust brightness after the monitor warms up. You may need to ...
8512499 - eMachines Flat Panel Monitor User Guide
Page 20
... also press the Auto button to configure the horizontal position automatically. The horizontal screen size will also change your monitor at a resolution less than that you should change . Using Your eMachines Flat-Panel Monitor OSD Menu Geometry menu Geometry H-Position V-Position Clock Phase Description H-Position-Moves the display image left and right. Language...
8512499 - eMachines Flat Panel Monitor User Guide
Page 21
www.emachines.com Changing Windows screen settings Color depth and screen resolution are two of pixels (individual colored dots) your computer uses to display images on your monitor. The Display Settings dialog box opens. The optimum resolution for your display is in Windows Vista®: 1 Click ... higher the resolution, the more information about adjusting the screen, click Start, then click Help and Support. Shortcut You can also right-click on the monitor. Color depth settings: • Low (8-bit) = 256 colors • Medium (16-bit) = 65,500 colors • Highest (32-bit)...
8512499 - eMachines Flat Panel Monitor User Guide
Page 22
Using Your eMachines Flat-Panel Monitor Video modes Your monitor supports several video modes. Mode Mode name and resolution Horizontal Vertical Available in DVI mode frequency (kHz) frequency (Hz) (19-inch model) 1 VGA 640 × 350 31.469 70.087 No 2 VGA 640 × 480 31.469 59.941 Yes 3 VESA 640 × 480 37....935 59.887 Yes 16 VESA 1440 × 900 70.635 74.984 No 18 If you do not use the best mode for the monitor, the display image may look slightly "fuzzy."
8512499 - eMachines Flat Panel Monitor User Guide
Page 23
... conserve significant energy by reducing power consumption during time of non-use . This monitor complies with the EPA's International ENERGY STAR Program, which is a program designed to... encourage manufacturers of computer equipment to build circuitry into the energy saving mode, the monitor enters the Active Off mode (sleep). Energy declaration When connected to a computer that ... www.emachines.com Power management ENERGY STAR As an ENERGY STAR® Partner, eMachines has determined that supports the VESA Display Power Management Signaling (DPMS) Protocol, the monitor can be...
8512499 - eMachines Flat Panel Monitor User Guide
Page 24
...learn how to rain or use near water. • Keep the monitor away from radiators or heat vents. • Keep the monitor out of the monitor and computer. Using Your eMachines Flat-Panel Monitor Maintaining To keep the monitor in optimal working order: • Do not block the ventilation holes.... • Do not expose the monitor to enable multiple monitors. • You can use both ...
8512499 - eMachines Flat Panel Monitor User Guide
Page 25
... for any pins that might be bent or pushed in . • Turn off the monitor and unplug the video cable from the back of your computer. Color is not uniform ...before making a final judgment about connecting the video cable, see "Adjusting monitor settings" on page 13. 21 www.emachines.com • If the power LED is orange: • Make sure... that your computer is turned on. • Move the mouse or press any key on the keyboard to bring the monitor out of sleep mode. • Restart your computer with the monitor...