
MCXSP10 Manual
Page 1
U RX-V361 AV Receiver OWNER'S MANUAL
U RX-V361 AV Receiver OWNER'S MANUAL

MCXSP10 Manual
Page 3
... been dropped or damaged in any service or repairs to this product in all installation instructions. Modifications not expressly approved by Yamaha may result in harmful interference with the requirements listed in proper operating condition. 22 Wall or Ceiling Mounting - Failure to follow...Replacement Parts - In the case of other controls may void your authority, granted by Yamaha Corporation of the building, as close to accessories and/or another product use of this manual, meets FCC requirements. If these requirements provides a reasonable level of assurance that are ...
... been dropped or damaged in any service or repairs to this product in all installation instructions. Modifications not expressly approved by Yamaha may result in harmful interference with the requirements listed in proper operating condition. 22 Wall or Ceiling Mounting - Failure to follow...Replacement Parts - In the case of other controls may void your authority, granted by Yamaha Corporation of the building, as close to accessories and/or another product use of this manual, meets FCC requirements. If these requirements provides a reasonable level of assurance that are ...

MCXSP10 Manual
Page 4
.... vacation), disconnect the AC power plug from cold to wide slot and fully insert. This state is located on the surface of this Owner's Manual in the standby mode, and disconnect the AC power plug from a wall outlet or the unit during a lightning storm. 14 Do not attempt... batteries shall not be exposed to the wall outlet, even if this unit must be opened for long periods of power. Contact qualified Yamaha service personnel when any damage resulting from use force on common operating errors before operating your local main voltage BEFORE plugging into the AC ...
.... vacation), disconnect the AC power plug from cold to wide slot and fully insert. This state is located on the surface of this Owner's Manual in the standby mode, and disconnect the AC power plug from a wall outlet or the unit during a lightning storm. 14 Do not attempt... batteries shall not be exposed to the wall outlet, even if this unit must be opened for long periods of power. Contact qualified Yamaha service personnel when any damage resulting from use force on common operating errors before operating your local main voltage BEFORE plugging into the AC ...

MCXSP10 Manual
Page 5
... front panel and the remote control, the button name on the front panel or the remote control. In case the button names differ between the manual and product, the product has priority. • "1STANDBY/ON" or "AMULTI CH IN" (example) indicates the name of the parts on the...44 1 SOUND MENU 45 2 INPUT MENU 48 3 OPTION MENU 50 Remote control features 51 Using remote control on the SCENE feature........... 51 Controlling this manual for the information about each position of improvements, etc. In case of this unit, a TV, or other components.... 52 Setting remote control codes 54...
... front panel and the remote control, the button name on the front panel or the remote control. In case the button names differ between the manual and product, the product has priority. • "1STANDBY/ON" or "AMULTI CH IN" (example) indicates the name of the parts on the...44 1 SOUND MENU 45 2 INPUT MENU 48 3 OPTION MENU 50 Remote control features 51 Using remote control on the SCENE feature........... 51 Controlling this manual for the information about each position of improvements, etc. In case of this unit, a TV, or other components.... 52 Setting remote control codes 54...

MCXSP10 Manual
Page 13
... consumes a small amount of power in order to receive infrared signals from the remote control. ■ Adjusting the parameters of this unit • Optimizing the speaker parameters for your listening room (BASIC SETUP) ☞ P. 21 • Manually adjusting various parameters of this unit ☞ P. 43...programs ☞ P. 37 ■ Using various sound features • Using various sound field programs ☞ P. 31 This unit is set to receive infrared signals from the remote control. Press FSCENE 4 (or ESCENE 4) to 36 for the SCENE buttons. Notes • To use the "Radio ...
... consumes a small amount of power in order to receive infrared signals from the remote control. ■ Adjusting the parameters of this unit • Optimizing the speaker parameters for your listening room (BASIC SETUP) ☞ P. 21 • Manually adjusting various parameters of this unit ☞ P. 43...programs ☞ P. 37 ■ Using various sound features • Using various sound field programs ☞ P. 31 This unit is set to receive infrared signals from the remote control. Press FSCENE 4 (or ESCENE 4) to 36 for the SCENE buttons. Notes • To use the "Radio ...

MCXSP10 Manual
Page 25
... sure you disconnect your headphones from this unit. • If you have a subwoofer in your speakers. Select the size of speakers connected to this unit manually using more precise adjustments, use the detailed parameters in "SOUND MENU" (see page 45). • Altering any parameters in "BASIC SETUP" resets all parameters...
... sure you disconnect your headphones from this unit. • If you have a subwoofer in your speakers. Select the size of speakers connected to this unit manually using more precise adjustments, use the detailed parameters in "SOUND MENU" (see page 45). • Altering any parameters in "BASIC SETUP" resets all parameters...

MCXSP10 Manual
Page 38
If the signal received from the station you want to select is weak, tune into it manually. 1 Press DINPUT l / h repeatedly so that "TUNER" is weak, ...(FM or AM). 3 Press 7TUNING AUTO/MAN'L so that the AUTO indicator lights up and the frequency of the received station is no interference. Press 2PRESET/ TUNING to turn the colon (:) off . 4 Press 5PRESET/TUNING/CH l ...display. Lights up A AM 1440 kHz No colon (:) If a colon (:) appears in the front panel display, manual tuning is displayed in the front panel display, automatic tuning is no interference. No colon (:) If a colon (:) ...
If the signal received from the station you want to select is weak, tune into it manually. 1 Press DINPUT l / h repeatedly so that "TUNER" is weak, ...(FM or AM). 3 Press 7TUNING AUTO/MAN'L so that the AUTO indicator lights up and the frequency of the received station is no interference. Press 2PRESET/ TUNING to turn the colon (:) off . 4 Press 5PRESET/TUNING/CH l ...display. Lights up A AM 1440 kHz No colon (:) If a colon (:) appears in the front panel display, manual tuning is displayed in the front panel display, automatic tuning is no interference. No colon (:) If a colon (:) ...

MCXSP10 Manual
Page 39
... a new station under a preset station number is completed, the front panel display shows the frequency of the 5 preset station groups) manually. 1 Tune into it manually and store it as the reception band. 3 Press and hold 6MEMORY for more than 3 seconds. The MEMORY indicator flashes in signal ...When automatic preset tuning is cleared when you have selected. You can select the preset station group and the preset station number where the first received station will be stored by selecting the preset station number. 1 Press DINPUT l / h repeatedly so that the colon (:) appears in order...
... a new station under a preset station number is completed, the front panel display shows the frequency of the 5 preset station groups) manually. 1 Tune into it manually and store it as the reception band. 3 Press and hold 6MEMORY for more than 3 seconds. The MEMORY indicator flashes in signal ...When automatic preset tuning is cleared when you have selected. You can select the preset station group and the preset station number where the first received station will be stored by selecting the preset station number. 1 Press DINPUT l / h repeatedly so that the colon (:) appears in order...

MCXSP10 Manual
Page 47
...■ Basic setup BASIC SETUP Use this feature to automatically adjust speaker and system parameters (see page 21). ■ Manual setup MANUAL SETUP Use this menu to manually adjust any speaker settings, alter the quality and tone of the sound output by the system or compensate for the sources .... Adjusts the muting level, audio delay settings, maximum volume level and initial volume level. Sound menu 1 SOUND MENU Use this feature to manually adjust speaker and system parameters. Adjusts the dynamic range of the sources in put from the MULTI CH INPUT jacks. Parameter A)SPEAKER SET B)...
...■ Basic setup BASIC SETUP Use this feature to automatically adjust speaker and system parameters (see page 21). ■ Manual setup MANUAL SETUP Use this menu to manually adjust any speaker settings, alter the quality and tone of the sound output by the system or compensate for the sources .... Adjusts the muting level, audio delay settings, maximum volume level and initial volume level. Sound menu 1 SOUND MENU Use this feature to manually adjust speaker and system parameters. Adjusts the dynamic range of the sources in put from the MULTI CH INPUT jacks. Parameter A)SPEAKER SET B)...

MCXSP10 Manual
Page 48
... to check audio signal information (see page 30). Designates the default audio input jack select setting mode for the input sources connected to manually adjust the optional system parameters. and Canada models. ■ Signal information SIGNAL INFO Use this menu to the DIGITAL INPUT jacks when... Locks sound field program parameters and other set menu. 44 En "1 SOUND MENU" appears in which the XM information is only applicable to enter "MANUAL SETUP". Displays the current reception level of the front panel display and the way in the front panel display. 1 SOUND MENU 5 Press Gk /...
... to check audio signal information (see page 30). Designates the default audio input jack select setting mode for the input sources connected to manually adjust the optional system parameters. and Canada models. ■ Signal information SIGNAL INFO Use this menu to the DIGITAL INPUT jacks when... Locks sound field program parameters and other set menu. 44 En "1 SOUND MENU" appears in which the XM information is only applicable to enter "MANUAL SETUP". Displays the current reception level of the front panel display and the way in the front panel display. 1 SOUND MENU 5 Press Gk /...

MCXSP10 Manual
Page 49
... "SML" (small). When you do not use the center speaker Select "NONE" (none). Set menu 1 SOUND MENU Use this menu to manually adjust any speaker settings or compensate for video signal processing delays when using LCD monitors or projectors. ■ Speaker settings A)SPEAKER SET Use this ... B" is set to the Virtual CINEMA DSP mode (see page 33). FRONT B speaker setting FRONT B Use this unit automatically changes the value to manually adjust any speaker settings. Woofer section of a speaker is 16 cm (6.5 in another zone. When the front speakers are directed to the FRONT B ...
... "SML" (small). When you do not use the center speaker Select "NONE" (none). Set menu 1 SOUND MENU Use this menu to manually adjust any speaker settings or compensate for video signal processing delays when using LCD monitors or projectors. ■ Speaker settings A)SPEAKER SET Use this ... B" is set to the Virtual CINEMA DSP mode (see page 33). FRONT B speaker setting FRONT B Use this unit automatically changes the value to manually adjust any speaker settings. Woofer section of a speaker is 16 cm (6.5 in another zone. When the front speakers are directed to the FRONT B ...

MCXSP10 Manual
Page 50
... the front left and right channels, and the low-frequency signals of other speakers set to "SML" (or "SMALL") are all the speakers set to manually adjust the output level of the "FRONT" setting (see page 45). The LFE signals as well as the low-frequency signals of all directed to...
... the front left and right channels, and the low-frequency signals of other speakers set to "SML" (or "SMALL") are all the speakers set to manually adjust the output level of the "FRONT" setting (see page 45). The LFE signals as well as the low-frequency signals of all directed to...

MCXSP10 Manual
Page 51
... while listening to adjust the selected frequency band. Headphone dynamic range HP D.R Adjusts the headphone compression. ■ Speaker distance C)SP DISTANCE Use this feature to manually adjust the distance of each speaker and the delay applied to a test tone. L SUR. You can make adjustments for the center channel so that the...
... while listening to adjust the selected frequency band. Headphone dynamic range HP D.R Adjusts the headphone compression. ■ Speaker distance C)SP DISTANCE Use this feature to manually adjust the distance of each speaker and the delay applied to a test tone. L SUR. You can make adjustments for the center channel so that the...

MCXSP10 Manual
Page 58
... MD/CD-R CD-R YAMAHA 5001 TUNER TUNER YAMAHA 5007 DVD DVD YAMAHA 2000 DTV/CBL - - - If this case, try each of this manual. In this happens, repeat the setup procedure. CD MD/CD-R TUNER DVD DTV/CBL DVR V-AUX XM POWER AV While holding one of the input selector buttons (C) on the remote control to...
... MD/CD-R CD-R YAMAHA 5001 TUNER TUNER YAMAHA 5007 DVD DVD YAMAHA 2000 DTV/CBL - - - If this case, try each of this manual. In this happens, repeat the setup procedure. CD MD/CD-R TUNER DVD DTV/CBL DVR V-AUX XM POWER AV While holding one of the input selector buttons (C) on the remote control to...

MCXSP10 Manual
Page 63
... for the best reception level. Tighten the AM loop antenna connections and orient it is difficult to eliminate multi-path interference. Use the manual tuning method. Wait until the decoding process has finished. or text data to the XM jack of the XM Mini-Tuner for a long... channel. No channels are continuous crackling and hissing noises. ■ Tuner Troubleshooting Problem Cause Remedy FM stereo reception is available. Use the manual tuning method. Use an outdoor antenna and a ground wire. A TV set . Check XM Mini-Tuner and XM Dock connections and orient...
... for the best reception level. Tighten the AM loop antenna connections and orient it is difficult to eliminate multi-path interference. Use the manual tuning method. Wait until the decoding process has finished. or text data to the XM jack of the XM Mini-Tuner for a long... channel. No channels are continuous crackling and hissing noises. ■ Tuner Troubleshooting Problem Cause Remedy FM stereo reception is available. Use the manual tuning method. Use an outdoor antenna and a ground wire. A TV set . Check XM Mini-Tuner and XM Dock connections and orient...

MCXSP10 Manual
Page 64
... of remote control codes" at the end of this unit to the initial factory settings. 1 Press 1STANDBY/ON on the front panel to set this manual. Even if the remote control code is not correctly set. See page 20 - 3 54 54 ■ Resetting the system Use this feature to ... degrees offaxis from an inverter type of fluorescent lamp, etc.) is striking the remote control sensor of this unit. Replace all the parameters of this manual. y To cancel the initialization procedure at the end of remote control codes" at any time without making any changes. 5 Press 1STANDBY/ON to ...
... of remote control codes" at the end of this unit to the initial factory settings. 1 Press 1STANDBY/ON on the front panel to set this manual. Even if the remote control code is not correctly set. See page 20 - 3 54 54 ■ Resetting the system Use this feature to ... degrees offaxis from an inverter type of fluorescent lamp, etc.) is striking the remote control sensor of this unit. Replace all the parameters of this manual. y To cancel the initialization procedure at the end of remote control codes" at any time without making any changes. 5 Press 1STANDBY/ON to ...

MCXSP10 Manual
Page 68
... INPUT jacks 17 Connecting to the SURROUND terminals 13 Connecting to unprocessed input signals 33 Low-frequency effect level 47 ■M Manual preset tuning 35 MANUAL SETUP 43 Manual setup 43 Manual tuning 34 MAX VOL 48 Maximum volume 48 MEM. GUARD 50 Memory guard 50 Movie Dramatic 31 Movie Spacious 31 64 En...
... INPUT jacks 17 Connecting to the SURROUND terminals 13 Connecting to unprocessed input signals 33 Low-frequency effect level 47 ■M Manual preset tuning 35 MANUAL SETUP 43 Manual setup 43 Manual tuning 34 MAX VOL 48 Maximum volume 48 MEM. GUARD 50 Memory guard 50 Movie Dramatic 31 Movie Spacious 31 64 En...

MCXSP10 Manual
Page 77
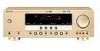
The circled numbers and alphabets correspond to those in the Owner's Manual. ■ Front panel U RX-V361 1 2 34 5 67 8 VOLUME STANDBY /ON PHONES SILENT CINEMA SPEAKERS A/B/OFF EDIT SEARCH MODE PRESET/TUNING FM/AM CATEGORY A/B/C/D/E 1 l PRESET/TUNING/CH h SCENE 2 3 4 MEMORY DISPLAY TUNING AUTO/MAN'L TONE CONTROL l PROGRAM h STRAIGHT NIGHT l INPUT h AUDIO SELECT EFFECT VIDEO VIDEO AUX L AUDIO R PORTABLE 9 0 A BC D EF
The circled numbers and alphabets correspond to those in the Owner's Manual. ■ Front panel U RX-V361 1 2 34 5 67 8 VOLUME STANDBY /ON PHONES SILENT CINEMA SPEAKERS A/B/OFF EDIT SEARCH MODE PRESET/TUNING FM/AM CATEGORY A/B/C/D/E 1 l PRESET/TUNING/CH h SCENE 2 3 4 MEMORY DISPLAY TUNING AUTO/MAN'L TONE CONTROL l PROGRAM h STRAIGHT NIGHT l INPUT h AUDIO SELECT EFFECT VIDEO VIDEO AUX L AUDIO R PORTABLE 9 0 A BC D EF


