
Owners Manual
Page 5
... CONTROLS AND FUNCTIONS 4 Front panel 4 Remote control 6 Using the remote control 7 Front panel display 8 Rear panel 10 PREPARATION SPEAKER SETUP 11 Speaker placement 11 Speaker connections 12 CONNECTIONS 14 Before connecting components 14 Connecting video components 16 Connecting audio components 19 Connecting the FM ...AM antennas 20 Connecting the power supply cord 21 Speaker impedance setting 21 Turning on the power 22 BASIC SETUP 23 Using the BASIC SETUP menu 23 BASIC OPERATION PLAYBACK 26 Basic operations 26 Selecting sound field programs 28 Selecting input modes 32 ...
... CONTROLS AND FUNCTIONS 4 Front panel 4 Remote control 6 Using the remote control 7 Front panel display 8 Rear panel 10 PREPARATION SPEAKER SETUP 11 Speaker placement 11 Speaker connections 12 CONNECTIONS 14 Before connecting components 14 Connecting video components 16 Connecting audio components 19 Connecting the FM ...AM antennas 20 Connecting the power supply cord 21 Speaker impedance setting 21 Turning on the power 22 BASIC SETUP 23 Using the BASIC SETUP menu 23 BASIC OPERATION PLAYBACK 26 Basic operations 26 Selecting sound field programs 28 Selecting input modes 32 ...

Owners Manual
Page 15
PREPARATION SPEAKER SETUP SPEAKER SETUP Speaker placement The speaker layout below shows the standard ITU-R* speaker setting. Center speaker (C) The center speaker is not practical to use a center speaker, you ... or under it to place the subwoofer near the front speakers. Place these speakers behind the listening position and at the same height as the YAMAHA Active Servo Processing Subwoofer System, is better to enjoy CINEMA DSP and multi-channel audio sources. * ITU-R is not so critical, because low bass sounds...
PREPARATION SPEAKER SETUP SPEAKER SETUP Speaker placement The speaker layout below shows the standard ITU-R* speaker setting. Center speaker (C) The center speaker is not practical to use a center speaker, you ... or under it to place the subwoofer near the front speakers. Place these speakers behind the listening position and at the same height as the YAMAHA Active Servo Processing Subwoofer System, is better to enjoy CINEMA DSP and multi-channel audio sources. * ITU-R is not so critical, because low bass sounds...

Owners Manual
Page 16
... of the cable together to 4 ohms before using (see page 21). • Before connecting the speakers, make sure that the power of this unit. SPEAKER SETUP Speaker connections Be sure to secure the wire. 3 4 5 Red: positive (+) Black: negative (-) ■ Banana plug connections (With the exception of the speaker connections is off...
... of the cable together to 4 ohms before using (see page 21). • Before connecting the speakers, make sure that the power of this unit. SPEAKER SETUP Speaker connections Be sure to secure the wire. 3 4 5 Red: positive (+) Black: negative (-) ■ Banana plug connections (With the exception of the speaker connections is off...

Owners Manual
Page 17
...SUBWOOFER jack Connect a subwoofer with built-in amplifier (1), such as the YAMAHA Active Servo Processing Subwoofer System, to this jack to control the power of your Yamaha subwoofer if a system connector jack is available on the subwoofer. ■... layout 6 13 and Canada models only) Use this jack. ■ SYSTEM CONNECTOR jack (HTR-5850: U.S.A. Subwoofer system 1 SYSTEM CONNECTOR SUB WOOFER OUTPUT Front speakers (A) Right Left Surround speakers Right Left SPEAKER SETUP 2 3 6 7 (HTR-5850 U.S.A. If you use only one or two speaker systems (2, 3) to these terminals. ...
...SUBWOOFER jack Connect a subwoofer with built-in amplifier (1), such as the YAMAHA Active Servo Processing Subwoofer System, to this jack to control the power of your Yamaha subwoofer if a system connector jack is available on the subwoofer. ■... layout 6 13 and Canada models only) Use this jack. ■ SYSTEM CONNECTOR jack (HTR-5850: U.S.A. Subwoofer system 1 SYSTEM CONNECTOR SUB WOOFER OUTPUT Front speakers (A) Right Left Surround speakers Right Left SPEAKER SETUP 2 3 6 7 (HTR-5850 U.S.A. If you use only one or two speaker systems (2, 3) to these terminals. ...

Owners Manual
Page 25
..., or the power supply is controlled by this unit, and while holding down STRAIGHT (EFFECT), press STANDBY/ON. This unit turns on, and the ADVANCED SETUP menu appears in the standby mode. and Australia models 1 outlet Korea model None Other models 2 outlets Use these outlets to this unit's STANDBY/ON (or...
..., or the power supply is controlled by this unit, and while holding down STRAIGHT (EFFECT), press STANDBY/ON. This unit turns on, and the ADVANCED SETUP menu appears in the standby mode. and Australia models 1 outlet Korea model None Other models 2 outlets Use these outlets to this unit's STANDBY/ON (or...
Owners Manual
Page 27
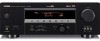
... a subwoofer in the front panel display. RETURN MEMORY REC DISC SKIP A-E/CAT. PRESET/CH A-E/CAT. "BASIC SETUP" appears in your system. 23 SET MENU MENU SRCH MODE BASIC SETUP A-E/CAT. DISPLAY AUDIO 2 3-13 1 Press AMP. PRESET/CH 2 Press SET MENU. DIRECT ST. 5 ...8 A SPEAKERS B 9 0 NIGHT 10 LEVEL TITLE BAND PRESET/CH STRAIGHT ENT. ENTER A-E/CAT. ENTER A-E/CAT. 6 Press j / i to enter BASIC SETUP. ROOM: S M >L Select the size of using more precise adjustments, use . • Make sure you disconnect your system quickly and with minimal effort. ...
... a subwoofer in the front panel display. RETURN MEMORY REC DISC SKIP A-E/CAT. PRESET/CH A-E/CAT. "BASIC SETUP" appears in your system. 23 SET MENU MENU SRCH MODE BASIC SETUP A-E/CAT. DISPLAY AUDIO 2 3-13 1 Press AMP. PRESET/CH 2 Press SET MENU. DIRECT ST. 5 ...8 A SPEAKERS B 9 0 NIGHT 10 LEVEL TITLE BAND PRESET/CH STRAIGHT ENT. ENTER A-E/CAT. ENTER A-E/CAT. 6 Press j / i to enter BASIC SETUP. ROOM: S M >L Select the size of using more precise adjustments, use . • Make sure you disconnect your system quickly and with minimal effort. ...

Owners Manual
Page 28
...Front L/R, Center, Surround L/R, L CR SL SB SR Surround back 9 Press d to confirm your selection. YES YES NO To complete the setup process if the test tone levels from each speaker in the front panel display. PRESET/CH A-E/CAT. ENTER A-E/CAT. SET CANCEL To apply ...CH A-E/CAT. PRESET/CH A-E/CAT. PRESET/CH A-E/CAT. ENTER A-E/CAT. 8 Press j / i to select the desired setting. >SET CANCEL CHECK OK? BASIC SETUP 7 Press d to select the desired setting. "CHECK:TestTone" appears in steps 4 through 8. YES 12 Press j / i to display the SPEAKERS parameter. CHECK OK...
...Front L/R, Center, Surround L/R, L CR SL SB SR Surround back 9 Press d to confirm your selection. YES YES NO To complete the setup process if the test tone levels from each speaker in the front panel display. PRESET/CH A-E/CAT. ENTER A-E/CAT. SET CANCEL To apply ...CH A-E/CAT. PRESET/CH A-E/CAT. PRESET/CH A-E/CAT. ENTER A-E/CAT. 8 Press j / i to select the desired setting. >SET CANCEL CHECK OK? BASIC SETUP 7 Press d to select the desired setting. "CHECK:TestTone" appears in steps 4 through 8. YES 12 Press j / i to display the SPEAKERS parameter. CHECK OK...

Owners Manual
Page 29
... SL SR The unit outputs the test tone from the selected speaker and the left front (or left surround) speaker in the standby mode. BASIC SETUP Memory back-up The memory back-up circuit prevents the stored data from +10 dB to -10 dB. Adjusts the balance between the surround left...
... SL SR The unit outputs the test tone from the selected speaker and the left front (or left surround) speaker in the standby mode. BASIC SETUP Memory back-up The memory back-up circuit prevents the stored data from +10 dB to -10 dB. Adjusts the balance between the surround left...

Owners Manual
Page 59
Please note that this operation will override the level adjustments made in "BASIC SETUP" (page 23) and "SP LEVEL" (page 59). RETURN MEMORY REC A-E/CAT. B SUR. Press NEXT repeatedly to select the speaker you want to adjust, then press ...
Please note that this operation will override the level adjustments made in "BASIC SETUP" (page 23) and "SP LEVEL" (page 59). RETURN MEMORY REC A-E/CAT. B SUR. Press NEXT repeatedly to select the speaker you want to adjust, then press ...

Owners Manual
Page 60
...Adjusts the tonal quality of the center speaker. 59 E)LFE LEVEL Adjusts the output level of your listening environment. ■ BASIC SETUP Use to quickly setup basic system parameters (see page 23). Item A)DISPLAY SET B)MEMORY GUARD C)PARAM. You can use SOUND MENU to make further ... or compensate for the XM Connect and Play digital antenna. Selects the initial input mode of the display and converts video signals (HTR-5850 only). Item A)I/O ASSIGN B)INPUT MODE C)INPUT RENAME Features Assigns jacks according to the component to adjust the optional system parameters...
...Adjusts the tonal quality of the center speaker. 59 E)LFE LEVEL Adjusts the output level of your listening environment. ■ BASIC SETUP Use to quickly setup basic system parameters (see page 23). Item A)DISPLAY SET B)MEMORY GUARD C)PARAM. You can use SOUND MENU to make further ... or compensate for the XM Connect and Play digital antenna. Selects the initial input mode of the display and converts video signals (HTR-5850 only). Item A)I/O ASSIGN B)INPUT MODE C)INPUT RENAME Features Assigns jacks according to the component to adjust the optional system parameters...

Owners Manual
Page 61
... BAND PRESET/CH EFFECT SET MENU FAVOR. To return to select and adjust each parameter. If so, adjust the items again. 2 Press SET MENU. MANUAL SETUP 4 Press ENTER to enter MANUAL SETUP. 1 SOUND MENU appears in either cinema or music night listening mode. 1 Press AMP. 6 Press ENTER to display MANUAL... SETUP. MENU SRCH MODE ENTER A-E/CAT. Repeat this unit is cut for more than one week, the stored data will be lost even if this operation ...
... BAND PRESET/CH EFFECT SET MENU FAVOR. To return to select and adjust each parameter. If so, adjust the items again. 2 Press SET MENU. MANUAL SETUP 4 Press ENTER to enter MANUAL SETUP. 1 SOUND MENU appears in either cinema or music night listening mode. 1 Press AMP. 6 Press ENTER to display MANUAL... SETUP. MENU SRCH MODE ENTER A-E/CAT. Repeat this unit is cut for more than one week, the stored data will be lost even if this operation ...

Owners Manual
Page 62
... small surround left and right speakers. Bass out BASS OUT Low-frequency (bass) signals can change these settings according to your speakers, you perform "BASIC SETUP" (see page 32) and automatically set the unit to the Virtual CINEMA DSP mode (see page 23). ■ Speaker settings A)SPEAKER SET Use to manually...
... small surround left and right speakers. Bass out BASS OUT Low-frequency (bass) signals can change these settings according to your speakers, you perform "BASIC SETUP" (see page 32) and automatically set the unit to the Virtual CINEMA DSP mode (see page 23). ■ Speaker settings A)SPEAKER SET Use to manually...

Owners Manual
Page 67
...for a complete list of this unit, and while holding down STRAIGHT (EFFECT), press STANDBY/ON. STANDBY /ON This completes the advanced setup procedure. l PROGRAM h 3 Press STRAIGHT (EFFECT) repeatedly to toggle between the available parameters. STRAIGHT EFFECT 4 Press STANDBY/ON to confirm.... STANDBY /ON PHONES SPEAKERS A B SILENT CINEMA (U.S.A. CAUTION Be sure to set up. ADVANCED SETUP MENU ADVANCED SETUP MENU The ADVANCED SETUP menu is muted. • During the advanced setup procedure, only the STANDBY/ON, STRAIGHT (EFFECT) and PROGRAM l / h buttons on the front...
...for a complete list of this unit, and while holding down STRAIGHT (EFFECT), press STANDBY/ON. STANDBY /ON This completes the advanced setup procedure. l PROGRAM h 3 Press STRAIGHT (EFFECT) repeatedly to toggle between the available parameters. STRAIGHT EFFECT 4 Press STANDBY/ON to confirm.... STANDBY /ON PHONES SPEAKERS A B SILENT CINEMA (U.S.A. CAUTION Be sure to set up. ADVANCED SETUP MENU ADVANCED SETUP MENU The ADVANCED SETUP menu is muted. • During the advanced setup procedure, only the STANDBY/ON, STRAIGHT (EFFECT) and PROGRAM l / h buttons on the front...
Owners Manual
Page 68
...must be 8 Ω or higher. Center Surround Surround back The impedance of this unit. Speaker impedance SP IMP. ADVANCED SETUP MENU ■ ADVANCED SETUP menu items Change the initial settings (indicated in bold under each speaker must be initialized when you use two separate speakers system...of each speaker must be 8 Ω or higher. If you reset the factory presets. Note This setting does not affect ADVANCED SETUP menu item parameters. Factory presets PRESET Use to reset all of each speaker must also make settings for this unit's parameters to ...
...must be 8 Ω or higher. Center Surround Surround back The impedance of this unit. Speaker impedance SP IMP. ADVANCED SETUP MENU ■ ADVANCED SETUP menu items Change the initial settings (indicated in bold under each speaker must be initialized when you use two separate speakers system...of each speaker must be 8 Ω or higher. If you reset the factory presets. Note This setting does not affect ADVANCED SETUP menu item parameters. Factory presets PRESET Use to reset all of each speaker must also make settings for this unit's parameters to ...

Owners Manual
Page 70
...CONTROL CODES" at the end of them until you find the correct one. • If you want to set up . Manufacturer YAMAHA YAMAHA YAMAHA YAMAHA - - - Default YAMAHA code 0005 0024 0023*1 0033*2 0098 - - - 0208 - *1 U.K. STEREO 1 MUSIC 2 ENTERTAIN 3 MOVIE 4 STANDARD SELECT ...one code, try to set other components by setting the appropriate remote control codes. Codes can control other YAMAHA remote control code(s). 1 Press an input selector button or / to select the component you wait for ...control code for more than 30 seconds during step 3, the setup process is canceled.
...CONTROL CODES" at the end of them until you find the correct one. • If you want to set up . Manufacturer YAMAHA YAMAHA YAMAHA YAMAHA - - - Default YAMAHA code 0005 0024 0023*1 0033*2 0098 - - - 0208 - *1 U.K. STEREO 1 MUSIC 2 ENTERTAIN 3 MOVIE 4 STANDARD SELECT ...one code, try to set other components by setting the appropriate remote control codes. Codes can control other YAMAHA remote control code(s). 1 Press an input selector button or / to select the component you wait for ...control code for more than 30 seconds during step 3, the setup process is canceled.

Owners Manual
Page 72
...AUX MULTI CH IN VCR AMP 2 Enter the code number "9991" or "9992" (see page 64) ID1 (initial setting) ID2 When using multiple YAMAHA receivers/amplifiers, you may be able to operate the other components simultaneously with the remote control by entering the code number "9990". 68 Note You... see the table below). The TRANSMIT indicator on the remote control flashes twice. REMOTE CONTROL FEATURES Switching library codes You can clear all setup remote control codes at once by entering the library code. 1 Press CODE SET using a ballpoint pen or similar object.
...AUX MULTI CH IN VCR AMP 2 Enter the code number "9991" or "9992" (see page 64) ID1 (initial setting) ID2 When using multiple YAMAHA receivers/amplifiers, you may be able to operate the other components simultaneously with the remote control by entering the code number "9990". 68 Note You... see the table below). The TRANSMIT indicator on the remote control flashes twice. REMOTE CONTROL FEATURES Switching library codes You can clear all setup remote control codes at once by entering the library code. 1 Press CODE SET using a ballpoint pen or similar object.

Owners Manual
Page 81
... display. l PROGRAM h 3 Press STRAIGHT (EFFECT) to standby mode. STANDBY /ON If you selected "CANCEL", the unit switches to reset all of your selection. The ADVANCED SETUP menu appears in standby mode. (U.S.A. ADDITIONAL INFORMATION 77 model) VOLUME STANDBY /ON PHONES SPEAKERS A B SILENT CINEMA PRESET/TUNING SEARCH MODE EDIT FM/AM XM A/B/C/D/E CATEGORY...
... display. l PROGRAM h 3 Press STRAIGHT (EFFECT) to standby mode. STANDBY /ON If you selected "CANCEL", the unit switches to reset all of your selection. The ADVANCED SETUP menu appears in standby mode. (U.S.A. ADDITIONAL INFORMATION 77 model) VOLUME STANDBY /ON PHONES SPEAKERS A B SILENT CINEMA PRESET/TUNING SEARCH MODE EDIT FM/AM XM A/B/C/D/E CATEGORY...


