
Additions And Changes In Version 1.2, 1.3
Page 1
... track 12 WAVE DISPLAY popup window linked with Locate operations 13 Changed procedure for deleting a Locate Point or ...;le 6 Writing audio from version 1.2. Table of the Operation Guide / Reference Guide as MTC and word clock slave 19 E Please also ...refer to the pages of Contents Messages displayed while mastering is being executed 2 Successive mastering operations...Writing audio data from a track to temporarily cancel fader grouping 18 Synchronized operation as specified within the various topics of this manual. The...
... track 12 WAVE DISPLAY popup window linked with Locate operations 13 Changed procedure for deleting a Locate Point or ...;le 6 Writing audio from version 1.2. Table of the Operation Guide / Reference Guide as MTC and word clock slave 19 E Please also ...refer to the pages of Contents Messages displayed while mastering is being executed 2 Successive mastering operations...Writing audio data from a track to temporarily cancel fader grouping 18 Synchronized operation as specified within the various topics of this manual. The...
Additions And Changes In Version 1.2, 1.3
Page 2
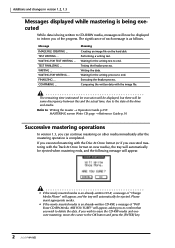
...SURE?" will be ejected. Executing the finalize process. Refer to: Writing the master → Operation Guide p.259 MASTERING screen Write CD page → Reference Guide p.10 Successive mastering operations In version 1.3, you wish to end. The significance of "Will Erase CD-RW Media.... Meaning Creating an image file on other media immediately after the mastering operation is as follows. TEST WRITING...
...SURE?" will be ejected. Executing the finalize process. Refer to: Writing the master → Operation Guide p.259 MASTERING screen Write CD page → Reference Guide p.10 Successive mastering operations In version 1.3, you wish to end. The significance of "Will Erase CD-RW Media.... Meaning Creating an image file on other media immediately after the mastering operation is as follows. TEST WRITING...
Additions And Changes In Version 1.2, 1.3
Page 3
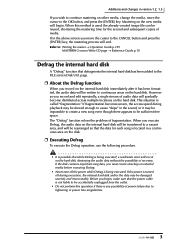
..., shortening the mastering time for each song is located in the above screen you begin . Refer to: Writing the master → Operation Guide p.259 MASTERING screen Write CD page → Reference Guide p.10 Defrag the internal hard disk A "Defrag" function that while Defrag is not liable to the FILE screen Disk Util. If...
..., shortening the mastering time for each song is located in the above screen you begin . Refer to: Writing the master → Operation Guide p.259 MASTERING screen Write CD page → Reference Guide p.10 Defrag the internal hard disk A "Defrag" function that while Defrag is not liable to the FILE screen Disk Util. If...
Additions And Changes In Version 1.2, 1.3
Page 5
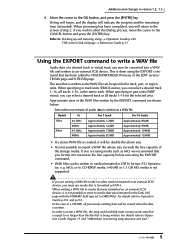
...the Defrag process, move the cursor to an external SCSI device. Refer to: Backing up and restoring songs → Operation Guide p.245 FILE screen Disk Util page → Reference Guide p.31 Using the EXPORT command to write a WAV file Audio data of step 2. For details refer to... Operation Guide chapter 11 and "Addendum concerning song structure and size." 5 For details refer to Operation Guide p.251 and p.253. Additions and changes in part units (PART menu), you can select a desired ...
...the Defrag process, move the cursor to an external SCSI device. Refer to: Backing up and restoring songs → Operation Guide p.245 FILE screen Disk Util page → Reference Guide p.31 Using the EXPORT command to write a WAV file Audio data of step 2. For details refer to... Operation Guide chapter 11 and "Addendum concerning song structure and size." 5 For details refer to Operation Guide p.251 and p.253. Additions and changes in part units (PART menu), you can select a desired ...
Additions And Changes In Version 1.2, 1.3
Page 9
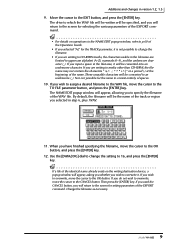
... (_). These unusable characters will be the name of the track or region you selected in the NAME EDIT popup window, refer to p.60 of the Operation Guide. • If you are writing to CD-R/RW media, the characters usable in version 1.2, 1.3 9. Use the [DATA/JOG] dial to change the fi.... If you wish to overwrite it possible for setting parameters of the EXPORT command. Tip If a file of the identical name already exists on operations in step 6, plus .WAV. 11. Nor is not possible to change the setting to 16, and press the [ENTER] key. By default, the...
... (_). These unusable characters will be the name of the track or region you selected in the NAME EDIT popup window, refer to p.60 of the Operation Guide. • If you are writing to CD-R/RW media, the characters usable in version 1.2, 1.3 9. Use the [DATA/JOG] dial to change the fi.... If you wish to overwrite it possible for setting parameters of the EXPORT command. Tip If a file of the identical name already exists on operations in step 6, plus .WAV. 11. Nor is not possible to change the setting to 16, and press the [ENTER] key. By default, the...

Additions And Changes In Version 1.2, 1.3
Page 13
... at the current pointer location. • Hold down the [SET] key and press the [IN]/[OUT] key The in /out points. Operating these keys merely moves the pointer location, and does not affect the counter location. In addition, it is now possible to specify the current ... WAVE DISPLAY popup window is as follows. • Press the [MARK] key ...... Refer to: WAVE DISPLAY popup window → Reference Guide p.93 Locate operations → Operation Guide p.115 To locate to the pointer location, move the pointer location. pointer location pointer • [RTZ] key Move the pointer to the...
... at the current pointer location. • Hold down the [SET] key and press the [IN]/[OUT] key The in /out points. Operating these keys merely moves the pointer location, and does not affect the counter location. In addition, it is now possible to specify the current ... WAVE DISPLAY popup window is as follows. • Press the [MARK] key ...... Refer to: WAVE DISPLAY popup window → Reference Guide p.93 Locate operations → Operation Guide p.115 To locate to the pointer location, move the pointer location. pointer location pointer • [RTZ] key Move the pointer to the...
Additions And Changes In Version 1.2, 1.3
Page 14
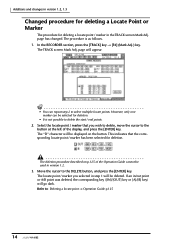
...the cursor to select multiple locate points. page has changed. However, only one marker can repeat step 2 to the button at the left of the Operation Guide cannot be displayed on p.125 of the display, and press the [ENTER] key. Move the cursor to : Deleting a locate point →...; Operation Guide p.125 14 The procedure is not possible to delete the start / end points. 2. The "D" character will be selected for deleting a locate point / marker in /out...
...the cursor to select multiple locate points. page has changed. However, only one marker can repeat step 2 to the button at the left of the Operation Guide cannot be displayed on p.125 of the display, and press the [ENTER] key. Move the cursor to : Deleting a locate point →...; Operation Guide p.125 14 The procedure is not possible to delete the start / end points. 2. The "D" character will be selected for deleting a locate point / marker in /out...
Additions And Changes In Version 1.2, 1.3
Page 17
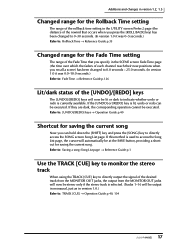
... Now you specify in version 1.0.) Refer to: TRACK [CUE] → Operation Guide p.40, 104 17 Refer to: [UNDO]/[REDO] keys → Operation Guide p.40 Shortcut for saving the current song. If they are dark, the corresponding operation cannot be executed. Refer to: Saving a song (Song List page) &#...8594; Reference Guide p.1 Use the TRACK [CUE] key to monitor the stereo...
... Now you specify in version 1.0.) Refer to: TRACK [CUE] → Operation Guide p.40, 104 17 Refer to: [UNDO]/[REDO] keys → Operation Guide p.40 Shortcut for saving the current song. If they are dark, the corresponding operation cannot be executed. Refer to: Saving a song (Song List page) &#...8594; Reference Guide p.1 Use the TRACK [CUE] key to monitor the stereo...
Additions And Changes In Version 1.2, 1.3
Page 18
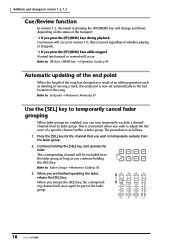
...desired channel from its fader group. Refer to: [FF] key / [REW] key → Operation Guide p.44 Automatic updating of the end point When the length of the song has changed as a result of an editing operation such as you wish to adjust the balance of a specific channel within a fader group... 1.0, this occurred regardless of whether playing or stopped). This is now set automatically to temporarily cancel fader grouping When fader groups are finished operating the fader, release the [SEL] key. Press the [SEL] key for the channel that you are enabled, you press the [FF]/[REW]...
...desired channel from its fader group. Refer to: [FF] key / [REW] key → Operation Guide p.44 Automatic updating of the end point When the length of the song has changed as a result of an editing operation such as you wish to adjust the balance of a specific channel within a fader group... 1.0, this occurred regardless of whether playing or stopped). This is now set automatically to temporarily cancel fader grouping When fader groups are finished operating the fader, release the [SEL] key. Press the [SEL] key for the channel that you are enabled, you press the [FF]/[REW]...
Limitations On I/o Cards
Page 1
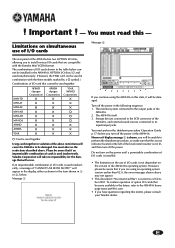
...the table below cannot be used simultaneously. (However, the Y56K card can be installed in the AW4416's OPTION I /O cards is shown, you will appear in the display, either as of the AW4416's operating system. However if display message 1 is not dependent on simultaneous use of I /O slots ... procedure (Operation Guide p.17) before you to install various I /O cards is current as shown in the form shown in combination with the Yamaha Mini YGDAI format. You must read this ") is installed. • The limitation on the power until a permissible combination of the AW4416 has two...
...the table below cannot be used simultaneously. (However, the Y56K card can be installed in the AW4416's OPTION I /O cards is shown, you will appear in the display, either as of the AW4416's operating system. However if display message 1 is not dependent on simultaneous use of I /O slots ... procedure (Operation Guide p.17) before you to install various I /O cards is current as shown in the form shown in combination with the Yamaha Mini YGDAI format. You must read this ") is installed. • The limitation on the power until a permissible combination of the AW4416 has two...
Owner's Manual
Page 4
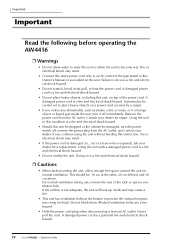
... off , remove the power plug from the AC outlet, and contact your dealer for repair. Never pull the cord. Important Important Read the following before operating the AW4416 ❒ Warnings • Do not allow water to enter this unit or allow enough free space around the unit for normal ventilation. A damaged power... • When rack-mounting the unit, allow the unit to do so is a fire and electrical shock hazard. • Do not modify the unit. Operation Guide iv -
... off , remove the power plug from the AC outlet, and contact your dealer for repair. Never pull the cord. Important Important Read the following before operating the AW4416 ❒ Warnings • Do not allow water to enter this unit or allow enough free space around the unit for normal ventilation. A damaged power... • When rack-mounting the unit, allow the unit to do so is a fire and electrical shock hazard. • Do not modify the unit. Operation Guide iv -
Owner's Manual
Page 5
...direct sunlight, high temperature, or high humidity. • Do not touch either surface of deterioration depends on the operating environment and is a potential electrical shock hazard. • Use only the included power supply cable for this unit,..."LOW BATTERY" appears when you save the data on this unit. Neglecting this precaution can cause contact defects. ❒ Operating Notes • Using a mobile telephone near this unit may be lost , the drive to malfunction, or the printed label... or external SCSI device before handling an I /O card or hard disk. Operation Guide
...direct sunlight, high temperature, or high humidity. • Do not touch either surface of deterioration depends on the operating environment and is a potential electrical shock hazard. • Use only the included power supply cable for this unit,..."LOW BATTERY" appears when you save the data on this unit. Neglecting this precaution can cause contact defects. ❒ Operating Notes • Using a mobile telephone near this unit may be lost , the drive to malfunction, or the printed label... or external SCSI device before handling an I /O card or hard disk. Operation Guide
Owner's Manual
Page 6
..., consult your body and clothing before starting installation work. • Wear thick gloves when working on this equipment to avoid cutting your Yamaha dealer. • Always switch off the power for the main unit and all important data on this equipment, please consult with the ...order to protect the electronic circuits of this equipment, take the most extreme care to avoid touching IC leads or other external storage medium. Operation Guide We recommend that equipment. When using this equipment. • Take extreme care to work on CD-R or CD-RW disks or other electronic...
..., consult your body and clothing before starting installation work. • Wear thick gloves when working on this equipment to avoid cutting your Yamaha dealer. • Always switch off the power for the main unit and all important data on this equipment, please consult with the ...order to protect the electronic circuits of this equipment, take the most extreme care to avoid touching IC leads or other external storage medium. Operation Guide We recommend that equipment. When using this equipment. • Take extreme care to work on CD-R or CD-RW disks or other electronic...
Owner's Manual
Page 7
... laws may accompany such works. Operation Guide Because violations of copyright laws may be used professionally and responsibly by copyright, without having obtained a proper license from the relevant copyright holders, may constitute copyright infringement and may otherwise violate copyright laws and other laws. Important ❍ Warning The Yamaha Professional Audio Workstation is designed...
... laws may accompany such works. Operation Guide Because violations of copyright laws may be used professionally and responsibly by copyright, without having obtained a proper license from the relevant copyright holders, may constitute copyright infringement and may otherwise violate copyright laws and other laws. Important ❍ Warning The Yamaha Professional Audio Workstation is designed...
Owner's Manual
Page 8
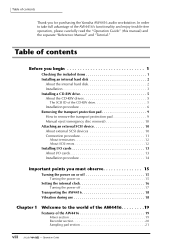
... 12 Installing I/O cards 13 About I/O cards 13 Installation procedure 14 Important points you for purchasing the Yamaha AW4416 audio workstation. Operation Guide In order to take full advantage of the AW4416's functionality and enjoy trouble-free operation, please carefully read the "Operation Guide" (this manual) and the separate "Reference Manual" and "Tutorial." Table of contents Thank you must...
... 12 Installing I/O cards 13 About I/O cards 13 Installation procedure 14 Important points you for purchasing the Yamaha AW4416 audio workstation. Operation Guide In order to take full advantage of the AW4416's functionality and enjoy trouble-free operation, please carefully read the "Operation Guide" (this manual) and the separate "Reference Manual" and "Tutorial." Table of contents Thank you must...

Owner's Manual
Page 9
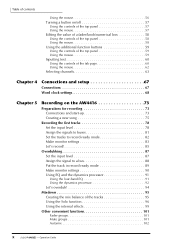
Operation Guide Table of contents CD-RW drive (option 21 Other features 21 Signal flow within the AW4416 22 Input patch 23 Input channels 1-24 24 Return channels 1/2 25 Recorder input patching 26 Monitor channels 1-16 26 Digital cascade connections 27 Oscillator 27 ... & SHUTTLE section 42 Locate section 43 Transport section 44 SAMPLING PAD section 45 Rear panel 46 Front panel 50 Chapter 3 The user interface of the AW4416 51 Display 51 Level meters/counter 54 Basic operation of the AW4416 56 Accessing a screen/page 56 Using the controls of the top panel 56 ix -
Operation Guide Table of contents CD-RW drive (option 21 Other features 21 Signal flow within the AW4416 22 Input patch 23 Input channels 1-24 24 Return channels 1/2 25 Recorder input patching 26 Monitor channels 1-16 26 Digital cascade connections 27 Oscillator 27 ... & SHUTTLE section 42 Locate section 43 Transport section 44 SAMPLING PAD section 45 Rear panel 46 Front panel 50 Chapter 3 The user interface of the AW4416 51 Display 51 Level meters/counter 54 Basic operation of the AW4416 56 Accessing a screen/page 56 Using the controls of the top panel 56 ix -
Owner's Manual
Page 10
... tab page 60 Using the mouse 62 Selecting channels 63 Chapter 4 Connections and setup 67 Connections 67 Word clock settings 68 Chapter 5 Recording on the AW4416 73 Preparations for recording 73 Connections and start-up 73 Creating a new song 75 Recording the first tracks 78 Set the input level 78 Assign... the tracks 95 Using the Solo function 96 Using the internal effects 99 Other convenient functions 101 Fader groups 101 Mute groups 101 Automix 102 x - Operation Guide
... tab page 60 Using the mouse 62 Selecting channels 63 Chapter 4 Connections and setup 67 Connections 67 Word clock settings 68 Chapter 5 Recording on the AW4416 73 Preparations for recording 73 Connections and start-up 73 Creating a new song 75 Recording the first tracks 78 Set the input level 78 Assign... the tracks 95 Using the Solo function 96 Using the internal effects 99 Other convenient functions 101 Fader groups 101 Mute groups 101 Automix 102 x - Operation Guide
Owner's Manual
Page 11
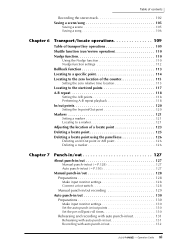
Table of contents Recording the stereo track 102 Saving a scene/song 105 Saving a scene 105 Saving a song 106 Chapter 6 Transport/locate operations 109 Table of transport key operations 109 Shuttle function (cue/review operation 110 Nudge function 110 Using the Nudge function 110 Nudge function settings 112 Rollback function 113 Locating to a specific point... 130 Rehearsing and recording with auto punch-in/out 131 Rehearsing with auto punch-in/out 131 Recording with auto punch-in/out 132 xi - Operation Guide
Table of contents Recording the stereo track 102 Saving a scene/song 105 Saving a scene 105 Saving a song 106 Chapter 6 Transport/locate operations 109 Table of transport key operations 109 Shuttle function (cue/review operation 110 Nudge function 110 Using the Nudge function 110 Nudge function settings 112 Rollback function 113 Locating to a specific point... 130 Rehearsing and recording with auto punch-in/out 131 Rehearsing with auto punch-in/out 131 Recording with auto punch-in/out 132 xi - Operation Guide
Owner's Manual
Page 12
... program 139 Patching input/output jacks to an insert I/O point 140 Using the Quick Rec function 143 Chapter 9 Track and virtual track operations 147 The track structure of the AW4416 147 Switching virtual tracks 149 Pairing tracks 151 Editing tracks and virtual tracks 152 Tracks, parts, and regions 152 Naming a virtual track... monitor channel 1 172 Recalling an effect program 174 Chapter 11 Song management 175 About songs 175 Song structure and size 176 Song structure 176 xii - Operation Guide
... program 139 Patching input/output jacks to an insert I/O point 140 Using the Quick Rec function 143 Chapter 9 Track and virtual track operations 147 The track structure of the AW4416 147 Switching virtual tracks 149 Pairing tracks 151 Editing tracks and virtual tracks 152 Tracks, parts, and regions 152 Naming a virtual track... monitor channel 1 172 Recalling an effect program 174 Chapter 11 Song management 175 About songs 175 Song structure and size 176 Song structure 176 xii - Operation Guide
Owner's Manual
Page 13
Operation Guide Table of contents Usable hard disks/song capacity 176 Work area for audio CD production 176 Saving/loading a song 177 Saving the current song 177 ...
Operation Guide Table of contents Usable hard disks/song capacity 176 Work area for audio CD production 176 Saving/loading a song 177 Saving the current song 177 ...
