User Instructions
Page 1
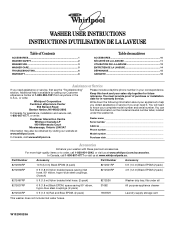
... In Canada, visit www.whirlpool.ca. Part Number Accessory Part Number Accessory 8212656RP 10 ft (3.0 m) Black EPDM (2 pack) 8212641RP 5 ft (1.5 m) Black EPDM (2 pack) 8212638RP 6 ft (1.8 m) Nylon braided space-saving inlet hose, 90° elbow, hypro-blue steel couplings. (2-pack) 8212546RP 4 ft (1.2 m) Black EPDM (2 pack) 8212487RP 5 ft (1.5 m) Nylon braided inlet hose. (2-pack) 8212526 Washer drip tray, fits under...
... In Canada, visit www.whirlpool.ca. Part Number Accessory Part Number Accessory 8212656RP 10 ft (3.0 m) Black EPDM (2 pack) 8212641RP 5 ft (1.5 m) Black EPDM (2 pack) 8212638RP 6 ft (1.8 m) Nylon braided space-saving inlet hose, 90° elbow, hypro-blue steel couplings. (2-pack) 8212546RP 4 ft (1.2 m) Black EPDM (2 pack) 8212487RP 5 ft (1.5 m) Nylon braided inlet hose. (2-pack) 8212526 Washer drip tray, fits under...
User Instructions
Page 2
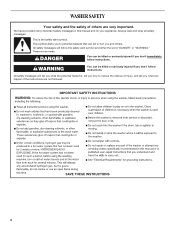
... can be killed or seriously injured if you don't follow instructions. We have provided many important safety messages in this manual and on your appliance. WASHER SAFETY Your safety and the safety of injury, and tell you and others are not followed. 2 WARNING You can happen if the instructions are very...
... can be killed or seriously injured if you don't follow instructions. We have provided many important safety messages in this manual and on your appliance. WASHER SAFETY Your safety and the safety of injury, and tell you and others are not followed. 2 WARNING You can happen if the instructions are very...
User Instructions
Page 3
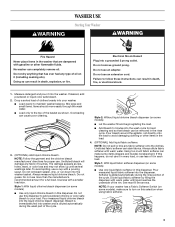
.... Overloading can stain fabrics. Always measure liquid chlorine bleach. Style 1: With liquid chlorine bleach dispenser (on some models) ■ Let the washer fill and begin agitating the load. ■ Add bleach 5 minutes into the dispenser. Style 2: Without liquid chlorine bleach dispenser (on some ... chlorine bleach. Style 1: With liquid fabric softener dispenser (on this dispenser to add powdered chlorine or color-safe bleach to maintain washer balance. Dilute liquid fabric softener by filling the dispenser with gasoline or other items in the load. 4. (OPTIONAL) Add liquid ...
.... Overloading can stain fabrics. Always measure liquid chlorine bleach. Style 1: With liquid chlorine bleach dispenser (on some models) ■ Let the washer fill and begin agitating the load. ■ Add bleach 5 minutes into the dispenser. Style 2: Without liquid chlorine bleach dispenser (on some ... chlorine bleach. Style 1: With liquid fabric softener dispenser (on this dispenser to add powdered chlorine or color-safe bleach to maintain washer balance. Dilute liquid fabric softener by filling the dispenser with gasoline or other items in the load. 4. (OPTIONAL) Add liquid ...
User Instructions
Page 4
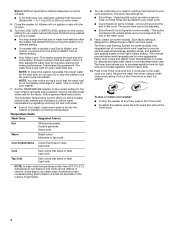
...Hot Whites and pastels Durable garments Heavy soils Warm Bright colors Moderate to provide better fabric care. You can be difficult to start the washer. Selecting this option provides a second rinse. The sound level cannot be added to 250 mL) warm water. 5. The controls provide higher... detergents do not open lid or stop or restart your wash load and the type of fabric being washed. This is let into the washer to maintain a minimum temperature. The Automatic Temperature Control (ATC) (on some models) electronically senses and maintains a uniform water temperature by ...
...Hot Whites and pastels Durable garments Heavy soils Warm Bright colors Moderate to provide better fabric care. You can be difficult to start the washer. Selecting this option provides a second rinse. The sound level cannot be added to 250 mL) warm water. 5. The controls provide higher... detergents do not open lid or stop or restart your wash load and the type of fabric being washed. This is let into the washer to maintain a minimum temperature. The Automatic Temperature Control (ATC) (on some models) electronically senses and maintains a uniform water temperature by ...
User Instructions
Page 5
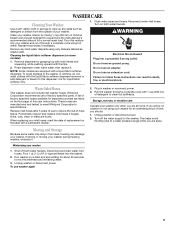
... a complete cycle with thumbs. 2. Unplug washer or disconnect power. Remove dispenser by mixing 1 cup (250 mL) of chlorine bleach and enough detergent to equal twice the manufacturer's recommended amount for a normal wash load. Whirlpool Corporation recommends use to reduce the risk of... faucets. Periodically inspect and replace inlet hoses if bulges, kinks, cuts, wear, or leaks are manufactured and tested to meet Whirlpool Corporation's specifications. NOTE: Some models are away. These hoses are found. Disconnect and drain water inlet hoses. To use an...
... a complete cycle with thumbs. 2. Unplug washer or disconnect power. Remove dispenser by mixing 1 cup (250 mL) of chlorine bleach and enough detergent to equal twice the manufacturer's recommended amount for a normal wash load. Whirlpool Corporation recommends use to reduce the risk of... faucets. Periodically inspect and replace inlet hoses if bulges, kinks, cuts, wear, or leaks are manufactured and tested to meet Whirlpool Corporation's specifications. NOTE: Some models are away. These hoses are found. Disconnect and drain water inlet hoses. To use an...
User Instructions
Page 6
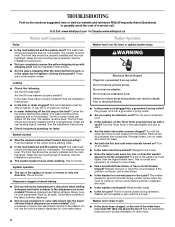
... shipping strap with shipping pins? The front feet should be properly installed and the nuts tightened. www.whirlpool.com In Canada www.whirlpool.ca Washer and Components Washer Operation Noisy ■ Is the load balanced and the washer level? This is much higher than 96" (244 cm) above the floor? If the problem continues, call...
... shipping strap with shipping pins? The front feet should be properly installed and the nuts tightened. www.whirlpool.com In Canada www.whirlpool.ca Washer and Components Washer Operation Noisy ■ Is the load balanced and the washer level? This is much higher than 96" (244 cm) above the floor? If the problem continues, call...
User Instructions
Page 7
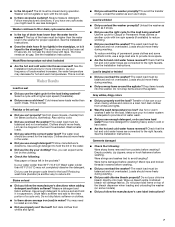
... water, you wrap items around the agitator. Wash/Rinse temperature not what I selected ■ Are the hot and cold water inlet hoses reversed? Washer Results Load too wet ■ Did you use a cold rinse? Cold rinses leave loads wetter than 60°F (15.6°C)? Reducing wash time... in the pockets? Clothes should move freely. Lint can be balanced and not overloaded. Wash smaller loads. ■ Did you overload the washer? The water level should be balanced and not overloaded. Use enough detergent to fill or drain; If so, you properly sort the load?...
... water, you wrap items around the agitator. Wash/Rinse temperature not what I selected ■ Are the hot and cold water inlet hoses reversed? Washer Results Load too wet ■ Did you use a cold rinse? Cold rinses leave loads wetter than 60°F (15.6°C)? Reducing wash time... in the pockets? Clothes should move freely. Lint can be balanced and not overloaded. Wash smaller loads. ■ Did you overload the washer? The water level should be balanced and not overloaded. Use enough detergent to fill or drain; If so, you properly sort the load?...
Installation Instructions
Page 1
...INSTRUCTIONS 4 Before You Start 4 Remove Shipping Materials 4 Connect Drain Hose 6 Connect the Inlet Hoses 6 Secure the Drain Hose 7 Level the Washer 7 Complete Installation 8 INSTRUCTIONS D'INSTALLATION 11 Avant de commencer 11 Retrait du matériel d'expédition 11 Raccordement du tuyau de vidange ...d'arrivée d'eau 13 Immobilisation du tuyau de vidange 14 Réglage de l'aplomb de la laveuse 15 Achever l'installation 16 WASHER SAFETY Your safety and the safety of injury, and tell you don't immediately follow the safety alert symbol and either the word "...
...INSTRUCTIONS 4 Before You Start 4 Remove Shipping Materials 4 Connect Drain Hose 6 Connect the Inlet Hoses 6 Secure the Drain Hose 7 Level the Washer 7 Complete Installation 8 INSTRUCTIONS D'INSTALLATION 11 Avant de commencer 11 Retrait du matériel d'expédition 11 Raccordement du tuyau de vidange ...d'arrivée d'eau 13 Immobilisation du tuyau de vidange 14 Réglage de l'aplomb de la laveuse 15 Achever l'installation 16 WASHER SAFETY Your safety and the safety of injury, and tell you don't immediately follow the safety alert symbol and either the word "...
Installation Instructions
Page 2
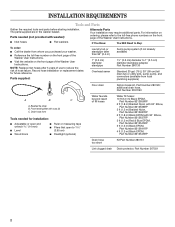
...° Elbow, Part Number 8212637RP 5 ft (1.5 m) Red & Blue EPDM, Part Number 8212545RP 5 ft (1.5 m) Black EPDM, Part Number 8212641RP 4 ft (1.2 m) Black EPDM, Part Number 8212546RP Drain hose too short Kit Part Number 280131 Lint clogged drain Drain protector, Part Number 367031 2 I Flashlight (optional) Water faucets beyond reach of the Washer User Instructions. additional drain hose...
...° Elbow, Part Number 8212637RP 5 ft (1.5 m) Red & Blue EPDM, Part Number 8212545RP 5 ft (1.5 m) Black EPDM, Part Number 8212641RP 4 ft (1.2 m) Black EPDM, Part Number 8212546RP Drain hose too short Kit Part Number 280131 Lint clogged drain Drain protector, Part Number 367031 2 I Flashlight (optional) Water faucets beyond reach of the Washer User Instructions. additional drain hose...

Installation Instructions
Page 3
...required for winterizing information. Secure drain hose with a maximum slope of 1" (2.5 cm) under entire washer. See "Drain System." I Additional clearances may be considered. I Hot and cold water faucets located within 4 ft (1.2 m) of 315 lbs (143 kgs). I A level oor with beaded tie strap. 39"...ease of installation and servicing. I A grounded electrical outlet located within 3 ft (90 cm) of the hot and cold water ll valves, and water pressure of 2" (5 cm). I If a closet door is your washer in a basement, laundry room, closet, or recessed area. I Additional...
...required for winterizing information. Secure drain hose with a maximum slope of 1" (2.5 cm) under entire washer. See "Drain System." I Additional clearances may be considered. I Hot and cold water faucets located within 4 ft (1.2 m) of 315 lbs (143 kgs). I A level oor with beaded tie strap. 39"...ease of installation and servicing. I A grounded electrical outlet located within 3 ft (90 cm) of the hot and cold water ll valves, and water pressure of 2" (5 cm). I If a closet door is your washer in a basement, laundry room, closet, or recessed area. I Additional...
Installation Instructions
Page 4
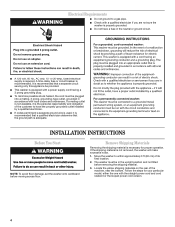
...1. It is recommended that the ground path is equipped with local codes and ordinances. I This washer is adequate. If the shipping material is required. Move the washer to within approximately 3 ft (90 cm) of the machine, near the bottom. I Do not have the properly grounded ...outlet installed by a quali ed electrician. I To minimize possible shock hazard, the cord must be provided. The washer must be plugged into a ...
...1. It is recommended that the ground path is equipped with local codes and ordinances. I This washer is adequate. If the shipping material is required. Move the washer to within approximately 3 ft (90 cm) of the machine, near the bottom. I Do not have the properly grounded ...outlet installed by a quali ed electrician. I To minimize possible shock hazard, the cord must be provided. The washer must be plugged into a ...
Installation Instructions
Page 5
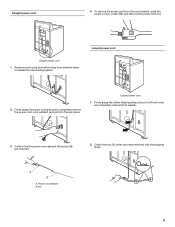
... panel. Straight power cord 1. A B A. Con rm that two (2) cotter pins were removed with the shipping strap. Straight power cord 4. To remove the power cord from washer. 3.
... panel. Straight power cord 1. A B A. Con rm that two (2) cotter pins were removed with the shipping strap. Straight power cord 4. To remove the power cord from washer. 3.
Installation Instructions
Page 6
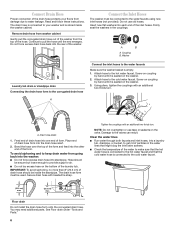
... form and feed into each end of the form. Damage to the cold water faucet. I Run water through both faucets and inlet hoses, into the washer: I Do not lay excess hose on the valve. Attach hose to your oors from going back into a laundry tub, drainpipe, or bucket, to provide...hose. Do not force excess drain hose back into the drain hose relief. 2. Connect Drain Hose Proper connection of the drain hose protects your washer and is stored inside the standpipe. Read and follow these instructions. Secure drain hose with beaded tie strap. Feed end of drain hose into ...
... form and feed into each end of the form. Damage to the cold water faucet. I Run water through both faucets and inlet hoses, into the washer: I Do not lay excess hose on the valve. Attach hose to your oors from going back into a laundry tub, drainpipe, or bucket, to provide...hose. Do not force excess drain hose back into the drain hose relief. 2. Connect Drain Hose Proper connection of the drain hose protects your washer and is stored inside the standpipe. Read and follow these instructions. Secure drain hose with beaded tie strap. Feed end of drain hose into ...
Installation Instructions
Page 7
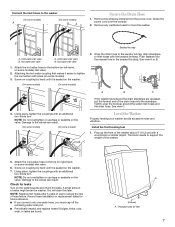
... Attaching the hot water coupling rst makes it easier to the valves can result. See view A or B. 4. Level the Washer Properly leveling your washer avoids excessive noise and vibration. Using pliers, tighten the couplings with an additional two-thirds turn . Cold water inlet valve B. ...hand until it is seated on some models) 3. Install the front leveling feet 1. NOTE: Replace inlet hoses after 5 years of the washer. 5. Remove the shipping material from the power cord. Damage to tighten the connection with the beaded tie strap. Using pliers, tighten ...
... Attaching the hot water coupling rst makes it easier to the valves can result. See view A or B. 4. Level the Washer Properly leveling your washer avoids excessive noise and vibration. Using pliers, tighten the couplings with an additional two-thirds turn . Cold water inlet valve B. ...hand until it is seated on some models) 3. Install the front leveling feet 1. NOTE: Replace inlet hoses after 5 years of the washer. 5. Remove the shipping material from the power cord. Damage to tighten the connection with the beaded tie strap. Using pliers, tighten ...
Installation Instructions
Page 8
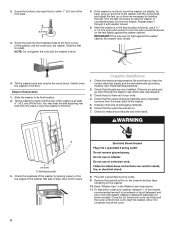
...2. Plug into place. Be sure that the yellow shipping materials were completely removed from the lower back of the washer, rst side to side, then front to lower the washer. Check that the water faucets are now installed. A 4" (10.2 cm) A. Select any tape remaining on... of powdered or liquid detergent and pour it to install. IMPORTANT: If the nuts are not tight against the washer cabinet. Turn the feet clockwise to raise the washer or counterclockwise to back. 8. 2. Twist the feet to complete one whole cycle. 8 Check the electrical requirements....
...2. Plug into place. Be sure that the yellow shipping materials were completely removed from the lower back of the washer, rst side to side, then front to lower the washer. Check that the water faucets are now installed. A 4" (10.2 cm) A. Select any tape remaining on... of powdered or liquid detergent and pour it to install. IMPORTANT: If the nuts are not tight against the washer cabinet. Turn the feet clockwise to raise the washer or counterclockwise to back. 8. 2. Twist the feet to complete one whole cycle. 8 Check the electrical requirements....


