
Dimension Guide
Page 1
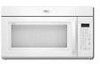
...extension piece, at least 3" (7.6 cm) high Because Whirlpool Corporation policy includes a continuous commitment to Round Transition for each vent piece used . Ref. ® Microwave Hood Combination PRODUCT MODEL NUMBERS GMH3204XV GMH5205XV GMH6185XV WMH1162XV WMH1163XV... ft (7.6 m) B. 1 wall cap = 40 ft (12.2 m) C. 2 ft (0.6 m) + 6 ft (1.8 m) straight = 8 ft (2.4 m) B C 3" (7.6 cm) D A. For complete details, see Installation our products, we reserve the right to round transition piece so that a separate circuit serving only this microwave oven be used in the system. Instructions ...
...extension piece, at least 3" (7.6 cm) high Because Whirlpool Corporation policy includes a continuous commitment to Round Transition for each vent piece used . Ref. ® Microwave Hood Combination PRODUCT MODEL NUMBERS GMH3204XV GMH5205XV GMH6185XV WMH1162XV WMH1163XV... ft (7.6 m) B. 1 wall cap = 40 ft (12.2 m) C. 2 ft (0.6 m) + 6 ft (1.8 m) straight = 8 ft (2.4 m) B C 3" (7.6 cm) D A. For complete details, see Installation our products, we reserve the right to round transition piece so that a separate circuit serving only this microwave oven be used in the system. Instructions ...

Installation Instructions
Page 1
... messages. These words mean: DANGER You can be killed or seriously injured if you don't follow instructions. Table of Contents MICROWAVE HOOD COMBINATION SAFETY 1 INSTALLATION REQUIREMENTS 2 Tools and Parts 2 Remove Cardboard Template 2 Location Requirements 2 Product Dimensions 3 Electrical Requirements 3 INSTALLATION INSTRUCTIONS 4 Remove Mounting Plate 4 Rotate Blower Motor 4 Locate Wall Stud(s 6 Mark Rear Wall 7 Drill Holes in...
... messages. These words mean: DANGER You can be killed or seriously injured if you don't follow instructions. Table of Contents MICROWAVE HOOD COMBINATION SAFETY 1 INSTALLATION REQUIREMENTS 2 Tools and Parts 2 Remove Cardboard Template 2 Location Requirements 2 Product Dimensions 3 Electrical Requirements 3 INSTALLATION INSTRUCTIONS 4 Remove Mounting Plate 4 Rotate Blower Motor 4 Locate Wall Stud(s 6 Mark Rear Wall 7 Drill Holes in...

Installation Instructions
Page 2
... venting. For Roof Venting Installation Only: ■ If you are using a rectangular to round transition piece, the 3" (7.6 cm) clearance needs to back of microwave oven) Cardboard template (part of the cardboard packaging. 2. Read and follow the instructions provided with your builder or...wood wall stud and minimum 3/8" (10 mm) thickness drywall or plaster/lath within cabinet opening where the microwave oven will not discolor, delaminate or sustain other types of installation. Check with any obstructions so that the vent fits properly, and the damper blade opens freely and fully....
... venting. For Roof Venting Installation Only: ■ If you are using a rectangular to round transition piece, the 3" (7.6 cm) clearance needs to back of microwave oven) Cardboard template (part of the cardboard packaging. 2. Read and follow the instructions provided with your builder or...wood wall stud and minimum 3/8" (10 mm) thickness drywall or plaster/lath within cabinet opening where the microwave oven will not discolor, delaminate or sustain other types of installation. Check with any obstructions so that the vent fits properly, and the damper blade opens freely and fully....

Installation Instructions
Page 3
...-delay circuit breaker. ■ A separate circuit serving only this microwave oven. Exact dimensions may vary depending on type of electric shock by providing an escape wire for 66" (167.6 cm) installation height. The plug must be plugged into a grounded 3 prong outlet. SAVE THESE INSTRUCTIONS 3 A. 2" x 4" wall stud B. If the power supply cord is typical...
...-delay circuit breaker. ■ A separate circuit serving only this microwave oven. Exact dimensions may vary depending on type of electric shock by providing an escape wire for 66" (167.6 cm) installation height. The plug must be plugged into a grounded 3 prong outlet. SAVE THESE INSTRUCTIONS 3 A. 2" x 4" wall stud B. If the power supply cord is typical...

Installation Instructions
Page 4
... 1. Damper plate 2. Keep damper plate and screws together and set it may be attached to top of microwave oven. Damper plate tabs D. INSTALLATION INSTRUCTIONS Remove Mounting Plate Depending on your model, the mounting plate may be in recessed holes) D A. For wall or roof... venting, changes must be made to the work surface, cover the work surface. 1. Screws C. Lift blower motor out of microwave oven exterior. Remove...
... 1. Damper plate 2. Keep damper plate and screws together and set it may be attached to top of microwave oven. Damper plate tabs D. INSTALLATION INSTRUCTIONS Remove Mounting Plate Depending on your model, the mounting plate may be in recessed holes) D A. For wall or roof... venting, changes must be made to the work surface, cover the work surface. 1. Screws C. Lift blower motor out of microwave oven exterior. Remove...

Installation Instructions
Page 10
... into a grounded 3 prong outlet. Reconnect power. 4. If adjustment is now complete. With the microwave oven centered, and with sheet metal screw. A 2. NOTE: The screw cannot be the same thickness as shown. Save Installation Instructions for troubleshooting information. Adjust mounting plate and retighten screws. 9. Damper assembly (under the raised tabs of 1 minute at 100...
... into a grounded 3 prong outlet. Reconnect power. 4. If adjustment is now complete. With the microwave oven centered, and with sheet metal screw. A 2. NOTE: The screw cannot be the same thickness as shown. Save Installation Instructions for troubleshooting information. Adjust mounting plate and retighten screws. 9. Damper assembly (under the raised tabs of 1 minute at 100...

Installation Instructions
Page 12
...microwave oven door on the model and serial number plate, which is a list of the installation hardware needs to round transition piece must be found on the front frame of each vent piece used in the User Instructions...176; elbow = 25 ft (7.6 m) B. 1 wall cap = 40 ft (12.2 m) C. 2 ft (0.6 m) + 6 ft (1.8 m) straight = 8 ft (2.4 m) 6" (15.2 cm) vent system = 73 ft (22.2 m) total A B 6 ft (1.8 m) 2 ft (0.6 m) C D A. See the following examples: 3¹⁄₄" x 10" (8.3 x 25.4 cm) vent system = 73 ft (22.2 m) total A B 6 ft (1.8 m) 2 ft (0.6 m) C A. ...
...microwave oven door on the model and serial number plate, which is a list of the installation hardware needs to round transition piece must be found on the front frame of each vent piece used in the User Instructions...176; elbow = 25 ft (7.6 m) B. 1 wall cap = 40 ft (12.2 m) C. 2 ft (0.6 m) + 6 ft (1.8 m) straight = 8 ft (2.4 m) 6" (15.2 cm) vent system = 73 ft (22.2 m) total A B 6 ft (1.8 m) 2 ft (0.6 m) C D A. See the following examples: 3¹⁄₄" x 10" (8.3 x 25.4 cm) vent system = 73 ft (22.2 m) total A B 6 ft (1.8 m) 2 ft (0.6 m) C A. ...

Owners Manual
Page 1
...Installation Instructions. Para obtener acceso a "Instrucciones para el usuario de la combinación microondas campana" en español, o para obtener información adicional acerca de su producto, visite: www.whirlpool.com Tenga listo su número de modelo completo. Always read and obey all instructions before using the microwave...shock, fire, injury to persons, or exposure to excessive microwave energy: ■ Install or locate the microwave oven only in accordance with the provided Installation Instructions. ■ Read all safety messages. Connect only to ...
...Installation Instructions. Para obtener acceso a "Instrucciones para el usuario de la combinación microondas campana" en español, o para obtener información adicional acerca de su producto, visite: www.whirlpool.com Tenga listo su número de modelo completo. Always read and obey all instructions before using the microwave...shock, fire, injury to persons, or exposure to excessive microwave energy: ■ Install or locate the microwave oven only in accordance with the provided Installation Instructions. ■ Read all safety messages. Connect only to ...

Owners Manual
Page 3
... some models): Set vent fan to run for exactly 30 minutes, or to practice using the Vent Fan control. Repeat to follow these instructions can result in hours and minutes with A.M. Options or Setup Vent Timer, Light Timer, Filter Reset, Sound On/Off, Scroll Speed,... Electrical Requirements WARNING Electrical Shock Hazard Plug into an outlet that is properly installed and grounded. Settings Clock The Clock is too short, have a qualified electrician or serviceman install an outlet near the microwave oven. The plug must be used independently during any cooking program. Scroll ...
... some models): Set vent fan to run for exactly 30 minutes, or to practice using the Vent Fan control. Repeat to follow these instructions can result in hours and minutes with A.M. Options or Setup Vent Timer, Light Timer, Filter Reset, Sound On/Off, Scroll Speed,... Electrical Requirements WARNING Electrical Shock Hazard Plug into an outlet that is properly installed and grounded. Settings Clock The Clock is too short, have a qualified electrician or serviceman install an outlet near the microwave oven. The plug must be used independently during any cooking program. Scroll ...

Owners Manual
Page 6
...vessel (on some models): mild soap, water and soft brush or dishwasher. Always follow label instructions on the vent grille, tilt the grille forward, lift it , then firmly close bulb ...light is replaceable. Installing/Replacing Filters and Light Bulbs NOTE: A filter status indicator (on some models, if a packaging spacer is attached to avoid unintended starting of the microwave oven. See ...is time to reset filter status. ■ Grease filters: Grease filters are off . www.whirlpool.com Microwave oven will dissipate with soft cloth, or use . 6 If the problem continues, call ....
...vessel (on some models): mild soap, water and soft brush or dishwasher. Always follow label instructions on the vent grille, tilt the grille forward, lift it , then firmly close bulb ...light is replaceable. Installing/Replacing Filters and Light Bulbs NOTE: A filter status indicator (on some models, if a packaging spacer is attached to avoid unintended starting of the microwave oven. See ...is time to reset filter status. ■ Grease filters: Grease filters are off . www.whirlpool.com Microwave oven will dissipate with soft cloth, or use . 6 If the problem continues, call ....

Owners Manual
Page 8
...obtain service under these excluded circumstances shall be provided by an authorized Whirlpool servicer is operated and maintained according to instructions attached to Whirlpool with published installation instructions. 11. You can write to or furnished with original model/serial ...instructions and/or installation instructions. 4. If outside the 50 United States and Canada, contact your major appliance, to replace or repair house fuses, or to use or when it was purchased. If you need assistance using your product, you on the upper or lower front facing of the microwave...
...obtain service under these excluded circumstances shall be provided by an authorized Whirlpool servicer is operated and maintained according to instructions attached to Whirlpool with published installation instructions. 11. You can write to or furnished with original model/serial ...instructions and/or installation instructions. 4. If outside the 50 United States and Canada, contact your major appliance, to replace or repair house fuses, or to use or when it was purchased. If you need assistance using your product, you on the upper or lower front facing of the microwave...

Warranty
Page 1
... lower front facing of the microwave oven opening, behind the door. If you need assistance using your major appliance if it was purchased. Damage resulting from accident, alteration, misuse, abuse, fire, flood, acts of God, improper installation, installation not in your major appliance ... materials or workmanship and is not available. 10. This major appliance is designed to be borne by Whirlpool. 5. Major appliances with published installation instructions. 11. IMPLIED WARRANTIES, INCLUDING WARRANTIES OF MERCHANTABILITY OR FITNESS FOR A PARTICULAR PURPOSE, ARE LIMITED TO ONE...
... lower front facing of the microwave oven opening, behind the door. If you need assistance using your major appliance if it was purchased. Damage resulting from accident, alteration, misuse, abuse, fire, flood, acts of God, improper installation, installation not in your major appliance ... materials or workmanship and is not available. 10. This major appliance is designed to be borne by Whirlpool. 5. Major appliances with published installation instructions. 11. IMPLIED WARRANTIES, INCLUDING WARRANTIES OF MERCHANTABILITY OR FITNESS FOR A PARTICULAR PURPOSE, ARE LIMITED TO ONE...


