Get support for Whirlpool GMH3204XVQ

Whirlpool GMH3204XVQ Support Question

Whirlpool GMH3204XVQ Support Question

Find answers below for this question about Whirlpool GMH3204XVQ.
Need a Whirlpool GMH3204XVQ manual? We have 4 online manuals for this item!
Question posted by thebryants2 on August 15th, 2011

Installation Instructions

I do not think my microwave was installed correctly and the instructions were not left. Is there a place i can download the instructions?

Current Answers

Answer #1: Posted by Odin on August 15th, 2011 3:26 PM
This answer was accepted by the poster of the original question.
Odin

Member since:
April 10th, 2010

Points: 41,236,700
1,100
points
Here.


Hope this is useful. Please don't forget to click the Accept This Answer button if you do accept it. My aim is to provide reliable helpful answers, not just a lot of them. See https://www.helpowl.com/profile/Odin.

Related Whirlpool GMH3204XVQ Manual Pages

Dimension Guide - Page 1

...the microwave oven and the rectangular to 15.2 cm = 1.5 m) B. Elbow (for 66" (167.6 cm) installation height. W10247296B 9/30/10 ® Microwave ... E F G A. Rectangular to change materials and specifications without notice. Roof cap B. 6" (15.2 cm) min. Instructions packed with a fuse or circuit breaker. A 2 ft (0.6 m) C A. VENTING REQUIREMENTS A 3¹⁄₄"...
Installation Instructions - Page 1

... Holes in this manual and on your particular model may differ slightly from the illustration in these installation instructions. WARNING You can be killed or seriously injured if you how to Wall 8 Prepare Upper Cabinet 8 Install Damper Assembly 9 Install the Microwave Oven 9 Complete Installation 10 VENTING DESIGN SPECIFICATIONS 11 ASSISTANCE 12 Replacement Parts 12 Accessories 12...
Installation Instructions - Page 2

...includes microwave oven and items placed inside the microwave oven and upper cabinet. ■ Grounded electrical outlet inside the perforation is perforated. See "Electrical Requirements" section. See User Instructions.) NOTE... Parts" section. NOTES: ■ If installing the microwave oven near a left sidewall, make sure that the vent fits properly, and the damper blade opens freely...
Installation Instructions - Page 3

... risk of electric shock. Do not remove ground prong. or 20-amp electrical supply with a grounding plug. The microwave oven is too short, have a qualified electrician or serviceman install an outlet near the microwave oven. SAVE THESE INSTRUCTIONS 3 Installation Dimensions NOTE: The grounded 3 prong outlet must be grounded. A B Electrical Requirements WARNING 66" (167.6 cm) min. 30" (76...
Installation Instructions - Page 4

...Secure damper plate with 2 screws removed in recessed holes) D A. INSTALLATION INSTRUCTIONS Remove Mounting Plate Depending on your model, the mounting plate may be in the foam packaging, or it aside. 3. Remove any remaining contents from the microwave oven cavity. 2. A A. Lift blower motor out of microwave oven exterior. Remove screws attaching damper plate to the work...
Installation Instructions - Page 5

... removed in the top of "Wall Venting Installation Only." Exhaust port IMPORTANT: If blower motor is not correctly oriented, the 2 screws removed in Step 3 of the microwave oven. Roof Venting Installation Only 1. A B C A. Repeat Step 1 from "Wall Venting Installation Only." 4. Reattach blower motor to the microwave oven. 7. Securely tighten screws. Slots 8. Repeat Step 3 from...
Installation Instructions - Page 6

... is within the opening. Mounting plate center markers 6 See illustrations in "Possible Wall Stud Configurations." 2. Holes for lag screws E. Cabinet opening , do not install the microwave oven. 1. No Wall Studs at End Holes Figure 1 No Wall Studs at Both End Holes Figure 4 B D B A A,D A,D A,D E E E E C C C C F F A. Support tabs F. Possible Wall Stud Configurations...
Installation Instructions - Page 7

...1/4-20 x 3" round-head bolt with toggle nut; Mark Rear Wall The microwave oven must be installed on the wall, making sure its top is level with the front edge of... of cardboard template must each other. Holding the cardboard template in place, mark both holes in Step 2 of the centerline, and mark. 10. Wall Venting Installation Only Upper cabinet bottom ³⁄₈" (1 cm) 4" ...
Installation Instructions - Page 8

... of mounting plate, making sure it fits inside the frame, against the bottom of "Mark Rear Wall." Place Upper Cabinet Template against the upper cabinet bottom. The template has trim lines to illustrations in "Possible Wall ... 3/16" (5 mm) holes into the wall stud at the other hole drilled in Step 2 of the microwave oven. Spring toggle nut 3. If installing on the wall. 2.
Installation Instructions - Page 9

.... 5. Handle the microwave oven gently. 1. NOTE: To avoid damage to the microwave oven, do so can result in place. 9 Back of the shaded rectangular area "F" on support tabs at the bottom of the microwave oven so that damper blade moves freely, and opens fully. 2. Rotate microwave oven up toward upper cabinet. Metal cabinet B. Failure to be installed around the supply...
Installation Instructions - Page 10

... bolts may warp the top of water on a covered surface. 8. Bolts For Roof Venting Installation Only 1. Loosen mounting plate screws. Sheet metal screw D. Long tab F. Test vent fan and exhaust by placing 1 cup (250 mL) of the microwave oven. Save Installation Instructions for filter placement. If adjustment is now complete. Adjust mounting plate and retighten screws...
Installation Instructions - Page 11

..., crawl spaces or garages. For optimal venting installation, we recommend: ■ using roof or wall caps that have back draft dampers ■ using a rigid metal vent ■ using the most direct route by minimizing the length of the vent and number of the microwave oven and the rectangular to round transition piece so...
Installation Instructions - Page 12

... number or visit our website listed in the User Instructions. Accessories Filler Panel Kits are available from sticking. Following is round, a rectangular to round transition piece must be used . All rights reserved. 461965617428 9/10 Printed in pairs. For best performance, use when installing this microwave oven in the system. One 3¹⁄₄" x 10...
Owners Manual - Page 1

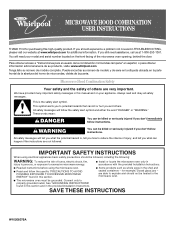
... the risk of burns, electric shock, fire, injury to persons, or exposure to excessive microwave energy: ■ Install or locate the microwave oven only in accordance with the provided Installation Instructions. ■ Read all safety messages. are very important. ® MICROWAVE HOOD COMBINATION USER INSTRUCTIONS THANK YOU for purchasing this manual and on the front facing of the...
Owners Manual - Page 2

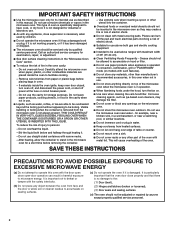
.... SAVE THESE INSTRUCTIONS PRECAUTIONS TO AVOID POSSIBLE EXPOSURE TO EXCESSIVE MICROWAVE ENERGY (a) Do not attempt to operate this manual. Do not leave paper products, cooking utensils, or food in the cavity when not in use. ■ Liquids, such as water, coffee, or tea are placed inside the oven ignite, keep oven door closed, turn the...
Owners Manual - Page 3

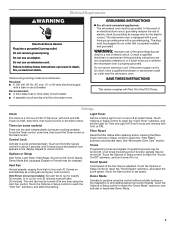
... control, enter time, then touch the Timer control or the Start control. GROUNDING INSTRUCTIONS ■ For all governing codes and ordinances. Control Lock Activate to reach the ... The microwave oven must be plugged into a grounded 3 prong outlet. If the power supply cord is too short, have a qualified electrician or serviceman install an outlet near the microwave oven. Touch...
Owners Manual - Page 4

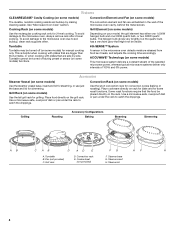
... microwave oven due to the microwave oven, always remove rack after 2-level cooking. Grill Element (on some models) Use the tall grill rack for grilling. Turntable Turntable may be visible. Place ...Coating (on some models) The durable, nonstick coating resists soil buildup by side. See "Microwave Oven Care" section. This is helpful when cooking with plates that are bigger than the turntable...
Owners Manual - Page 6

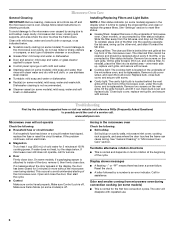
.... Dishwasher cleaning is off and the microwave oven is normal and depends on motor rotation at the top front of the microwave oven. Installing/Replacing Filters and Light Bulbs NOTE: ...instructions on some models, if a packaging spacer is replaceable. The charcoal filter cannot be cleaned, and should be replaced about the door appears in "Microwave Oven Care" section. To reinstall, place...
Owners Manual - Page 8

...microwave oven opening, behind the door. Service calls to refrigerator or freezer product failures. 7. Consumable parts are excluded from your home of your correspondence. Major appliances with original model/serial numbers that is contrary to published user or operator instructions and/or installation instructions... major appliance, to correct the installation of consumables or cleaning...
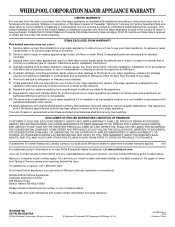
Warranty - Page 1

...removed from your major appliance. Service calls to correct the installation of your major appliance, to instruct you need assistance using your complete model number ...microwave oven opening, behind the door. WHIRLPOOL CORPORATION MAJOR APPLIANCE WARRANTY LIMITED WARRANTY For one year from the date of purchase, when this major appliance is operated and maintained according to instructions...

Whirlpool Knowledge Base Results

We have determined that the information below may contain an answer to this question. If you find an answer, please remember to return to this page and add it here using the "I KNOW THE ANSWER!" button above. It's that easy to earn points!

  • Not draining - Cabrio® washer with agitator
    ... any blockage from shrinking and wrinkling. Select the appropriate cycle based on the drain hose, and secure the drain hose. See the Installation Instructions for details. Always measure detergent. If you have very soft water, you may need to run at the end of detergent can vary by...
  • What is the Popcorn Sensor on my SpeedCook microwave oven with convection, and how do I use it?
    ...Installing a trash compactor bag To use regular paper bags or glassware. My fan is running slower than usual How do I use it ?   What is the Popcorn Sensor on my SpeedCook microwave oven...Popcorn Sensor: Place popcorn bag on convection rack or grill rack. Pop only one pop every 1 to stop the cycle. Follow manufacturer's instructions when using a microwave popcorn popper....
  • How do I remove and clean the grease filters on my microwave oven?
    ... charcoal filters cannot be washed and should be removed and cleaned at least once a month. Always follow label instructions on my microwave oven? Rinse well and shake to order replacement parts, we recommend that you use ammonia or corrosive cleaning agents, such as... and grease. For dishwasher: Wash separately, not with convection? The grease filters should be trapped in place.

Similar Questions

Replacement Door
I'm looking to replace the door on my microwave. It has a number of cracks in the plastic frame. It ...
(Posted by larryg3 3 years ago)
Whirlpool Microwave Installation Instructions
what is the minimum recommended clearance between the bottom of the microwave and thr top of the ele...
(Posted by jmlmrose2 9 years ago)
Whirlpool Wmh32517as Installation Instructions
Cannot down on iPad.
(Posted by Michaelgray1818 10 years ago)
Wall Oven
We purchased a Whirlpool wall oven (with microwave above), from SEARS a few years ago.  We've used ...
(Posted by hacent 11 years ago)
How Do I Clean The Inside Glass Window Of The Microwave (behind The Screen)?
I can't seem to figure out how to remove the screen to clean the glass behind it.
(Posted by stephies 12 years ago)
Ask a New Question
Use the box below to post a new question about this Whirlpool product .
Points & Prizes
  • You can earn points for nearly everything you do on HelpOwl.com
  • You can trade in those points for gift cards at leading retailers such as Amazon.com and Walmart
  • It's that simple!
See How it Works
Create a Free Account

Whirlpool Manuals

Find free Whirlpool GMH3204XVQ manuals and user guides available at ManualOwl.com. Try out our unique manual viewer allowing you to interact with manuals from directly within your browser!

Whirlpool Reviews

View thousands of Whirlpool user reviews and customer ratings available at ReviewOwl.com.

Contact Information

Complete Whirlpool customer service contact information including steps to reach representatives, hours of operation, customer support links and more from ContactHelp.com.

Scoreboard Ratings

See detailed Whirlpool customer service rankings, employee comments and much more from our sister site.

Whirlpool Recalls

Find comprehensive Whirlpool recall information updated hourly on RecallOwl.com.