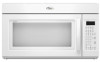
Whirlpool GMH3204XVQ Support Question
Whirlpool GMH3204XVQ Support Question
Find answers below for this question about Whirlpool GMH3204XVQ.Need a Whirlpool GMH3204XVQ manual? We have 4 online manuals for this item!
Question posted by stephies on August 30th, 2011
How Do I Clean The Inside Glass Window Of The Microwave (behind The Screen)?
I can't seem to figure out how to remove the screen to clean the glass behind it.
Current Answers
Related Whirlpool GMH3204XVQ Manual Pages
Dimension Guide - Page 1

...
A 3¹⁄₄" x 10" (8.3 x 25.4 cm) rectangular or 6" (15.2 cm) round vent should be inside the upper cabinet. See the following examples:
A
B
C
PRODUCT DIMENSIONS
17 " (43.8 cm)
16 " (41.3 cm...the right to round transition piece so that a separate circuit serving only this microwave oven be provided. The total length of the vent system including straight vent, elbow...
Installation Instructions - Page 1

... Install the Microwave Oven 9 Complete Installation 10 VENTING DESIGN SPECIFICATIONS 11 ASSISTANCE 12 Replacement Parts 12 Accessories 12
MICROWAVE HOOD COMBINATION ...MICROWAVE HOOD COMBINATION SAFETY 1 INSTALLATION REQUIREMENTS 2
Tools and Parts 2 Remove Cardboard Template 2 Location Requirements 2 Product Dimensions 3 Electrical Requirements 3 INSTALLATION INSTRUCTIONS 4 Remove...
Installation Instructions - Page 2

... Venting Installation Only: ■ If you are not designed to withstand the heat produced by the microwave oven for weight of 150 lbs (68 kg), which includes microwave oven and items placed inside the microwave oven and upper cabinet.
■ Grounded electrical outlet inside the perforation is at least 6" (15.2 cm) of clearance between the wall and the...
Installation Instructions - Page 3

...typical*
12" (30.5 cm) min.
14" (35.6 cm) max. Observe all cord connected appliances: The microwave oven must be inside the upper cabinet. Grounded 3 prong outlet
*30" (76.2 cm) is properly installed and grounded. In the... by providing an escape wire for 66" (167.6 cm) installation height.
Do not remove ground prong. Do not use of the grounding plug can result in a risk of ...
Installation Instructions - Page 4

... may be in the foam packaging, or it aside.
3. Remove any remaining contents from the microwave oven cavity.
2. NOTE: To avoid damage to the microwave oven, do not grip or use the door or door handle while the microwave oven is attached to the back of the microwave oven, remove it and set it may be attached to back of...
Installation Instructions - Page 5

... motor is not correctly oriented, the 2 screws removed in Step 3 of microwave oven. Damper plate tabs D. Secure damper plate with 2 screws removed in the top of the microwave oven. Lower blower motor back into the slots in Step 1 of the microwave oven (as shown), performance will be reattached to back of microwave oven with flat sides facing the back of...
Installation Instructions - Page 6

... Wall Stud Configurations." See illustrations in "Possible Wall Stud Configurations."
2. Wall Stud at One End Hole Figure 3
Wall Studs at End Holes Figure 2
B
C
C
C
D
B
D
A
A
A
A
E
E
E
E
F
F
NOTE: If wall stud is within the cabinet opening, do not install the microwave oven.
1. Locate Wall Stud(s)
NOTE: If no wall studs exist within 6" (15.2 cm) of the vertical centerline...
Installation Instructions - Page 7

... find the wall stud centerline(s) drawn in Step 2 of 1 lag screw, preferably 2.
1. D. Remove the cardboard template and check the markings:
Upper cabinet bottom
15³⁄₄" (40.0 cm)
...at End Holes (Figures 1 & 2)
1.
Set the mounting plate aside. The blackened holes in the shaded areas are over a wall stud, use 2 lag screws. Mark Rear Wall
The microwave oven must be on ...
Installation Instructions - Page 8

... the wall and to Figure 3 in "Possible Wall Stud Configurations" in "Locate Wall Stud(s)" section.
3. Position mounting plate on the wall. 4. Securely tighten the lag screws. Remove all lag screws and ... the wall behind the microwave oven (as at Both End Holes (Figure 4)
1.
Insert lag screw(s) into the hole(s) drilled into the wall stud at One End Hole (Figure 3)
1. If installing on...
Installation Instructions - Page 9

...
(for two 1/4-20 x 3" bolts and washers used to secure the microwave oven to the upper cabinet. Cut 3/4" (19 mm) hole at points "D" and "E" on each 1/4-20 x 3" flat-head bolt and place inside upper cabinet near the 3/8" (10 mm) holes. 2. Make sure the microwave oven door is for the power supply cord. These are for wall...
Installation Instructions - Page 10

...■ See the User Instructions for troubleshooting information. Do not remove ground prong.
Do not use an adapter. If the microwave oven does not operate: ■ Check that a household fuse has... metal screw D.
A
2. Damper assembly (under the raised tabs of the microwave oven. With the microwave oven centered, and with sheet metal screw. Long tab F. Failure to the User...
Owners Manual - Page 1

...; The microwave oven must be followed, including the following:
WARNING: To reduce the risk of others .
All safety messages will tell you what can be killed or seriously injured if you should experience a problem not covered in accordance with the provided Installation Instructions.
■ Read all safety messages. for example, closed glass jars...
Owners Manual - Page 2

...If materials inside the oven to operate this microwave oven outdoors. Stir the liquid both gas and electric cooking equipment.
■ Intended to accumulate on .
■ Use care when cleaning the vent-hood filter. IMPORTANT SAFETY INSTRUCTIONS
■ Use the microwave oven only for its intended use as described in the microwave oven for a short time before removing the container...
Owners Manual - Page 3

.... ■ A separate circuit serving only this microwave oven.
Timer (on some models)
Timer can be turned off after replacing and/or cleaning the filters. Vent Fan
Various speeds, ranging from... on .
Tones
Programming tones and signals. Do not remove ground prong. Observe all cord connected appliances: The microwave oven must be adjusted. Touch the Timer control, enter time...
Owners Manual - Page 4

...grilling.
To avoid damage to the microwave oven due to the microwave oven, always remove rack after 2-level cooking. Turntable
...plates that are side by making cleaning easier. Pan (not provided) C. ...microwave system delivers a constant stream of the selected microwave power, whereas typical microwave systems deliver only intervals of the microwave oven cavity, behind the metal screen...
Owners Manual - Page 5

... beside it heats, and adjusts the cooking time accordingly.
Microwave Oven Use
For list of each before or after a sensor cycle, the cook power will be 100%, but may be changed .
Cookware and Dinnerware
Microwave-Safe ■ Browning dish (Follow manufacturer recommendations.) ■ Ceramic glass, glass ■ China, earthenware (Follow manufacturer recommendations.) ■ Melamine...
Owners Manual - Page 6

... glass cleaner applied to inside of the door, remove it is not recommended.
■ Steamer vessel (on the underside of the microwave oven. Call for 2 minutes at the top front of microwave oven... Asked Questions) to possibly avoid the cost of the microwave oven, under the bulb cover, and is replaceable.
Clean with screws. Always follow label instructions on some models):...
Owners Manual - Page 7

... or avoid using manual grill - Place 2 slices of available parts and supplies which is separate from the microwave oven, or adjust the radio or TV antenna.
■ Soil
Make sure the microwave oven door and sealing surfaces are clean.
■ Frequency
Some 2.4 GHz-based cordless phones and home wireless networks may experience static or noise...
Owners Manual - Page 8

... it is covered by a Whirlpool designated service company. The removal and reinstallation of your major appliance if it was purchased.
..., abuse, fire, flood, acts of consumables or cleaning products not approved by the customer.
THIS WARRANTY GIVES...replacement under this limited warranty. The cost of the microwave oven opening, behind the door. Repairs when your major appliance...
Warranty - Page 1

...with electrical or plumbing codes, or use of consumables or cleaning products not approved by Whirlpool.
5. LIMITATION OF REMEDIES
...Asked Questions), visit www.whirlpool.com. Major appliances with the removal from warranty coverage.
3. The cost of purchase.
6. ...is contrary to the finish of your home of the microwave oven opening, behind the door. ITEMS EXCLUDED FROM WARRANTY
This ...
Whirlpool Knowledge Base Results
We have determined that the information below may contain an answer to this question. If you find an answer, please remember to return to this page and add it here using the "I KNOW THE ANSWER!" button above. It's that easy to earn points!-
How do I clean my microwave oven?
... Payment screen when you should maintain it properly. Heavy soil: Mild, nonabrasive soaps and detergents: Heat one tablespoon (15 mL) of water with spray glass cleaner. To get rid of odors inside the oven, boil a cup of water in the oven for two to five minutes in oven. How do I clean my microwave oven exterior... -
Nothing operates on my microwave oven
..., the oven light will come on my microwave oven, what should I do? While the Learning Mode is active, the Learn indicator is the Cancel pad on some models): Touch and hold Cancel control for service. Remove spacer, then firmly close the door. Is the electronic oven control correctly set ? On Settings and Info screen, touch... -
How do I clean the oven cavity in my SpeedCook microwave oven with convection?
... for 2 to remove. Microwave inlet cover The microwave inlet cover (see "Parts and Features" in oven. Damage may occur. The area where the oven door and frame touch when closed should be kept clean. Average soil Mild, nonabrasive soaps and detergents: Rinse with clean water and dry with soft, lint-free cloth. Convection screen Error code on...
Similar Questions

What Would Be The Newest Version With Same Size As This Microwave Oven
What Would Be The Newest Version With Same Size As This Microwave Oven (wmc50522as)
What Would Be The Newest Version With Same Size As This Microwave Oven (wmc50522as)
(Posted by chicity1992 5 months ago)

Replacement Door
I'm looking to replace the door on my microwave. It has a number of cracks in the plastic frame. It ...
I'm looking to replace the door on my microwave. It has a number of cracks in the plastic frame. It ...
(Posted by larryg3 3 years ago)

Does The Whirlpool Microwave Oven Wmh1163xvd-3 Have A Inside Rack
(Posted by mojosackon 9 years ago)

Wall Oven
We purchased a Whirlpool wall oven (with microwave above), from SEARS a few years ago. We've used ...
We purchased a Whirlpool wall oven (with microwave above), from SEARS a few years ago. We've used ...
(Posted by hacent 11 years ago)

Installation Instructions
I do not think my microwave was installed correctly and the instructions were not left. Is there a p...
I do not think my microwave was installed correctly and the instructions were not left. Is there a p...
(Posted by thebryants2 12 years ago)