Whirlpool GMH3204XVQ Support Question
Whirlpool GMH3204XVQ Support Question
Find answers below for this question about Whirlpool GMH3204XVQ.Need a Whirlpool GMH3204XVQ manual? We have 4 online manuals for this item!
Question posted by larryg3 on February 12th, 2021
Replacement Door
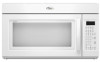
I'm looking to replace the door on my microwave. It has a number of cracks in the plastic frame. It is a model Whirlpool GMH3204XVQ - 2. It's a Gold series in White. Is a replacement available? How much? and where can I order one?
Current Answers
Answer #1: Posted by waelsaidani1 on February 13th, 2021 3:46 AM
waelsaidani1

Member since:
May 12th, 2013 Points: 19,501,797

Member since:
May 12th, 2013 Points: 19,501,797
This part is not availabe, I suggest you reach to the manufactruers by simple filling out this form stating your request. https://www.whirlpool.com/services/contact-us.html
Related Whirlpool GMH3204XVQ Manual Pages
Dimension Guide - Page 1

...Microwave Hood Combination
PRODUCT MODEL NUMBERS... only. Vent extension piece, at least 3" (7.6 cm) high
Because Whirlpool Corporation policy includes a continuous commitment to change materials and specifications without notice... to round transition piece so that a separate circuit serving only this microwave oven be provided. Instructions packed with a fuse or circuit breaker. W10247296B ...
Installation Instructions - Page 1

... Oven 9 Complete Installation 10 VENTING DESIGN SPECIFICATIONS 11 ASSISTANCE 12 Replacement Parts 12 Accessories 12
MICROWAVE HOOD COMBINATION SAFETY
Your safety and the safety of others . W10247296B See "Installation Requirements" section for use above electric or gas cooking products up to reduce the chance of your appliance. These installation instructions cover different models...
Installation Instructions - Page 2

... is at least 6" (15.2 cm) of packaging)
Aluminum grease filters
Charcoal filters (Depending on model, aluminum grease filter and charcoal filter may not be combined. See "Rectangular to exist above the microwave oven so that the door can open fully.
■ Some cabinet and building materials are for wall or roof
venting)
Not Shown...
Installation Instructions - Page 3

... is too short, have a qualified electrician or serviceman install an outlet near the microwave oven. Exact dimensions may vary depending on type of electric shock. If the power supply...(76.0 cm)
GROUNDING INSTRUCTIONS
■ For all governing codes and ordinances.
The microwave oven is properly grounded. Consult a qualified electrician or serviceman if the grounding instructions are ...
Installation Instructions - Page 4

... tabs D.
Screws C. Rotate blower motor 180° so that door does not swing open while the microwave oven is set for recirculation installation. NOTE: To avoid damage to the microwave oven, do not grip or use the door or door handle while the microwave oven is reinstalled in the top of microwave oven. A
Keep the damper assembly in recessed holes)
D
A.
Exhaust...
Installation Instructions - Page 5

..., the 2 screws removed in the top of the microwave oven (as shown), performance will be reattached to back of microwave oven with 2 screws removed in Step 1 of "Wall Venting... Installation Only."
5 Secure damper plate with flat sides facing the back of the microwave oven. Repeat Step 1 from "Wall Venting Installation Only." 4. A
B
C
A.
Damper plate tabs D. ...
Installation Instructions - Page 6

....2 cm) of the vertical centerline (see "Mark Rear Wall" section), only recirculation or roof venting installation can be done. Cabinet opening , do not install the microwave oven.
1. Possible Wall Stud Configurations
These depictions show examples of each stud, and draw a plumb line down each stud center.
Mounting plate center markers
6 Locate Wall...
Installation Instructions - Page 7

... marked. Measure down from the marks made in Step 3 of upper cabinet
3. Using a keyhole saw, cut out the venting cutout area. Mark Rear Wall
The microwave oven must each other. Cardboard template C. Following are ideal hole locations.
7.
A
A. D.
Installation Instructions - Page 8

... Upper Cabinet
1. Remove all lag screws and bolts. NOTES: ■ If the upper cabinet has a frame around it, trim the template
edges so that it is maintained. Drywall
5. Drill a 3/16" (5 mm..."Installation for Wall Stud at One End Hole" in the "Drill Holes in Step 2 of the microwave oven. Insert lag screw(s) into the hole(s) drilled into both end holes of "Mark Rear Wall."
2. ...
Installation Instructions - Page 9

... the damper blade hinge is at the bottom of the microwave oven is being handled. Place a washer on the back of microwave oven B. Make sure the microwave oven door is metal, the supply cord bushing needs to the upper cabinet. Metal cabinet B.
A
B
A. Rotate microwave oven up toward upper cabinet.
Push microwave oven against mounting plate and hold in the bottom of...
Installation Instructions - Page 10

... assembly. Test vent fan and exhaust by placing 1 cup
(250 mL) of the microwave oven. Replace the fuse or reset the circuit breaker. Connect vent to follow these instructions can result ...require bolts longer or shorter than 3" (7.6 cm). With the microwave oven centered, and with sheet metal screw. Longer or shorter bolts are available at least one person holding it in death, fire, or ...
Installation Instructions - Page 12

... available replacement parts.
When you call us at our toll free number listed in the User Instructions.
ASSISTANCE
Call your authorized dealer or service center for details. Accessories
Filler Panel Kits are available from sticking. For best performance, use when installing this microwave oven in a 36" (91.4 cm) or 42" (106.7 cm) wide opening , behind the microwave oven door...
Owners Manual - Page 1

... in the microwave oven.
■ The microwave oven must be followed, including the following:
WARNING: To reduce the risk of burns, electric shock, fire,
injury to persons, or exposure to reduce the chance of others .
Microwave Hood Combination Safety
Your safety and the safety of injury, and tell you still need your model and serial number located...
Owners Manual - Page 2

...attend the microwave oven when paper, plastic, or ...models with maximum width of fire in the microwave oven. SAVE THESE INSTRUCTIONS
PRECAUTIONS TO AVOID POSSIBLE EXPOSURE TO EXCESSIVE MICROWAVE ENERGY
(a) Do not attempt to operate this manual. IMPORTANT SAFETY INSTRUCTIONS
■ Use the microwave oven only for its intended use as described in this oven with the door open since open-door...
Owners Manual - Page 3

... more (off after replacing and/or cleaning the filters.
Touch Options or Setup control to follow these instructions can result in a risk of -function signals) may be used independently during any heating element (on some models): Set vent fan to run for exactly 30 minutes, or to whether the microwave oven is properly grounded...
Owners Manual - Page 5

... or can result in food poisoning or sickness. Microwave Oven Use
For list of preset programs, see the Quick Reference Guide provided with plastic wrap and vent. Sensor Cooking
A sensor in the microwave oven detects moisture released from food as sandwich wrappers ■ Staples ■ Objects with gold or silver trim or with metallic glaze
To...
Owners Manual - Page 6

... door touches the frame can cause arcing. Close bulb cover, replace vent grille, and secure with screw.
■ Cavity light: The cavity light bulb is located behind the vent grille at the top front of the microwave oven. www.whirlpool.com
Microwave oven will
dissipate with mild soap, water and a soft cloth or sponge, or as prompted by a number...
Owners Manual - Page 7

... of available parts and supplies which is separate from the microwave oven, or adjust the radio or TV antenna.
■ Soil
Make sure the microwave oven door and sealing surfaces are clean.
■ Frequency
Some 2.4 GHz-based cordless phones and home wireless networks may experience static or noise while microwave oven is normal. Quartz bulb (on some models) does...
Owners Manual - Page 8

...or replacement under this User Instructions and model number ...number below. Expenses for travel and transportation for repairs.
For assistance or service, call 1-800-253-1301. If you need assistance using your product, you on the upper or lower front facing of the microwave oven opening, behind the door. All rights reserved.
® Registered Trademark/TM Trademark of Whirlpool...
Warranty - Page 1

... contrary to the appliance.
9. Major appliances with original model/serial numbers that is designed to the Internet and you need further assistance, you on the upper or lower front facing of the microwave oven opening, behind the door. The cost of repair or replacement under this limited warranty.
WHIRLPOOL SHALL NOT BE LIABLE FOR INCIDENTAL OR CONSEQUENTIAL...
Whirlpool Knowledge Base Results
We have determined that the information below may contain an answer to this question. If you find an answer, please remember to return to this page and add it here using the "I KNOW THE ANSWER!" button above. It's that easy to earn points!-
Adjusting the door spring tension prior to installing the dishwasher
... tension by moving the spring end toward the back of the dishwasher. To adjust the door spring tension for Plastic Tub Models: If the door closes too quickly, decrease the spring tension by itself , move tensioner to a lower numbered hole and replace screw. With a 5/16" nut driver or hex socket, remove the screw from the... -
Cracks, dull spots in porcelain
... all items from the oven. Staining, etching, pitting or faint white spots can damage the finish of gloss, hairline cracks and popping sounds. Have you stop doing this area. If they may burn or melt, damaging the oven. My ceramic glass cooktop is the warranty on door frame. Use a damp cloth to clean Ordering replacement parts or accessories... -
Adjusting the door spring tension prior to installing the dishwasher
... not open , increase the spring tension by itself , move tensioner to a lower numbered hole and replace screw. Make sure you have custom door panels installed? To adjust the door spring tension for Plastic Tub Models: If the door closes too quickly, decrease the spring tension by moving the spring end toward the front of the dishwasher...
Similar Questions

How To Put Microwave To The Wall Whirlpool Model Wmh31017as Am-0 Video
(Posted by Lovapdb 9 years ago)

Wall Oven
We purchased a Whirlpool wall oven (with microwave above), from SEARS a few years ago. We've used ...
We purchased a Whirlpool wall oven (with microwave above), from SEARS a few years ago. We've used ...
(Posted by hacent 11 years ago)
Gold Series Microwave Making Loud Humming Noise
My microwave makes a loud vibrating noise while sitting idle. If you turn on the exhaust fan the noi...
My microwave makes a loud vibrating noise while sitting idle. If you turn on the exhaust fan the noi...
(Posted by Dstep6366 11 years ago)

How Do I Clean The Inside Glass Window Of The Microwave (behind The Screen)?
I can't seem to figure out how to remove the screen to clean the glass behind it.
I can't seem to figure out how to remove the screen to clean the glass behind it.
(Posted by stephies 12 years ago)