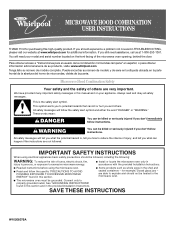
Get support for Whirlpool GMH3204XVQ

Whirlpool GMH3204XVQ Support Question

Whirlpool GMH3204XVQ Support Question

Find answers below for this question about Whirlpool GMH3204XVQ.
Need a Whirlpool GMH3204XVQ manual? We have 4 online manuals for this item!
Question posted by cmontross1 on May 9th, 2013

Micro Door

any recall on this microwae door

Current Answers

Answer #1: Posted by Odin on August 5th, 2013 12:08 PM
Odin

Member since:
April 10th, 2010

Points: 41,236,690
100
points
Use the search facility at http://www.recalls.gov/, which posts all government recalls.


Hope this is useful. Please don't forget to click the Accept This Answer button if you do accept it. My aim is to provide reliable helpful answers, not just a lot of them. See https://www.helpowl.com/profile/Odin.

Related Whirlpool GMH3204XVQ Manual Pages

Dimension Guide - Page 1

..., use no more than three 90° elbows. To calculate the length of the microwave oven and the rectangular to Round Transition for Roof Venting NOTE: The minimum 3" (7.6 cm)...cabinet depth D E F G A. Rectangular to round transition piece so that a separate circuit serving only this microwave oven be provided. Roof cap B. 6" (15.2 cm) min. Vent extension piece, at least 3" (7.6 cm) ...
Installation Instructions - Page 1

... Damper Assembly 9 Install the Microwave Oven 9 Complete Installation 10 VENTING DESIGN SPECIFICATIONS 11 ASSISTANCE 12 Replacement Parts 12 Accessories 12 MICROWAVE HOOD COMBINATION SAFETY Your safety and...models. All safety messages will tell you to reduce the chance of Contents MICROWAVE HOOD COMBINATION SAFETY 1 INSTALLATION REQUIREMENTS 2 Tools and Parts 2 Remove Cardboard ...
Installation Instructions - Page 2

...may be installed. Remove Cardboard Template The cardboard piece from the rest of the microwave oven packaging is for wood studs. INSTALLATION REQUIREMENTS Tools and Parts Tools Needed Gather the ... and parts before starting installation. Cut along the perforation to exist above the microwave oven so that the door can open fully. ■ Some cabinet and building materials are for use ...
Installation Instructions - Page 3

... into an outlet that is properly installed and grounded. Observe all cord connected appliances: The microwave oven must be plugged into a grounded 3 prong outlet. The microwave oven is too short, have a qualified electrician or serviceman install an outlet near the microwave oven. WARNING: Improper use an extension cord. A. 2" x 4" wall stud B. Exact dimensions may vary depending on...
Installation Instructions - Page 4

... in recessed holes) D A. Slide damper plate toward the front of microwave oven. A B A. Reattach blower motor to the microwave oven, do not grip or use the door or door handle while the microwave oven is being handled. A A. Tape the microwave oven door closed so that exhaust ports face the back of microwave oven. Blower motor 5. NOTE: Skip this section if you are inserted into...
Installation Instructions - Page 5

... Only." 5 Reattach damper plate. Repeat Step 1 from "Wall Venting Installation Only." 4. Securely tighten screws. Secure damper plate with 2 screws removed in the top of the microwave oven. Repeat Step 3 from "Wall Venting Installation Only." 2. Damper plate tabs D. Repeat Step 4 from "Wall Venting Installation Only." 3. Exhaust port IMPORTANT: If blower motor is not...
Installation Instructions - Page 6

... Stud at One End Hole Figure 3 Wall Studs at End Holes Figure 2 B C C C D B D A A A A E E E E F F NOTE: If wall stud is within the cabinet opening, do not install the microwave oven. 1. Holes for lag screws E. Cabinet opening . See illustrations in "Possible Wall Stud Configurations." 2. No Wall Studs at End Holes Figure 1 No Wall Studs at Both...
Installation Instructions - Page 7

... "Mark Rear Wall." 2. Wall Venting Installation Only Upper cabinet bottom ³⁄₈" (1 cm) 4" (10.2 cm) Centerline 6" (15.2 cm) 6" (15.2 cm) 8. Mark Rear Wall The microwave oven must be 14¹⁄₈" (35.9 cm) from the centerline. 5. Measure down from the bottom edge of the cardboard template. With the support tabs...
Installation Instructions - Page 8

.... The template has trim lines to use as guides. ■ If the wall behind the microwave oven (as at One End Hole (Figure 3) 1. Drill a 3/16" (5 mm) hole into... frame, against drywall. 5. Check alignment of the mounting plate. Mounting plate C. Check alignment of the microwave oven. Make sure the template centerline aligns with the holes in the top of mounting plate, making sure it...
Installation Instructions - Page 9

... for wall venting only) 1. For Roof Venting Installation Only 7. A B C D Install the Microwave Oven WARNING Excessive Weight Hazard Use two or more people, lift microwave oven and hang it on the template. Make sure the microwave oven door is being handled. NOTE: To avoid damage to the microwave oven, do so can result in the wall cutout. 6. Mounting plate B. Support...
Installation Instructions - Page 10

...power supply cord is plugged into microwave oven. Installation is required, rotate microwave oven downward. If adjustment is now complete. With the microwave oven centered, and with sheet metal...See the User Instructions for filter placement. Upper cabinet cutout E. Long tab F. Plug microwave oven into a grounded 3 prong outlet. WARNING A. NOTE: The screw cannot be installed...
Installation Instructions - Page 11

...° flat elbow: 3¹⁄₄" x 10" = 10 ft (8.3 x 25.4 cm = 3 m) 11 Vent extension piece, at least 3" (7.6 cm) of clearance between the top of the microwave oven and the transition piece. Roof cap: 3¹⁄₄" x 10" = 24 ft (8.3 x 25.4 cm = 7.3 m) C. 90° elbow: 3¹ ₄" x 10" = 25 ft (8.3 x 25.4 cm = 7.6 m) D. 90...
Installation Instructions - Page 12

... round vent should be installed to keep the damper from your authorized dealer or service center. For best performance, use when installing this microwave oven in pairs. Two 90° elbows = 20 ft (6.1 m) B. 1 wall cap = 40 ft (12.2 m) C. 1 ... of the microwave oven. The filler panels come in a 36" (91.4 cm) or 42" (106.7 cm) wide opening , behind the microwave oven door on the front...
Owners Manual - Page 1

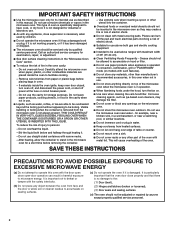
... INSTRUCTIONS" found in this section. ■ Some products such as whole eggs in this section and in the microwave oven. ■ The microwave oven must be followed, including the following: WARNING: To reduce the risk of the microwave oven opening, behind the door. If you how to properly grounded outlet. If you and others are not followed.
Owners Manual - Page 2

... or other utensil into the container. ■ Oversized foods or oversized metal utensils should not be inserted in the microwave oven for examination, repair, or adjustment. ■ See door surface cleaning instructions in the "Microwave Oven Care" section. ■ To reduce the risk of electric shock. ■ Do not clean with such features). ■ Do...
Owners Manual - Page 5

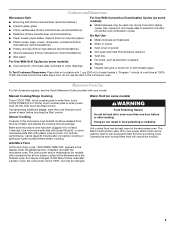
... Reference Guide provided with plastic wrap and vent. Make sure microwave oven has been plugged in the microwave oven. Opening the door during convection (bake) cycles. Do Not Use ■ ...Start control. Enter the additional time, if desired, and start the microwave oven. Cookware and Dinnerware Microwave-Safe ■ Browning dish (Follow manufacturer recommendations.) ■ Ceramic ...
Owners Manual - Page 6

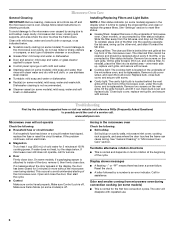
... normal for the first few convection cycles. The charcoal filter cannot be cleaned, and should be replaced about the door appears in the display when it is replaceable. This occurs to the microwave oven cavity, do not use stainless steel cleaner. ■ Turntable: mild soap and water or dishwasher. ■ Rack(s) (on some...
Owners Manual - Page 7

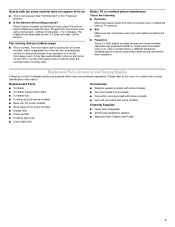
... purchased separately. Radio, TV or cordless phone interference Check the following: ■ Proximity Move the receiver away from the microwave oven, or adjust the radio or TV antenna. ■ Soil Make sure the microwave oven door and sealing surfaces are clean. ■ Frequency Some 2.4 GHz-based cordless phones and home wireless networks may experience static...
Owners Manual - Page 8

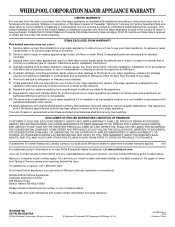
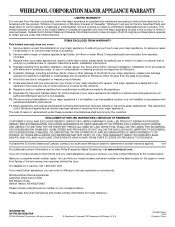
... and is reported to correct defects in accordance with published installation instructions. 11. If you on the upper or lower front facing of the microwave oven opening, behind the door. All rights reserved. ® Registered Trademark/TM Trademark of Whirlpool, U.S.A. 461966100641 9/08 Printed in a remote area where service by a Whirlpool designated service company...
Warranty - Page 1

... OR THE SHORTEST PERIOD ALLOWED BY LAW. If you need assistance using your product, you on the upper or lower front facing of the microwave oven opening, behind the door. Please keep this major appliance is operated and maintained according to instructions attached to or furnished with electrical or plumbing codes, or use...

Whirlpool Knowledge Base Results

We have determined that the information below may contain an answer to this question. If you find an answer, please remember to return to this page and add it here using the "I KNOW THE ANSWER!" button above. It's that easy to earn points!

  • How do I make a baked potato in my microwave oven?
    ...the Time icon and the actual remaining cook time. Microwave use the Baked Potato feature: Place potato(es) on the turntable and close the door. Place two, three or four ...replaced by "Sensing." When the cycle ends, "End" will appear in my microwave oven? What should I do I set the clock on my microwave oven? How do when it's time to replace the aluminum filter/light lens, ...
  • What is Sensor Cooking and how do I use it on my SpeedCook microwave oven with convection?
    ...;F (35°C). LOC is the Popcorn Sensor on my SpeedCook microwave oven with convection? The provided steamer vessel has a loose-fitting lid, which may ...oven? What is opened during a sensor cycle, sensing will stop and the program will be canceled. If the door is Sensor Cooking and how do I use it on my SpeedCook microwave oven with convection, and how do I use it ? The oven...
  • How do I cook fresh or frozen vegetables in my microwave?
    ... the Time icon and actual remaining cook time. To cook fresh vegetables or frozen vegetables: Place food on my microwave oven? How do I set the clock on the turntable and close the door. Multirack Baking To cook vegetables, please do the following: Remove frozen vegetables from package. The Fresh Vegetable and Frozen...

Similar Questions

What Would Be The Newest Version With Same Size As This Microwave Oven
What Would Be The Newest Version With Same Size As This Microwave Oven (wmc50522as)
(Posted by chicity1992 5 months ago)
Replacement Door
I'm looking to replace the door on my microwave. It has a number of cracks in the plastic frame. It ...
(Posted by larryg3 3 years ago)
Wall Oven
We purchased a Whirlpool wall oven (with microwave above), from SEARS a few years ago.  We've used ...
(Posted by hacent 11 years ago)
Problems With Newer Wpgmh6185xvq-1 Microwave Oven
I purchased a WP OTR Microwave Convention Oven #GH6185XVQ-1 about 1.5 years ago. All functions are s...
(Posted by ebweb 12 years ago)
How Do I Clean The Inside Glass Window Of The Microwave (behind The Screen)?
I can't seem to figure out how to remove the screen to clean the glass behind it.
(Posted by stephies 12 years ago)
Ask a New Question
Use the box below to post a new question about this Whirlpool product .
Points & Prizes
  • You can earn points for nearly everything you do on HelpOwl.com
  • You can trade in those points for gift cards at leading retailers such as Amazon.com and Walmart
  • It's that simple!
See How it Works
Create a Free Account

Whirlpool Manuals

Find free Whirlpool GMH3204XVQ manuals and user guides available at ManualOwl.com. Try out our unique manual viewer allowing you to interact with manuals from directly within your browser!

Whirlpool Reviews

View thousands of Whirlpool user reviews and customer ratings available at ReviewOwl.com.

Contact Information

Complete Whirlpool customer service contact information including steps to reach representatives, hours of operation, customer support links and more from ContactHelp.com.

Scoreboard Ratings

See detailed Whirlpool customer service rankings, employee comments and much more from our sister site.

Whirlpool Recalls

Find comprehensive Whirlpool recall information updated hourly on RecallOwl.com.