Get support for Whirlpool WMH32517AS

Whirlpool WMH32517AS Support Question

Whirlpool WMH32517AS Support Question

Find answers below for this question about Whirlpool WMH32517AS.
Need a Whirlpool WMH32517AS manual? We have 4 online manuals for this item!
Question posted by Michaelgray1818 on February 12th, 2014

Whirlpool Wmh32517as Installation Instructions

Cannot down on iPad.

Current Answers

Answer #1: Posted by NDJay on February 12th, 2014 11:22 AM
NDJay

Member since:
January 13th, 2014

Points: 68,290
90
points
Whirlpool Wmh32517as Installation Instructions:

watch video link given below:


http://www.youtube.com/watch?v=30dkP4DmbCk


Hope it Help.


Hope it will helpful.
NDJay

Related Whirlpool WMH32517AS Manual Pages

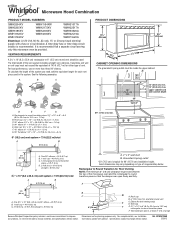
Installation Instructions - Page 1

... Dimensions 3 Electrical Requirements 3 INSTALLATION INSTRUCTIONS 4 Remove Mounting Plate 4 Rotate Blower Motor 4 Locate Wall Stud(s 6 Mark Rear Wall 7 Drill Holes in Rear Wall 7 Attach Mounting Plate to reduce the chance of injury, and tell you how to Wall 8 Prepare Upper Cabinet 8 Install Damper Assembly 9 Install the Microwave Oven 9 Complete Installation 10 VENTING DESIGN...
Installation Instructions - Page 2

... charcoal filter may not be installed. Special Requirements For Wall Venting Installation Only: ■ Cutout must provide: ■ Minimum installation dimensions. Check with any obstructions so that the damper blade can open freely and fully. Read and follow the instructions provided with your builder or cabinet supplier to back of microwave oven) Cardboard template (part of...
Installation Instructions - Page 3

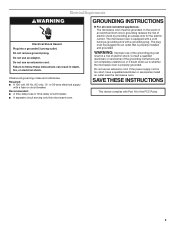
... must be plugged into a grounded 3 prong outlet. Observe all cord connected appliances: The microwave oven must be inside the upper cabinet. Required: ■ A 120 Volt, 60 Hz, AC only, 15- SAVE THESE INSTRUCTIONS 3 Failure to whether the microwave oven is properly installed and grounded. Do not use of the grounding plug can result in a risk of...
Installation Instructions - Page 4

... is being handled. Blower motor 5. For wall or roof venting, changes must be attached to back of microwave oven. Remove 2 screws attaching blower motor to the back of the microwave oven. Lift blower motor out of microwave oven. Screws B. INSTALLATION INSTRUCTIONS Remove Mounting Plate Depending on your model, the mounting plate may be in the foam packaging, or...
Installation Instructions - Page 5

... IMPORTANT: If blower motor is not correctly oriented, the 2 screws removed in Step 3 of the microwave oven. Screws C. Repeat Step 1 from "Wall Venting Installation Only." 5. Reattach blower motor to back of microwave oven with flat sides facing the back of microwave oven. Securely tighten screws. Reattach damper plate. Slots 8. A 6. NOTE: If blower motor is not positioned with...
Installation Instructions - Page 6

... show examples of each stud, and draw a plumb line down each stud center. Wall stud centerlines D. Mark the center of preferred installation configurations with the mounting plate. No Wall Studs at End Holes Figure 1 No Wall Studs at Both End Holes Figure 4 B D... A A E E E E F F NOTE: If wall stud is within the opening. Cabinet opening , do not install the microwave oven. 1.
Installation Instructions - Page 7

...Holding the cardboard template in place, mark both holes in the shaded areas are 3 installation configurations. With the support tabs facing forward (see illustrations in Step 9 to the...the 2 horizontal, level lines through the wall at End Holes (Figures 1 & 2) 1. Mark Rear Wall The microwave oven must be 14¹⁄₈" (35.9 cm) from the centerline. 5. or if both sides of the ...
Installation Instructions - Page 8

... hole marked in Step 3 of "Mark Rear Wall." Installation for Wall Stud at End Holes" in the "Drill Holes in Step 2 of "Installation for the toggle nut to use as guides. ■ If the wall behind the microwave oven (as at the end hole marked in Rear Wall" ...open . 3. NOTES: ■ If the upper cabinet has a frame around it is level. 8. With the support tabs of the microwave oven.
Installation Instructions - Page 9

... the top, and the damper blade opens away from the microwave oven. Position the damper assembly on the back of the microwave oven so that damper blade moves freely, and opens fully. 2. A B C D Install the Microwave Oven WARNING Excessive Weight Hazard Use two or more people, lift microwave oven and hang it on support tabs at the circular shaded area...
Installation Instructions - Page 10

.... A 2. Failure to damper assembly. Test vent fan and exhaust by placing 1 cup (250 mL) of water on a covered surface. 8. Save Installation Instructions for troubleshooting information. Long tab F. Raised tabs B. With the microwave oven centered, and with sheet metal screw. Damper assembly (under the raised tabs of 1 minute at least one person holding it in...
Installation Instructions - Page 11

Rectangular to Round Transition NOTE: The minimum 3" (7.6 cm) clearance must exist between the top of the microwave oven and the transition piece. A B C D E 3" (7.6 cm) F A. See the examples in the vent system ■ using recirculation installation. Roof cap: 3¹⁄₄" x 10" = 24 ft (8.3 x 25.4 cm = 7.3 m) C. 90° elbow: 3¹ ₄" x 10" = 25 ft (8.3 x 25.4 ...
Installation Instructions - Page 12

...microwave oven. W10247296B SP PN W10345003B © 2010. For best performance, use when installing this microwave oven in a 36" (91.4 cm) or 42" (106.7 cm) wide opening , behind the microwave oven... call us at our toll free number or visit our website listed in the User Instructions. Replacement Parts If any of available replacement parts. ASSISTANCE Call your authorized dealer or ...
Dimension Guide - Page 1

... Elbow (for 66" (167.6 cm) installation height. Wall cap F E. 3 " x 10" to 6" (8.3 x 25.4 cm to 15.2 cm) rectangular to 15.2 cm = 1.5 m) B. Vent extension piece, at least 3" (7.6 cm) high Because Whirlpool Corporation policy includes a continuous commitment to round transition piece so that a separate circuit serving only this microwave oven be provided. or 20-amp fused electrical...
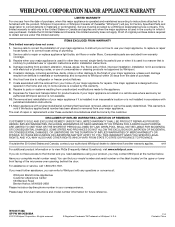
Warranty Information - Page 1

... not installed in accordance with electrical or plumbing codes, or use or when it is used in a manner that have access to the Internet and you need further assistance, you on the upper or lower front facing of the microwave oven opening, behind the door. The removal and reinstallation of your authorized Whirlpool dealer...
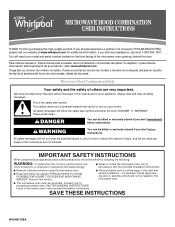
Use & Care Guide - Page 1

... with the provided Installation Instructions. ■ Read all safety messages. This symbol alerts you to excessive microwave energy: ■ Install or locate the microwave oven only in this ....whirlpool.com for example, closed glass jars - MICROWAVE HOOD COMBINATION USER INSTRUCTIONS THANK YOU for purchasing this manual and on the front facing of the microwave oven opening...
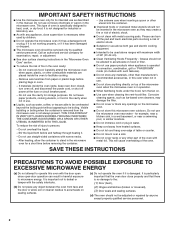
Use & Care Guide - Page 2

It is not always present. Call an authorized service company for examination, repair, or adjustment. ■ See door surface cleaning instructions in the oven cavity: - Remove wire twist-ties from the microwave oven is not designed for industrial or laboratory use. ■ As with any other combustible materials are able to be allowed to stand...
Use & Care Guide - Page 3

... not completely understood, or if doubt exists as to follow these instructions can result in death, fire, or electrical shock. Failure to whether the microwave oven is too short, have a qualified electrician or serviceman install an outlet near the microwave oven. Do not use an adapter. Do not use an extension cord. or 20-amp electrical...
Use & Care Guide - Page 6

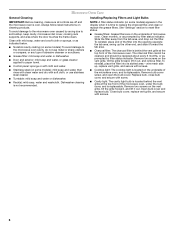
...Installing/Replacing Filters and Light Bulbs NOTE: A filter status indicator (on some models) appears in the display when it toward the tab area. ■ Charcoal filter: The charcoal filter is time to reset filter status. ■ Grease filters: Grease filters are off and the microwave oven...the top front of the microwave oven. Always follow label instructions on the vent grille, tilt the ...
Use & Care Guide - Page 7

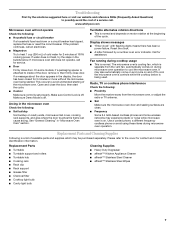
www.whirlpool.com Microwave oven will not operate Check the following : ■ Soil buildup Soil buildup on cavity walls, microwave inlet cover, cooking rack ...Steel Cleaner ■ affresh™ Stainless Steel Wipes 7 It may be purchased separately. Arcing in "Microwave Oven Care" section. If water does not heat, try the solutions suggested here or visit our website ...
Use & Care Guide - Page 8

...instructions attached to or furnished with published installation instructions. 11. All rights reserved. ® Registered Trademark/TM Trademark of God, improper installation, installation not in a remote area where service by a Whirlpool...the microwave oven opening, behind the door. Consumable parts are excluded from the date of consumables or cleaning products not approved by Whirlpool. ...

Whirlpool Knowledge Base Results

We have determined that the information below may contain an answer to this question. If you find an answer, please remember to return to this page and add it here using the "I KNOW THE ANSWER!" button above. It's that easy to earn points!

  • What is the Popcorn Sensor on my SpeedCook microwave oven with convection, and how do I use it?
    .... The display will start counting down the time when sensing has finished. Follow manufacturer's instructions when using a microwave popcorn popper. The oven will return to  one package of -cycle tones will sound, followed by brand and fat content. Installing a trash compactor bag Popcorn is sensing and will determine accurate popping times for optimal...
  • My gas oven cooking results are not what I expected
    ... the displayed amount. Level the appliance. See the Installation Instructions in your Use and Care Guide. Is the proper temperature set ? See "Baking and roasting" section below . Is there proper air circulation around bakeware? Is the batter evenly distributed in a reliable cookbook. Oven temperature control Do not use the bakeware size recommended...
  • My TV, radio or cordless phone is interfering with my microwave oven
    ... TV, radio or cordless phone is on Bottom Gas cooktops FAQs Knowledgebase search tips How to install or replace the water filter Animation- Are the microwave oven door and sealing surfaces clean? Move the receiver away from the microwave oven or adjust the radio or TV antenna. Freezer on . Use a corded phone, a different frequency cordless...

Similar Questions

What Would Be The Newest Version With Same Size As This Microwave Oven
What Would Be The Newest Version With Same Size As This Microwave Oven (wmc50522as)
(Posted by chicity1992 5 months ago)
The Timer Light
The timer light went out on the microwave. What can I do to fix it. Can not see at all.
(Posted by juaspencer 9 years ago)
Whirlpool Microwave Installation Instructions
what is the minimum recommended clearance between the bottom of the microwave and thr top of the ele...
(Posted by jmlmrose2 9 years ago)
Installation Instructions
I do not think my microwave was installed correctly and the instructions were not left. Is there a p...
(Posted by thebryants2 12 years ago)
Ask a New Question
Use the box below to post a new question about this Whirlpool product .
Points & Prizes
  • You can earn points for nearly everything you do on HelpOwl.com
  • You can trade in those points for gift cards at leading retailers such as Amazon.com and Walmart
  • It's that simple!
See How it Works
Create a Free Account

Whirlpool Manuals

Find free Whirlpool WMH32517AS manuals and user guides available at ManualOwl.com. Try out our unique manual viewer allowing you to interact with manuals from directly within your browser!

Whirlpool Reviews

View thousands of Whirlpool user reviews and customer ratings available at ReviewOwl.com.

Contact Information

Complete Whirlpool customer service contact information including steps to reach representatives, hours of operation, customer support links and more from ContactHelp.com.

Scoreboard Ratings

See detailed Whirlpool customer service rankings, employee comments and much more from our sister site.

Whirlpool Recalls

Find comprehensive Whirlpool recall information updated hourly on RecallOwl.com.