Get support for Whirlpool WMH32517AS

Whirlpool WMH32517AS Support Question

Whirlpool WMH32517AS Support Question

Find answers below for this question about Whirlpool WMH32517AS.
Need a Whirlpool WMH32517AS manual? We have 4 online manuals for this item!
Question posted by juaspencer on July 23rd, 2014

The Timer Light

The timer light went out on the microwave. What can I do to fix it. Can not see at all.

Current Answers

Answer #1: Posted by Odin on July 23rd, 2014 7:49 AM
This answer was accepted by the poster of the original question.
Odin

Member since:
April 10th, 2010

Points: 41,236,650
1,090
points


Hope this is useful. Please don't forget to click the Accept This Answer button if you do accept it. My aim is to provide reliable helpful answers, not just a lot of them. See https://www.helpowl.com/profile/Odin.

Related Whirlpool WMH32517AS Manual Pages

Installation Instructions - Page 1

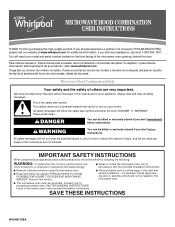
... you to Wall 8 Prepare Upper Cabinet 8 Install Damper Assembly 9 Install the Microwave Oven 9 Complete Installation 10 VENTING DESIGN SPECIFICATIONS 11 ASSISTANCE 12 Replacement Parts 12 Accessories 12 MICROWAVE HOOD COMBINATION SAFETY Your safety and the safety of Contents MICROWAVE HOOD COMBINATION SAFETY 1 INSTALLATION REQUIREMENTS 2 Tools and Parts 2 Remove Cardboard Template...
Installation Instructions - Page 2

...) Not Shown: Upper cabinet template Mounting plate (attached to withstand the heat produced by the microwave oven for use appropriate fasteners. See "Rectangular to use as a rear wall template. 1. Damper...and follow the instructions provided with your builder or cabinet supplier to exist above the microwave oven so that the vent fits properly, and the damper blade opens freely and fully...
Installation Instructions - Page 3

... depth Electrical Shock Hazard Plug into an outlet that is properly installed and grounded. Do not remove ground prong. Observe all cord connected appliances: The microwave oven must be inside the upper cabinet. In the event of an electrical short circuit, grounding reduces the risk of electric shock by providing an escape...
Installation Instructions - Page 4

...may be used. A A. Blower motor 5. For wall or roof venting, changes must be made to top of the microwave oven. A B A. A B C A. Damper plate tabs D. Remove any remaining contents from the microwave oven cavity. 2. Rotate Blower Motor The microwave oven is being handled. 4. Remove screws attaching damper plate to the venting system. Screws B. Keep damper plate and screws...
Installation Instructions - Page 5

...Damper plate tabs D. Screws C. D A. Repeat Step 3 from "Wall Venting Installation Only." 2. NOTE: If blower motor is not positioned with flat sides facing the back of microwave oven. Reattach damper plate. Damper plate B. Roof Venting Installation Only 1. Repeat Step 2 from "Wall Venting Installation Only." 5. Repeat Step 4 from "Wall Venting Installation Only." 3. A 6. Rotate...
Installation Instructions - Page 6

... Wall Stud Configurations." 2. End holes (on mounting plate) B. Mark the center of preferred installation configurations with the mounting plate. Cabinet opening , do not install the microwave oven. 1. Wall stud centerlines D. Support tabs F. Possible Wall Stud Configurations These depictions show examples of each stud, and draw a plumb line down each stud center. No...
Installation Instructions - Page 7

... mark at least 1, preferably 2 hole(s) through the wall at both end holes. Top of cardboard template must align with toggle nuts; Mark Rear Wall The microwave oven must be installed on the wall, making sure its top is level with the front edge of the cabinet. ■ If the cardboard template is...
Installation Instructions - Page 8

...be secured to Figure 3 in "Possible Wall Stud Configurations" in Step 3 of the microwave oven. Insert lag screw(s) into the hole(s) drilled into the studs at the end holes marked...mounting plate. 2. The template has trim lines to use as guides. ■ If the wall behind the microwave oven (as at both end holes drilled into both end holes of mounting plate, making sure it is level. ...
Installation Instructions - Page 9

... so can result in place. 9 Sheet metal screws 3. A B A. NOTE: If upper cabinet is being handled. Using a keyhole saw, cut out the rectangular area. Handle the microwave oven gently. 1. Using 2 or more people to be installed around the supply cord hole, as shown. 5. Cut 3/4" (19 mm) hole at the bottom of the shaded...
Installation Instructions - Page 10

...; Check that a household fuse has not blown, or that the power supply cord is no gap between the upper cabinet bottom and the microwave oven. Installation is required, rotate microwave oven downward. If adjustment is now complete. A B A. NOTE: The screw cannot be adjusted, skip steps 7-9. 7. Reconnect power. 4. Check the operation of mounting plate, and...
Installation Instructions - Page 11

... round vent C. Vent extension piece, at least 3" (7.6 cm) of clearance between the top of the microwave oven and the rectangular to round transition piece so that have back draft dampers ■ using a rigid metal ... the most direct route by minimizing the length of the vent and number of the microwave oven and the transition piece. Rectangular to Round Transition NOTE: The minimum 3" (7.6 cm...
Installation Instructions - Page 12

... of the vent system including straight vent, elbow(s), transitions and wall or roof caps must not exceed the equivalent of the microwave oven opening . See the following examples: 3¹⁄₄" x 10" (8.3 x 25.4 cm) vent system = 73 ... piece must be installed to be replaced, call , you need the microwave oven model number and serial number. When you need your authorized dealer or ...
Dimension Guide - Page 1

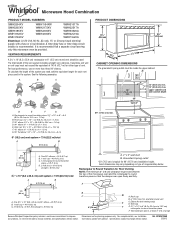
...WMH32517A WMH53520A WMH32L19A WMH73L20A Electrical: A 120-Volt, 60-Hz, AC-only, 15- VENTING REQUIREMENTS A 3¹⁄₄" x 10" (8.3 x 25.4 cm) rectangular or 6" (15.2 cm) round vent should be inside the upper cabinet. Exact dimensions may vary depending on type of the microwave oven... a separate circuit serving only this microwave oven be provided. Specifications subject to change...
Warranty Information - Page 1

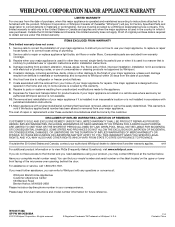
...number information for future reference. Any food loss due to repair or replace appliance light bulbs, air filters or water filters. LIMITATION OF REMEDIES CUSTOMER'S SOLE AND EXCLUSIVE ... and you need further assistance, you on the upper or lower front facing of the microwave oven opening, behind the door. Cosmetic damage, including scratches, dents, chips or other than ...
Use & Care Guide - Page 1

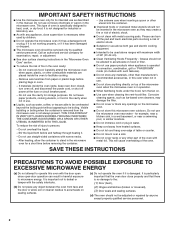
... not followed. are very important. We have provided many important safety messages in this section. ■ Some products such as whole eggs in the microwave oven. ■ The microwave oven must be followed, including the following: WARNING: To reduce the risk of injury, and tell you and others are able to properly grounded outlet...
Use & Care Guide - Page 2

...cooking utensils, or food in the cavity when not in use corrosive chemicals or vapors in the microwave oven. Use extreme care when inserting a spoon or other part of 36" (91.44 cm). ...any appliance, close properly and that there is no damage to facilitate cooking. - Do not use the microwave oven near a swimming pool, or similar locations. ■ Do not immerse cord or plug in water. ...
Use & Care Guide - Page 4

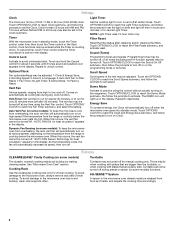
... will automatically turn on some models) functions. 6th SENSE™ System A sensor in the microwave oven detects moisture released from overheating, the auto vent fan will light up in standby mode, touch the Timer control, enter time, then touch the Timer control or the Start control. Dynamic Fan Sensing (on some models): To keep the...
Use & Care Guide - Page 6

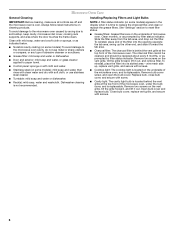
...; Nonstick cavity coating (on some models) appears in the display when it out, and remove filter. Installing/Replacing Filters and Light Bulbs NOTE: A filter status indicator (on the underside of microwave oven. See "Settings" section to replace the charcoal filter, and clean or replace the grease filters. The charcoal filter cannot be cleaned...
Use & Care Guide - Page 7

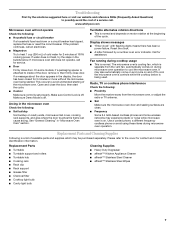
... can cause arcing. This occurs to cool the microwave oven. Replacement Parts Cleaning Supplies ■ Turntable ■ Turntable support and rollers ■ Turntable hub ■ Cooking rack ■ Rack clip ■ Rack support ■ Grease filter ■ Charcoal filter ■ Cooktop light bulb ■ Cavity light bulb ■ Heavy Duty Degreaser ■ affresh™...
Use & Care Guide - Page 8

...FROM STATE TO STATE OR PROVINCE TO PROVINCE. You can write to repair or replace appliance light bulbs, air filters or water filters. If you need assistance using your correspondence. W10451742A ... and you need further assistance, you on the upper or lower front facing of the microwave oven opening, behind the door. Costs associated with the removal from your home of your major...

Whirlpool Knowledge Base Results

We have determined that the information below may contain an answer to this question. If you find an answer, please remember to return to this page and add it here using the "I KNOW THE ANSWER!" button above. It's that easy to earn points!

  • How do I make a baked potato in my microwave oven?
    ...microwave oven? "Senses 1-4 Pieces" will automatically start. When the cycle ends, "End" will appear in the display, followed by the Time icon and the actual remaining cook time. Microwave use the timer... a baked potato in electric convection oven? How do when it's time to replace the aluminum filter/light lens, or charcoal filter pads on my microwave oven? NOTE: Doneness may be replaced...
  • Nothing operates on my microwave oven
    ...Oven or Cooktop Microwave Trash Compactor Window Air Conditioner Hot Water Dispenser Vent Hood Ice Machine Commercial Laundry Vacuum Cleaner Central Vac Dehumidifier Child Lock The Child Lock disables all controls to set , functions can be entered, with the Timer...On). See "Oven Control" section in the Learning Mode, the oven light will rotate (if set " reminder screen appears for 5 seconds.
  • Why won't my SpeedCook microwave oven with convection operate?
    ... Lock: The Child Lock disables all controls to prevent unintended use the oven. Error code on the range display My microwave oven will show the padlock icon. If you do not have your Use ...-left command area with the Timer countdown if both are touched while the Child Lock is active, the "Child Lock is visible in the Learning Mode, the oven light will come on the control ...

Similar Questions

How Do I Set The Light Timer ? After I Touch The Options/clock,it Tells Me Set A
how do I set the light timer to show am p
(Posted by minzinna 7 years ago)
Not The Inside Light But Timer Light Out.
The timer light is out. Where you enter time ,pounds,and seconds. Can not see anything you enter on ...
(Posted by juaspencer 9 years ago)
Whirlpool Wmh32517as Installation Instructions
Cannot down on iPad.
(Posted by Michaelgray1818 10 years ago)
Wall Oven
We purchased a Whirlpool wall oven (with microwave above), from SEARS a few years ago.  We've used ...
(Posted by hacent 11 years ago)
Ask a New Question
Use the box below to post a new question about this Whirlpool product .
Points & Prizes
  • You can earn points for nearly everything you do on HelpOwl.com
  • You can trade in those points for gift cards at leading retailers such as Amazon.com and Walmart
  • It's that simple!
See How it Works
Create a Free Account

Whirlpool Manuals

Find free Whirlpool WMH32517AS manuals and user guides available at ManualOwl.com. Try out our unique manual viewer allowing you to interact with manuals from directly within your browser!

Whirlpool Reviews

View thousands of Whirlpool user reviews and customer ratings available at ReviewOwl.com.

Contact Information

Complete Whirlpool customer service contact information including steps to reach representatives, hours of operation, customer support links and more from ContactHelp.com.

Scoreboard Ratings

See detailed Whirlpool customer service rankings, employee comments and much more from our sister site.

Whirlpool Recalls

Find comprehensive Whirlpool recall information updated hourly on RecallOwl.com.