Get support for Whirlpool WMH32517AS

Whirlpool WMH32517AS Support Question

Whirlpool WMH32517AS Support Question

Find answers below for this question about Whirlpool WMH32517AS.
Need a Whirlpool WMH32517AS manual? We have 4 online manuals for this item!
Question posted by juaspencer on July 23rd, 2014

Not The Inside Light But Timer Light Out.

The timer light is out. Where you enter time ,pounds,and seconds. Can not see anything you enter on front panel.

Current Answers

There are currently no answers that have been posted for this question.
Be the first to post an answer!

Remember that you can earn up to 1,100 points for every answer you submit. The better the quality of your answer, the better chance it has to be accepted.

Related Whirlpool WMH32517AS Manual Pages

Installation Instructions - Page 1

... use above electric or gas cooking products up to Wall 8 Prepare Upper Cabinet 8 Install Damper Assembly 9 Install the Microwave Oven 9 Complete Installation 10 VENTING DESIGN SPECIFICATIONS 11 ASSISTANCE 12 Replacement Parts 12 Accessories 12 MICROWAVE HOOD COMBINATION SAFETY Your safety and the safety of injury, and tell you what the potential hazard is...
Installation Instructions - Page 2

... and building materials are not designed to make sure there is for weight of 150 lbs (68 kg), which includes microwave oven and items placed inside the microwave oven and upper cabinet. ■ Grounded electrical outlet inside the perforation is at least 6" (15.2 cm) of the cardboard packaging. 2. For Roof Venting Installation Only: ■ If you...
Installation Instructions - Page 3

...Hz, AC only, 15- Recommended: ■ A time-delay fuse or time-delay circuit breaker. ■ A separate circuit serving only this microwave oven. Product Dimensions 17¹⁄₄" (43.8 ...30.5 cm) min. 14" (35.6 cm) max. Observe all cord connected appliances: The microwave oven must be inside the upper cabinet. Do not use an adapter. Do not use of the grounding plug can ...
Installation Instructions - Page 4

... for recirculation installation. Screws (in Step 3. 7. Screws C. A A. Rotate Blower Motor The microwave oven is being handled. Remove any remaining contents from the microwave oven cavity. 2. Lift blower motor out of microwave oven exterior. NOTE: Skip this section if you are inserted into the microwave oven. Rotate blower motor 180° so that door does not swing open...
Installation Instructions - Page 5

... tabs D. Damper plate B. Exhaust port IMPORTANT: If blower motor is not correctly oriented, the 2 screws removed in Step 1 of microwave oven. Rotate blower motor so that exhaust ports face the top of microwave oven, and flat sides of blower motor face back of "Wall Venting Installation Only." 5 Repeat Step 1 from "Wall Venting Installation Only...
Installation Instructions - Page 6

... Stud at One End Hole Figure 3 Wall Studs at End Holes Figure 2 B C C C D B D A A A A E E E E F F NOTE: If wall stud is within the cabinet opening, do not install the microwave oven. 1.
Installation Instructions - Page 7

..., find and clearly mark the vertical centerline of the cutout area. 14. Using a keyhole saw, cut out the venting cutout area. Mark Rear Wall The microwave oven must be 14¹⁄₈" (35.9 cm) from the centerline. 5. Top of cardboard template must align with front edge of the upper cabinet, and...
Installation Instructions - Page 8

...(Figures 1 & 2) NOTE: The mounting plate must be against the rear wall so that it fits inside the frame, against drywall. 5. C A 6. Disconnect power to the thickest part of mounting plate, ...F E 10" G (25.4 cm) Insert a lag screw into both end holes of the microwave oven. If installing on a second wall stud, drill a 3/16" (5 mm) hole into the upper cabinet align with toggle nuts...
Installation Instructions - Page 9

... plate. Using 2 or more people to do not grip or use the door or door handle while the microwave oven is at the circular shaded area "G" on each 1/4-20 x 3" flat-head bolt and place inside upper cabinet near the 3/8" (10 mm) holes. 2. Sheet metal screws 3. Support tabs 4. NOTE: If venting through the power...
Installation Instructions - Page 10

... For Roof Venting Installation Only 1. Upper cabinet cutout E. Do not remove ground prong. Plug microwave oven into a grounded 3 prong outlet. Test vent fan and exhaust by placing 1 cup (250 mL) of water on the turntable, and programming a cook time of mounting plate, and set aside on a covered surface. 8. Save Installation Instructions for troubleshooting...
Installation Instructions - Page 11

... fully. A B C D E 3" (7.6 cm) F A. Elbow (for installation are for use when figuring vent length. Vent extension piece, at least 3" (7.6 cm) of clearance between the top of the microwave oven and the rectangular to round transition piece so that there is proper clearance within walls or ceilings, attics, crawl spaces or garages. Roof cap: 3¹...
Installation Instructions - Page 12

.... For best performance, use when installing this microwave oven in a 36" (91.4 cm) or 42" (106.7 cm) wide opening , behind the microwave oven door on the front facing of the system you need the microwave oven model number and serial number. To calculate the length of the microwave oven opening . Each panel is a list of the vent system including...
Dimension Guide - Page 1

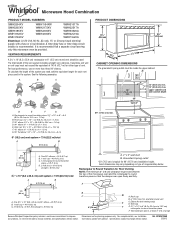
...time-delay fuse or time...Microwave Hood Combination PRODUCT MODEL NUMBERS GMH3204XV GMH5205XV GMH6185XV WMH1162XV WMH1163XV WMH1164XW WMH2175XV WMH2205XV WMH3205XV WMH31017A WMH32517A...8324;" x 10" (8.3 x 25.4 cm) rectangular or 6" (15.2 cm) round vent should be inside the upper cabinet. A B 30" (76.2 cm) min. 33" (83.8 cm) typical* 12... only this microwave oven be provided. Specifications subject to...
Warranty Information - Page 1

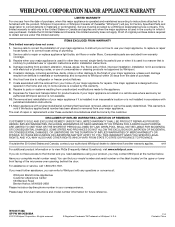
... information for future reference. Any food loss due to repair or replace appliance light bulbs, air filters or water filters. The cost of original purchase date is ...to parts or systems resulting from accident, alteration, misuse, abuse, fire, flood, acts of the microwave oven opening, behind the door. The removal and reinstallation of Whirlpool, U.S.A. 1/12 Printed in a manner...
Use & Care Guide - Page 1

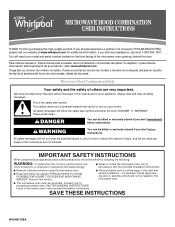
... WARNING You can happen if the instructions are not followed. All safety messages will follow instructions. are very important. IMPORTANT SAFETY INSTRUCTIONS When using the microwave oven. ■ Read and follow instructions. If you should be killed or seriously injured if you don't follow the specific "PRECAUTIONS TO AVOID POSSIBLE EXPOSURE TO...
Use & Care Guide - Page 2

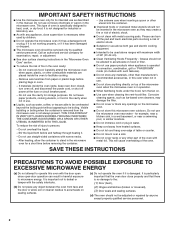
... or circuit breaker panel. - It is particularly important that there is damaged. Do not leave paper products, cooking utensils, or food in the cavity when not in use. ■ Liquids, such as water, coffee, or tea are placed inside the oven ignite, keep oven door closed, turn the fan on the microwave oven. ■ Do not...
Use & Care Guide - Page 4

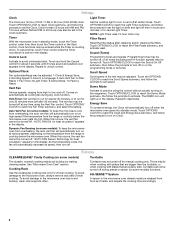
... automatically decrease its speed, then turn off or on some models): To keep the microwave oven from the range or cooktop below the microwave oven. When this occurs, the vent fan cannot be turned off time in the display. NOTE: Light Timer uses 12-hour clock only. Touch OPTIONS/CLOCK to reach the Demo Mode submenu, the...
Use & Care Guide - Page 6

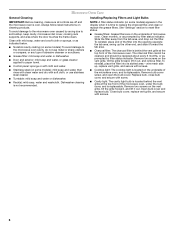
...toward the tab area. ■ Charcoal filter: The charcoal filter is time to paper towel. ■ Control panel: sponge or soft cloth and water. ■ Stainless steel (on ... with screws. ■ Cooktop light: The cooktop light is located on some models): To avoid damage to the microwave oven caused by filter status indicator. Microwave Oven Care General Cleaning IMPORTANT: Before cleaning...
Use & Care Guide - Page 7

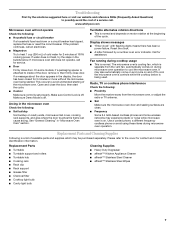
... the following : ■ Proximity Move the receiver away from the vent fan, automatically comes on during microwave oven operation to cool the microwave oven. Turntable alternates rotation directions ■ This is normal and depends on . Display shows messages ■ "Enter clock" with flashing digits means there has been a power failure. Call for 5 minutes or more...
Use & Care Guide - Page 8

...with published installation instructions. 11. Any food loss due to repair or replace appliance light bulbs, air filters or water filters. Repairs to parts or systems resulting from warranty ... Damage resulting from accident, alteration, misuse, abuse, fire, flood, acts of the microwave oven opening, behind the door. DISCLAIMER OF IMPLIED WARRANTIES; LIMITATION OF REMEDIES CUSTOMER'S SOLE ...

Whirlpool Knowledge Base Results

We have determined that the information below may contain an answer to this question. If you find an answer, please remember to return to this page and add it here using the "I KNOW THE ANSWER!" button above. It's that easy to earn points!

  • What is the Time/Temp/Power Cooking control on my Speedcook microwave oven with convection?
    ... changed . What is for my convertible range hood and I use : Touch "Time/Temp/Power" on my Speedcook microwave oven with convection, and how do I cook foods manually using my microwave oven? Time/Temp/Power cooking The Time/Temp/Power control on the Main Menu is the Time/Temp/Power Cooking control on the Main Menu. There are...
  • How does combination microwave-convection cooking work and how do I use it?
    ... after the cycle has ended. How do I use "+" or "-" controls, or touch number pad to set to 100°F (38°C), or from which to enter the cook time in my microwave oven? Combination cooking may be changed. Some of beef can be roasted and tenderized using it with my SpeedCook...
  • How do I clean the coil elements on my electric range?
    ... cooktop work? IMPORTANT: Before cleaning, make sure all controls are off and the oven and cooktop are the parts and features on the control panel of my electric drop-in water. appliances How do I clean the rack supports on my microwave oven? What are cool. Cleaning Method: Damp cloth: Make sure control knobs are...

Similar Questions

The Timer Light
The timer light went out on the microwave. What can I do to fix it. Can not see at all.
(Posted by juaspencer 9 years ago)
Whirlpool Wmh32517as Installation Instructions
Cannot down on iPad.
(Posted by Michaelgray1818 10 years ago)
Inside Light
When the door is opened the light inside flashes on and off constantly.
(Posted by garygirouard03060 11 years ago)
Ask a New Question
Use the box below to post a new question about this Whirlpool product .
Points & Prizes
  • You can earn points for nearly everything you do on HelpOwl.com
  • You can trade in those points for gift cards at leading retailers such as Amazon.com and Walmart
  • It's that simple!
See How it Works
Create a Free Account

Whirlpool Manuals

Find free Whirlpool WMH32517AS manuals and user guides available at ManualOwl.com. Try out our unique manual viewer allowing you to interact with manuals from directly within your browser!

Whirlpool Reviews

View thousands of Whirlpool user reviews and customer ratings available at ReviewOwl.com.

Contact Information

Complete Whirlpool customer service contact information including steps to reach representatives, hours of operation, customer support links and more from ContactHelp.com.

Scoreboard Ratings

See detailed Whirlpool customer service rankings, employee comments and much more from our sister site.

Whirlpool Recalls

Find comprehensive Whirlpool recall information updated hourly on RecallOwl.com.