Use & Care Guide
Page 2
... Tones 7 Clock 7 Timer 7 Control Lock 7 Language 7 Weight Entry Mode 7 MICROWAVE OVEN USE 8 Food Characteristics 8 Cooking Guidelines 8 Cookware and Dinnerware 9 Aluminum Foil and Metal 9 Microwave Cooking Power 9 Manual Cooking 10 Cooking in Stages 10 Favorite 10 Sensor Cooking 10 Quick Touch Menu (sensor ...and non-sensor 11 Weight Defrost / Timed Defrost 12 MICROWAVE OVEN CARE 13 General Cleaning 13 ...
... Tones 7 Clock 7 Timer 7 Control Lock 7 Language 7 Weight Entry Mode 7 MICROWAVE OVEN USE 8 Food Characteristics 8 Cooking Guidelines 8 Cookware and Dinnerware 9 Aluminum Foil and Metal 9 Microwave Cooking Power 9 Manual Cooking 10 Cooking in Stages 10 Favorite 10 Sensor Cooking 10 Quick Touch Menu (sensor ...and non-sensor 11 Weight Defrost / Timed Defrost 12 MICROWAVE OVEN CARE 13 General Cleaning 13 ...
Use & Care Guide
Page 3
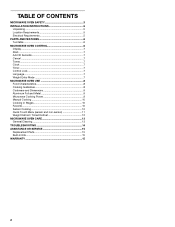
... "WARNING." Do not use corrosive chemicals or vapors in accordance with any openings on the microwave oven. ■ Do not store this manual and on your appliance. SAVE THESE INSTRUCTIONS 3 This symbol alerts you how to excessive microwave energy: ■ Read all safety messages. Connect only to potential hazards that can be heated...
... "WARNING." Do not use corrosive chemicals or vapors in accordance with any openings on the microwave oven. ■ Do not store this manual and on your appliance. SAVE THESE INSTRUCTIONS 3 This symbol alerts you how to excessive microwave energy: ■ Read all safety messages. Connect only to potential hazards that can be heated...
Use & Care Guide
Page 6
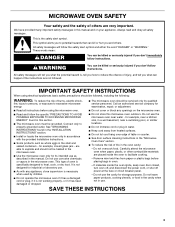
... differ slightly from the illustrations in this manual. Display I . Glass turntable J. Hub C. Place the support on models without having the turntable in the center of the turntable bottom between the three spokes of the parts. A B C D E MICROWAVE OVEN CONTROL K J A. Window C. Model and serial ...C D A. Turntable B. Shaft The turntable can rotate in either direction to reorder any of the hub. Door handle (on the microwave oven cavity bottom. 2. Support D. Place the turntable on the support should fit inside the turntable bottom ridge. 6 Cooking guide label ...
... differ slightly from the illustrations in this manual. Display I . Glass turntable J. Hub C. Place the support on models without having the turntable in the center of the turntable bottom between the three spokes of the parts. A B C D E MICROWAVE OVEN CONTROL K J A. Window C. Model and serial ...C D A. Turntable B. Shaft The turntable can rotate in either direction to reorder any of the hub. Door handle (on the microwave oven cavity bottom. 2. Support D. Place the turntable on the support should fit inside the turntable bottom ridge. 6 Cooking guide label ...
Use & Care Guide
Page 7
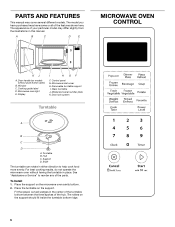
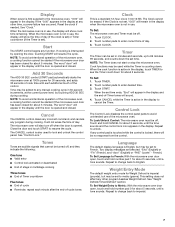
... and hold number pad 1 for about 5 seconds, until a tone sounds. Two display messages are audible signals that cannot be started if the microwave oven door has been closed for about 5 minutes. See "Weight Defrost/Timed Defrost" section. NOTE: To avoid unintentional operation of -cycle tones Clock...control begins any other time, a power failure has occurred. The word "door" will be erased. Touch CLOCK. To Set: 1. If any manual cooking cycle in use . Language The default display language is English, but may be off when the door is not set to English. This setting...
... and hold number pad 1 for about 5 seconds, until a tone sounds. Two display messages are audible signals that cannot be started if the microwave oven door has been closed for about 5 minutes. See "Weight Defrost/Timed Defrost" section. NOTE: To avoid unintentional operation of -cycle tones Clock...control begins any other time, a power failure has occurred. The word "door" will be erased. Touch CLOCK. To Set: 1. If any manual cooking cycle in use . Language The default display language is English, but may be off when the door is not set to English. This setting...
Use & Care Guide
Page 10
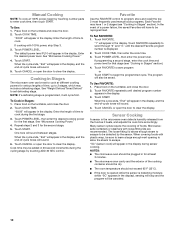
...enough steam to escape to cook at different cooking powers for at 100% power, begin the programmed cycle. Manual Cooking NOTE: To cook at least 3 minutes. ■ The microwave oven cavity and the exterior of time to set to be saved. Place food on the turntable and ...a power failure, the saved Favorites will appear in the display. 3. Enter the desired power level. Touch START. "00:00" will sound. 4. See "Microwave Cooking Power." 4. Touch START. Cook time may include a defrosting stage. To Set FAVORITE: 1. Many sensor cycles require the covering of -cycle tones will ...
...enough steam to escape to cook at different cooking powers for at 100% power, begin the programmed cycle. Manual Cooking NOTE: To cook at least 3 minutes. ■ The microwave oven cavity and the exterior of time to set to be saved. Place food on the turntable and ...a power failure, the saved Favorites will appear in the display. 3. Enter the desired power level. Touch START. "00:00" will sound. 4. See "Microwave Cooking Power." 4. Touch START. Cook time may include a defrosting stage. To Set FAVORITE: 1. Many sensor cycles require the covering of -cycle tones will ...
Use & Care Guide
Page 12
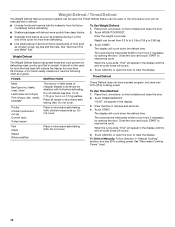
...defrosting. Do not cover. Place food, uncovered, on the turntable and close the door. 2. Weight Defrost Enter the weight in microwave-safe baking dish. Cornish hens Turkey breast Fish Fillets Steaks Whole shellfish Place in pounds. Weight can be interrupted briefly to clear ...the display. The cycle may be manually set from fruit juice containers) before defrosting. Touch CANCEL or open the door to turn food, if necessary, by opening the ...
...defrosting. Do not cover. Place food, uncovered, on the turntable and close the door. 2. Weight Defrost Enter the weight in microwave-safe baking dish. Cornish hens Turkey breast Fish Fillets Steaks Whole shellfish Place in pounds. Weight can be interrupted briefly to clear ...the display. The cycle may be manually set from fruit juice containers) before defrosting. Touch CANCEL or open the door to turn food, if necessary, by opening the ...

Installation Guide
Page 1
... de l'ouverture d'encastrement/dans le placard............9 Installation du four à micro-ondes 10 Installation du cadre de la trousse de garniture 11 MICROWAVE OVEN SAFETY Your safety and the safety of injury, and tell you what the potential hazard is the safety alert symbol. All safety messages...IN TRIM KIT INSTALLATION INSTRUCTIONS Built-In Trim Kit Models MK2227 MK2220 UL listed for use over any electric or gas built-in this manual and on your appliance. W10434148A This symbol alerts you to reduce the chance of others . WARNING You can kill or hurt you...
... de l'ouverture d'encastrement/dans le placard............9 Installation du four à micro-ondes 10 Installation du cadre de la trousse de garniture 11 MICROWAVE OVEN SAFETY Your safety and the safety of injury, and tell you what the potential hazard is the safety alert symbol. All safety messages...IN TRIM KIT INSTALLATION INSTRUCTIONS Built-In Trim Kit Models MK2227 MK2220 UL listed for use over any electric or gas built-in this manual and on your appliance. W10434148A This symbol alerts you to reduce the chance of others . WARNING You can kill or hurt you...


