

Use and Care Guide
Page 2
... Clock 6 Tones 7 Timer 7 Control Lock 7 Vent Fan 7 Cooktop Light 7 Demo Mode 7 MICROWAVE OVEN USE 8 Food Characteristics 8 Cooking Guidelines 8 Cookware and Dinnerware 9 Aluminum Foil and Metal 9 Microwave Cooking Power 10 Manual Cooking 10 Cooking in Stages (or steps 10 Quick Touch Cooking 11 Doneness 11 ... Cooking 11 Reheating 12 2-4 Plates 12 Defrosting 12 Warm Hold 13 MICROWAVE OVEN CARE 14 General Cleaning 14 Replacing Filters 15 Replacing Cooktop Light 15 Replacing Microwave Oven Light 16 TROUBLESHOOTING 17 ASSISTANCE OR SERVICE 19 Replacement Parts 19 ...
... Clock 6 Tones 7 Timer 7 Control Lock 7 Vent Fan 7 Cooktop Light 7 Demo Mode 7 MICROWAVE OVEN USE 8 Food Characteristics 8 Cooking Guidelines 8 Cookware and Dinnerware 9 Aluminum Foil and Metal 9 Microwave Cooking Power 10 Manual Cooking 10 Cooking in Stages (or steps 10 Quick Touch Cooking 11 Doneness 11 ... Cooking 11 Reheating 12 2-4 Plates 12 Defrosting 12 Warm Hold 13 MICROWAVE OVEN CARE 14 General Cleaning 14 Replacing Filters 15 Replacing Cooktop Light 15 Replacing Microwave Oven Light 16 TROUBLESHOOTING 17 ASSISTANCE OR SERVICE 19 Replacement Parts 19 ...
Use and Care Guide
Page 3
... is not always present. These words mean: You can burn off power at the fuse or circuit breaker panel. - Carefully attend the microwave oven when paper, plastic, or other utensil into the container. [] Oversized foods or oversized metal utensils should be followed, including the following...- Stir the liquid both before placing bags in accordance with metal scouring pads. After heating, allow the container to stand in the microwave oven for industrial or laboratory use the cavity for examination, repair, or adjustment. [] See door surface cleaning instructions in this manual. ...
... is not always present. These words mean: You can burn off power at the fuse or circuit breaker panel. - Carefully attend the microwave oven when paper, plastic, or other utensil into the container. [] Oversized foods or oversized metal utensils should be followed, including the following...- Stir the liquid both before placing bags in accordance with metal scouring pads. After heating, allow the container to stand in the microwave oven for industrial or laboratory use the cavity for examination, repair, or adjustment. [] See door surface cleaning instructions in this manual. ...
Use and Care Guide
Page 4
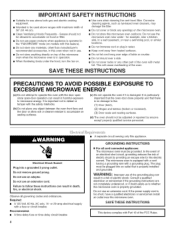
...breaker. [] A separate circuit serving only this appliance. GROUNDING INSTRUCTIONS [] For all governing codes and ordinances. WARNING: Improper use the microwave oven near water - SAVE THESE INSTRUCTIONS This device complies with a fuse or circuit breaker. Required: [] A 120 Volt, 60 Hz, AC only, 15-... sink, in death, fire, or electrical shock. Electrical Shock Hazard Plug into an outlet that there is no damage to whether the microwave oven is equipped with a cord having a grounding wire with metal foil. Do not use an adapter. It is particularly important that the...
...breaker. [] A separate circuit serving only this appliance. GROUNDING INSTRUCTIONS [] For all governing codes and ordinances. WARNING: Improper use the microwave oven near water - SAVE THESE INSTRUCTIONS This device complies with a fuse or circuit breaker. Required: [] A 120 Volt, 60 Hz, AC only, 15-... sink, in death, fire, or electrical shock. Electrical Shock Hazard Plug into an outlet that there is no damage to whether the microwave oven is equipped with a cord having a grounding wire with metal foil. Do not use an adapter. It is particularly important that the...
Use and Care Guide
Page 5
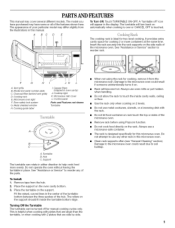
... when cooking is over or CANCEL OFF is ideal for manual cooking cycles only. Do not attempt to use a microwave-safe container. Microwave oven light F. Cooktop light K, Microwave inlet cover L. Hub C. Remove tape from the illustrations in this manual. Do not allow the rack to reorder rack... A. Place the support on the support should fit inside cavity walls, ceiling or floor. Place the turntable on the side walls of the microwave oven. PARTSANDFEATURES This manual may differ slightly from the hub. 2. HI JK L A. Door safety lock system G. Rack will turn back ...
... when cooking is over or CANCEL OFF is ideal for manual cooking cycles only. Do not attempt to use a microwave-safe container. Microwave oven light F. Cooktop light K, Microwave inlet cover L. Hub C. Remove tape from the illustrations in this manual. Do not allow the rack to reorder rack... A. Place the support on the support should fit inside cavity walls, ceiling or floor. Place the turntable on the side walls of the microwave oven. PARTSANDFEATURES This manual may differ slightly from the hub. 2. HI JK L A. Door safety lock system G. Rack will turn back ...

Use and Care Guide
Page 6
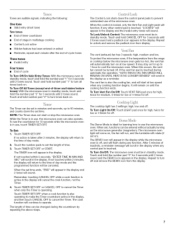
...at the current cook power. Touch CLOCK or START. Touch 0. 3. The time will disappear, and ":" will be adjusted, if necessary. When the microwave oven is opened. If cooking is a standard 12-hour clock (12:00-11:59) and does not show a.m. Touch CLOCK. 2. MICROWAVEOVENCONTROL QUICK ...the display. If not touched within 2 minutes after touching a pad, "PRESS START" will reappear in the display as a reminder. When the microwave oven is first supplied to 10 minutes, with each additional touch of cook time at any function. The speed of day. 3. Touch START ...
...at the current cook power. Touch CLOCK or START. Touch 0. 3. The time will disappear, and ":" will be adjusted, if necessary. When the microwave oven is opened. If cooking is a standard 12-hour clock (12:00-11:59) and does not show a.m. Touch CLOCK. 2. MICROWAVEOVENCONTROL QUICK ...the display. If not touched within 2 minutes after touching a pad, "PRESS START" will reappear in the display as a reminder. When the microwave oven is first supplied to 10 minutes, with each additional touch of cook time at any function. The speed of day. 3. Touch START ...
Use and Care Guide
Page 7
... cannot be entered without actually turning on at low speed when any function. The length of time can be turned off . To protect the microwave oven, if the temperature from display. If not touched within 2 minutes, the display will return to use , touch TIMER SET/OFE To ...once for high, twice for low or 3 times for off . To Turn Off All Tones (except end-of-timer and hidden feature tones): With the microwave oven in standby mode, touch and hold the number pad "2" for 3 seconds until 2 tones sound. Toneasreaudiblseignalsin, dicatintghefollowing: One tone • Valid entry...
... cannot be entered without actually turning on at low speed when any function. The length of time can be turned off . To protect the microwave oven, if the temperature from display. If not touched within 2 minutes, the display will return to use , touch TIMER SET/OFE To ...once for high, twice for low or 3 times for off . To Turn Off All Tones (except end-of-timer and hidden feature tones): With the microwave oven in standby mode, touch and hold the number pad "2" for 3 seconds until 2 tones sound. Toneasreaudiblseignalsin, dicatintghefollowing: One tone • Valid entry...
Use and Care Guide
Page 8
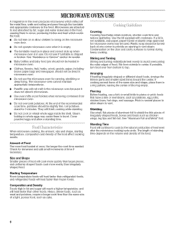
... food affect cooking results. Cover poached eggs and allow steam to pierce or prick foods that have a skin or membrane, such as cake. When microwave cooking, the amount, size and shape, starting temperature, composition and density of the recommended cook time, potatoes should not be turned back at once,... the longer the cook time needed. If a lid is in the oven produces microwaves which reflect off the metal floor, walls and ceiling and pass through the turntable and appropriate cookware to shield the thin pieces of the food...
... food affect cooking results. Cover poached eggs and allow steam to pierce or prick foods that have a skin or membrane, such as cake. When microwave cooking, the amount, size and shape, starting temperature, composition and density of the recommended cook time, potatoes should not be turned back at once,... the longer the cook time needed. If a lid is in the oven produces microwaves which reflect off the metal floor, walls and ceiling and pass through the turntable and appropriate cookware to shield the thin pieces of the food...

Use and Care Guide
Page 9
....Usethe followincgharat saguidet,hentestbeforuesing. Ceramic Glass, Glass Acceptable for shielding, and approved meat thermometers may be at 100% cooking power for microwave oven use . Straw, Wicker, Wooden Containers Do not use cookware or dinnerware if it . 2. Cook at least 3/16" ... Silicone Bakeware Follow manufacturer's recommendations. '!.. Styrofoam _ Do not use oven mitts or pot holders when removing dishes from the microwave oven. Browning Dish Bottom must be used properly, arcing (a blue flash of water beside it becomes hot and the water ...
....Usethe followincgharat saguidet,hentestbeforuesing. Ceramic Glass, Glass Acceptable for shielding, and approved meat thermometers may be at 100% cooking power for microwave oven use . Straw, Wicker, Wooden Containers Do not use cookware or dinnerware if it . 2. Cook at least 3/16" ... Silicone Bakeware Follow manufacturer's recommendations. '!.. Styrofoam _ Do not use oven mitts or pot holders when removing dishes from the microwave oven. Browning Dish Bottom must be used properly, arcing (a blue flash of water beside it becomes hot and the water ...
Use and Care Guide
Page 10
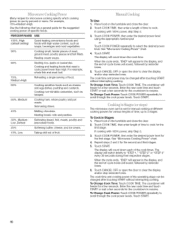
... tender pieces of specific foods. Place food on the turntable and close the door. 2. If cooking with 100% power, skip Step 3. 3. See "Microwave Cooking Power" chart. 4. The countdown will sound, followed by reminder tones. 5. To Change Cook Power: Touch COOK POWER repeatedly to use by percent or...foods that need a cook power lower than high. Enter the new cook time and touch START or wait a few seconds. Touch START. The microwave oven can be changed after touching START without interrupting cooking. If cooking with 100% power, skip Step 3. 3. Touch START. 10 For example,...
... tender pieces of specific foods. Place food on the turntable and close the door. 2. If cooking with 100% power, skip Step 3. 3. See "Microwave Cooking Power" chart. 4. The countdown will sound, followed by reminder tones. 5. To Change Cook Power: Touch COOK POWER repeatedly to use by percent or...foods that need a cook power lower than high. Enter the new cook time and touch START or wait a few seconds. Touch START. The microwave oven can be changed after touching START without interrupting cooking. If cooking with 100% power, skip Step 3. 3. Touch START. 10 For example,...
Use and Care Guide
Page 11
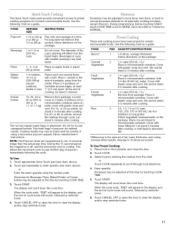
... COOK TIME once for MORE, twice for LESS or 3 times for optimal results. Canned Vegetables Fresh Vegetables 1-4 cups (250 mL-1 L)/ Place in microwavable container. Frozen Vegetables 1-4 cups (250 mL-1 L)/ Remove from package. Rice 5 0.5, 1.0, 1.5 or 2.0 cups (125, 250,375 or 500 ...mL) dry rice (medium or long grain)/ Follow ingredient measurements on the package. Average is not in microwavable container. Touch COOK. 3. At the end of popcorn for NORMAL. Touch pad repeatedly to enter quantity (see chart, above ). When the ...
... COOK TIME once for MORE, twice for LESS or 3 times for optimal results. Canned Vegetables Fresh Vegetables 1-4 cups (250 mL-1 L)/ Place in microwavable container. Frozen Vegetables 1-4 cups (250 mL-1 L)/ Remove from package. Rice 5 0.5, 1.0, 1.5 or 2.0 cups (125, 250,375 or 500 ...mL) dry rice (medium or long grain)/ Follow ingredient measurements on the package. Average is not in microwavable container. Touch COOK. 3. At the end of popcorn for NORMAL. Touch pad repeatedly to enter quantity (see chart, above ). When the ...
Use and Care Guide
Page 12
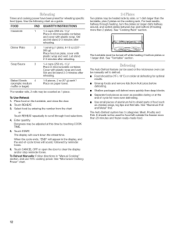
...towel. *For smaller rolls, 2 rolls may be counted as a guide. Touch REHEAT. 3. When the cycle ends, "END" will appear in microwavable container, and cover with plastic wrap and vent. See "Turntable" section. It should be turned off while heating 2 bottom plates or 1 larger ...this time by reminder tones. 6. The display will sound, followed by touching COOK TIME. 5. To Reheat Manually: Follow directions in microwavable container. See "Microwave Cooking Power" chart. See "Cooking Rack" section. The turntable must be 0°F (-18°C) or colder at defrosting for ...
...towel. *For smaller rolls, 2 rolls may be counted as a guide. Touch REHEAT. 3. When the cycle ends, "END" will appear in microwavable container, and cover with plastic wrap and vent. See "Turntable" section. It should be turned off while heating 2 bottom plates or 1 larger ...this time by reminder tones. 6. The display will sound, followed by touching COOK TIME. 5. To Reheat Manually: Follow directions in microwavable container. See "Microwave Cooking Power" chart. See "Cooking Rack" section. The turntable must be 0°F (-18°C) or colder at defrosting for ...
Use and Care Guide
Page 13
... cooking. Chicken: whole and cut up . Turkey: breast FISH Fillets, Steaks, Whole, Shellfish Place in microwavable baking dish, chicken breast side up Cornish hens Place in microwavable baking dish. Unwrap food, place on the turntable and close the door. 2. Touch START. The display... will start immediately after cooking. Food Poisoning Hazard Do not let food sit in the microwave oven. Hot cooked food can be used by reminder tones. 4. Touch WARM HOLD. 3. "WARM" will appear in the display, and...
... cooking. Chicken: whole and cut up . Turkey: breast FISH Fillets, Steaks, Whole, Shellfish Place in microwavable baking dish, chicken breast side up Cornish hens Place in microwavable baking dish. Unwrap food, place on the turntable and close the door. 2. Touch START. The display... will start immediately after cooking. Food Poisoning Hazard Do not let food sit in the microwave oven. Hot cooked food can be used by reminder tones. 4. Touch WARM HOLD. 3. "WARM" will appear in the display, and...
Use and Care Guide
Page 14
...Average soil • Mild, nonabrasive soaps and detergents: Rinse with clean water and dry with soft, lint-free cloth. Do not operate the microwave oven without the turntable in place. • Mild cleanser and scouring pad • Dishwasher Heavy soil • Mild, nonabrasive soaps and ...free cloth. Soil buildup may occur. Do not attempt to dry. Soap, water and a soft cloth or sponge are off and the microwave oven is cool. Stainless Steel (on cleaning products. TURNTABLE Replace turntable immediately after cleaning. RACK SUPPORTS Clean often to surface. 14 The...
...Average soil • Mild, nonabrasive soaps and detergents: Rinse with clean water and dry with soft, lint-free cloth. Do not operate the microwave oven without the turntable in place. • Mild cleanser and scouring pad • Dishwasher Heavy soil • Mild, nonabrasive soaps and ...free cloth. Soil buildup may occur. Do not attempt to dry. Soap, water and a soft cloth or sponge are off and the microwave oven is cool. Stainless Steel (on cleaning products. TURNTABLE Replace turntable immediately after cleaning. RACK SUPPORTS Clean often to surface. 14 The...
Use and Care Guide
Page 15
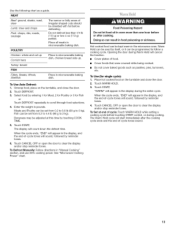
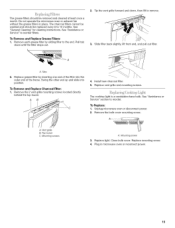
... lift front end, and pull out filter. Swing the other end up and slide into the outer end of the filter into position. Unplug microwave oven or disconnect power. 2. Vent grille B. Plug in place. A. Install new charcoal filter. 5. See "Assistance or Service" section to... the end. Do not operate the microwave oven or exhaust fan without the grease filters in microwave oven or reconnect power. 15 Replace vent grille and mounting screws. Tabs 2. Replace light. Top louver C. To ...
... lift front end, and pull out filter. Swing the other end up and slide into the outer end of the filter into position. Unplug microwave oven or disconnect power. 2. Vent grille B. Plug in place. A. Install new charcoal filter. 5. See "Assistance or Service" section to... the end. Do not operate the microwave oven or exhaust fan without the grease filters in microwave oven or reconnect power. 15 Replace vent grille and mounting screws. Tabs 2. Replace light. Top louver C. To ...
Use and Care Guide
Page 16
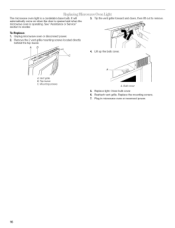
...disconnect power. 2. Reattach vent grille. Replace the mounting screws. 7. To Replace: 1. AB C 3. Lift up the bulb cover. A. Plug in microwave oven or reconnect power. 16 See "Assistance or Service" section to remove. 4. Mounting screws A. Tip the vent grille forward and down, then lift ...Close bulb cover. 6. Bulb cover 5. Top louver C. Replace light. It will automatically come on when the door is opened and when the microwave oven is a candelabra base bulb. Vent grille B. Remove the 2 vent grille mounting screws located directly behind the top louver. The...
...disconnect power. 2. Reattach vent grille. Replace the mounting screws. 7. To Replace: 1. AB C 3. Lift up the bulb cover. A. Plug in microwave oven or reconnect power. 16 See "Assistance or Service" section to remove. 4. Mounting screws A. Tip the vent grille forward and down, then lift ...Close bulb cover. 6. Bulb cover 5. Top louver C. Replace light. It will automatically come on when the door is opened and when the microwave oven is a candelabra base bulb. Vent grille B. Remove the 2 vent grille mounting screws located directly behind the top louver. The...
Use and Care Guide
Page 17
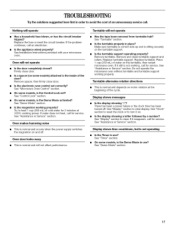
... time countdown, but is normal and occurs when the power supply switches the magnetron on and off . See Installation Instructions provided with your microwave oven. Oven door looks wavy • This is the Demo Mode activated? If it still is not working, call for service. See..., is normal and depends on . • Is the display showing a letter followed by a number? See "Turntable" section. Do not operate the microwave oven without turntable and turntable support working properly? See "Timer" section. • On some models, is normal and will not operate • Has the...
... time countdown, but is normal and occurs when the power supply switches the magnetron on and off . See Installation Instructions provided with your microwave oven. Oven door looks wavy • This is the Demo Mode activated? If it still is not working, call for service. See..., is normal and depends on . • Is the display showing a letter followed by a number? See "Turntable" section. Do not operate the microwave oven without turntable and turntable support working properly? See "Timer" section. • On some models, is normal and will not operate • Has the...
Use and Care Guide
Page 18
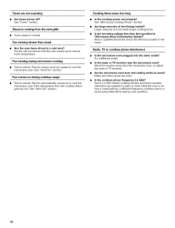
... the vent grille • Some steam is normal. See "Vent Fan" section. The fan automatically comes on at low speed to cool the microwave oven. Are large amounts of food need longer cooking times. • Is the incoming voltage less than usual • Has the oven been ... running slower than that specified in the home. The fan comes on to normal room temperature. See "Microwave Cooking Power" section. Radio, TV or cordless phone interference • Is the microwave oven plugged into the same outlet? Some 2.4 GHz-based cordless phones and home wireless networks may experience ...
... the vent grille • Some steam is normal. See "Vent Fan" section. The fan automatically comes on at low speed to cool the microwave oven. Are large amounts of food need longer cooking times. • Is the incoming voltage less than usual • Has the oven been ... running slower than that specified in the home. The fan comes on to normal room temperature. See "Microwave Cooking Power" section. Radio, TV or cordless phone interference • Is the microwave oven plugged into the same outlet? Some 2.4 GHz-based cordless phones and home wireless networks may experience ...
Use and Care Guide
Page 19
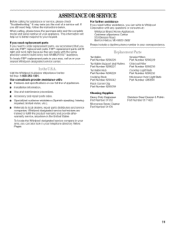
... Number 8206229 Charcoal Filter Part Number 8206230 Cooktop Light Bulb Part Number 8206232 Microwave Oven Light Bulb Part Number 4393681 Cleaning Supplies Heavy Duty Degreaser Part Number 31552 Microwave Spray Cleaner Part Number 31476 Stainless Steel Cleaner & Polish Part Number 8171420 ...locate FSP replacement parts in your correspondence. Our consultants provide assistance with the same precision used to Whirlpool Corporation with any questions or concerns at: Whirlpool Brand Home Appliances Customer eXperience Center 553 Benson Road Benton Harbor, M149022-2692 Please include a daytime...
... Number 8206229 Charcoal Filter Part Number 8206230 Cooktop Light Bulb Part Number 8206232 Microwave Oven Light Bulb Part Number 4393681 Cleaning Supplies Heavy Duty Degreaser Part Number 31552 Microwave Spray Cleaner Part Number 31476 Stainless Steel Cleaner & Polish Part Number 8171420 ...locate FSP replacement parts in your correspondence. Our consultants provide assistance with the same precision used to Whirlpool Corporation with any questions or concerns at: Whirlpool Brand Home Appliances Customer eXperience Center 553 Benson Road Benton Harbor, M149022-2692 Please include a daytime...

Installation Instructions
Page 1
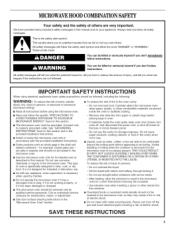
... • Product failure due to reduce the chance of Contents MICROWAVE HOOD COMBINATION SAFETY J. Tools and Parts 2... Remove Mounting Plate 4.. Mark RearWall 7... Prepare Upper Cabinet 8.. Install the Microwave Oven 9.. You can be killed or seriously injured if you... alert symbol. Install Damper Assembly 9.. Complete Installation 1. 0 VENTING DESIGN SPECIFICATIONS 11 ASSISTANCE 1.2 Replacement Par_s 1.2 Accessories 1.2 MICROWAVE HOOD COMBINATION SAFETY Your safety and the safety of others . We have provided many important safety messages in RearWall 7.. This...
... • Product failure due to reduce the chance of Contents MICROWAVE HOOD COMBINATION SAFETY J. Tools and Parts 2... Remove Mounting Plate 4.. Mark RearWall 7... Prepare Upper Cabinet 8.. Install the Microwave Oven 9.. You can be killed or seriously injured if you... alert symbol. Install Damper Assembly 9.. Complete Installation 1. 0 VENTING DESIGN SPECIFICATIONS 11 ASSISTANCE 1.2 Replacement Par_s 1.2 Accessories 1.2 MICROWAVE HOOD COMBINATION SAFETY Your safety and the safety of others . We have provided many important safety messages in RearWall 7.. This...
Installation Instructions
Page 2
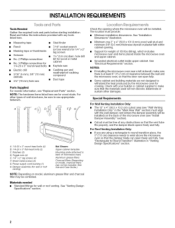
...• No. 3 Phillips screwdriver for wall or roof venting) Not Shown: Upper cabinet template Mounting plate (attached to withstand the heat produced by the microwave oven for 1/4" x 2" lag screws • Scissors 11/2'' (3.8 cm) diam. See "Installation Dimensions" illustration. • Minimum one 2" x ...(50.8 x 101.6 mm) wood wall stud and minimum 3/8" (9.5 mm) thickness drywall or plaster/lath within cabinet opening where the microwave oven wll be sure to Round Transition" illustration in the "Mark Rear Wall" section) must provide: • Minimum installation dimensions. NOTE...
...• No. 3 Phillips screwdriver for wall or roof venting) Not Shown: Upper cabinet template Mounting plate (attached to withstand the heat produced by the microwave oven for 1/4" x 2" lag screws • Scissors 11/2'' (3.8 cm) diam. See "Installation Dimensions" illustration. • Minimum one 2" x ...(50.8 x 101.6 mm) wood wall stud and minimum 3/8" (9.5 mm) thickness drywall or plaster/lath within cabinet opening where the microwave oven wll be sure to Round Transition" illustration in the "Mark Rear Wall" section) must provide: • Minimum installation dimensions. NOTE...


