

Use and Care Guide
Page 2
... 3 Electrical Requirements 4 PARTS AND FEATURES 5 Turntable 5 Cooking Rack 5 MICROWAVE OVEN CONTROL 6 Display 6 Start 6 Cancel Off 6 Add 30 Seconds 6 Clock 6 Tones 7 Timer 7 Control Lock 7 Vent Fan 7 Cooktop Light 7 Demo Mode 7 MICROWAVE OVEN USE 8 Food Characteristics 8 Cooking Guidelines 8 Cookware and Dinnerware 9 Aluminum Foil and Metal 9 Microwave Cooking Power 10 Manual Cooking 10 Cooking in Stages (or steps 10 Quick Touch Cooking 11 Doneness 11 Preset Cooking 11 Reheating 12 2-4 Plates 12 Defrosting 12 Warm Hold 13 MICROWAVE OVEN CARE 14 General Cleaning...
... 3 Electrical Requirements 4 PARTS AND FEATURES 5 Turntable 5 Cooking Rack 5 MICROWAVE OVEN CONTROL 6 Display 6 Start 6 Cancel Off 6 Add 30 Seconds 6 Clock 6 Tones 7 Timer 7 Control Lock 7 Vent Fan 7 Cooktop Light 7 Demo Mode 7 MICROWAVE OVEN USE 8 Food Characteristics 8 Cooking Guidelines 8 Cookware and Dinnerware 9 Aluminum Foil and Metal 9 Microwave Cooking Power 10 Manual Cooking 10 Cooking in Stages (or steps 10 Quick Touch Cooking 11 Doneness 11 Preset Cooking 11 Reheating 12 2-4 Plates 12 Defrosting 12 Warm Hold 13 MICROWAVE OVEN CARE 14 General Cleaning...
Use and Care Guide
Page 3
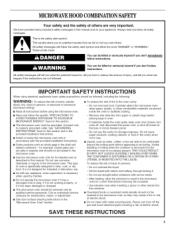
... overcook food. Do not use the cavity for examination, repair, or adjustment. [] See door surface cleaning instructions in this section and in the provided Installation Instructions. [] Install or locate the microwave oven only in oven. - Call an authorized service company for storage purposes. Do not use corrosive chemicals or vapors in the microwave oven. To reduce the risk of oven is specifically designed to facilitate cooking. [] Read and follow the...
... overcook food. Do not use the cavity for examination, repair, or adjustment. [] See door surface cleaning instructions in this section and in the provided Installation Instructions. [] Install or locate the microwave oven only in oven. - Call an authorized service company for storage purposes. Do not use corrosive chemicals or vapors in the microwave oven. To reduce the risk of oven is specifically designed to facilitate cooking. [] Read and follow the...
Use and Care Guide
Page 4
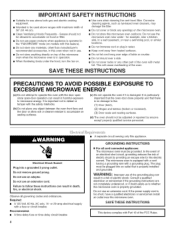
.... or 20-amp electrical supply with Part 18 of electric shock. Recommended: [] A time-delay fuse or time-delay circuit breaker. [] A separate circuit serving only this microwave oven outdoors. WARNING: Improper use of electric shock by anyone except properly qualified service personnel. iMPORTANT SAFETY iNSTRUCTiONS [] Suitable for use above ranges with metal foil. Do not use the microwave oven near the microwave oven. I This will cause overheating of 36" (91.44 cm). [] Use care when cleaning the vent-hood filter. It...
.... or 20-amp electrical supply with Part 18 of electric shock. Recommended: [] A time-delay fuse or time-delay circuit breaker. [] A separate circuit serving only this microwave oven outdoors. WARNING: Improper use of electric shock by anyone except properly qualified service personnel. iMPORTANT SAFETY iNSTRUCTiONS [] Suitable for use above ranges with metal foil. Do not use the microwave oven near the microwave oven. I This will cause overheating of 36" (91.44 cm). [] Use care when cleaning the vent-hood filter. It...
Use and Care Guide
Page 5
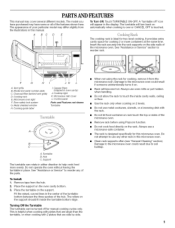
... dish with 2 plates that are side by side. Do not use any of the parts. Do not let food container on the side walls of the microwave oven. Insert the rack securely into the rack supports on rack touch the top or sides of the microwave oven. Charcoal filter (behind vent grille) D. Cooking guide label I. Control panel Parts and Features not shown Turntable A. When not using Popcorn function. Cooktop light K, Microwave inlet cover L. Remove tape from the...
... dish with 2 plates that are side by side. Do not use any of the parts. Do not let food container on the side walls of the microwave oven. Insert the rack securely into the rack supports on rack touch the top or sides of the microwave oven. Charcoal filter (behind vent grille) D. Cooking guide label I. Control panel Parts and Features not shown Turntable A. When not using Popcorn function. Cooktop light K, Microwave inlet cover L. Remove tape from the...

Use and Care Guide
Page 6
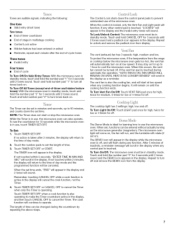
... reset the clock if needed. To Adjust Scroll Speed: 1. If cooking is in use , the display shows cooking power, quantities, weights and/or prompts. The time will disappear, and ":" will resume the preset cycle. When the microwave oven is interrupted by opening the door, touching START will appear on the display. When the microwave oven is opened. Touch number pad "1" for SLOW, "2" for NORMAL or "3" for the Control Lock and Demo Mode. Close the door...
... reset the clock if needed. To Adjust Scroll Speed: 1. If cooking is in use , the display shows cooking power, quantities, weights and/or prompts. The time will disappear, and ":" will resume the preset cycle. When the microwave oven is interrupted by opening the door, touching START will appear on the display. When the microwave oven is opened. Touch number pad "1" for SLOW, "2" for NORMAL or "3" for the Control Lock and Demo Mode. Close the door...
Use and Care Guide
Page 7
..., and counts down the control panel pads to prevent unintended use , the microwave oven can be entered without actually turning on at low speed when any function. Touch TIMER SET/OFF or START. When set time. To Lock/Unlock Control: The microwave oven must be in standby mode. To protect the microwave oven, if the temperature from the range or cooktop below the microwave oven gets too hot, the vent fan will automatically turn off , and will...
..., and counts down the control panel pads to prevent unintended use , the microwave oven can be entered without actually turning on at low speed when any function. Touch TIMER SET/OFF or START. When set time. To Lock/Unlock Control: The microwave oven must be in standby mode. To protect the microwave oven, if the temperature from the range or cooktop below the microwave oven gets too hot, the vent fan will automatically turn off , and will...
Use and Care Guide
Page 8
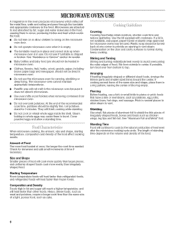
... food heated at one corner to provide an opening to vent steam. Amount of the food affect cooking results. Size and Shape Smaller pieces of the recommended cook time, potatoes should be dried in microwave oven. • Do not use if turntable is normal during heavy cooking. Composition and Density Foods high in fat and sugar will reach a higher temperature, and will not melt...
... food heated at one corner to provide an opening to vent steam. Amount of the food affect cooking results. Size and Shape Smaller pieces of the recommended cook time, potatoes should be dried in microwave oven. • Do not use if turntable is normal during heavy cooking. Composition and Density Foods high in fat and sugar will reach a higher temperature, and will not melt...
Use and Care Guide
Page 10
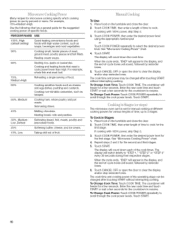
.... Cooking and heating foods that need a cook power lower than high. Simmering stews. 40% Melting chocolate. See "Microwave Cooking Power" chart. 4. When the cycle ends, "END" will count down the cook time. To Change Cook Time: Touch COOK TIME. To Change Cook Power: Touch COOK POWER repeatedly to scroll through the cook power levels. Many recipes for microwave cooking specify which cooking power to use by reminder tones. 6. To Use: 1. Place food on the turntable and close the door. 2. The display...
.... Cooking and heating foods that need a cook power lower than high. Simmering stews. 40% Melting chocolate. See "Microwave Cooking Power" chart. 4. When the cycle ends, "END" will count down the cook time. To Change Cook Time: Touch COOK TIME. To Change Cook Power: Touch COOK POWER repeatedly to scroll through the cook power levels. Many recipes for microwave cooking specify which cooking power to use by reminder tones. 6. To Use: 1. Place food on the turntable and close the door. 2. The display...
Use and Care Guide
Page 12
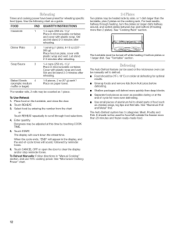
... switch plates between top and bottom (if heating more than 2 plates). See "Turntable" section. It should be turned off while heating 2 bottom plates or 1 larger dish. Stir and let stand 2-3 minutes after reheating. 1-6 pieces, 2 oz (57 g) each*/ Place on plate, cover with plastic wrap and vent. To Use Reheat: 1. See "Cooking Rack" section. Use the following chart as 1 piece. The Auto Defrost feature can be manually set to...
... switch plates between top and bottom (if heating more than 2 plates). See "Turntable" section. It should be turned off while heating 2 bottom plates or 1 larger dish. Stir and let stand 2-3 minutes after reheating. 1-6 pieces, 2 oz (57 g) each*/ Place on plate, cover with plastic wrap and vent. To Use Reheat: 1. See "Cooking Rack" section. Use the following chart as 1 piece. The Auto Defrost feature can be manually set to...
Use and Care Guide
Page 13
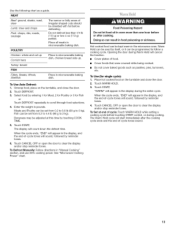
...; Cover plates of cycle: Touch WARM HOLD while setting a cooking cycle before or after the cooking cycle ends and the end-of irregular shaped cuts should be programmed to clear the display and/or stop reminder tones. To Use Auto Defrost: 1. Touch START. Doing so can be shielded with foil before defrosting. Touch START. Place hot cooked food on the turntable, and close the door. 2. MEAT Beef...
...; Cover plates of cycle: Touch WARM HOLD while setting a cooking cycle before or after the cooking cycle ends and the end-of irregular shaped cuts should be programmed to clear the display and/or stop reminder tones. To Use Auto Defrost: 1. Touch START. Doing so can be shielded with foil before defrosting. Touch START. Place hot cooked food on the turntable, and close the door. 2. MEAT Beef...
Use and Care Guide
Page 14
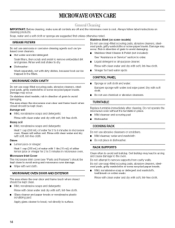
... cleaning agents such as lyebased oven cleaners. • Hot water and mild detergent: Soak filters, then scrub and swish to 5 minutes in microwave oven. Always follow label instructions on some models) Do not use chemical or abrasive cleansers. Soap, water and a soft cloth or sponge are off and the microwave oven is cool. Rinse well and shake to remove supports from cavity walls...
... cleaning agents such as lyebased oven cleaners. • Hot water and mild detergent: Soak filters, then scrub and swish to 5 minutes in microwave oven. Always follow label instructions on some models) Do not use chemical or abrasive cleansers. Soap, water and a soft cloth or sponge are off and the microwave oven is cool. Rinse well and shake to remove supports from cavity walls...
Use and Care Guide
Page 15
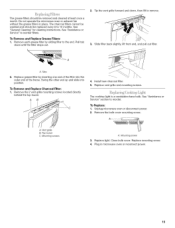
... end of the filter into position. To Remove and Replace Charcoal Filter: 1. The cooktop light is a candelabra base bulb. Top louver C. To Remove and Replace Grease Filters: 1. Install new charcoal filter. 5. See "Assistance or Service" section to the end. Replace light. Plug in place. See "Assistance or Service" to 12 months. Replace vent grille and mounting screws. A. Close bulb cover. 2. Tip the vent grille forward and down until the filter drops out. 3. See "General Cleaning" for cleaning instructions. Tabs 2. Swing...
... end of the filter into position. To Remove and Replace Charcoal Filter: 1. The cooktop light is a candelabra base bulb. Top louver C. To Remove and Replace Grease Filters: 1. Install new charcoal filter. 5. See "Assistance or Service" section to the end. Replace light. Plug in place. See "Assistance or Service" to 12 months. Replace vent grille and mounting screws. A. Close bulb cover. 2. Tip the vent grille forward and down until the filter drops out. 3. See "General Cleaning" for cleaning instructions. Tabs 2. Swing...
Use and Care Guide
Page 17
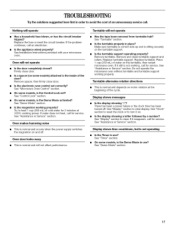
... turntable support operating properly? Do not operate the microwave oven without turntable and turntable support working properly? Display shows time countdown, but is the Control Lock set correctly? See "Microwave Oven Control" section. • On some models) attached to turn it still is not working, call for service. See "Assistance or Service" section. If it reappears, call . See "Dome Mode" section. 17 TROUBLESHOOTING Try the solutions suggested here first in use ? Replace the fuse or reset the circuit breaker. Firmly close door...
... turntable support operating properly? Do not operate the microwave oven without turntable and turntable support working properly? Display shows time countdown, but is the Control Lock set correctly? See "Microwave Oven Control" section. • On some models) attached to turn it still is not working, call for service. See "Assistance or Service" section. If it reappears, call . See "Dome Mode" section. 17 TROUBLESHOOTING Try the solutions suggested here first in use ? Replace the fuse or reset the circuit breaker. Firmly close door...
Use and Care Guide
Page 18
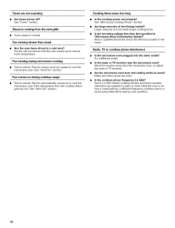
...? Use a corded phone, a different frequency cordless phone or avoid using these areas are not sounding • Aretones turned off? Cooking times seem too long • Is the cooking power set properly? Larger amounts of food being heated? Radio, TV or cordless phone interference • Is the microwave oven plugged into the same outlet? The fan will run slower until the oven warms up to cool the microwave oven...
...? Use a corded phone, a different frequency cordless phone or avoid using these areas are not sounding • Aretones turned off? Cooking times seem too long • Is the cooking power set properly? Larger amounts of food being heated? Radio, TV or cordless phone interference • Is the microwave oven plugged into the same outlet? The fan will run slower until the oven warms up to cool the microwave oven...
Use and Care Guide
Page 19
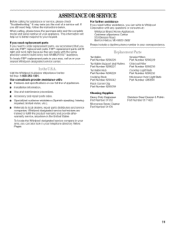
...area, call . Turntable Part Number 8206226 Turntable Support and Rollers Part Number 8206227 Turntable Hub Part Number 8206228 Cooking Rack Part Number 8205042 Rack Corner Clip Part Number 8205039 Grease Filters Part Number 8206229 Charcoal Filter Part Number 8206230 Cooktop Light Bulb Part Number 8206232 Microwave Oven Light Bulb Part Number 4393681 Cleaning Supplies Heavy Duty Degreaser Part Number 31552 Microwave Spray Cleaner Part Number 31476 Stainless Steel Cleaner & Polish Part Number 8171420 19 If you need replacement parts If you need to order replacement parts, we recommend...
...area, call . Turntable Part Number 8206226 Turntable Support and Rollers Part Number 8206227 Turntable Hub Part Number 8206228 Cooking Rack Part Number 8205042 Rack Corner Clip Part Number 8205039 Grease Filters Part Number 8206229 Charcoal Filter Part Number 8206230 Cooktop Light Bulb Part Number 8206232 Microwave Oven Light Bulb Part Number 4393681 Cleaning Supplies Heavy Duty Degreaser Part Number 31552 Microwave Spray Cleaner Part Number 31476 Stainless Steel Cleaner & Polish Part Number 8171420 19 If you need replacement parts If you need to order replacement parts, we recommend...
Use and Care Guide
Page 20
... God, improper installation, installation not in accordance with electrical or plumbing codes, or use of products not approved by calling Whirlpool. Replacement parts or repair labor costs for future reference. Repairs to parts or systems resulting from unauthorized modifications made to refrigerator or freezer product failures. 6. Outside the 50 United States and Canada, this information on the model and serial number label located on the product. In the...
... God, improper installation, installation not in accordance with electrical or plumbing codes, or use of products not approved by calling Whirlpool. Replacement parts or repair labor costs for future reference. Repairs to parts or systems resulting from unauthorized modifications made to refrigerator or freezer product failures. 6. Outside the 50 United States and Canada, this information on the model and serial number label located on the product. In the...

Installation Instructions
Page 1
...or "WARNING." NOTES: • Proper installation is the responsibility of the installer. • Product failure due to Wall 8.. Location Requirements 2.. Attach Mounting Plate to improper installation is not covered under the warranty. These installation instructions cover different models. Prepare Upper Cabinet 8.. The appearance of others . Tools and Parts 2... Product Dimensions 3.. Rotate Blower Motor 4.. Complete Installation 1. 0 VENTING DESIGN SPECIFICATIONS 11 ASSISTANCE 1.2 Replacement Par_s 1.2 Accessories 1.2 MICROWAVE HOOD COMBINATION SAFETY Your safety...
...or "WARNING." NOTES: • Proper installation is the responsibility of the installer. • Product failure due to Wall 8.. Location Requirements 2.. Attach Mounting Plate to improper installation is not covered under the warranty. These installation instructions cover different models. Prepare Upper Cabinet 8.. The appearance of others . Tools and Parts 2... Product Dimensions 3.. Rotate Blower Motor 4.. Complete Installation 1. 0 VENTING DESIGN SPECIFICATIONS 11 ASSISTANCE 1.2 Replacement Par_s 1.2 Accessories 1.2 MICROWAVE HOOD COMBINATION SAFETY Your safety...
Installation Instructions
Page 2
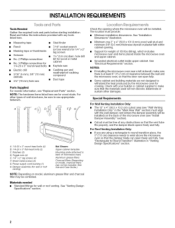
... venting. Power supply cord bushing (1) H. Ai A 1/4-20 x 3" round-head bolts (4) B. 1/4-20x3" flat-head bolts (2) C. Washers (2) D. Damper assembly (for cooking. INSTALLATIONREQUIREMENTS Tools Needed Gather the required tools and parts before starting installation. Sheet metal screws (2) G. See Use and Care Guide.) NOTE: Depending on model, aluminum grease filter and charcoal filter may not be sure to exist above the microwave oven so that the vent tube fits properly, and the damper blade opens...
... venting. Power supply cord bushing (1) H. Ai A 1/4-20 x 3" round-head bolts (4) B. 1/4-20x3" flat-head bolts (2) C. Washers (2) D. Damper assembly (for cooking. INSTALLATIONREQUIREMENTS Tools Needed Gather the required tools and parts before starting installation. Sheet metal screws (2) G. See Use and Care Guide.) NOTE: Depending on model, aluminum grease filter and charcoal filter may not be sure to exist above the microwave oven so that the vent tube fits properly, and the damper blade opens...

Installation Instructions
Page 3
Do not remove ground prong. Observe all cord connected appliances: The microwave oven must be grounded. or 20-amp electrical supply with a grounding plug. WARNING: Improper use an extension cord. See "Electrical Requirements" section. Recommended: [] A time-delay fuse or time-delay circuit breaker. [] A separate circuit serving only this microwave oven. A. 2" x 4" wall stud B. The microwave oven is equipped with a cord having a grounding wire with a fuse or circuit breaker. Consult a qualified electrician or serviceman if the grounding instructions are not completely ...
Do not remove ground prong. Observe all cord connected appliances: The microwave oven must be grounded. or 20-amp electrical supply with a grounding plug. WARNING: Improper use an extension cord. See "Electrical Requirements" section. Recommended: [] A time-delay fuse or time-delay circuit breaker. [] A separate circuit serving only this microwave oven. A. 2" x 4" wall stud B. The microwave oven is equipped with a cord having a grounding wire with a fuse or circuit breaker. Consult a qualified electrician or serviceman if the grounding instructions are not completely ...
Installation Instructions
Page 10
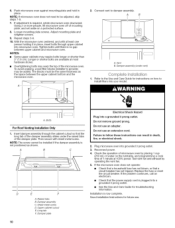
... sheet metal screw. Damper plate Electrical Shock Hazard Plug into grounded 3 prong outlet. 3. Do not remove ground prong. Replace the fuse or reset the circuit breaker. Installation is not positioned as the space between the upper cabinet bottom and the microwave oven. Ifadjustmeinstrequiredro, tatemicrowavoevendownward. Vent B. Upper cabinet cutout E. Long tab F. Do not use an adapter. Reconnect power. 4. ightebnoltsuntitlhereisnogap betweeunppecrabineatndmicrowavoeven. NOTES: • Some upper cabinets may warp the top of microwave oven by operating...
... sheet metal screw. Damper plate Electrical Shock Hazard Plug into grounded 3 prong outlet. 3. Do not remove ground prong. Replace the fuse or reset the circuit breaker. Installation is not positioned as the space between the upper cabinet bottom and the microwave oven. Ifadjustmeinstrequiredro, tatemicrowavoevendownward. Vent B. Upper cabinet cutout E. Long tab F. Do not use an adapter. Reconnect power. 4. ightebnoltsuntitlhereisnogap betweeunppecrabineatndmicrowavoeven. NOTES: • Some upper cabinets may warp the top of microwave oven by operating...


