
Brochure
Page 1
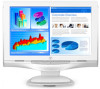
Video M AMAZING 1080E LVM-37w1 Tech Talk • HDTV Tips • lien,. Centr.is • HDTV TDS • porno. ..... ... ~ji.ten..ln Westinghouse Digital Electronics Home Products Support Company Resellers Impress' High De. Convols Spotlight Digital Phc LIFE IS MORE THAN •
Video M AMAZING 1080E LVM-37w1 Tech Talk • HDTV Tips • lien,. Centr.is • HDTV TDS • porno. ..... ... ~ji.ten..ln Westinghouse Digital Electronics Home Products Support Company Resellers Impress' High De. Convols Spotlight Digital Phc LIFE IS MORE THAN •
Brochure
Page 2
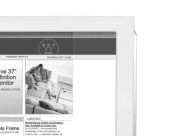
Int.,* specialty retailer of its LCD displays et Conn's.. Jul 13,2005 -...announced the availability of Customer Service ye 37" finition onitor RESOLUTION Shopping Cart I LooiA Ito Frame LSINGLE PICTURE Latest News Westinahouse Digital LCD Displays Now Available at Conn's Inc.
Int.,* specialty retailer of its LCD displays et Conn's.. Jul 13,2005 -...announced the availability of Customer Service ye 37" finition onitor RESOLUTION Shopping Cart I LooiA Ito Frame LSINGLE PICTURE Latest News Westinahouse Digital LCD Displays Now Available at Conn's Inc.

Brochure
Page 3
Cr. .1 1 Privacy I Trademarks 5.Term: of W. 2005 Vies tinollou St Digital Electronics, All rights reserved. Vz;
Cr. .1 1 Privacy I Trademarks 5.Term: of W. 2005 Vies tinollou St Digital Electronics, All rights reserved. Vz;
User Manual
Page 2
... Side Connectors 7 CONNECT THE VIDEO AND AUDIO CABLES 8 CONNECT THE POWER CABLE ...8 TURN THE POWER ON ...8 Automatic Screen Adjustment ...8 OSD MENU FUNCTIONS...9 SCREEN DISPLAY ADJUSTMENT (ANALOG SIGNAL 10 SCREEN DISPLAY ADJUSTMENT (DIGITAL SIGNAL 11 APPENDIX ...12 SPECIFICATIONS ...12 TROUBLESHOOTING ...13 No Power...13 No Image...13 Power is ON but no Screen Image 13 Fuzzy Image...13 Image is Too Bright or Too Dark ...13 Distorted Image...13 Image is Not Centered (size is not scaled correctly 13 Colors are Not Correct ...13 No Sound ...13 Mounting the LCD Monitor on a wall 14...
... Side Connectors 7 CONNECT THE VIDEO AND AUDIO CABLES 8 CONNECT THE POWER CABLE ...8 TURN THE POWER ON ...8 Automatic Screen Adjustment ...8 OSD MENU FUNCTIONS...9 SCREEN DISPLAY ADJUSTMENT (ANALOG SIGNAL 10 SCREEN DISPLAY ADJUSTMENT (DIGITAL SIGNAL 11 APPENDIX ...12 SPECIFICATIONS ...12 TROUBLESHOOTING ...13 No Power...13 No Image...13 Power is ON but no Screen Image 13 Fuzzy Image...13 Image is Too Bright or Too Dark ...13 Distorted Image...13 Image is Not Centered (size is not scaled correctly 13 Colors are Not Correct ...13 No Sound ...13 Mounting the LCD Monitor on a wall 14...
User Manual
Page 3
... shipping needs. Overloading Outlets Do not overload electrical power sources when installing the LCD monitor. The power supply cord should never be blocked or covered. Periodically inspect the power cord and each end of the Monitor Always handle the LCD monitor with other appliances that generate heat. To ensure reliable operation of four (4) inches away from direct sunlight to the monitor. Always position the LCD monitor on the LCD monitor, video cable, or power cord. Overloading wall...
... shipping needs. Overloading Outlets Do not overload electrical power sources when installing the LCD monitor. The power supply cord should never be blocked or covered. Periodically inspect the power cord and each end of the Monitor Always handle the LCD monitor with other appliances that generate heat. To ensure reliable operation of four (4) inches away from direct sunlight to the monitor. Always position the LCD monitor on the LCD monitor, video cable, or power cord. Overloading wall...
User Manual
Page 4
... if you touch them. There are no user serviceable parts inside. The LCD monitor contains high voltage parts. If the monitor begins to qualified service personnel. You may be used for an extended period of time, unplug the power cord. 3 Do not place it off and unplug the power cord. Do not attempt repairs yourself. To assure proper ventilation, do not block the openings by Westinghouse Digital. Other...
... if you touch them. There are no user serviceable parts inside. The LCD monitor contains high voltage parts. If the monitor begins to qualified service personnel. You may be used for an extended period of time, unplug the power cord. 3 Do not place it off and unplug the power cord. Do not attempt repairs yourself. To assure proper ventilation, do not block the openings by Westinghouse Digital. Other...

User Manual
Page 5
Wipe the screen with a clean, soft, lint-free cloth. Cleaning the LCD Monitor • MAKE SURE THE LCD MONITOR IS TURNED OFF • NEVER SPRAY OR POUR LIQUID DIRECTLY ONTO THE SCREEN OR CASE To Clean the Screen: 1. To Clean the Case: 1. Disclaimer Westinghouse Digital does not recommend the use of non-ammonia, non-alcohol based, mild non-abrasive detergent on a clean, soft, lint-free cloth to clean the surface. If it...
Wipe the screen with a clean, soft, lint-free cloth. Cleaning the LCD Monitor • MAKE SURE THE LCD MONITOR IS TURNED OFF • NEVER SPRAY OR POUR LIQUID DIRECTLY ONTO THE SCREEN OR CASE To Clean the Screen: 1. To Clean the Case: 1. Disclaimer Westinghouse Digital does not recommend the use of non-ammonia, non-alcohol based, mild non-abrasive detergent on a clean, soft, lint-free cloth to clean the surface. If it...
User Manual
Page 6
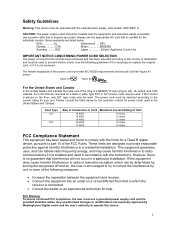
... original power supply, part number ADP-60CF A. Any unauthorized changes or modifications not expressly approved by one or more of the following guidelines if it is necessary to replace the original cord, or if it is certified for the individual country. The power cord must be used . Cord Type SJT SVT Size of Conductors in accordance with the instructions. This equipment generates, uses, and...
... original power supply, part number ADP-60CF A. Any unauthorized changes or modifications not expressly approved by one or more of the following guidelines if it is necessary to replace the original cord, or if it is certified for the individual country. The power cord must be used . Cord Type SJT SVT Size of Conductors in accordance with the instructions. This equipment generates, uses, and...
User Manual
Page 7
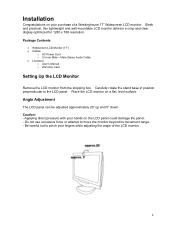
... the stand base in position perpendicular to move the monitor beyond its movement range. - Caution: - Be careful not to pinch your fingers while adjusting the angle of a Westinghouse 17" Widescreen LCD monitor. Do not use excessive force or attempt to the LCD panel. Angle Adjustment The LCD panel can be adjusted approximately 20° up and 5° down. Male Stereo Audio Cable • Literature o User's Manual o Warranty Card Setting Up the LCD Monitor Remove the LCD monitor...
... the stand base in position perpendicular to move the monitor beyond its movement range. - Caution: - Be careful not to pinch your fingers while adjusting the angle of a Westinghouse 17" Widescreen LCD monitor. Do not use excessive force or attempt to the LCD panel. Angle Adjustment The LCD panel can be adjusted approximately 20° up and 5° down. Male Stereo Audio Cable • Literature o User's Manual o Warranty Card Setting Up the LCD Monitor Remove the LCD monitor...

User Manual
Page 8
... Openings 12. Security Lock Anchor When the OSD Menu is displayed: Increase/Decrease Volume (While in the Volume Menu) When the OSD Menu is not displayed: Increase/Decrease Volume Enter/Exit the OSD Menu The LED is lit green when in the monitor is not displayed: Switch the signal input between analog and digital Power On/Off Use the AC power cord to connect the monitor to a grounded AC outlet. Use an analog VGA cable (not included) to connect to your PC VGA Output. Digital DVI-D Connector 10. Use a DVI-D cable...
... Openings 12. Security Lock Anchor When the OSD Menu is displayed: Increase/Decrease Volume (While in the Volume Menu) When the OSD Menu is not displayed: Increase/Decrease Volume Enter/Exit the OSD Menu The LED is lit green when in the monitor is not displayed: Switch the signal input between analog and digital Power On/Off Use the AC power cord to connect the monitor to a grounded AC outlet. Use an analog VGA cable (not included) to connect to your PC VGA Output. Digital DVI-D Connector 10. Use a DVI-D cable...
User Manual
Page 9
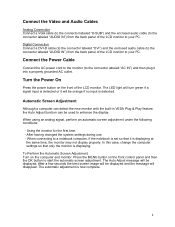
... now complete. 8 The LED light will turn green if a signal input is detected or it into a properly grounded AC outlet. The automatic adjustment is detected. When connecting to enhance the display. Connect the Power Cable Connect the AC power cord to the monitor (to your PC. Digital Connection Connect a DVI-D cable (to the connector labeled "DVI") and the enclosed audio cable (to the connector labeled "AUDIO IN") from the back panel of the LCD monitor. Automatic Screen Adjustment Although a computer can detect...
... now complete. 8 The LED light will turn green if a signal input is detected or it into a properly grounded AC outlet. The automatic adjustment is detected. When connecting to enhance the display. Connect the Power Cable Connect the AC power cord to the monitor (to your PC. Digital Connection Connect a DVI-D cable (to the connector labeled "DVI") and the enclosed audio cable (to the connector labeled "AUDIO IN") from the back panel of the LCD monitor. Automatic Screen Adjustment Although a computer can detect...
User Manual
Page 10
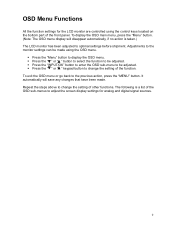
..., press the "MENU" button. To exit the OSD menu or go back to display the OSD menu. The following is taken.) The LCD monitor has been adjusted to the monitor settings can be made . Adjustments to optimal settings before shipment. Press the "INPUT/OK" button to enter the OSD sub-menu to be adjusted. Press the " " or " " button to select the function to be adjusted. OSD Menu Functions All the function settings for analog and digital signal sources. 9 It...
..., press the "MENU" button. To exit the OSD menu or go back to display the OSD menu. The following is taken.) The LCD monitor has been adjusted to the monitor settings can be made . Adjustments to optimal settings before shipment. Press the "INPUT/OK" button to enter the OSD sub-menu to be adjusted. Press the " " or " " button to select the function to be adjusted. OSD Menu Functions All the function settings for analog and digital signal sources. 9 It...
User Manual
Page 11
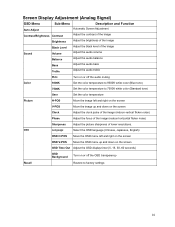
... audio treble Mute Turn on or off the OSD transparency Recall Restore to 7500K white color (Standard tone) User Set the color temperature Picture H-POS Move the image left and right on the screen OSD V-POS Move the OSD menu up and down on or off the audio muting Color 9300K Set the color temperature to 9300K white color (Blue tone) 7500K Set the color temperature to factory settings 10 Screen Display Adjustment (Analog Signal) OSD Menu Sub-Menu Description and Function Auto Adjust Contrast/Brightness Contrast Brightness Black Level Sound Volume...
... audio treble Mute Turn on or off the OSD transparency Recall Restore to 7500K white color (Standard tone) User Set the color temperature Picture H-POS Move the image left and right on the screen OSD V-POS Move the OSD menu up and down on or off the audio muting Color 9300K Set the color temperature to 9300K white color (Blue tone) 7500K Set the color temperature to factory settings 10 Screen Display Adjustment (Analog Signal) OSD Menu Sub-Menu Description and Function Auto Adjust Contrast/Brightness Contrast Brightness Black Level Sound Volume...
User Manual
Page 12
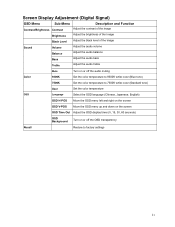
Screen Display Adjustment (Digital Signal) OSD Menu Sub-Menu Description and Function Contrast/Brightness Contrast Brightness Black Level Sound Volume Balance Bass Treble Adjust the contrast of the image Adjust the brightness of the image Adjust the black level of the image Adjust the audio volume Adjust the audio balance Adjust the audio bass Adjust the audio treble Mute Turn on or off the audio muting Color 9300K Set the color temperature to 9300K white color (Blue tone) 7500K Set the color temperature to 7500K white color (Standard tone) User Set the color temperature ...
Screen Display Adjustment (Digital Signal) OSD Menu Sub-Menu Description and Function Contrast/Brightness Contrast Brightness Black Level Sound Volume Balance Bass Treble Adjust the contrast of the image Adjust the brightness of the image Adjust the black level of the image Adjust the audio volume Adjust the audio balance Adjust the audio bass Adjust the audio treble Mute Turn on or off the audio muting Color 9300K Set the color temperature to 9300K white color (Blue tone) 7500K Set the color temperature to 7500K white color (Standard tone) User Set the color temperature ...

User Manual
Page 13
Appendix Specifications Panel Type Optimum Resolution Response Time Contrast Ratio Maximum Brightness Viewing Angles Displayable Colors Wall/Arm Mount Input Signal Physical Video Audio Speaker Output Power Voltage Operating Conditions Temperature Humidity Altitude Storage Conditions Temperature Humidity Altitude Dimensions Physical Weight Net Regulations Lamp Life 17" Widescreen Color TFT LCD Panel 1280 x 768 15 ms 600:1 450 Nits 170° (H) / 170° (V) 16.77 million colors (8 bit) 100mm VESA® HD-15 pin...
Appendix Specifications Panel Type Optimum Resolution Response Time Contrast Ratio Maximum Brightness Viewing Angles Displayable Colors Wall/Arm Mount Input Signal Physical Video Audio Speaker Output Power Voltage Operating Conditions Temperature Humidity Altitude Storage Conditions Temperature Humidity Altitude Dimensions Physical Weight Net Regulations Lamp Life 17" Widescreen Color TFT LCD Panel 1280 x 768 15 ms 600:1 450 Nits 170° (H) / 170° (V) 16.77 million colors (8 bit) 100mm VESA® HD-15 pin...
User Manual
Page 14
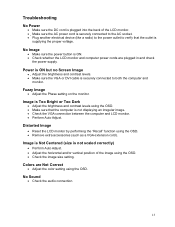
... (size is not scaled correctly) • Perform Auto Adjust. • Adjust the horizontal and/or vertical position of the LCD monitor. • Make sure the AC power cord is ON. • Check whether the LCD monitor and computer power cords are Not Correct • Adjust the color setting using the OSD. Image is Too Bright or Too Dark • Adjust the brightness and contrast levels using the OSD. • Remove extra accessories (such as a VGA extension cord). No Sound • Check the audio connection. 13...
... (size is not scaled correctly) • Perform Auto Adjust. • Adjust the horizontal and/or vertical position of the LCD monitor. • Make sure the AC power cord is ON. • Check whether the LCD monitor and computer power cords are Not Correct • Adjust the color setting using the OSD. Image is Too Bright or Too Dark • Adjust the brightness and contrast levels using the OSD. • Remove extra accessories (such as a VGA extension cord). No Sound • Check the audio connection. 13...

User Manual
Page 15
Additional Questions • See our website at www.westinghousedigital.com • Contact Westinghouse Digital Customer Service at (866) 287-5555 or write us at service@westinghousedigital.com 14 Mounting the LCD Monitor on a wall • Check the Westinghouse Digital website for wall mounting solutions. • Use the 100mm VESA hole pattern to secure a mounting plate to the LCD monitor. • Use professional installation to reduce the risk of injury and damage.
Additional Questions • See our website at www.westinghousedigital.com • Contact Westinghouse Digital Customer Service at (866) 287-5555 or write us at service@westinghousedigital.com 14 Mounting the LCD Monitor on a wall • Check the Westinghouse Digital website for wall mounting solutions. • Use the 100mm VESA hole pattern to secure a mounting plate to the LCD monitor. • Use professional installation to reduce the risk of injury and damage.

User Manual
Page 16
Westinghouse Digital Electronics, LLC. Santa Fe Springs, CA www.westinghousedigital.com SE-UM-1704-0501
Westinghouse Digital Electronics, LLC. Santa Fe Springs, CA www.westinghousedigital.com SE-UM-1704-0501


