Weslo Gym 1000 Support and Manuals
Get Help and Manuals for this Weslo item

View All Support Options Below
Free Weslo Gym 1000 manuals!
Problems with Weslo Gym 1000?
Ask a Question
Free Weslo Gym 1000 manuals!
Problems with Weslo Gym 1000?
Ask a Question
Popular Weslo Gym 1000 Manual Pages
Uk Manual - Page 1
....com
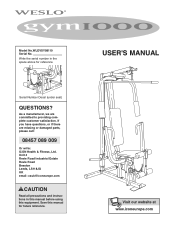
CAUTION
Read all precautions and instructions in the space above for future reference. As a manufacturer, we are missing or damaged parts, please call:
08457 089 009
Or write: ICON Health & Fitness, Ltd. Write the serial number in this manual before using this manual for reference. Save this equipment. Model No.WLEVSY98110 Serial No. Serial...
Uk Manual - Page 2
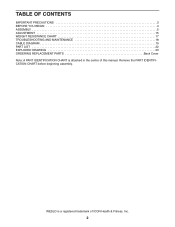
... OF CONTENTS
IMPORTANT PRECAUTIONS 3 BEFORE YOU BEGIN 4 ASSEMBLY 5 ADJUSTMENT 15 WEIGHT RESISTANCE CHART 17 TROUBLESHOOTING AND MAINTENANCE 18 CABLE DIAGRAM 19 PART LIST 22 EXPLODED DRAWING 23 ORDERING REPLACEMENT PARTS Back Cover Note: A PART IDENTIFICATION CHART is a registered trademark of this manual. WESLO is attached in the centre of ICON Health & Fitness, Inc.
2 Remove the...
Uk Manual - Page 3
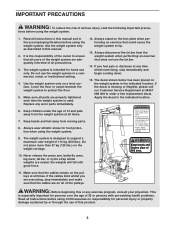
... time the weight system is the responsibility of this or any worn parts immediately.
12. Read all parts are raised; It is used. Replace any exercise program, consult your physician. Always wear athletic shoes for home use the weight system in this manual and in the indicated location. This
is designed to ensure that the...
Uk Manual - Page 4
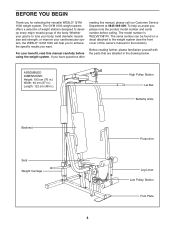
...improve your benefit, read this owner's manual for selecting the versatile WESLO® GYM 1000 weight system. Whether your goal is ...GYM 1000 weight system offers a selection of this manual carefully before calling.
The model number is to the weight system (see the front cover of weight stations designed to achieve the specific results you , please note the product model...
Uk Manual - Page 5
....
• As you have a socket set, a set of open-end or closed-end wrenches, or a set of the Stabiliser (5).
Before beginning assembly, make sure you assemble the weight system, make sure all parts in the centre of this manual is completed.
• Tighten all parts as you assemble them, unless instructed to ensure that the weight system...
Uk Manual - Page 6
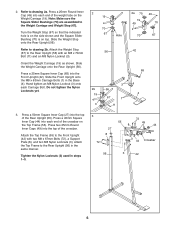
... a 45mm Square Inner Cap (44) into the top of the Rear Upright (56). Refer to the Rear Upright (56) with two M8 x 67mm Bolts (72), a Support Plate (8), and two M8 Nylon Locknuts (3). Slide the Weight Carriage onto the Rear Upright (56). Attach the Weight Stop (67) to drawing 2b. Slide the...
Uk Manual - Page 8
... axle of the Left and Right Arms (47, 48). Make sure that the end of each Arm.
7
48
44 45
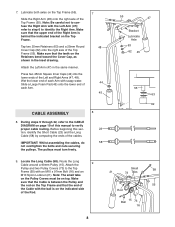
CABLE ASSEMBLY
8. Before beginning this manual to identify the Right Arm.
Uk Manual - Page 14
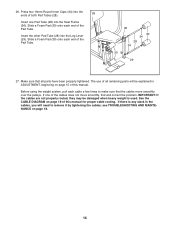
... a Foam Pad (30) onto each end of this manual for proper cable routing. See the CABLE DIAGRAM on page 18.
14 see TROUBLESHOOTING AND MAINTENANCE on page 19 of the Pad Tube.
36...Pad (30) onto each end of this manual. Make sure that all remaining parts will need to make sure that the cables move smoothly, find and correct the problem.
The use of the cables does not move...
Uk Manual - Page 15
...a Cable Clip (53).
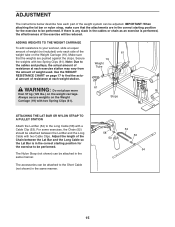
The Nylon Strap (not shown) can be attached in the correct starting position for the exercise to your workout, slide an equal
amount of weight (not included) onto each side of the weight system can...the WEIGHT
RESISTANCE CHART on page 17 to be performed. ADJUSTMENT
The instructions below describe how each part of the
61
weight tube on the Weight Carriage (19).
Uk Manual - Page 16
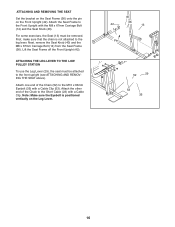
For some exercises, the Seat (13) must be removed. Attach one end of the Chain to the Short Cable (23) with a Cable Clip (53). Attach the ...(42).
Next, remove the Seat Knob (40) and the M8 x 67mm Carriage Bolt (14) from the Seat Frame (36). ATTACHING AND REMOVING THE SEAT
Set the bracket on the Seat Frame (36) onto the pin on the Leg Lever.
40
42
36 13
14
Pin
52
29
53
23
35...
Uk Manual - Page 18
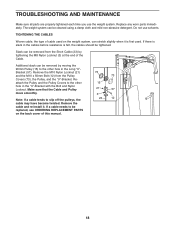
TROUBLESHOOTING AND MAINTENANCE
Make sure all parts are ...and mild non-abrasive detergent. Remove the cable and re-install it is felt, the cables should be replaced, see ORDERING REPLACEMENT PARTS on the weight system, can stretch slightly when it ...M8 Nylon Locknut (3) at the end of cable used on the back cover of this manual.
73 73
15
21
57
3
23
12
18
If there is slack in the ...
Uk Manual - Page 22

...M8 Nylon Locknut
4
1
Base
5
1
Stabiliser
6
3
"V"-Pulley
7
3
M10 x 60mm Bolt
8
2
Support Plate
9
8
M10 Washer
10
4
M6 Washer
11
1
M8 x 70mm Bolt
12
1
M10 x 50mm...1
Userʼs Manual
Note: "#" indicates a non-illustrated part. Qty. Qty. Description
Key No. Specifications are subject to change without notice.
22 PART LIST-Model No. WLEVSY98110
R0702A
Key No.
Uk Manual - Page 23

EXPLODED DRAWING-Model No. WLEVSY98110 R0702A
64
20 21
66 3
71 15
27
8 72
56
73 15 73
55
72 8
15 71
44
49
3
21
44 21
73 ...
Uk Manual - Page 24
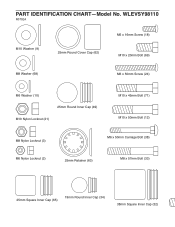
PART IDENTIFICATION CHART-Model No. WLEVSY98110
R0702A
M10 Washer (9)
25mm Round Cover Cap (62)
M6 x 16mm Screw (18) M10 x 20mm Bolt (69)
M8 Washer (68)
M6 x 50mm Screw (24)
...
Uk Manual - Page 27
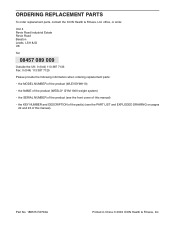
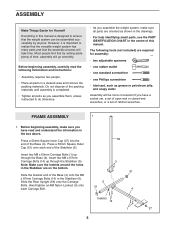
... provide the following information when ordering replacement parts:
• the MODEL NUMBER of the product (WLEVSY98110)
• the NAME of the product (WESLO® GYM 1000 weight system)
• the SERIAL NUMBER of the product (see the front cover of this manual)
• the KEY NUMBER and DESCRIPTION of the part(s) (see the PART LIST and EXPLODED DRAWING on...
Weslo Gym 1000 Reviews
We have not received any reviews for Weslo yet.