v2 Camera Manual
Page 3
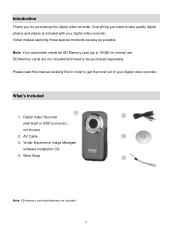
...you for normal use. SD Memory cards are not included and need to take quality digital photos and videos is included with Built-in order to get the most out of your digital video recorder. Please read this digital video recorder. Vivitar makes capturing those special ...moments as easy as possible. What's Included 1. Introduction Thank you need to be purchased separately. Note: Your camcorder needs an SD Memory card (up to 16GB) for purchasing this manual carefully first...
...you for normal use. SD Memory cards are not included and need to take quality digital photos and videos is included with Built-in order to get the most out of your digital video recorder. Please read this digital video recorder. Vivitar makes capturing those special ...moments as easy as possible. What's Included 1. Introduction Thank you need to be purchased separately. Note: Your camcorder needs an SD Memory card (up to 16GB) for purchasing this manual carefully first...
v2 Camera Manual
Page 4
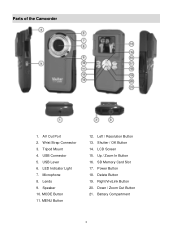
Wrist Strap Connector 3. USB Connector 5. Lends 9. LCD Screen 15. Power Button 18. Right/ViviLink Button 20. Speaker 10. Shutter / OK Button 14. Up / Zoom In Button 16. Battery Compartment 3 AV Out Port 2. USB Lever 6. MENU Button 12. Delete Button 19. Down / Zoom Out Button 21. LED Indicator Light 7. Microphone 8. Tripod Mount 4. SD Memory Card Slot 17. MODE Button 11. Left / Resolution Button 13. Parts of the Camcorder 1.
Wrist Strap Connector 3. USB Connector 5. Lends 9. LCD Screen 15. Power Button 18. Right/ViviLink Button 20. Speaker 10. Shutter / OK Button 14. Up / Zoom In Button 16. Battery Compartment 3 AV Out Port 2. USB Lever 6. MENU Button 12. Delete Button 19. Down / Zoom Out Button 21. LED Indicator Light 7. Microphone 8. Tripod Mount 4. SD Memory Card Slot 17. MODE Button 11. Left / Resolution Button 13. Parts of the Camcorder 1.
v2 Camera Manual
Page 5
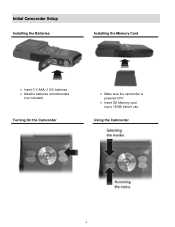
Using the Camcorder 4 Turning On the Camcorder Make sure the camcorder is powered OFF. Insert SD Memory card (up to 16GB) before use. Initial Camcorder Setup Installing the Batteries Installing the Memory Card Insert 3 X AAA (1.5V) batteries. Alkaline batteries recommended (not included).
Using the Camcorder 4 Turning On the Camcorder Make sure the camcorder is powered OFF. Insert SD Memory card (up to 16GB) before use. Initial Camcorder Setup Installing the Batteries Installing the Memory Card Insert 3 X AAA (1.5V) batteries. Alkaline batteries recommended (not included).
v2 Camera Manual
Page 6
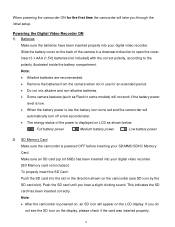
... Video Recorder ON 1) Batteries Make sure the batteries have been inserted properly into your digital video recorder. (SD Memory card not included.) To properly insert the SD Card: Push the SD card into your digital video recorder. Note: Alkaline batteries are recommended. Remove the batteries from... first time the camcorder will take you through the initial setup. This indicates the SD card has been inserted correctly. Push the SD card until you do not see SD icon by the SD card slot). When powering the camcorder ON for an extended period. Do not...
... Video Recorder ON 1) Batteries Make sure the batteries have been inserted properly into your digital video recorder. (SD Memory card not included.) To properly insert the SD Card: Push the SD card into your digital video recorder. Note: Alkaline batteries are recommended. Remove the batteries from... first time the camcorder will take you through the initial setup. This indicates the SD card has been inserted correctly. Push the SD card until you do not see SD icon by the SD card slot). When powering the camcorder ON for an extended period. Do not...
v2 Camera Manual
Page 7
... the Camcorder Language You will appear. Select the language of the SD card). Your digital video recorder is now ready to confirm the selection. If the SD card is locked this will prevent the camcorder from saving captured photos to the SD card. 3) Power On Press and hold the POWER button to select ...a language for the camcorder. Make sure the SD card is not locked (check the lock switch ...
... the Camcorder Language You will appear. Select the language of the SD card). Your digital video recorder is now ready to confirm the selection. If the SD card is locked this will prevent the camcorder from saving captured photos to the SD card. 3) Power On Press and hold the POWER button to select ...a language for the camcorder. Make sure the SD card is not locked (check the lock switch ...
v2 Camera Manual
Page 9
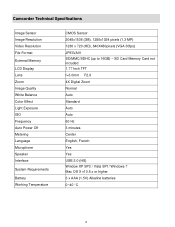
SD Card Memory Card not included 1.77 Inch TFT f=3.0mm F2.8 4X Digital Zoom Normal Auto Standard Auto Auto 60 Hz 3 minutes Center English, French Yes Yes USB 2.0 (HS) ... Metering Language Microphone Speaker Interface System Requirements Battery Working Temperature CMOS Sensor 2048x1536 (3M), 1280x1024 pixels (1.3 MP) 1280 x 720 (HD), 640X480pixels (VGA 30fps) JPEG/AVI SD/MMC/SDHC (up to 16GB) -
SD Card Memory Card not included 1.77 Inch TFT f=3.0mm F2.8 4X Digital Zoom Normal Auto Standard Auto Auto 60 Hz 3 minutes Center English, French Yes Yes USB 2.0 (HS) ... Metering Language Microphone Speaker Interface System Requirements Battery Working Temperature CMOS Sensor 2048x1536 (3M), 1280x1024 pixels (1.3 MP) 1280 x 720 (HD), 640X480pixels (VGA 30fps) JPEG/AVI SD/MMC/SDHC (up to 16GB) -
v2 Camera Manual
Page 11
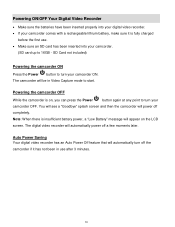
... again at any point to turn your camcorder OFF. Note: When there is insufficient battery power, a "Low Battery" message will automatically turn your camcorder. (SD card up to 16GB - Powering the camcorder OFF While the camcorder is fully charged before the first use after 3 minutes. 10 The digital video recorder will... on the LCD screen. Powering ON/OFF Your Digital Video Recorder Make sure the batteries have been inserted properly into your camcorder ON. SD Card not included) Powering the camcorder ON Press the Power button to turn off completely.
... again at any point to turn your camcorder OFF. Note: When there is insufficient battery power, a "Low Battery" message will automatically turn your camcorder. (SD card up to 16GB - Powering the camcorder OFF While the camcorder is fully charged before the first use after 3 minutes. 10 The digital video recorder will... on the LCD screen. Powering ON/OFF Your Digital Video Recorder Make sure the batteries have been inserted properly into your camcorder ON. SD Card not included) Powering the camcorder ON Press the Power button to turn off completely.

v2 Camera Manual
Page 14
Video Capture Mode The Video Capture Mode allows you to begin to the camcorder's SD card. 7) You can see yourself within the scene on the top right corner of the LCD screen and a red indicator will display by default. When the ... begin recording. The lower the resolution setting the more recording time is first powered ON, the Video Capture Mode will appear in place of the SD memory card inserted as well as twist and shoot! It's as easy as the video resolution selected. 13
Video Capture Mode The Video Capture Mode allows you to begin to the camcorder's SD card. 7) You can see yourself within the scene on the top right corner of the LCD screen and a red indicator will display by default. When the ... begin recording. The lower the resolution setting the more recording time is first powered ON, the Video Capture Mode will appear in place of the SD memory card inserted as well as twist and shoot! It's as easy as the video resolution selected. 13
v2 Camera Manual
Page 21
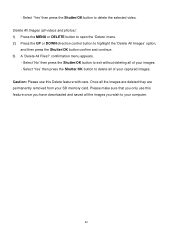
... button to exit without deleting all the images you wish to your images. - Please make sure that you have downloaded and saved all of your SD memory card. Delete All Images (all of your computer. 20 confirmation menu appears. - Caution: Please use this feature once you only use this Delete feature with...
... button to exit without deleting all the images you wish to your images. - Please make sure that you have downloaded and saved all of your SD memory card. Delete All Images (all of your computer. 20 confirmation menu appears. - Caution: Please use this feature once you only use this Delete feature with...
v2 Camera Manual
Page 29
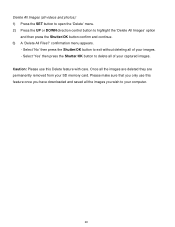
Caution: Please use this Delete feature with care. Once all the images are deleted they are permanently removed from your SD memory card. confirmation menu appears. - Select 'Yes' then press the Shutter/OK button to exit without deleting all of your captured images. Select 'No' then press the ...
Caution: Please use this Delete feature with care. Once all the images are deleted they are permanently removed from your SD memory card. confirmation menu appears. - Select 'Yes' then press the Shutter/OK button to exit without deleting all of your captured images. Select 'No' then press the ...
v2 Camera Manual
Page 32
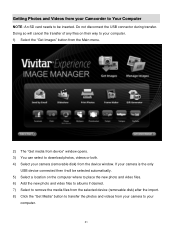
...) after the import. 8) Click the "Get Media" button to transfer the photos and videos from your camera to your Camcorder to Your Computer NOTE: An SD card needs to download photos, videos or both. 4) Select your camera (removable disk) from the device window. Getting Photos and Videos from your computer. 31 Doing...
...) after the import. 8) Click the "Get Media" button to transfer the photos and videos from your camera to your Camcorder to Your Computer NOTE: An SD card needs to download photos, videos or both. 4) Select your camera (removable disk) from the device window. Getting Photos and Videos from your computer. 31 Doing...
v2 Camera Manual
Page 35
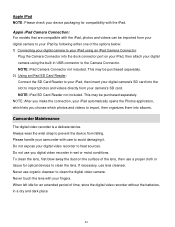
... videos to avoid damaging it. Do not use a proper cloth or tissue for optical devices to heat sources. Please handle your camera's SD card. Never use lens cleanser. This may be imported from falling. If necessary, use organic cleanser to prevent the device from your digital camera... The digital video recorder is a delicate device. Apple iPad Camera Connection: For models that are compatible with the iPad. NOTE: iPad SD Card Reader not included. Never touch the lens with your device packaging for an extended period of the lens, then use you choose which lets...
... videos to avoid damaging it. Do not use a proper cloth or tissue for optical devices to heat sources. Please handle your camera's SD card. Never use lens cleanser. This may be imported from falling. If necessary, use organic cleanser to prevent the device from your digital camera... The digital video recorder is a delicate device. Apple iPad Camera Connection: For models that are compatible with the iPad. NOTE: iPad SD Card Reader not included. Never touch the lens with your device packaging for an extended period of the lens, then use you choose which lets...
v2 Camera Manual
Page 37
...the images stored on my computer. This camera requires an SD card for ? If the camera powers off . We recommend always downloading your photos to your local toll free number. Can't find manuals, software and FAQ's at support@vivitar.com and one of our technical support team members will ... 36 You can be uploaded quickly before you are sent to the SD memory card then all the photos should be retrieved from my computer. The images were also deleted from there. All images deleted using the Vivitar Experience Image Manager. If you have taken photos and selected the "...
...the images stored on my computer. This camera requires an SD card for ? If the camera powers off . We recommend always downloading your photos to your local toll free number. Can't find manuals, software and FAQ's at support@vivitar.com and one of our technical support team members will ... 36 You can be uploaded quickly before you are sent to the SD memory card then all the photos should be retrieved from my computer. The images were also deleted from there. All images deleted using the Vivitar Experience Image Manager. If you have taken photos and selected the "...


