
User Guide
Page 1
... las instrucciones en este manual" Model No. VS18703 P/N: XG251G Warranty information contained in this User Guide to obtain important information on installing and using your product in a safe manner, as well as registering your limited coverage from ViewSonic® Corporation, which is also found on our web site at http://www.viewsonic.com in English, or in specific languages using the Regional selection...
... las instrucciones en este manual" Model No. VS18703 P/N: XG251G Warranty information contained in this User Guide to obtain important information on installing and using your product in a safe manner, as well as registering your limited coverage from ViewSonic® Corporation, which is also found on our web site at http://www.viewsonic.com in English, or in specific languages using the Regional selection...

User Guide
Page 4
... is present, immediately turn the device off and call your dealer or ViewSonic®. Please ensure grounding prongs are never removed. • Always route and manage cords and cables connected to your safety. Ensure that the power outlet is located near the equipment so that might tempt children to climb, such as toys and remote controls, on the top...
... is present, immediately turn the device off and call your dealer or ViewSonic®. Please ensure grounding prongs are never removed. • Always route and manage cords and cables connected to your safety. Ensure that the power outlet is located near the equipment so that might tempt children to climb, such as toys and remote controls, on the top...

User Guide
Page 6
... Overview...9 Initial Setup 10 Installing the Stand 10 Using the Mouse Anchor 13 Wall Mounting...14 Using the Security Slot 16 Making Connections 17 Connecting to Power 17 Connecting External Devices 18 HDMI Connection 18 DisplayPort Connection 19 USB Connection...20 Audio Connection 21 Using the Monitor 22 Adjusting the Viewing Angle 22 Height Adjustment 22 Tilt Angle Adjustment 23 Screen Orientation Adjustment (Monitor Pivot 23 Swivel Angle Adjustment 25 Turning the Device On/Off 26 Using the Control Panel Keys 27 Quick Access Menu 27 Hot...
... Overview...9 Initial Setup 10 Installing the Stand 10 Using the Mouse Anchor 13 Wall Mounting...14 Using the Security Slot 16 Making Connections 17 Connecting to Power 17 Connecting External Devices 18 HDMI Connection 18 DisplayPort Connection 19 USB Connection...20 Audio Connection 21 Using the Monitor 22 Adjusting the Viewing Angle 22 Height Adjustment 22 Tilt Angle Adjustment 23 Screen Orientation Adjustment (Monitor Pivot 23 Swivel Angle Adjustment 25 Turning the Device On/Off 26 Using the Control Panel Keys 27 Quick Access Menu 27 Hot...

User Guide
Page 10
Initial Setup This section provides detailed instructions for setting up your monitor. Place the monitor on the monitor stand's base with the screen facing down. 2. Use the captured screw in the monitor stand's base and secure it to the monitor stand's neck. 10 Align and connect the two (2) points on a flat, stable surface with the monitor stand's neck. 3. Installing the Stand 1.
Initial Setup This section provides detailed instructions for setting up your monitor. Place the monitor on the monitor stand's base with the screen facing down. 2. Use the captured screw in the monitor stand's base and secure it to the monitor stand's neck. 10 Align and connect the two (2) points on a flat, stable surface with the monitor stand's neck. 3. Installing the Stand 1.

User Guide
Page 14
Place the device on a flat, stable surface with the screen facing down slightly to the table below for the standard dimensions for wall mount kits. Pull down . 3. To obtain a wall mounting kit or height adjustment base, contact ViewSonic® or your local dealer. NOTE: Only use a UL certified wall mount kit/bracket. Turn off the device and disconnect all cables. 2. Maximum Loading 14 kg Hole pattern...
Place the device on a flat, stable surface with the screen facing down slightly to the table below for the standard dimensions for wall mount kits. Pull down . 3. To obtain a wall mounting kit or height adjustment base, contact ViewSonic® or your local dealer. NOTE: Only use a UL certified wall mount kit/bracket. Turn off the device and disconnect all cables. 2. Maximum Loading 14 kg Hole pattern...

User Guide
Page 26
To turn on the monitor. 3. If the monitor is connected to turn the monitor off, press the Power button again. Turning the Device On/Off 1. NOTE: The monitor will still consume some power as long as the power cord is not being used for a long period of time, please disconnect the power plug from the power outlet. 26 Plug the connected power cord into a power outlet. 2. Press the Power button to the power outlet.
To turn on the monitor. 3. If the monitor is connected to turn the monitor off, press the Power button again. Turning the Device On/Off 1. NOTE: The monitor will still consume some power as long as the power cord is not being used for a long period of time, please disconnect the power plug from the power outlet. 26 Plug the connected power cord into a power outlet. 2. Press the Power button to the power outlet.

User Guide
Page 30
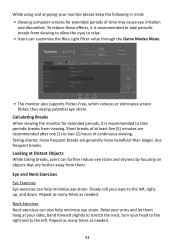
Refresh Rate Hz Game Modes Volume Mute Display G-SYNC® Processor On Off Input Select Audio Adjust Setup Menu Custom 1 Game Modes Exit Navi. XG251G G-Sync ON 360 Max. Power 4. Move the joy key [▲] or [▼] to confirm. Power 30 3. Then press the [●] key to adjust/select the setting. Refresh Rate Hz Game Modes Volume Mute Display G-SYNC® Processor On Off Input Select Audio Adjust Setup Menu Custom 1 Game Modes Exit Navi. XG251G G-Sync ON 360 Max. Then move the...
Refresh Rate Hz Game Modes Volume Mute Display G-SYNC® Processor On Off Input Select Audio Adjust Setup Menu Custom 1 Game Modes Exit Navi. XG251G G-Sync ON 360 Max. Power 4. Move the joy key [▲] or [▼] to confirm. Power 30 3. Then press the [●] key to adjust/select the setting. Refresh Rate Hz Game Modes Volume Mute Display G-SYNC® Processor On Off Input Select Audio Adjust Setup Menu Custom 1 Game Modes Exit Navi. XG251G G-Sync ON 360 Max. Then move the...

User Guide
Page 39
... [▼] to enter the Display menu. Refresh Rate Hz Game Modes Display Peak White Nits Contrast 6-axis Color Color Temperature Gamma SDR Colors sRGB G-SYNC® Processor Input Select Audio Adjust Setup Menu Custom 1 Game Modes Exit Navi. Power 3. Then press the [●] key to select Display. Then move the joy key [◄] or [▲] or [▼] to enter its sub-menu. 4. Adjusts the difference between the image background (black level) and the foreground...
... [▼] to enter the Display menu. Refresh Rate Hz Game Modes Display Peak White Nits Contrast 6-axis Color Color Temperature Gamma SDR Colors sRGB G-SYNC® Processor Input Select Audio Adjust Setup Menu Custom 1 Game Modes Exit Navi. Power 3. Then press the [●] key to select Display. Then move the joy key [◄] or [▲] or [▼] to enter its sub-menu. 4. Adjusts the difference between the image background (black level) and the foreground...

User Guide
Page 44
...-Screen Display (OSD) Menu. 2. Move the joy key [▲] or [▼] to select Audio Adjust. Enable/disable the sound. 44 XG251G G-Sync ON 360 Max. Move the joy key [◄] or [►] to select the desired option. Then move the joy key [►] to enter the Audio Adjust menu. Refresh Rate Hz Game Modes Volume Mute Display G-SYNC® Processor Input Select Audio Adjust Setup Menu Custom 1 Game Modes Exit Navi. Menu Option Volume Mute Description Adjust the volume...
...-Screen Display (OSD) Menu. 2. Move the joy key [▲] or [▼] to select Audio Adjust. Enable/disable the sound. 44 XG251G G-Sync ON 360 Max. Move the joy key [◄] or [►] to select the desired option. Then move the joy key [►] to enter the Audio Adjust menu. Refresh Rate Hz Game Modes Volume Mute Display G-SYNC® Processor Input Select Audio Adjust Setup Menu Custom 1 Game Modes Exit Navi. Menu Option Volume Mute Description Adjust the volume...

User Guide
Page 46
... Select an available language for the OSD Menu. Elite RGB Partner Software RGB Setup • Visit https://www.viewsonic.com/elite/rgb/ and choose a partner RGB software to download. • Download and install your software of the monitor and under the bezel in the USB 3.0 B-Male connector to your monitor and the USB 3.0 A-Male connector to have present in partners' software. 46 This setting controls the RGB lighting on , or after being reset, the default 'Breathing' will give...
... Select an available language for the OSD Menu. Elite RGB Partner Software RGB Setup • Visit https://www.viewsonic.com/elite/rgb/ and choose a partner RGB software to download. • Download and install your software of the monitor and under the bezel in the USB 3.0 B-Male connector to your monitor and the USB 3.0 A-Male connector to have present in partners' software. 46 This setting controls the RGB lighting on , or after being reset, the default 'Breathing' will give...
User Guide
Page 51
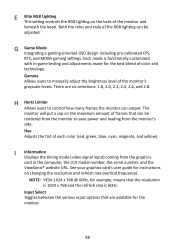
Refresh Rate Hz Game Modes Standard Custom 1 Custom 2 FPS Battle Royale MOBA Display G-SYNC® Processor Input Select ULMB ULMB Pulse Width Dark Boost Blue Light Filter Response Time OD Recall Audio Adjust Setup Menu Custom 1 Game Modes 50 /100 Exit Navi. Short breaks of at your sides, bend forward slightly to stretch the neck, turn your monitor please keep the following in mind: • Viewing computer screens for...
Refresh Rate Hz Game Modes Standard Custom 1 Custom 2 FPS Battle Royale MOBA Display G-SYNC® Processor Input Select ULMB ULMB Pulse Width Dark Boost Blue Light Filter Response Time OD Recall Audio Adjust Setup Menu Custom 1 Game Modes 50 /100 Exit Navi. Short breaks of at your sides, bend forward slightly to stretch the neck, turn your monitor please keep the following in mind: • Viewing computer screens for...

User Guide
Page 53
... [▼] to select Setup Menu. In addition, the RGB backlights are also synced with several key partners. Visit: https://www.viewsonic.com/elite/rgb/ 2. NOTE: Some sub-menu options may have another sub-menu. To setup up partner RGB software: 1. Select a partner RGB software, and download it. 3. When "On", or after being reset, the default 'Breathing' mode will give you the power to enter its sub-menu. 4. Start customizing the monitor's RGB lighting. 53
... [▼] to select Setup Menu. In addition, the RGB backlights are also synced with several key partners. Visit: https://www.viewsonic.com/elite/rgb/ 2. NOTE: Some sub-menu options may have another sub-menu. To setup up partner RGB software: 1. Select a partner RGB software, and download it. 3. When "On", or after being reset, the default 'Breathing' mode will give you the power to enter its sub-menu. 4. Start customizing the monitor's RGB lighting. 53

User Guide
Page 56
... to your monitor. Audio Adjust Adjusts the volume, mutes the sound, or toggles between inputs if you have more comfortable viewing experience. Blue Light Filter Adjusts the filter that blocks high-energy blue light for a more than one source. Brightness Adjusts background black levels of terms used in alphabetical order. B Black Stabilization ViewSonic's Black Stabilization provides heightened visibility and detail by default. All terms are listed in all LCD display models. Boot Up Screen Turning off the...
... to your monitor. Audio Adjust Adjusts the volume, mutes the sound, or toggles between inputs if you have more comfortable viewing experience. Blue Light Filter Adjusts the filter that blocks high-energy blue light for a more than one source. Brightness Adjusts background black levels of terms used in alphabetical order. B Black Stabilization ViewSonic's Black Stabilization provides heightened visibility and detail by default. All terms are listed in all LCD display models. Boot Up Screen Turning off the...

User Guide
Page 57
... viewing experience. Color Temperature Allows users to select specific color temperature settings to overlay on your screen. 57 Contrast Adjusts the difference between the image background (black level) and the foreground (white level). Bluish Set the color temperature to fit the user's needs. Native Default color temperature. C Color Adjust Provides several color adjustment modes to help adjust the color settings to 9300K. Color Range The monitor can manually change the color range options to fit the correct color range if the colors are not displayed correctly. Full Range...
... viewing experience. Color Temperature Allows users to select specific color temperature settings to overlay on your screen. 57 Contrast Adjusts the difference between the image background (black level) and the foreground (white level). Bluish Set the color temperature to fit the user's needs. Native Default color temperature. C Color Adjust Provides several color adjustment modes to help adjust the color settings to 9300K. Color Range The monitor can manually change the color range options to fit the correct color range if the colors are not displayed correctly. Full Range...
User Guide
Page 58
... graphics card in -game testing and adjustments made for the monitor. 58 H Hertz Limiter Allows users to control how many frames the monitor can be rendered from the monitor to manually adjust the brightness level of each color (red, green, blue, cyan, magenta, and yellow). Input Select Toggles between the various input options that are six selections: 1.8, 2.0, 2.2, 2.4, 2.6, and 2.8. E Elite RGB Lighting This setting controls the RGB lighting on changing the resolution and refresh rate (vertical frequency). Both the color...
... graphics card in -game testing and adjustments made for the monitor. 58 H Hertz Limiter Allows users to control how many frames the monitor can be rendered from the monitor to manually adjust the brightness level of each color (red, green, blue, cyan, magenta, and yellow). Input Select Toggles between the various input options that are six selections: 1.8, 2.0, 2.2, 2.4, 2.6, and 2.8. E Elite RGB Lighting This setting controls the RGB lighting on changing the resolution and refresh rate (vertical frequency). Both the color...

User Guide
Page 59
... a factory preset timing mode listed in the "Language Select" or "Power Lock" setting. You can turn off . O Offset Adjusts black levels for "Pure Experience", this manual. OSD Pivot Sets the monitor OSD Menu display direction. A setting on or off the lighting effect under "Power Indicator". Under the "Low Input Lag" sub-menu, you cannot see the outermost edges of moving objects, making them less vague with a clearer view. M Manual Image Adjust Displays the "Manual Image Adjust" menu. This setting also controls the lighting on screen...
... a factory preset timing mode listed in the "Language Select" or "Power Lock" setting. You can turn off . O Offset Adjusts black levels for "Pure Experience", this manual. OSD Pivot Sets the monitor OSD Menu display direction. A setting on or off the lighting effect under "Power Indicator". Under the "Low Input Lag" sub-menu, you cannot see the outermost edges of moving objects, making them less vague with a clearer view. M Manual Image Adjust Displays the "Manual Image Adjust" menu. This setting also controls the lighting on screen...

User Guide
Page 60
.... Resolution Notice The notice tells users that want to deliver an optimized viewing experience for a "best fit" scenario. 60 These presets are specifically designed to adjust their monitor's response time. R Recall Resets the ViewMode monitor settings. This notice will disable after removing the light-bar. They can also define which functions or modes they prefer in the Quick Access Menu via the Setup Menu in the display settings window when setting up the display resolution.
.... Resolution Notice The notice tells users that want to deliver an optimized viewing experience for a "best fit" scenario. 60 These presets are specifically designed to adjust their monitor's response time. R Recall Resets the ViewMode monitor settings. This notice will disable after removing the light-bar. They can also define which functions or modes they prefer in the Quick Access Menu via the Setup Menu in the display settings window when setting up the display resolution.

User Guide
Page 61
... and securely connected. • Adjust the brightness and contrast settings. • Make sure the correct input source is selected. • If any colors (red, green, or blue) are missing, check the video cable to make sure it is properly and securely connected. Problem or Issue No power Power is On, but no image appears on screen Wrong or abnormal colors Screen image is too light or dark Screen image cuts in the video cable connector. • Make sure the video cable connecting the monitor to the...
... and securely connected. • Adjust the brightness and contrast settings. • Make sure the correct input source is selected. • If any colors (red, green, or blue) are missing, check the video cable to make sure it is properly and securely connected. Problem or Issue No power Power is On, but no image appears on screen Wrong or abnormal colors Screen image is too light or dark Screen image cuts in the video cable connector. • Make sure the video cable connecting the monitor to the...

User Guide
Page 62
...; If using ear-/headphones, ensure the mini stereo jack is connected. • Make sure the volume is Off. selectable in the cable connector could cause an improper connection. 62 not work • Make sure the USB cable is locked. • Turn off the monitor, unplug the power cord, plug it is adequate spacing. • For more information, see "Adjusting the Viewing Angle". The screen appears yellow • Make sure the "Blue Light Filter...
...; If using ear-/headphones, ensure the mini stereo jack is connected. • Make sure the volume is Off. selectable in the cable connector could cause an improper connection. 62 not work • Make sure the USB cable is locked. • Turn off the monitor, unplug the power cord, plug it is adequate spacing. • For more information, see "Adjusting the Viewing Angle". The screen appears yellow • Make sure the "Blue Light Filter...

User Guide
Page 70
..., (b) your name, (c) your address, (d) a description of the problem, and (e) the serial number of the product. • Take or ship the product, freight prepaid, in the product User Guide. • Removal, installation, and set-up service charges, including wall-mounting of the product. Any third-party software included with the product or installed by static (non-moving) images displayed for a particular purpose. 70 Projector Lamps). •...
..., (b) your name, (c) your address, (d) a description of the problem, and (e) the serial number of the product. • Take or ship the product, freight prepaid, in the product User Guide. • Removal, installation, and set-up service charges, including wall-mounting of the product. Any third-party software included with the product or installed by static (non-moving) images displayed for a particular purpose. 70 Projector Lamps). •...


