
English Owners Manual
Page 1
... Handset Controls and Keys 2 Base Unit Controls and Keys 3 Important Safety Instructions 3 Battery Safety Precautions 4 Introduction 5 Features 5 Included with the XCA650 6 Important Electrical Considerations 7 Range 7 Telephone Line Problems 7 Radio Interference 8 More Than One Cordless Telephone 8 Installation 9 Selecting a Location 9 Telephone...Safety Feature 11 Desk or Tabletop Installation 11 Wall Installation 14 Direct Wall Mounting 16 Setting Up Your Phone 21 Extending the Antenna 21 Installing the Handset Battery Pack 21 Cleaning the Battery Contacts 23 Charging the...
... Handset Controls and Keys 2 Base Unit Controls and Keys 3 Important Safety Instructions 3 Battery Safety Precautions 4 Introduction 5 Features 5 Included with the XCA650 6 Important Electrical Considerations 7 Range 7 Telephone Line Problems 7 Radio Interference 8 More Than One Cordless Telephone 8 Installation 9 Selecting a Location 9 Telephone...Safety Feature 11 Desk or Tabletop Installation 11 Wall Installation 14 Direct Wall Mounting 16 Setting Up Your Phone 21 Extending the Antenna 21 Installing the Handset Battery Pack 21 Cleaning the Battery Contacts 23 Charging the...
English Owners Manual
Page 2
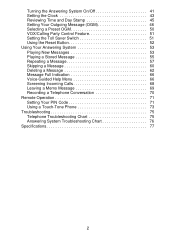
... Menu 66 Screening Incoming Calls 68 Leaving a Memo Message 69 Recording a Telephone Conversation 70 Remote Operation 71 Setting Your PIN Code 71 Using a Touch-Tone Phone 73 Troubleshooting 75 Telephone Troubleshooting Chart 75 Answering System Troubleshooting Chart 76 Specifications 77 2
... Menu 66 Screening Incoming Calls 68 Leaving a Memo Message 69 Recording a Telephone Conversation 70 Remote Operation 71 Setting Your PIN Code 71 Using a Touch-Tone Phone 73 Troubleshooting 75 Telephone Troubleshooting Chart 75 Answering System Troubleshooting Chart 76 Specifications 77 2
English Owners Manual
Page 5
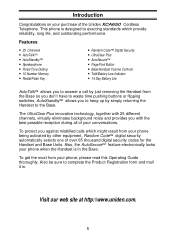
... outstanding performance. Also, the AutoSecure™ feature electronically locks your phone when the Handset is designed to waste time pushing buttons or flipping switches. Visit our web site at http:\\www.uniden.com. 5 To protect you to hang up by just removing ...reception during all of your phone being activated by other equipment, Random Code™ digital security automatically selects one of the Uniden XCA650 Cordless Telephone. To get the most from your conversations. This phone is in . Introduction Congratulations on your phone, please read this Operating Guide...
... outstanding performance. Also, the AutoSecure™ feature electronically locks your phone when the Handset is designed to waste time pushing buttons or flipping switches. Visit our web site at http:\\www.uniden.com. 5 To protect you to hang up by just removing ...reception during all of your phone being activated by other equipment, Random Code™ digital security automatically selects one of the Uniden XCA650 Cordless Telephone. To get the most from your conversations. This phone is in . Introduction Congratulations on your phone, please read this Operating Guide...
English Owners Manual
Page 7
... determine if it is no exception. Also, the telephone company may affect the operation of this phone is used as a means of comparison against other than as detailed by Uniden, or operation of your authority to it. However, your telephone company must give adequate notice in writing prior to... such actions to allow you must leave it disconnected until the trouble has been corrected. 7 This phone is the cause of this phone to include all ...
... determine if it is no exception. Also, the telephone company may affect the operation of this phone is used as a means of comparison against other than as detailed by Uniden, or operation of your authority to it. However, your telephone company must give adequate notice in writing prior to... such actions to allow you must leave it disconnected until the trouble has been corrected. 7 This phone is the cause of this phone to include all ...
English Owners Manual
Page 8
... the interference. Be certain that you cannot eliminate this type of the potential for interference. Finally, it should not be placed near or on your phone, you need to change to nearby TVs and VCRs. Press the channel key to use more than one cordless telephone in your cordless Handset, or...
... the interference. Be certain that you cannot eliminate this type of the potential for interference. Finally, it should not be placed near or on your phone, you need to change to nearby TVs and VCRs. Press the channel key to use more than one cordless telephone in your cordless Handset, or...

English Owners Manual
Page 9
...to a phone jack, and these types of jack. however, you should charge your particular situation. 9 Telephone Line Outlets There are fitted with a molded plastic connector which holds the Handset faces up. (See page 19 for more information.) • You should contact your Uniden telephone ...do not have a switch to interrupt its power. • Keep the Base Unit and Handset away from sources of phone outlets: Modular Jack Most phone equipment available now uses modular jacks. Installation Selecting a Location Before choosing a location for your local telephone company for information...
...to a phone jack, and these types of jack. however, you should charge your particular situation. 9 Telephone Line Outlets There are fitted with a molded plastic connector which holds the Handset faces up. (See page 19 for more information.) • You should contact your Uniden telephone ...do not have a switch to interrupt its power. • Keep the Base Unit and Handset away from sources of phone outlets: Modular Jack Most phone equipment available now uses modular jacks. Installation Selecting a Location Before choosing a location for your local telephone company for information...

English Owners Manual
Page 10
TEL LINE +- To relieve strain on the DC plug when the phone is placed on the bottom. Applying Power to the Base Unit All the XCA650 phones require an AC outlet, without a switch to interrupt power, and the included AC Adapter. Connecting the Telephone Cords Consider these safety guidelines before connecting the ...
TEL LINE +- To relieve strain on the DC plug when the phone is placed on the bottom. Applying Power to the Base Unit All the XCA650 phones require an AC outlet, without a switch to interrupt power, and the included AC Adapter. Connecting the Telephone Cords Consider these safety guidelines before connecting the ...

English Owners Manual
Page 11
If you are unable to insert the plug fully into the power outlet only one blade wider than the other. Place the Base on a desk or tabletop. 11 a plug having one way. Do not alter the shape of the blades of the polarized plug. Desk or Tabletop Installation 1. This plug will fit into the outlet, try reversing the plug. Adapter Safety Feature The AC Adapter furnished with this phone may be equipped with a polarized line plug -
If you are unable to insert the plug fully into the power outlet only one blade wider than the other. Place the Base on a desk or tabletop. 11 a plug having one way. Do not alter the shape of the blades of the polarized plug. Desk or Tabletop Installation 1. This plug will fit into the outlet, try reversing the plug. Adapter Safety Feature The AC Adapter furnished with this phone may be equipped with a polarized line plug -

English Owners Manual
Page 13
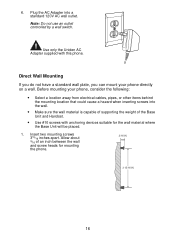
Use only the Uniden AC Adapter supplied with this phone. 13 Plug the AC Adapter into the telephone jack on the wall. 6. Note: Do not use an outlet controlled by a wall switch. Plug the other end of the cord into a standard 120V AC wall outlet. 5.
Use only the Uniden AC Adapter supplied with this phone. 13 Plug the AC Adapter into the telephone jack on the wall. 6. Note: Do not use an outlet controlled by a wall switch. Plug the other end of the cord into a standard 120V AC wall outlet. 5.

English Owners Manual
Page 14
Place the telephone cord inside the molded channel on the Base Unit. RING VOL PULSE-TONE DC IN 9V OFF-LO-HI TEL LINE 2. RING VOL PULSE-TONE DC IN 9V OFF-LO-HI +- Plug one end of the short telephone cord into the TEL LINE jack on the bottom of the Base Unit. Wall Installation Standard Wall Plate Mounting These phones are designed to be mounted on a standard AT&T or GTE wall plate. 1. TEL LINE 14
Place the telephone cord inside the molded channel on the Base Unit. RING VOL PULSE-TONE DC IN 9V OFF-LO-HI TEL LINE 2. RING VOL PULSE-TONE DC IN 9V OFF-LO-HI +- Plug one end of the short telephone cord into the TEL LINE jack on the bottom of the Base Unit. Wall Installation Standard Wall Plate Mounting These phones are designed to be mounted on a standard AT&T or GTE wall plate. 1. TEL LINE 14
English Owners Manual
Page 16
... switch. Insert two mounting screws 315⁄16 inches apart. Direct Wall Mounting If you do not have a standard wall plate, you can mount your phone, consider the following: • Select a location away from electrical cables, pipes, or other items behind the mounting location that could cause a hazard when inserting screws... the weight of an inch between the wall and screw heads for the wall material where the Base Unit will be placed. 1. Use only the Uniden AC Adapter supplied with anchoring devices suitable for mounting the phone. 3/16 IN. 3 15/16 IN. 16
... switch. Insert two mounting screws 315⁄16 inches apart. Direct Wall Mounting If you do not have a standard wall plate, you can mount your phone, consider the following: • Select a location away from electrical cables, pipes, or other items behind the mounting location that could cause a hazard when inserting screws... the weight of an inch between the wall and screw heads for the wall material where the Base Unit will be placed. 1. Use only the Uniden AC Adapter supplied with anchoring devices suitable for mounting the phone. 3/16 IN. 3 15/16 IN. 16
English Owners Manual
Page 19
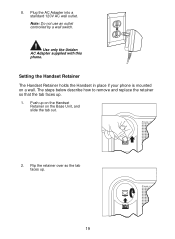
The steps below describe how to remove and replace the retainer so that the tab faces up . 19 25 CHANNEL Plug the AC Adapter into a standard 120V AC wall outlet. Note: Do not use an outlet controlled by a wall switch. Setting the Handset Retainer The Handset Retainer holds the Handset in place if your phone is mounted on the Base Unit, and slide the tab out. 25 CHANNEL 2. 8. Use only the Uniden AC Adapter supplied with this phone. Flip the retainer over so the tab faces up . 1. Push up on the Handset Retainer on a wall.
The steps below describe how to remove and replace the retainer so that the tab faces up . 19 25 CHANNEL Plug the AC Adapter into a standard 120V AC wall outlet. Note: Do not use an outlet controlled by a wall switch. Setting the Handset Retainer The Handset Retainer holds the Handset in place if your phone is mounted on the Base Unit, and slide the tab out. 25 CHANNEL 2. 8. Use only the Uniden AC Adapter supplied with this phone. Flip the retainer over so the tab faces up . 1. Push up on the Handset Retainer on a wall.

English Owners Manual
Page 21
Press in on the Battery Cover charge Release. 21 RING TIME 2-4-TS REC TIME ANN/4/1 Installing the Handset Battery Pack 1. Setting Up Your Phone Extending the Antenna Before using your phone, be sure to raise the antenna to the vertical position.
Press in on the Battery Cover charge Release. 21 RING TIME 2-4-TS REC TIME ANN/4/1 Installing the Handset Battery Pack 1. Setting Up Your Phone Extending the Antenna Before using your phone, be sure to raise the antenna to the vertical position.

English Owners Manual
Page 24
Hang the Handset on the cradle when the phone is mounted on the Base Unit. -or- We recommend that the battery pack charge for approximately 15-20 hours, without interruption, before using your new phone. 1. Place the Handset on a wall. Charging the Battery Pack Initial Battery Charging The rechargeable Nickel-Cadmium battery pack must be fully charged before plugging the phone line into your phone for the first time. Note: Make sure to change the Handset Retainer before hanging up the phone. 24 REC TIME ANN/4/1 RING TIME 2-4-TS
Hang the Handset on the cradle when the phone is mounted on the Base Unit. -or- We recommend that the battery pack charge for approximately 15-20 hours, without interruption, before using your new phone. 1. Place the Handset on a wall. Charging the Battery Pack Initial Battery Charging The rechargeable Nickel-Cadmium battery pack must be fully charged before plugging the phone line into your phone for the first time. Note: Make sure to change the Handset Retainer before hanging up the phone. 24 REC TIME ANN/4/1 RING TIME 2-4-TS

English Owners Manual
Page 25
.... To Avoid Memory Effect At least once a month, operate the unit until the "Battery Low" indicator appears. Avoid "topping off" the charge after using the phone for extended periods of time. 25 The battery life will seem to be shorter every time you use the unit. Battery Memory Effect Rechargeable batteries...
.... To Avoid Memory Effect At least once a month, operate the unit until the "Battery Low" indicator appears. Avoid "topping off" the charge after using the phone for extended periods of time. 25 The battery life will seem to be shorter every time you use the unit. Battery Memory Effect Rechargeable batteries...

English Owners Manual
Page 26
The Handset beeps and the talk/batt low LED flashes once every 3 seconds. Complete your phone to normal operation. Return the Handset to the Base Unit for charging. Return the Handset to the Base Unit for the Handset to fully recharge. ... its functions to save power. The Handset talk/batt low LED flashes once every 3 seconds. If the talk/batt low LED begins to flash, the phone is in the TONE position. IN STANDBY MODE None of the buttons will not be able to make a call as quickly as possible. Note: Most...
The Handset beeps and the talk/batt low LED flashes once every 3 seconds. Complete your phone to normal operation. Return the Handset to the Base Unit for charging. Return the Handset to the Base Unit for the Handset to fully recharge. ... its functions to save power. The Handset talk/batt low LED flashes once every 3 seconds. If the talk/batt low LED begins to flash, the phone is in the TONE position. IN STANDBY MODE None of the buttons will not be able to make a call as quickly as possible. Note: Most...

English Owners Manual
Page 27
Base Volume Controls To adjust the Base Unit ringer volume, move the RING VOL-OFF LO HI switch to select a different ringer tone when the phone is not in use. Press ringer to the desired setting. Adjusting Ringer/Volume Controls Handset Ringer Control You can also select one of two different ringer tones for the Handset. Handset Ringer Tone Select Button 27
Base Volume Controls To adjust the Base Unit ringer volume, move the RING VOL-OFF LO HI switch to select a different ringer tone when the phone is not in use. Press ringer to the desired setting. Adjusting Ringer/Volume Controls Handset Ringer Control You can also select one of two different ringer tones for the Handset. Handset Ringer Tone Select Button 27
English Owners Manual
Page 28
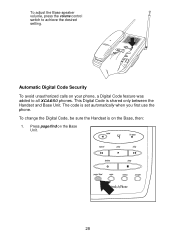
This Digital Code is set automatically when you first use the phone. The code is shared only between the Handset and Base Unit. Automatic Digital Code Security To avoid unauthorized calls on the Base, then: 1. To change the Digital Code, be sure the Handset is on your phone, a Digital Code feature was added to achieve the desired setting. Press page/find on the Base Unit. 28 To adjust the Base speaker volume, press the volume control switch to all XCA650 phones.
This Digital Code is set automatically when you first use the phone. The code is shared only between the Handset and Base Unit. Automatic Digital Code Security To avoid unauthorized calls on the Base, then: 1. To change the Digital Code, be sure the Handset is on your phone, a Digital Code feature was added to achieve the desired setting. Press page/find on the Base Unit. 28 To adjust the Base speaker volume, press the volume control switch to all XCA650 phones.

English Owners Manual
Page 31
... (AutoStandby) Note: You must use the Handset to make a call. Using Your Phone Making and Receiving Calls The following features of the XCA650 phone are different depending on the Handset's location when you may get an error tone and the phone will not disconnect. Press speaker on the Base Unit or press A again while... happens, place the Handset on the Base Unit HANG UP REDIAL - ANSWER CALL MAKE CALL HANDSET ON BASE Pick up Handset (AutoTalk) 1) Pick up the phone, you make a call . OR -
... (AutoStandby) Note: You must use the Handset to make a call. Using Your Phone Making and Receiving Calls The following features of the XCA650 phone are different depending on the Handset's location when you may get an error tone and the phone will not disconnect. Press speaker on the Base Unit or press A again while... happens, place the Handset on the Base Unit HANG UP REDIAL - ANSWER CALL MAKE CALL HANDSET ON BASE Pick up Handset (AutoTalk) 1) Pick up the phone, you make a call . OR -

English Owners Manual
Page 32
..., and Page/Find To change channels. Note: The Base Unit does not have finished a call and want to accept the waiting call waiting while the phone is pressed on the Base Unit to hang up and get a dial tone. If the call waiting tone sounds, press F to make a call , press F to...
..., and Page/Find To change channels. Note: The Base Unit does not have finished a call and want to accept the waiting call waiting while the phone is pressed on the Base Unit to hang up and get a dial tone. If the call waiting tone sounds, press F to make a call , press F to...

