
User Guide
Page 3
...TOSHIBA America Information Systems, Inc. 9740 Irvine Boulevard Irvine, California 92618-1697 Telephone: (949) 583-3000 Safety Instructions 1 Do not drop, puncture or disassemble the camcorder; Doing so may lead to the potential for serious damage. 7 Remove the battery during long periods between usage, as a deteriorated battery... 9 Use only the accessories supplied by the manufacturer. 10 Keep the camcorder out of the reach of infants. 11 Risk of explosion if battery is a storm or lightning. 6 Do not use batteries of different specifications. otherwise the warranty will be voided. 2 Avoid all ...
...TOSHIBA America Information Systems, Inc. 9740 Irvine Boulevard Irvine, California 92618-1697 Telephone: (949) 583-3000 Safety Instructions 1 Do not drop, puncture or disassemble the camcorder; Doing so may lead to the potential for serious damage. 7 Remove the battery during long periods between usage, as a deteriorated battery... 9 Use only the accessories supplied by the manufacturer. 10 Keep the camcorder out of the reach of infants. 11 Risk of explosion if battery is a storm or lightning. 6 Do not use batteries of different specifications. otherwise the warranty will be voided. 2 Avoid all ...
User Guide
Page 4
... properly. Otherwise, the electrolyte solution might leak, battery performance might deteriorate and the battery life might be completely secured, discontinue use the supplied AC adaptor or USB cable, or an optional Toshiba battery charger to charge the battery with this camcorder contains a button cell battery. Keep the button cell battery out of reach of the remote control and...
... properly. Otherwise, the electrolyte solution might leak, battery performance might deteriorate and the battery life might be completely secured, discontinue use the supplied AC adaptor or USB cable, or an optional Toshiba battery charger to charge the battery with this camcorder contains a button cell battery. Keep the button cell battery out of reach of the remote control and...
User Guide
Page 7
Contents Chapter 1: Getting to Know Your Camcorder 10 Overview 10 Check the components 11 System requirements 11 Front view 12 Rear view 12 Side view 13 Underside view 13 Chapter 2: Getting Started 14 Loading the battery 14 Charge your battery 16 Inserting and removing an SD™ Card (optional).....20 Protecting data on an SD™ Card 21 Turning the camcorder on and getting started .......22 Turning off the camcorder 22 Chapter 3: Record Mode 23 Button functions 23 LCD touch screen information 24 Notification icons 24 7
Contents Chapter 1: Getting to Know Your Camcorder 10 Overview 10 Check the components 11 System requirements 11 Front view 12 Rear view 12 Side view 13 Underside view 13 Chapter 2: Getting Started 14 Loading the battery 14 Charge your battery 16 Inserting and removing an SD™ Card (optional).....20 Protecting data on an SD™ Card 21 Turning the camcorder on and getting started .......22 Turning off the camcorder 22 Chapter 3: Record Mode 23 Button functions 23 LCD touch screen information 24 Notification icons 24 7
User Guide
Page 11
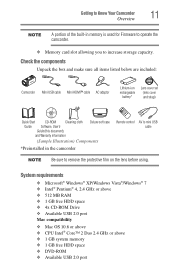
Check the components Unpack the box and make sure all items listed below are included: Camcorder Mini USB cable Mini HDMI™ cable AC adaptor Lithium-ion rechargeable battery* Lens cover set (lens cover and strap) Quick Start CD-ROM Cleaning cloth Guide Software, User's Guide (this document), and Warranty information Deluxe soft...
Check the components Unpack the box and make sure all items listed below are included: Camcorder Mini USB cable Mini HDMI™ cable AC adaptor Lithium-ion rechargeable battery* Lens cover set (lens cover and strap) Quick Start CD-ROM Cleaning cloth Guide Software, User's Guide (this document), and Warranty information Deluxe soft...
User Guide
Page 13
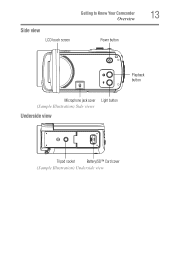
Side view LCD touch screen Getting to Know Your Camcorder Overview Power button 13 Playback button Microphone jack cover Light button (Sample Illustration) Side views Underside view Tripod socket Battery/SD™ Card cover (Sample Illustration) Underside view
Side view LCD touch screen Getting to Know Your Camcorder Overview Power button 13 Playback button Microphone jack cover Light button (Sample Illustration) Side views Underside view Tripod socket Battery/SD™ Card cover (Sample Illustration) Underside view
User Guide
Page 14
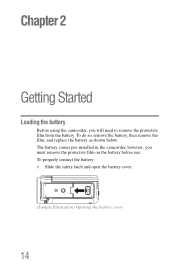
To properly connect the battery: 1 Slide the safety latch and open the battery cover. (Sample Illustration) Opening the battery cover 14 To do so, remove the battery, then remove the film, and replace the battery as shown below. Chapter 2 Getting Started Loading the battery Before using the camcorder, you must remove the protective film on the battery before use. The battery comes pre-installed in the camcorder, however, you will need to remove the protective film from the battery.
To properly connect the battery: 1 Slide the safety latch and open the battery cover. (Sample Illustration) Opening the battery cover 14 To do so, remove the battery, then remove the film, and replace the battery as shown below. Chapter 2 Getting Started Loading the battery Before using the camcorder, you must remove the protective film on the battery before use. The battery comes pre-installed in the camcorder, however, you will need to remove the protective film from the battery.
User Guide
Page 16
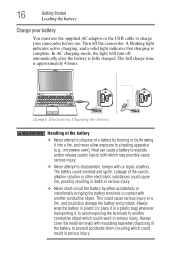
...In AC charging mode, the light will turn off the camcorder. The full charge time is approximately 4 hours. (Sample Illustration) Charging the battery Handling of the battery ❖ Never attempt to dispose of the battery, to prevent accidental short-circuiting which could result in a...transporting it, to avoid exposing the terminals to a heating apparatus (e.g., microwave oven). The battery could also damage the battery and product. 16 Getting Started Loading the battery Charge your camcorder before use the supplied AC adaptor or the USB cable to disassemble, tamper with another...
...In AC charging mode, the light will turn off the camcorder. The full charge time is approximately 4 hours. (Sample Illustration) Charging the battery Handling of the battery ❖ Never attempt to dispose of the battery, to prevent accidental short-circuiting which could result in a...transporting it, to avoid exposing the terminals to a heating apparatus (e.g., microwave oven). The battery could also damage the battery and product. 16 Getting Started Loading the battery Charge your camcorder before use the supplied AC adaptor or the USB cable to disassemble, tamper with another...
User Guide
Page 20
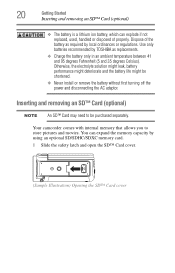
...) NOTE An SD™ Card may need to store pictures and movies. Your camcorder comes with internal memory that allows you to be shortened. ❖ Never install or remove the battery without first turning off the power and disconnecting the AC adaptor. Dispose of properly.... Otherwise, the electrolyte solution might leak, battery performance might deteriorate and the battery life might be purchased separately. Use only batteries recommended by TOSHIBA as required by using an optional SD/SDHC/SDXC memory card. 1 Slide the safety ...
...) NOTE An SD™ Card may need to store pictures and movies. Your camcorder comes with internal memory that allows you to be shortened. ❖ Never install or remove the battery without first turning off the power and disconnecting the AC adaptor. Dispose of properly.... Otherwise, the electrolyte solution might leak, battery performance might deteriorate and the battery life might be purchased separately. Use only batteries recommended by TOSHIBA as required by using an optional SD/SDHC/SDXC memory card. 1 Slide the safety ...
User Guide
Page 28
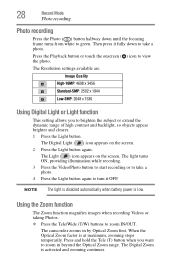
... of high contrast and backlight, so objects appear brighter and clearer. 1 Press the Light button. The camcorder zooms in beyond the Optical Zoom range. Then press it OFF. NOTE The light is disabled automatically when battery power is activated and zooming continues. The light turns ON, providing illumination while recording. 3 Press the...
... of high contrast and backlight, so objects appear brighter and clearer. 1 Press the Light button. The camcorder zooms in beyond the Optical Zoom range. Then press it OFF. NOTE The light is disabled automatically when battery power is activated and zooming continues. The light turns ON, providing illumination while recording. 3 Press the...
User Guide
Page 69
... corrupted files. The camcorder extends picture exposure time under low-light/ indoor conditions. Keep the camcorder (and the target subject) steady for several seconds when taking pictures. The camcorder must use the supplied AC adaptor or the USB cable. The light turns off automatically after battery is currently charging.... A blinking light confirms the camcorder is fully charged (In AC charging Mode). 69 Change the SD/SDHC/SDXC card to "Format" on the ...
... corrupted files. The camcorder extends picture exposure time under low-light/ indoor conditions. Keep the camcorder (and the target subject) steady for several seconds when taking pictures. The camcorder must use the supplied AC adaptor or the USB cable. The light turns off automatically after battery is currently charging.... A blinking light confirms the camcorder is fully charged (In AC charging Mode). 69 Change the SD/SDHC/SDXC card to "Format" on the ...


