User Manual
Page 5
... network, the telephone company may request that you to make changes in advance that temporary discontinuance of the transmission, the date and time it can. If Problems Arise If this equipment causes harm to the fax software instructions installed on the first page of service may occasionally be necessary for which charges exceed local or long-distance transmission charges.) In order...
... network, the telephone company may request that you to make changes in advance that temporary discontinuance of the transmission, the date and time it can. If Problems Arise If this equipment causes harm to the fax software instructions installed on the first page of service may occasionally be necessary for which charges exceed local or long-distance transmission charges.) In order...

User Manual
Page 28
... 46 Opening the display panel 46 Your computer's features and specifications ....47 Turning on the power 47 Adding memory (optional 48 Installing a memory module 48 Removing a memory module 54 Checking total memory 55 Using the TouchPad 56 Scrolling with the TouchPad 57 Control buttons 57 Disabling or enabling the TouchPad 57 Using the Dual Mode Pad 57 Using Dual Mode 57 Using external display devices 60 Connecting the display device 60 Directing the display output when you turn on the computer 64 Adjusting the quality of the external display......65 Using an external keyboard...
... 46 Opening the display panel 46 Your computer's features and specifications ....47 Turning on the power 47 Adding memory (optional 48 Installing a memory module 48 Removing a memory module 54 Checking total memory 55 Using the TouchPad 56 Scrolling with the TouchPad 57 Control buttons 57 Disabling or enabling the TouchPad 57 Using the Dual Mode Pad 57 Using Dual Mode 57 Using external display devices 60 Connecting the display device 60 Directing the display output when you turn on the computer 64 Adjusting the quality of the external display......65 Using an external keyboard...
User Manual
Page 48
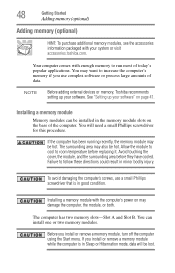
... bodily injury. See "Setting up your software. Failure to increase the computer's memory if you install or remove a memory module, turn off the computer using the Start menu. NOTE Before adding external devices or memory, Toshiba recommends setting up your system or visit accessories.toshiba.com. Avoid touching the cover, the module, and the surrounding area before replacing it. You can be lost. Installing a memory module Memory modules can install one or two memory modules. If the computer has...
... bodily injury. See "Setting up your software. Failure to increase the computer's memory if you install or remove a memory module, turn off the computer using the Start menu. NOTE Before adding external devices or memory, Toshiba recommends setting up your system or visit accessories.toshiba.com. Avoid touching the cover, the module, and the surrounding area before replacing it. You can be lost. Installing a memory module Memory modules can install one or two memory modules. If the computer has...
User Manual
Page 50
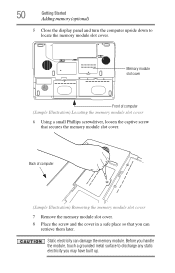
...handle the module, touch a grounded metal surface to locate the memory module slot cover. Memory module slot cover Front of computer (Sample Illustration) Removing the memory module slot cover 7 Remove the memory module slot cover. 8 Place the screw and the cover in a safe place so that secures the memory module slot cover. Back of computer (Sample Illustration) Locating the memory module slot cover 6 Using a small Phillips screwdriver, loosen the captive screw that you can damage the memory module. 50 Getting Started Adding memory (optional) 5 Close the display panel and turn the...
...handle the module, touch a grounded metal surface to locate the memory module slot cover. Memory module slot cover Front of computer (Sample Illustration) Removing the memory module slot cover 7 Remove the memory module slot cover. 8 Place the screw and the cover in a safe place so that secures the memory module slot cover. Back of computer (Sample Illustration) Locating the memory module slot cover 6 Using a small Phillips screwdriver, loosen the captive screw that you can damage the memory module. 50 Getting Started Adding memory (optional) 5 Close the display panel and turn the...

User Manual
Page 53
... on inserting the main battery, see "Inserting a charged battery" on page 55. When the operating system has loaded, you are adding extra memory after setting up the computer. If you can now continue setting up the computer, verify that the computer has recognized the additional memory module. TECHNICAL NOTE: You must be installed in slot A. 14 Replace the memory module slot cover and secure it correctly...
... on inserting the main battery, see "Inserting a charged battery" on page 55. When the operating system has loaded, you are adding extra memory after setting up the computer. If you can now continue setting up the computer, verify that the computer has recognized the additional memory module. TECHNICAL NOTE: You must be installed in slot A. 14 Replace the memory module slot cover and secure it correctly...
User Manual
Page 54
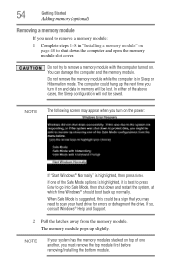
... open the memory module slot cover. If one another, you must remove the top module first before removing/installing the bottom module. NOTE If your hard drive for errors or defragment the drive. You can damage the computer and the memory module. The computer could be a sign that you may appear when you turn it is in Sleep or Hibernation mode. When Safe Mode is highlighted, then press Enter. If so, consult Windows...
... open the memory module slot cover. If one another, you must remove the top module first before removing/installing the bottom module. NOTE If your hard drive for errors or defragment the drive. You can damage the computer and the memory module. The computer could be a sign that you may appear when you turn it is in Sleep or Hibernation mode. When Safe Mode is highlighted, then press Enter. If so, consult Windows...

User Manual
Page 55
.... 7 Reconnect the cables. 8 Restart the computer. TECHNICAL NOTE: You must have at least one memory module installed for the computer to a 30-degree angle and slide it out of computer Slot A Slot B (Sample Illustration) Removing the memory module 4 Replace the memory module slot cover and secure it using the screw. 5 Re-insert the main battery. The System window appears. 2 The total memory is displayed below the System heading under Memory (RAM).
.... 7 Reconnect the cables. 8 Restart the computer. TECHNICAL NOTE: You must have at least one memory module installed for the computer to a 30-degree angle and slide it out of computer Slot A Slot B (Sample Illustration) Removing the memory module 4 Replace the memory module slot cover and secure it using the screw. 5 Re-insert the main battery. The System window appears. 2 The total memory is displayed below the System heading under Memory (RAM).
User Manual
Page 61
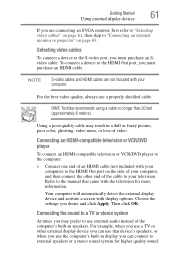
... video. Then click OK. Getting Started Using external display devices 61 If you are not included with your computer) to use a properly shielded cable. HINT: Toshiba recommends using a cable no longer than 20 feet (approximately 6 meters). Selecting video cables To connect a device to the manual that device's speakers, or when you use that came with display options. Your computer will automatically detect the external display device and activate a screen with the television for higher quality sound...
... video. Then click OK. Getting Started Using external display devices 61 If you are not included with your computer) to use a properly shielded cable. HINT: Toshiba recommends using a cable no longer than 20 feet (approximately 6 meters). Selecting video cables To connect a device to the manual that device's speakers, or when you use that came with display options. Your computer will automatically detect the external display device and activate a screen with the television for higher quality sound...
User Manual
Page 161
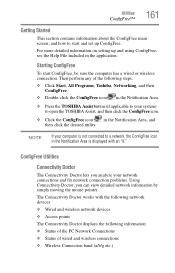
... network devices: ❖ Wired and wireless network devices ❖ Access points The Connectivity Doctor displays the following steps: ❖ Click Start, All Programs, Toshiba, Networking, and then ConfigFree. ❖ Double-click the ConfigFree icon in the application. Starting ConfigFree To start and set up and using ConfigFree, see the Help File included in the Notification Area. ❖ Press the TOSHIBA Assist button (if applicable to your network connections and fix network connection problems. Using Connectivity...
... network devices: ❖ Wired and wireless network devices ❖ Access points The Connectivity Doctor displays the following steps: ❖ Click Start, All Programs, Toshiba, Networking, and then ConfigFree. ❖ Double-click the ConfigFree icon in the application. Starting ConfigFree To start and set up and using ConfigFree, see the Help File included in the Notification Area. ❖ Press the TOSHIBA Assist button (if applicable to your network connections and fix network connection problems. Using Connectivity...
User Manual
Page 162
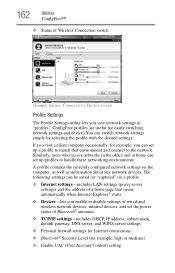
... about any network devices. Similarly, users who access networks in "profiles." 162 Utilities ConfigFree™ ❖ Status of Bluetooth® antennas ❖ TCP/IP settings-includes DHCP, IP address, subnet mask, default gateway, DNS server, and WINS server settings ❖ Personal firewall settings for Internet connections ❖ Bluetooth® Security Level (for example, high or medium) ❖ Enable UAC (User Account Control) setting The following settings can switch network settings simply by...
... about any network devices. Similarly, users who access networks in "profiles." 162 Utilities ConfigFree™ ❖ Status of Bluetooth® antennas ❖ TCP/IP settings-includes DHCP, IP address, subnet mask, default gateway, DNS server, and WINS server settings ❖ Personal firewall settings for Internet connections ❖ Bluetooth® Security Level (for example, high or medium) ❖ Enable UAC (User Account Control) setting The following settings can switch network settings simply by...
User Manual
Page 168
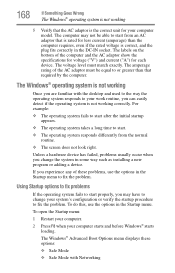
... easily detect if the operating system is not working correctly. Unless a hardware device has failed, problems usually occur when you change your work routine, you are familiar with Networking 168 If Something Goes Wrong The Windows® operating system is not working 5 Verify that required by the computer. The Windows® Advanced Boot Options menu displays these problems, use the options in the Startup menu to start . ❖ The operating system responds differently...
... easily detect if the operating system is not working correctly. Unless a hardware device has failed, problems usually occur when you change your work routine, you are familiar with Networking 168 If Something Goes Wrong The Windows® operating system is not working 5 Verify that required by the computer. The Windows® Advanced Boot Options menu displays these problems, use the options in the Startup menu to start . ❖ The operating system responds differently...
User Manual
Page 172
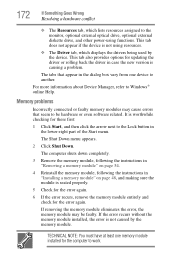
... work. If removing the memory module eliminates the error, the memory module may cause errors that appear in the dialog box vary from one memory module installed for these first: 1 Click Start, and then click the arrow next to the Lock button in case the new version is not using functions. Memory problems Incorrectly connected or faulty memory modules may be hardware or even software related. TECHNICAL NOTE: You must have at least one device...
... work. If removing the memory module eliminates the error, the memory module may cause errors that appear in the dialog box vary from one memory module installed for these first: 1 Click Start, and then click the arrow next to the Lock button in case the new version is not using functions. Memory problems Incorrectly connected or faulty memory modules may be hardware or even software related. TECHNICAL NOTE: You must have at least one device...
User Manual
Page 175
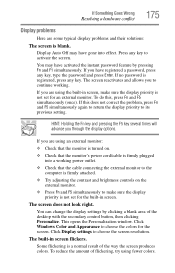
... the monitor's power cord/cable is a normal result of flickering, try using the built-in screen flickers. If you have activated the instant password feature by clicking a blank area of the desktop with the secondary control button, then clicking Personalize. This opens the Personalization window. Click Display settings to choose the colors for the screen. You may have gone into a working . You can change the display settings by...
... the monitor's power cord/cable is a normal result of flickering, try using the built-in screen flickers. If you have activated the instant password feature by clicking a blank area of the desktop with the secondary control button, then clicking Personalize. This opens the Personalization window. Click Display settings to choose the colors for the screen. You may have gone into a working . You can change the display settings by...
User Manual
Page 183
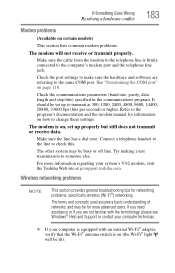
... port settings to make sure the hardware and software are not familiar with an internal Wi-Fi® adapter, verify that the Wi-Fi® antenna switch is firmly connected to someone else. Try making a test transmission to the computer's modem port and the telephone line jack. The terms and concepts used assume a basic understanding of networks, and may be for networking problems, specifically wireless (Wi-Fi®) networking...
... port settings to make sure the hardware and software are not familiar with an internal Wi-Fi® adapter, verify that the Wi-Fi® antenna switch is firmly connected to someone else. Try making a test transmission to the computer's modem port and the telephone line jack. The terms and concepts used assume a basic understanding of networks, and may be for networking problems, specifically wireless (Wi-Fi®) networking...
User Manual
Page 221
... and have the operating system automatically recognize the change. Memory cache built into memory for processing. 221 Glossary hot key - (1) A feature in which only every other line of pixels is refreshed. hot swapping - The ability to create a complete screen image. I icon - A small image displayed on the network. interlaced - internal device - See device. Internet - K keyboard shortcut - Memory cache installed on the motherboard to the surface of computers that activates a memory resident program...
... and have the operating system automatically recognize the change. Memory cache built into memory for processing. 221 Glossary hot key - (1) A feature in which only every other line of pixels is refreshed. hot swapping - The ability to create a complete screen image. I icon - A small image displayed on the network. interlaced - internal device - See device. Internet - K keyboard shortcut - Memory cache installed on the motherboard to the surface of computers that activates a memory resident program...
User Manual
Page 227
... 79 battery changing 108 charge indicator light 44, 101 charge not lasting 174 charging 43, 45 conserving power 105 disposal 113 low charge 103 monitoring power 44, 101 not charging 173 notification 104 power plan 203 power plan hot key 107 real-time clock (RTC) 98 removing 108 BIOS Setup see Toshiba Hardware Setup Bridge Media Adapter inserting memory media 129 removing memory media 129 button power 47 start 117 C CD creating 94 playing an audio 93 CD, using 89 character keys 81 charging the battery 45 checking device...
... 79 battery changing 108 charge indicator light 44, 101 charge not lasting 174 charging 43, 45 conserving power 105 disposal 113 low charge 103 monitoring power 44, 101 not charging 173 notification 104 power plan 203 power plan hot key 107 real-time clock (RTC) 98 removing 108 BIOS Setup see Toshiba Hardware Setup Bridge Media Adapter inserting memory media 129 removing memory media 129 button power 47 start 117 C CD creating 94 playing an audio 93 CD, using 89 character keys 81 charging the battery 45 checking device...
User Manual
Page 228
...-system disk or disk error message 167 not accessing disk drives 166 running on battery power 97 setting up 41, 49 warning resume failure message 166 computer lock 78 computing tips 79 connecting to a power source 43 connection set up 121 control buttons 57 Ctrl keys 81 D desktop creating new icon 116 major features 116 desktop exploration 115 desktop icons 116 Device Manager 171 checking properties 171 devices keyboard 65 mouse 65 Disk Defragmenter 177 disk drive...
...-system disk or disk error message 167 not accessing disk drives 166 running on battery power 97 setting up 41, 49 warning resume failure message 166 computer lock 78 computing tips 79 connecting to a power source 43 connection set up 121 control buttons 57 Ctrl keys 81 D desktop creating new icon 116 major features 116 desktop exploration 115 desktop icons 116 Device Manager 171 checking properties 171 devices keyboard 65 mouse 65 Disk Defragmenter 177 disk drive...
User Manual
Page 229
... function keys 81 H hardware conflicts 170 resolving 171 headphones using 126 Help and Support Windows® operating system 170 Hibernation mode 68 configuring 72 starting again from 74 hot key display brightness 207 display modes 206 Hibernation mode 205 keyboard overlays 211 password security 202 power plan 203 Sleep mode 204 volume mute 201 zooming 211 hot key power plan 107 http 123 I i.LINK port 130 icon 116 moving to desktop 116 recycle bin 116 safety 36 installation memory module...
... function keys 81 H hardware conflicts 170 resolving 171 headphones using 126 Help and Support Windows® operating system 170 Hibernation mode 68 configuring 72 starting again from 74 hot key display brightness 207 display modes 206 Hibernation mode 205 keyboard overlays 211 password security 202 power plan 203 Sleep mode 204 volume mute 201 zooming 211 hot key power plan 107 http 123 I i.LINK port 130 icon 116 moving to desktop 116 recycle bin 116 safety 36 installation memory module...
User Manual
Page 230
... L lock computer, using 78 M main battery removing 108 memory adding 48 problem solving 172 removing expansion slot cover 50 memory module inserting 51 installation 48 removing 55 microphone 125 modem connecting to telephone line 119 determining COM port 118 problem solving 183 resetting port to default settings 118 upgrading 118 monitor 60 connecting 63 not working 175 mouse installing 65 serial 65 mouse utility 143 N network accessing 120 Dial-Up Networking Wizard 120 networking wireless 122 Notification Area 117 O opening the display panel 46 optical drive problems 178 troubleshooting 178...
... L lock computer, using 78 M main battery removing 108 memory adding 48 problem solving 172 removing expansion slot cover 50 memory module inserting 51 installation 48 removing 55 microphone 125 modem connecting to telephone line 119 determining COM port 118 problem solving 183 resetting port to default settings 118 upgrading 118 monitor 60 connecting 63 not working 175 mouse installing 65 serial 65 mouse utility 143 N network accessing 120 Dial-Up Networking Wizard 120 networking wireless 122 Notification Area 117 O opening the display panel 46 optical drive problems 178 troubleshooting 178...
User Manual
Page 232
... password, set up 138 S-video port cable selection 61 T Taskbar 117 telephone line connecting to modem 119 television adjusting display 65 Toshiba registering computer 42 worldwide offices 194 TOSHIBA Assist 132 Toshiba Hardware Setup 144 Toshiba online resources 96 traveling tips 114 troubleshooting DVD player general problems 186 external keyboard 174 keyboard 174 optical drive 178 turning on the computer 47 turning on the power 47 U user password, disabling 140 user password, setting 139 using a file extension 86 Utilities 131 V video cables 61 video projector adjusting display...
... password, set up 138 S-video port cable selection 61 T Taskbar 117 telephone line connecting to modem 119 television adjusting display 65 Toshiba registering computer 42 worldwide offices 194 TOSHIBA Assist 132 Toshiba Hardware Setup 144 Toshiba online resources 96 traveling tips 114 troubleshooting DVD player general problems 186 external keyboard 174 keyboard 174 optical drive 178 turning on the computer 47 turning on the power 47 U user password, disabling 140 user password, setting 139 using a file extension 86 Utilities 131 V video cables 61 video projector adjusting display...


