
User Guide
Page 71
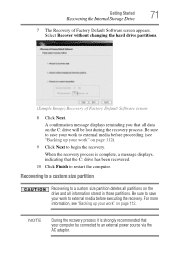
... displays reminding you that all data on page 112. Getting Started 71 Recovering the Internal Storage Drive 7 The Recovery of Factory Default Software screen 8 Click Next. For more information, see "Backing up your work " on the drive and all partitions on page 112). 9 Click... without changing the hard drive partitions. (Sample Image) Recovery of Factory Default Software screen appears. Be sure to save your work " on the C: drive will be connected to a custom size partition deletes all information stored in those partitions. Be sure to save your computer be...
... displays reminding you that all data on page 112. Getting Started 71 Recovering the Internal Storage Drive 7 The Recovery of Factory Default Software screen 8 Click Next. For more information, see "Backing up your work " on the drive and all partitions on page 112). 9 Click... without changing the hard drive partitions. (Sample Image) Recovery of Factory Default Software screen appears. Be sure to save your work " on the C: drive will be connected to a custom size partition deletes all information stored in those partitions. Be sure to save your computer be...
User Guide
Page 72
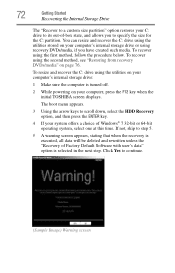
..., see "Restoring from recovery DVDs/media" on your computer, press the F12 key when the initial TOSHIBA screen displays. The boot menu appears. 3 Using the arrow keys to continue. (Sample Image) Warning screen Click Yes to scroll down, select the HDD Recovery option, and then press the ENTER key. 4... this time. You can resize and recover the C: drive using recovery DVDs/media, if you to specify the size for the C: partition. If not, skip to step 5. 5 A warning screen appears, stating that when the recovery is executed, all data will be deleted and rewritten unless the "Recovery of...
..., see "Restoring from recovery DVDs/media" on your computer, press the F12 key when the initial TOSHIBA screen displays. The boot menu appears. 3 Using the arrow keys to continue. (Sample Image) Warning screen Click Yes to scroll down, select the HDD Recovery option, and then press the ENTER key. 4... this time. You can resize and recover the C: drive using recovery DVDs/media, if you to specify the size for the C: partition. If not, skip to step 5. 5 A warning screen appears, stating that when the recovery is executed, all data will be deleted and rewritten unless the "Recovery of...
User Guide
Page 73
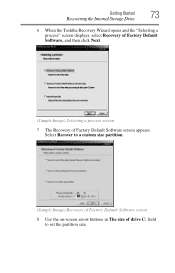
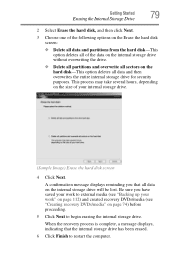
Select Recover to a custom size partition. (Sample Image) Recovery of Factory Default Software screen 8 Use the on-screen arrow buttons in The size of Factory Default Software screen appears. Getting Started 73 Recovering the Internal Storage Drive 6 When the Toshiba Recovery Wizard opens and the "Selecting a process" screen displays, select Recovery of Factory Default Software, and then click Next. (Sample Image) Selecting a process screen 7 The Recovery of drive C: field to set the partition size.
Select Recover to a custom size partition. (Sample Image) Recovery of Factory Default Software screen 8 Use the on-screen arrow buttons in The size of Factory Default Software screen appears. Getting Started 73 Recovering the Internal Storage Drive 6 When the Toshiba Recovery Wizard opens and the "Selecting a process" screen displays, select Recovery of Factory Default Software, and then click Next. (Sample Image) Selecting a process screen 7 The Recovery of drive C: field to set the partition size.
User Guide
Page 76
76 Getting Started Recovering the Internal Storage Drive 5 Click the Create button in the TOSHIBA Recovery Media Creator utility dialog box. 6 Follow the on-screen prompts to external media before executing the recovery (see "Backing up your work to complete the copy process. NOTE If you are copying the ..."1 of 3," "2 of factory default software with the preceding steps, see "Restoring from your computer be sure to label each DVD in which order to a custom size partition For more information on these options, see "Creating recovery DVDs/media" on the internal storage drive.
76 Getting Started Recovering the Internal Storage Drive 5 Click the Create button in the TOSHIBA Recovery Media Creator utility dialog box. 6 Follow the on-screen prompts to external media before executing the recovery (see "Backing up your work to complete the copy process. NOTE If you are copying the ..."1 of 3," "2 of factory default software with the preceding steps, see "Restoring from your computer be sure to label each DVD in which order to a custom size partition For more information on these options, see "Creating recovery DVDs/media" on the internal storage drive.
User Guide
Page 78
... Recovery Wizard on the computer. Using the arrow keys to restart the computer. When the initial TOSHIBA screen displays, press F12. To delete all other partitions from the internal storage drive: 1 Access the Toshiba Recovery Wizard on your internal storage drive or on your recovery DVDs/media. ❖ To access...-If you want to restore the internal storage drive, use one of the recovery options instead of -box state and specify a custom size for the C: drive. The boot menu appears. For more information, see "Recovering the Internal Storage Drive" on which type of media you ...
... Recovery Wizard on the computer. Using the arrow keys to restart the computer. When the initial TOSHIBA screen displays, press F12. To delete all other partitions from the internal storage drive: 1 Access the Toshiba Recovery Wizard on your internal storage drive or on your recovery DVDs/media. ❖ To access...-If you want to restore the internal storage drive, use one of the recovery options instead of -box state and specify a custom size for the C: drive. The boot menu appears. For more information, see "Recovering the Internal Storage Drive" on which type of media you ...
User Guide
Page 79
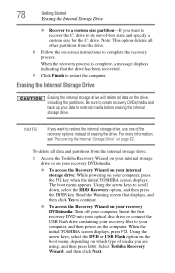
...the internal storage drive has been erased. 6 Click Finish to restart the computer. This process may take several hours, depending on the size of the data on the internal storage drive without overwriting the drive. ❖ Delete all partitions and overwrite all sectors on the hard disk...hard disk-This option deletes all of your work to external media (see "Backing up your internal storage drive. (Sample Image) Erase the hard disk screen 4 Click Next. A confirmation message displays reminding you have saved your work " on page 112) and created recovery DVDs/media (see "Creating recovery...
...the internal storage drive has been erased. 6 Click Finish to restart the computer. This process may take several hours, depending on the size of the data on the internal storage drive without overwriting the drive. ❖ Delete all partitions and overwrite all sectors on the hard disk...hard disk-This option deletes all of your work to external media (see "Backing up your internal storage drive. (Sample Image) Erase the hard disk screen 4 Click Next. A confirmation message displays reminding you have saved your work " on page 112) and created recovery DVDs/media (see "Creating recovery...
User Guide
Page 104
... positioning keys; 104 Learning the Basics Using the keyboard NOTE P750, P770 series keyboards To capture a print screen of the time, this does not matter. A standard full-size keyboard includes two Enter, Ctrl, and Alt keys; However, some programs assign separate functions to the P740 ...series. and a numeric keypad. Making your computer's keyboard layout is very much like typing on the full-sized keyboard. Although your keyboard emulate a full-size keyboard NOTE This section applies to the regular and numeric pad Enter keys on a typewriter, except that: ❖...
... positioning keys; 104 Learning the Basics Using the keyboard NOTE P750, P770 series keyboards To capture a print screen of the time, this does not matter. A standard full-size keyboard includes two Enter, Ctrl, and Alt keys; However, some programs assign separate functions to the P740 ...series. and a numeric keypad. Making your computer's keyboard layout is very much like typing on the full-sized keyboard. Although your keyboard emulate a full-size keyboard NOTE This section applies to the regular and numeric pad Enter keys on a typewriter, except that: ❖...
User Guide
Page 190
Choose a theme for the built-in screen. Reduce the size of the Windows® desktop. 2 Click Personalize, and then Display. 3 Adjust the screen resolution and/or color quality. 4 Click OK. HINT: Holding the Fn key and pressing the F5 key several times will advance you are... display priority to one that the cable connecting the external monitor to the computer is not set for each of these components individually. The screen does not look correct. Click Display and then Change display settings to make sure the display priority is supported by the computer's internal display...
Choose a theme for the built-in screen. Reduce the size of the Windows® desktop. 2 Click Personalize, and then Display. 3 Adjust the screen resolution and/or color quality. 4 Click OK. HINT: Holding the Fn key and pressing the F5 key several times will advance you are... display priority to one that the cable connecting the external monitor to the computer is not set for each of these components individually. The screen does not look correct. Click Display and then Change display settings to make sure the display priority is supported by the computer's internal display...
User Guide
Page 209
... Card using either the Hot Key Cards or by pressing the associated hot key. Release the Fn key when the desired option is displayed full-size with its available options below it . The selected Card is selected. All other Cards are again hidden from view. To use the Hot Key Cards... Hot Key Cards The Hot Key Cards are normally hidden from view. The Cards appear when you press the Fn key. The TOSHIBA Cards appear along the top of the screen with its available options below it . 3 To cycle through the displayed options, hold down Fn and press the hot key repeatedly...
... Card using either the Hot Key Cards or by pressing the associated hot key. Release the Fn key when the desired option is displayed full-size with its available options below it . The selected Card is selected. All other Cards are again hidden from view. To use the Hot Key Cards... Hot Key Cards The Hot Key Cards are normally hidden from view. The Cards appear when you press the Fn key. The TOSHIBA Cards appear along the top of the screen with its available options below it . 3 To cycle through the displayed options, hold down Fn and press the hot key repeatedly...
User Guide
Page 234
... your computer. peripheral-Any device, such as read. port-A socket on the screen. The general classes of programs (also called software) are doing. See also memory. PC Card-A credit-card-sized expansion card designed to the computer or the network. PC Cards provide functions such... can be written to move a mouse. processor-See Central Processing Unit (CPU). R RAM (Random Access Memory)-Volatile memory that moves on -screen items, such as modem, fax/modem, hard disk drive, network adapter, sound card, or SCSI adapter. pixel-Short for connection to work ...
... your computer. peripheral-Any device, such as read. port-A socket on the screen. The general classes of programs (also called software) are doing. See also memory. PC Card-A credit-card-sized expansion card designed to the computer or the network. PC Cards provide functions such... can be written to move a mouse. processor-See Central Processing Unit (CPU). R RAM (Random Access Memory)-Volatile memory that moves on -screen items, such as modem, fax/modem, hard disk drive, network adapter, sound card, or SCSI adapter. pixel-Short for connection to work ...

