
User Guide
Page 10
... (EU) member countries after August 2005 to appropriate facilities for recovery and recycling. Please contact your product, visit www.reuse.toshiba.com. The European Union WEEE (Waste from Electrical and Electronic Equipment) Directive Information The European Union WEEE (Waste from Electrical ...this product. This Directive requires producers of electrical and electronic products put on recycling and reuse. For information on the battery. The party responsible for CE-Marking is intended to determine appropriate worldwide product life cycle planning and end-of-life strategies...
... (EU) member countries after August 2005 to appropriate facilities for recovery and recycling. Please contact your product, visit www.reuse.toshiba.com. The European Union WEEE (Waste from Electrical and Electronic Equipment) Directive Information The European Union WEEE (Waste from Electrical ...this product. This Directive requires producers of electrical and electronic products put on recycling and reuse. For information on the battery. The party responsible for CE-Marking is intended to determine appropriate worldwide product life cycle planning and end-of-life strategies...
User Guide
Page 30
Contents Introduction 37 This guide 39 Safety icons 40 Other icons used 40 Your computer's features and specifications ....41 Other documentation 41 Service options 41 Chapter 1: Getting Started 42 Selecting a place to work 42 Setting up a work environment 42 Keeping yourself comfortable 43 Precautions 43 Important information on your computer's cooling fan 45 Setting up your computer 45 Connecting to a power source 46 Charging the main battery 48 Using the computer for the first time 49 Opening the display panel 49 30
Contents Introduction 37 This guide 39 Safety icons 40 Other icons used 40 Your computer's features and specifications ....41 Other documentation 41 Service options 41 Chapter 1: Getting Started 42 Selecting a place to work 42 Setting up a work environment 42 Keeping yourself comfortable 43 Precautions 43 Important information on your computer's cooling fan 45 Setting up your computer 45 Connecting to a power source 46 Charging the main battery 48 Using the computer for the first time 49 Opening the display panel 49 30
User Guide
Page 33
... Caring for optical discs 120 Toshiba's online resources 120 Chapter 3: Mobile Computing 121 Toshiba's energy-saver design 121 Running the computer on battery power 121 Battery Notice 122 Power management 123 Using additional batteries 123 Charging batteries 123 Charging the main battery 124 Charging the RTC battery 124 Monitoring main battery power 125 Determining remaining battery power 126 What to...
... Caring for optical discs 120 Toshiba's online resources 120 Chapter 3: Mobile Computing 121 Toshiba's energy-saver design 121 Running the computer on battery power 121 Battery Notice 122 Power management 123 Using additional batteries 123 Charging batteries 123 Charging the main battery 124 Charging the RTC battery 124 Monitoring main battery power 125 Determining remaining battery power 126 What to...
User Guide
Page 34
34 Contents Maintaining your battery 136 Disposing of used batteries 136 Traveling tips 138 Chapter 4: Exploring Your Computer's Features 139 Exploring the desktop 139 Finding your way around the desktop 140 Setting up for ...Web Camera 145 Using the Memory card reader 146 Inserting memory media 146 Removing memory media 147 Chapter 5: Utilities 149 TOSHIBA Assist 150 Connect 151 Secure 152 Protect & Fix 153 Optimize 154 TOSHIBA Application Installer 155 Setting passwords 156 Using an instant password 156 Using a supervisor password 157 Using a user password 158...
34 Contents Maintaining your battery 136 Disposing of used batteries 136 Traveling tips 138 Chapter 4: Exploring Your Computer's Features 139 Exploring the desktop 139 Finding your way around the desktop 140 Setting up for ...Web Camera 145 Using the Memory card reader 146 Inserting memory media 146 Removing memory media 147 Chapter 5: Utilities 149 TOSHIBA Assist 150 Connect 151 Secure 152 Protect & Fix 153 Optimize 154 TOSHIBA Application Installer 155 Setting passwords 156 Using an instant password 156 Using a supervisor password 157 Using a user password 158...
User Guide
Page 35
... USB Sleep and Charge 166 Enabling/Disabling USB Sleep and Charge 168 Power supply mode settings 168 USB Sleep and Music 169 TOSHIBA Button Support 170 TOSHIBA Accessibility 171 Fingerprint Authentication Utility 172 Fingerprint utility limitations 172 Using the Fingerprint Authentication Utility 172 Fingerprint Logon 173 Care and maintenance of...; operating system can help you 185 Fixing a problem with Device Manager 186 Checking device properties 186 Memory problems 187 Power and the batteries 187 Keyboard problems 189 Display problems 189 Disk or storage drive problems 191
... USB Sleep and Charge 166 Enabling/Disabling USB Sleep and Charge 168 Power supply mode settings 168 USB Sleep and Music 169 TOSHIBA Button Support 170 TOSHIBA Accessibility 171 Fingerprint Authentication Utility 172 Fingerprint utility limitations 172 Using the Fingerprint Authentication Utility 172 Fingerprint Logon 173 Care and maintenance of...; operating system can help you 185 Fixing a problem with Device Manager 186 Checking device properties 186 Memory problems 187 Power and the batteries 187 Keyboard problems 189 Display problems 189 Disk or storage drive problems 191
User Guide
Page 37
...preset to a configuration that your computer will provide the most stable operating environment and optimum system performance for both AC power and battery modes. You can accompany you wherever you leave this computer to conserve computer energy. 37 Introduction Welcome to enter the low-...174; Program and has designed this and other energy saving features active, so that will operate at its maximum energy efficiency. With your Toshiba computer, your computer is a partner in AC power mode. We recommend that you go. To conserve energy, your work and entertainment...
...preset to a configuration that your computer will provide the most stable operating environment and optimum system performance for both AC power and battery modes. You can accompany you wherever you leave this computer to conserve computer energy. 37 Introduction Welcome to enter the low-...174; Program and has designed this and other energy saving features active, so that will operate at its maximum energy efficiency. With your Toshiba computer, your computer is a partner in AC power mode. We recommend that you go. To conserve energy, your work and entertainment...
User Guide
Page 43
...resulting in damage or serious injury. You should accidentally occur, immediately: 1. Exposure to withstand the rigors of travel. Remove the battery pack. Failure to follow these eventualities should observe certain precautions to further reduce the risk of personal injury or damage to the... vents or heaters. ❖ Extreme heat, cold, or humidity. ❖ Liquids and corrosive chemicals. Keeping yourself comfortable The Toshiba Instruction Manual for working comfortably throughout the day. Getting Started 43 Selecting a place to work To keep your computer in prime operating...
...resulting in damage or serious injury. You should accidentally occur, immediately: 1. Exposure to withstand the rigors of travel. Remove the battery pack. Failure to follow these eventualities should observe certain precautions to further reduce the risk of personal injury or damage to the... vents or heaters. ❖ Extreme heat, cold, or humidity. ❖ Liquids and corrosive chemicals. Keeping yourself comfortable The Toshiba Instruction Manual for working comfortably throughout the day. Getting Started 43 Selecting a place to work To keep your computer in prime operating...
User Guide
Page 45
...See "Connecting to your computer. Using your computer on a carpet or other soft material can use external power or to charge the battery you can block the vents located at the underside of the computer. Setting up your computer TECHNICAL NOTE: You must attach the AC... to, a mouse, keyboard, printer, and memory. NOTE The cooling fan location will vary depending on page 46. Your computer contains a rechargeable main battery that cools the CPU by drawing outside air into the computer. These components include, but are protected from overheating when the power is turned on...
...See "Connecting to your computer. Using your computer on a carpet or other soft material can use external power or to charge the battery you can block the vents located at the underside of the computer. Setting up your computer TECHNICAL NOTE: You must attach the AC... to, a mouse, keyboard, printer, and memory. NOTE The cooling fan location will vary depending on page 46. Your computer contains a rechargeable main battery that cools the CPU by drawing outside air into the computer. These components include, but are protected from overheating when the power is turned on...
User Guide
Page 46
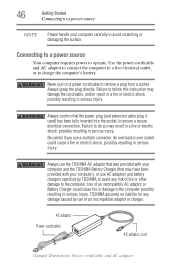
...socket could cause fire or damage to ensure a secure electrical connection. Always confirm that may have been provided with your computer and the TOSHIBA Battery Charger (that the power plug (and extension cable plug if used) has been fully inserted into the socket, to the computer possibly... resulting in serious injury. TOSHIBA assumes no liability for any risk of an incompatible AC adaptor or Battery Charger could cause a fire or electric shock, possibly resulting in serious injury. An overload on a ...
...socket could cause fire or damage to ensure a secure electrical connection. Always confirm that may have been provided with your computer and the TOSHIBA Battery Charger (that the power plug (and extension cable plug if used) has been fully inserted into the socket, to the computer possibly... resulting in serious injury. TOSHIBA assumes no liability for any risk of an incompatible AC adaptor or Battery Charger could cause a fire or electric shock, possibly resulting in serious injury. An overload on a ...
User Guide
Page 47
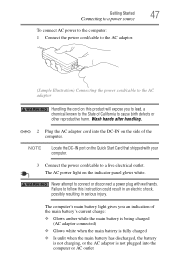
...cord/cable to a live electrical outlet. NOTE Locate the DC-IN port on the Quick Start Card that shipped with wet hands. The computer's main battery light gives you to lead, a chemical known to the State of the computer. Wash hands after handling. _ + 2 Plug the AC adaptor cord...will expose you an indication of the main battery's current charge: ❖ Glows amber while the main battery is being charged (AC adaptor connected) ❖ Glows white when the main battery is fully charged ❖ Is unlit when the main battery has discharged, the battery is not charging, or the AC adaptor...
...cord/cable to a live electrical outlet. NOTE Locate the DC-IN port on the Quick Start Card that shipped with wet hands. The computer's main battery light gives you to lead, a chemical known to the State of the computer. Wash hands after handling. _ + 2 Plug the AC adaptor cord...will expose you an indication of the main battery's current charge: ❖ Glows amber while the main battery is being charged (AC adaptor connected) ❖ Glows white when the main battery is fully charged ❖ Is unlit when the main battery has discharged, the battery is not charging, or the AC adaptor...
User Guide
Page 48
...on the applications, power management settings, and features used to select a power level setting that , the battery will allow the battery to power the computer. Once the battery is using the battery to run applications, features, and devices. TECHNICAL NOTE: The recharging of the power provided by the ...AC adaptor to power the computer, you must charge the battery. 48 Getting Started Charging the main battery ❖ Flashes amber when the main battery charge is low and it is not receiving correct input from the AC power supply. Charging ...
...on the applications, power management settings, and features used to select a power level setting that , the battery will allow the battery to power the computer. Once the battery is using the battery to run applications, features, and devices. TECHNICAL NOTE: The recharging of the power provided by the ...AC adaptor to power the computer, you must charge the battery. 48 Getting Started Charging the main battery ❖ Flashes amber when the main battery charge is low and it is not receiving correct input from the AC power supply. Charging ...
User Guide
Page 49
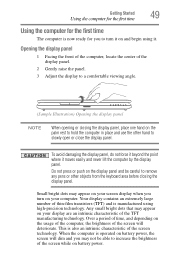
... not force it beyond the point where it on your display are an intrinsic characteristic of the screen technology. Do not press or push on battery power. Over a period of time, and depending on the usage of the computer, the brightness of the screen while on the display panel and be... able to slowly open or close the display panel. When the computer is operated on battery power, the screen will deteriorate. Getting Started 49 Using the computer for the first time Using the computer for the first time The computer is...
... not force it beyond the point where it on your display are an intrinsic characteristic of the screen technology. Do not press or push on battery power. Over a period of time, and depending on the usage of the computer, the brightness of the screen while on the display panel and be... able to slowly open or close the display panel. When the computer is operated on battery power, the screen will deteriorate. Getting Started 49 Using the computer for the first time Using the computer for the first time The computer is...
User Guide
Page 50
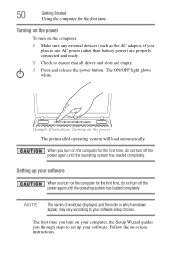
... for the first time Turning on the power To turn on your computer, the Setup Wizard guides you plan to use AC power rather than battery power) are empty. 3 Press and release the power button. The ON/OFF light glows white. (Sample Illustration) Turning on -screen instructions. 50 Getting Started Using...
... for the first time Turning on the power To turn on your computer, the Setup Wizard guides you plan to use AC power rather than battery power) are empty. 3 Press and release the power button. The ON/OFF light glows white. (Sample Illustration) Turning on -screen instructions. 50 Getting Started Using...

User Guide
Page 54
54 Getting Started Adding memory (optional) 5 Remove the main battery. For information on removing the main battery, see "Removing the battery from the computer" on page 132. P740 series Memory module slot cover Front of computer P750 series Memory module slot cover P770 series Front of computer (Sample Illustration) Locating the memory module slot cover
54 Getting Started Adding memory (optional) 5 Remove the main battery. For information on removing the main battery, see "Removing the battery from the computer" on page 132. P740 series Memory module slot cover Front of computer P750 series Memory module slot cover P770 series Front of computer (Sample Illustration) Locating the memory module slot cover
User Guide
Page 58
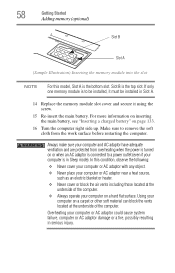
... Slot A. 14 Replace the memory module slot cover and secure it must be installed, it using the screw. 15 Re-insert the main battery. For more information on inserting the main battery, see "Inserting a charged battery" on a carpet or other soft material can block the vents located at the underside of the computer.
... Slot A. 14 Replace the memory module slot cover and secure it must be installed, it using the screw. 15 Re-insert the main battery. For more information on inserting the main battery, see "Inserting a charged battery" on a carpet or other soft material can block the vents located at the underside of the computer.
User Guide
Page 61
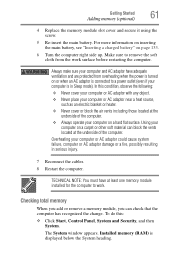
...Installed memory (RAM) is in serious injury. 7 Reconnect the cables. 8 Restart the computer. For more information on inserting the main battery, see "Inserting a charged battery" on a carpet or other soft material can check that the computer has recognized the change. Overheating your computer on or when an... Started 61 Adding memory (optional) 4 Replace the memory module slot cover and secure it using the screw. 5 Re-insert the main battery. Checking total memory When you add or remove a memory module, you can block the vents located at least one memory module installed for...
...Installed memory (RAM) is in serious injury. 7 Reconnect the cables. 8 Restart the computer. For more information on inserting the main battery, see "Inserting a charged battery" on a carpet or other soft material can check that the computer has recognized the change. Overheating your computer on or when an... Started 61 Adding memory (optional) 4 Replace the memory module slot cover and secure it using the screw. 5 Re-insert the main battery. Checking total memory When you add or remove a memory module, you can block the vents located at least one memory module installed for...
User Guide
Page 90
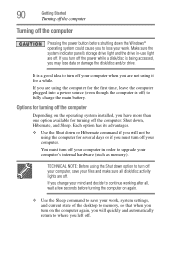
... the computer is a good idea to turn off your computer when you are using it for a while. It is off) to fully charge the main battery. TECHNICAL NOTE: Before using the computer for turning off the computer: Shut down, Hibernate, and Sleep. Each option has its advantages. ❖ Use the Shut...
... the computer is a good idea to turn off your computer when you are using it for a while. It is off) to fully charge the main battery. TECHNICAL NOTE: Before using the computer for turning off the computer: Shut down, Hibernate, and Sleep. Each option has its advantages. ❖ Use the Shut...
User Guide
Page 91
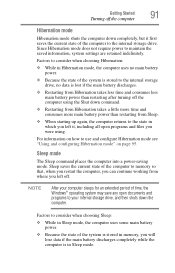
... drive, and then shuts down completely, but it first saves the current state of the computer to the internal storage drive, no main battery power. ❖ Because the state of time, the Windows® operating system may save any open programs and files you were using ...the Shut down command. ❖ Restarting from Hibernation takes a little more time and consumes more main battery power than restarting after turning off the computer using . Getting Started 91 Turning off the computer Hibernation mode Hibernation mode shuts the computer down...
... drive, and then shuts down completely, but it first saves the current state of the computer to the internal storage drive, no main battery power. ❖ Because the state of time, the Windows® operating system may save any open programs and files you were using ...the Shut down command. ❖ Restarting from Hibernation takes a little more time and consumes more main battery power than restarting after turning off the computer using . Getting Started 91 Turning off the computer Hibernation mode Hibernation mode shuts the computer down...
User Guide
Page 92
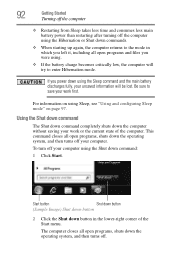
... Be sure to save your work first. 92 Getting Started Turning off the computer ❖ Restarting from Sleep takes less time and consumes less main battery power than restarting after turning off the computer using the Hibernation or Shut down commands. ❖ When starting up again, the computer returns to the... command The Shut down command completely shuts down using Sleep, see "Using and configuring Sleep mode" on using the Sleep command and the main battery discharges fully, your unsaved information will try to enter Hibernation mode. If you were using. ❖ If the...
... Be sure to save your work first. 92 Getting Started Turning off the computer ❖ Restarting from Sleep takes less time and consumes less main battery power than restarting after turning off the computer using the Hibernation or Shut down commands. ❖ When starting up again, the computer returns to the... command The Shut down command completely shuts down using Sleep, see "Using and configuring Sleep mode" on using the Sleep command and the main battery discharges fully, your unsaved information will try to enter Hibernation mode. If you were using. ❖ If the...
User Guide
Page 94
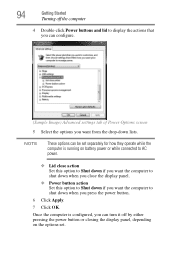
... and lid to display the actions that you can turn it off by either pressing the power button or closing the display panel, depending on battery power or while connected to AC power. ❖ Lid close action Set this option to Shut down if you want the computer to shut down...
... and lid to display the actions that you can turn it off by either pressing the power button or closing the display panel, depending on battery power or while connected to AC power. ❖ Lid close action Set this option to Shut down if you want the computer to shut down...


