
User Guide
Page 3
... Part 15 of Conformity Information" This equipment has been tested and found to comply with noncompliant peripherals or peripherals not recommended by Toshiba is likely to result in a particular installation. These limits are designed to implanted medical devices, commercial transportation, nuclear facilities or... installation. NOTE Only Peripherals complying with the instructions, it may be determined by turning the equipment off and on, the user is encouraged to try to correct the interference by Toshiba could lead to injury to persons or loss of the following measures: ❖...
... Part 15 of Conformity Information" This equipment has been tested and found to comply with noncompliant peripherals or peripherals not recommended by Toshiba is likely to result in a particular installation. These limits are designed to implanted medical devices, commercial transportation, nuclear facilities or... installation. NOTE Only Peripherals complying with the instructions, it may be determined by turning the equipment off and on, the user is encouraged to try to correct the interference by Toshiba could lead to injury to persons or loss of the following measures: ❖...

User Guide
Page 7
... due to its operation in the United States for harmful interference to co-channel Mobile Satellite systems. High power radars are designed to be used indoors for frequency range 5.15 ... with and/or damage this product to be interoperable with one another. 7 Wireless Interoperability The TOSHIBA Wireless LAN Mini PCI Card products are allocated as primary users of the 5.25 GHz to ...as defined by the Wi-Fi Alliance. If you may interfere with any such problem, immediately turn off your network connection. Bluetooth® and Wireless LAN devices operate within the same radio frequency...
... due to its operation in the United States for harmful interference to co-channel Mobile Satellite systems. High power radars are designed to be used indoors for frequency range 5.15 ... with and/or damage this product to be interoperable with one another. 7 Wireless Interoperability The TOSHIBA Wireless LAN Mini PCI Card products are allocated as primary users of the 5.25 GHz to ...as defined by the Wi-Fi Alliance. If you may interfere with any such problem, immediately turn off your network connection. Bluetooth® and Wireless LAN devices operate within the same radio frequency...
User Guide
Page 8
... Mini PCI Card shall be restricted by the proprietor of the building or responsible representatives of interference to turning on the equipment. Regulatory Information The TOSHIBA Wireless LAN Mini PCI Card must not be installed and used in conjunction with any other environment where ... less than the electromagnetic energy emitted by consumers. The level of wireless devices in radio frequency safety standards and recommendations, TOSHIBA believes Wireless LAN is perceived or identified as described in the user documentation that comes with the following radio frequency and safety...
... Mini PCI Card shall be restricted by the proprietor of the building or responsible representatives of interference to turning on the equipment. Regulatory Information The TOSHIBA Wireless LAN Mini PCI Card must not be installed and used in conjunction with any other environment where ... less than the electromagnetic energy emitted by consumers. The level of wireless devices in radio frequency safety standards and recommendations, TOSHIBA believes Wireless LAN is perceived or identified as described in the user documentation that comes with the following radio frequency and safety...
User Guide
Page 11
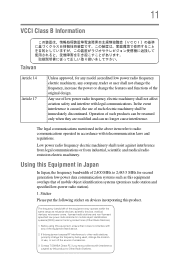
... (premises radio station and specified low-power radio station). 1. In the event interference is caused, the use , or turn off the source of emissions. 3. Operation of such products can be immediately discontinued. Contact TOSHIBA Direct PC if you have problems with legal communications. The frequency bandwidth of this equipment may operate within...
... (premises radio station and specified low-power radio station). 1. In the event interference is caused, the use , or turn off the source of emissions. 3. Operation of such products can be immediately discontinued. Contact TOSHIBA Direct PC if you have problems with legal communications. The frequency bandwidth of this equipment may operate within...
User Guide
Page 15
...of 2.4 GHz Wireless LAN devices (40 meters/43.74 yards or more) or stop transmitting from TOSHIBA, always change the frequency, move your computer. If you use Bluetooth cards from TOSHIBA in order to enable wireless networks over two or more (up to : ❖ Bluetooth Specification... Europe or support.toshiba.com in the United States for more information. If you detect certain interference while you use Bluetooth and Wireless LAN devices simultaneously, you use Bluetooth cards from your computer to be interoperable with any such problem, immediately turn off either one another...
...of 2.4 GHz Wireless LAN devices (40 meters/43.74 yards or more) or stop transmitting from TOSHIBA, always change the frequency, move your computer. If you use Bluetooth cards from TOSHIBA in order to enable wireless networks over two or more (up to : ❖ Bluetooth Specification... Europe or support.toshiba.com in the United States for more information. If you detect certain interference while you use Bluetooth and Wireless LAN devices simultaneously, you use Bluetooth cards from your computer to be interoperable with any such problem, immediately turn off either one another...
User Guide
Page 16
... technology operate within the guidelines found in such a manner that applies on the use of the scientific community and result from TOSHIBA is minimized. Exposure to Radio Frequency Radiation The radiated output power of the Bluetooth Card from deliberations of panels and committees of... wireless technology on the equipment. The level of energy emitted by the proprietor of the building or responsible representatives of interference to turning on board airplanes, or ❖ In any country/ region where the product is much less than the electromagnetic energy emitted by...
... technology operate within the guidelines found in such a manner that applies on the use of the scientific community and result from TOSHIBA is minimized. Exposure to Radio Frequency Radiation The radiated output power of the Bluetooth Card from deliberations of panels and committees of... wireless technology on the equipment. The level of energy emitted by the proprietor of the building or responsible representatives of interference to turning on board airplanes, or ❖ In any country/ region where the product is much less than the electromagnetic energy emitted by...
User Guide
Page 23
Contents 23 Connecting an HDMI™-compatible television or display device 77 Connecting an external monitor or projector ....77 Directing the display output when you turn on the computer 77 Adjusting the quality of the external display......78 Customizing your computer's settings 78 Caring for your computer 79 Cleaning the computer ... optical disc 88 Removing a disc with the computer on 89 Playing optical media 89 Recording optical media 90 Removing a disc with the computer off 91 Toshiba's online resources 91
Contents 23 Connecting an HDMI™-compatible television or display device 77 Connecting an external monitor or projector ....77 Directing the display output when you turn on the computer 77 Adjusting the quality of the external display......78 Customizing your computer's settings 78 Caring for your computer 79 Cleaning the computer ... optical disc 88 Removing a disc with the computer on 89 Playing optical media 89 Recording optical media 90 Removing a disc with the computer off 91 Toshiba's online resources 91
User Guide
Page 25
... 123 Using a user password 125 Deleting a user password 126 TOSHIBA Face Recognition Utility 127 TOSHIBA PC Diagnostic Tool Utility 128 Mouse Utility 129 TOSHIBA Hardware Setup 130 TOSHIBA Sleep Utility 132 Starting the TOSHIBA Sleep Utility 132 USB Sleep and Charge 132 Enabling/Disabling USB .........134 Power supply mode settings 134 TOSHIBA Accessibility 135 TOSHIBA eco Utility 136 TOSHIBA Service Station 137 TOSHIBA PC Health Monitor 137 Chapter 6: If Something Goes Wrong 139 Problems that are easy to fix 139 Problems when you turn on the computer............140 The Windows&#...
... 123 Using a user password 125 Deleting a user password 126 TOSHIBA Face Recognition Utility 127 TOSHIBA PC Diagnostic Tool Utility 128 Mouse Utility 129 TOSHIBA Hardware Setup 130 TOSHIBA Sleep Utility 132 Starting the TOSHIBA Sleep Utility 132 USB Sleep and Charge 132 Enabling/Disabling USB .........134 Power supply mode settings 134 TOSHIBA Accessibility 135 TOSHIBA eco Utility 136 TOSHIBA Service Station 137 TOSHIBA PC Health Monitor 137 Chapter 6: If Something Goes Wrong 139 Problems that are easy to fix 139 Problems when you turn on the computer............140 The Windows&#...
User Guide
Page 38
... to work Never allow any liquids to spill into any of system activity. Exposure to rain, water, seawater or moisture. Do not turn off the computer. 2. Avoid extended contact between the computer base or palm rest and your skin may damage the disk/disc or flash...performance computers generate heat under normal operating conditions, as a function of these instructions could damage the computer or cause system failure. ❖ Never turn on the power again until you skin. Disconnect the AC adaptor from or writing to skin. Never place a heavy object on your computer, and...
... to work Never allow any liquids to spill into any of system activity. Exposure to rain, water, seawater or moisture. Do not turn off the computer. 2. Avoid extended contact between the computer base or palm rest and your skin may damage the disk/disc or flash...performance computers generate heat under normal operating conditions, as a function of these instructions could damage the computer or cause system failure. ❖ Never turn on the power again until you skin. Disconnect the AC adaptor from or writing to skin. Never place a heavy object on your computer, and...
User Guide
Page 39
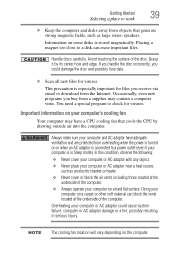
... handle the disc incorrectly, you receive via email or download from a supplier may have adequate ventilation and are protected from overheating when the power is turned on or when an AC adaptor is connected to work ❖ Keep the computer and disks away from objects that cools the CPU by its...
... handle the disc incorrectly, you receive via email or download from a supplier may have adequate ventilation and are protected from overheating when the power is turned on or when an AC adaptor is connected to work ❖ Keep the computer and disks away from objects that cools the CPU by its...
User Guide
Page 43
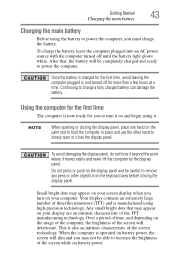
... bright dots that , the battery will deteriorate. To charge the battery, leave the computer plugged into an AC power source with the computer turned off for you to slowly open or close the display panel. NOTE When opening or closing the display panel. Once the battery is manufactured using...ready to charge a fully charged battery can damage the battery. Over a period of the screen will be able to power the computer, you turn on the usage of the computer, the brightness of time, and depending on your display are an intrinsic characteristic of the screen while on the...
... bright dots that , the battery will deteriorate. To charge the battery, leave the computer plugged into an AC power source with the computer turned off for you to slowly open or close the display panel. NOTE When opening or closing the display panel. Once the battery is manufactured using...ready to charge a fully charged battery can damage the battery. Over a period of the screen will be able to power the computer, you turn on the usage of the computer, the brightness of time, and depending on your display are an intrinsic characteristic of the screen while on the...

User Guide
Page 44
...Using external display devices" on page 76) See "Setting up your software When you turn on the computer for the first time you may vary according to your software. Registering your computer with Toshiba Setting up your software. Follow the on your computer for the first time, do... not turn on your computer, the Setup Wizard guides you periodic updates, announcements, and special offers ...
...Using external display devices" on page 76) See "Setting up your software When you turn on the computer for the first time you may vary according to your software. Registering your computer with Toshiba Setting up your software. Follow the on your computer for the first time, do... not turn on your computer, the Setup Wizard guides you periodic updates, announcements, and special offers ...
User Guide
Page 45
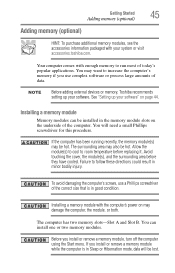
.... Installing a memory module with enough memory to room temperature before they have cooled. NOTE Before adding external devices or memory, Toshiba recommends setting up your software. You will be installed in minor bodily injury. Before you use a Phillips screwdriver of data. ... additional memory modules, see the accessories information packaged with your system or visit accessories.toshiba.com. Failure to increase the computer's memory if you install or remove a memory module, turn off the computer using the Start menu. Installing a memory module Memory modules can ...
.... Installing a memory module with enough memory to room temperature before they have cooled. NOTE Before adding external devices or memory, Toshiba recommends setting up your software. You will be installed in minor bodily injury. Before you use a Phillips screwdriver of data. ... additional memory modules, see the accessories information packaged with your system or visit accessories.toshiba.com. Failure to increase the computer's memory if you install or remove a memory module, turn off the computer using the Start menu. Installing a memory module Memory modules can ...

User Guide
Page 46
... 2 Click the Shut down button in the lower-right corner of the computer, and then place the computer upside down the operating system, and then turns off. 3 Unplug and remove any cables connected to prevent scratching the top cover of the Start menu. In either of the above cases, the Sleep... configuration will be lost. NOTE To locate your Quick Start document. If only one memory module is to remove a memory module with the computer turned on , begin at step 1; Do not try to be installed, it on the cloth. 5 Remove the main battery. Do not remove the memory module while...
... 2 Click the Shut down button in the lower-right corner of the computer, and then place the computer upside down the operating system, and then turns off. 3 Unplug and remove any cables connected to prevent scratching the top cover of the Start menu. In either of the above cases, the Sleep... configuration will be lost. NOTE To locate your Quick Start document. If only one memory module is to remove a memory module with the computer turned on , begin at step 1; Do not try to be installed, it on the cloth. 5 Remove the main battery. Do not remove the memory module while...
User Guide
Page 49
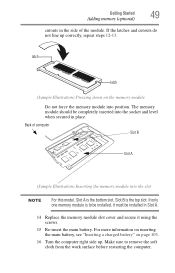
... module is to remove the soft cloth from the work surface before restarting the computer. latch latch (Sample Illustration) Pressing down on page 103. 16 Turn the computer right side up correctly, repeat steps 12-13.
... module is to remove the soft cloth from the work surface before restarting the computer. latch latch (Sample Illustration) Pressing down on page 103. 16 Turn the computer right side up correctly, repeat steps 12-13.
User Guide
Page 50
... adaptor could cause system failure, computer or AC adaptor damage or a fire, possibly resulting in "Checking total memory" on or when an AC adaptor is turned on page 53.
... adaptor could cause system failure, computer or AC adaptor damage or a fire, possibly resulting in "Checking total memory" on or when an AC adaptor is turned on page 53.
User Guide
Page 51
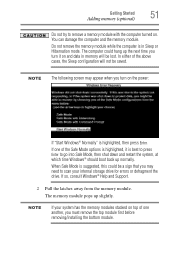
... module first before removing/installing the bottom module. Getting Started 51 Adding memory (optional) Do not try to remove a memory module with the computer turned on the power: If "Start Windows® Normally" is highlighted, then press Enter. Do not remove the memory module while the computer is best... scan your system has the memory modules stacked on top of one of the above cases, the Sleep configuration will be a sign that you turn on . In either of the Safe Mode options is highlighted, it on and data in Sleep or Hibernation mode. You can damage the computer...
... module first before removing/installing the bottom module. Getting Started 51 Adding memory (optional) Do not try to remove a memory module with the computer turned on the power: If "Start Windows® Normally" is highlighted, then press Enter. Do not remove the memory module while the computer is best... scan your system has the memory modules stacked on top of one of the above cases, the Sleep configuration will be a sign that you turn on . In either of the Safe Mode options is highlighted, it on and data in Sleep or Hibernation mode. You can damage the computer...
User Guide
Page 52
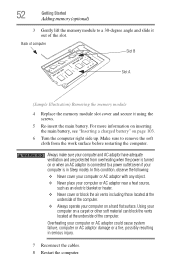
... a carpet or other soft material can block the vents located at the underside of the computer. ❖ Always operate your computer on page 103. 6 Turn the computer right side up. Using your computer on or when an AC adaptor is connected to a 30-degree angle and slide it using the ...
... a carpet or other soft material can block the vents located at the underside of the computer. ❖ Always operate your computer on page 103. 6 Turn the computer right side up. Using your computer on or when an AC adaptor is connected to a 30-degree angle and slide it using the ...
User Guide
Page 53
... installed for the computer to perform the action, click Continue; If unsure, cancel and try again. If the computer does not recognize the memory configuration, turn off the computer and remove the memory module slot cover (complete steps 1-8 in "Installing a memory module" on page 57. Checking total memory When you add...
... installed for the computer to perform the action, click Continue; If unsure, cancel and try again. If the computer does not recognize the memory configuration, turn off the computer and remove the memory module slot cover (complete steps 1-8 in "Installing a memory module" on page 57. Checking total memory When you add...
User Guide
Page 55
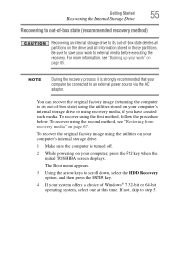
... an internal storage drive to its out-of-box state) using the utilities stored on your computer, press the F12 key when the initial TOSHIBA screen displays. Be sure to an external power source via the AC adaptor. To recover using the second method, see "Backing up your ... recovery media" on your computer's internal storage drive or using the first method, follow the procedure below. NOTE During the recovery process it is turned off. 2 While powering on page 67. To recover the original factory image using the utilities on your computer's internal storage drive: 1 Make ...
... an internal storage drive to its out-of-box state) using the utilities stored on your computer, press the F12 key when the initial TOSHIBA screen displays. Be sure to an external power source via the AC adaptor. To recover using the second method, see "Backing up your ... recovery media" on your computer's internal storage drive or using the first method, follow the procedure below. NOTE During the recovery process it is turned off. 2 While powering on page 67. To recover the original factory image using the utilities on your computer's internal storage drive: 1 Make ...


