Toshiba Online Users Guide for Satellite A70/A75
Page 2
...OPERATION OF THE PRODUCT WILL BE UNINTERRUPTED OR ERROR FREE. IF YOU USE THE COMPUTER PRODUCTS IN A YOU AGREE THAT TOSHIBA, ITS AFFILIATES AND SUPPLIERS SHALL HAVE NO RESPONSIBILITY FOR DAMAGE TO OR LOSS OF ANY BUSINESS, PROFITS, PROGRAMS, DATA OR REMOVABLE STORAGE MEDIA... devices as a precaution against possible failures, alteration, or loss of all set-up and usage instructions in the applicable user guides and/or manuals enclosed. TOSHIBA DISCLAIMS ANY LIABILITY FOR THE FAILURE TO COPY OR TRANSFER THE DATA CORRECTLY. 2 Models: Satellite® A70/A75 Series ReWritable CD/DVD Drives ...
...OPERATION OF THE PRODUCT WILL BE UNINTERRUPTED OR ERROR FREE. IF YOU USE THE COMPUTER PRODUCTS IN A YOU AGREE THAT TOSHIBA, ITS AFFILIATES AND SUPPLIERS SHALL HAVE NO RESPONSIBILITY FOR DAMAGE TO OR LOSS OF ANY BUSINESS, PROFITS, PROGRAMS, DATA OR REMOVABLE STORAGE MEDIA... devices as a precaution against possible failures, alteration, or loss of all set-up and usage instructions in the applicable user guides and/or manuals enclosed. TOSHIBA DISCLAIMS ANY LIABILITY FOR THE FAILURE TO COPY OR TRANSFER THE DATA CORRECTLY. 2 Models: Satellite® A70/A75 Series ReWritable CD/DVD Drives ...
Toshiba Online Users Guide for Satellite A70/A75
Page 5
...make changes in advance that you disconnect the equipment until the problem is not practical, the telephone company will be advised of service may be necessary for repair or limited warranty information, please contact Toshiba Corporation, Toshiba America Information Systems, Inc. If Problems Arise If this equipment causes harm to the telephone network...other entity, or other number for which charges exceed local or long-distance transmission charges.) In order to program this information into your fax transmission, refer to the fax software instructions installed on the first page ...
...make changes in advance that you disconnect the equipment until the problem is not practical, the telephone company will be advised of service may be necessary for repair or limited warranty information, please contact Toshiba Corporation, Toshiba America Information Systems, Inc. If Problems Arise If this equipment causes harm to the telephone network...other entity, or other number for which charges exceed local or long-distance transmission charges.) In order to program this information into your fax transmission, refer to the fax software instructions installed on the first page ...
Toshiba Online Users Guide for Satellite A70/A75
Page 29
... 53 Opening the display panel 53 Your computer's features and specifications ....54 Turning on the power 55 Using the TouchPad 55 Control buttons 56 Disabling or enabling the TouchPad 56 Installing additional memory (optional 57 Removing a memory module 61 Using an external keyboard 62 Connecting a mouse 62 Connecting a printer 62 Setting up a printer 64 Using external display devices 67 Directing the display output when you turn on the computer 67 Adjusting the quality of the external display......68 Turning off the computer 69 Closing the display panel 70...
... 53 Opening the display panel 53 Your computer's features and specifications ....54 Turning on the power 55 Using the TouchPad 55 Control buttons 56 Disabling or enabling the TouchPad 56 Installing additional memory (optional 57 Removing a memory module 61 Using an external keyboard 62 Connecting a mouse 62 Connecting a printer 62 Setting up a printer 64 Using external display devices 67 Directing the display output when you turn on the computer 67 Adjusting the quality of the external display......68 Turning off the computer 69 Closing the display panel 70...
Toshiba Online Users Guide for Satellite A70/A75
Page 32
... Exploring video features 132 Changing the display properties setting 133 Display settings hot key 133 Exploring audio features 134 Recording sounds 134 Using a microphone 134 Adjusting recording settings 135 Using external speakers or headphones..........136 Using the i.LINK® port 137 Using PC Cards 137 PC Card supporting software 138 Inserting PC Cards 138 Removing PC Cards 139 Hot swapping 140 Using the Media Card Reader 141 Inserting a Card in the Media Card Reader......141 Removing a Card from the Media Card Reader 142 Chapter 5: If Something Goes Wrong 143 Problems...
... Exploring video features 132 Changing the display properties setting 133 Display settings hot key 133 Exploring audio features 134 Recording sounds 134 Using a microphone 134 Adjusting recording settings 135 Using external speakers or headphones..........136 Using the i.LINK® port 137 Using PC Cards 137 PC Card supporting software 138 Inserting PC Cards 138 Removing PC Cards 139 Hot swapping 140 Using the Media Card Reader 141 Inserting a Card in the Media Card Reader......141 Removing a Card from the Media Card Reader 142 Chapter 5: If Something Goes Wrong 143 Problems...
Toshiba Online Users Guide for Satellite A70/A75
Page 33
... 168 If you need further assistance 169 Before you call 169 Contacting Toshiba 170 Other Toshiba Internet Web sites 171 Toshiba's worldwide offices 171 Appendix A: Hot Keys 173 Instant password security 173 Without a password 173 With a password 173 Maintaining security when the battery is not fully charged 174 Sound 175 Power usage mode 175 Stand by mode 176 Hibernation mode 177 Display modes 178 Enabling a wireless device 179 Disabling or enabling the TouchPad 179 Keyboard hot keys 179
... 168 If you need further assistance 169 Before you call 169 Contacting Toshiba 170 Other Toshiba Internet Web sites 171 Toshiba's worldwide offices 171 Appendix A: Hot Keys 173 Instant password security 173 Without a password 173 With a password 173 Maintaining security when the battery is not fully charged 174 Sound 175 Power usage mode 175 Stand by mode 176 Hibernation mode 177 Display modes 178 Enabling a wireless device 179 Disabling or enabling the TouchPad 179 Keyboard hot keys 179
Toshiba Online Users Guide for Satellite A70/A75
Page 57
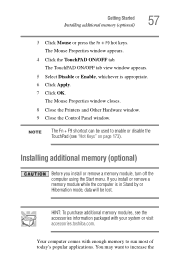
... Other Hardware window. 9 Close the Control Panel window. Installing additional memory (optional) Before you install or remove a memory module while the computer is appropriate. 6 Click Apply. 7 Click OK. If you install or remove a memory module, turn off the computer using the Start menu. HINT: To purchase additional memory modules, see "Hot Keys" on page 173). Your computer comes with your system or visit accessories.toshiba.com. The TouchPAD ON/OFF tab view window appears. 5 Select Disable or Enable, whichever...
... Other Hardware window. 9 Close the Control Panel window. Installing additional memory (optional) Before you install or remove a memory module while the computer is appropriate. 6 Click Apply. 7 Click OK. If you install or remove a memory module, turn off the computer using the Start menu. HINT: To purchase additional memory modules, see "Hot Keys" on page 173). Your computer comes with your system or visit accessories.toshiba.com. The TouchPAD ON/OFF tab view window appears. 5 Select Disable or Enable, whichever...
Toshiba Online Users Guide for Satellite A70/A75
Page 59
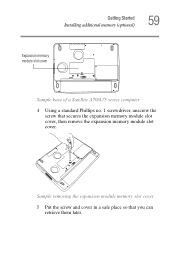
Sample removing the expansion module memory slot cover 5 Put the screw and cover in a safe place so that secures the expansion memory module slot cover, then remove the expansion memory module slot cover. Getting Started Installing additional memory (optional) 59 Expansion memory module slot cover Sample base of a Satellite A70/A75 series computer 4 Using a standard Phillips no. 1 screwdriver, unscrew the screw that you can retrieve them later.
Sample removing the expansion module memory slot cover 5 Put the screw and cover in a safe place so that secures the expansion memory module slot cover, then remove the expansion memory module slot cover. Getting Started Installing additional memory (optional) 59 Expansion memory module slot cover Sample base of a Satellite A70/A75 series computer 4 Using a standard Phillips no. 1 screwdriver, unscrew the screw that you can retrieve them later.

Toshiba Online Users Guide for Satellite A70/A75
Page 61
... the computer correctly recognizes the memory, click Start, Control Panel and click Performance and Maintenance. Removing a memory module 1 Follow steps 1 through 6 in step 8. Click System to pull it . 11 Turn the computer over and reconnect any cables you removed. 12 Turn on page 57. 2 Gently push the memory module locks outward until the memory module pops up. Getting Started Installing additional memory (optional) 61 9 Replace the expansion memory module slot cover. 10 Replace the screw and tighten...
... the computer correctly recognizes the memory, click Start, Control Panel and click Performance and Maintenance. Removing a memory module 1 Follow steps 1 through 6 in step 8. Click System to pull it . 11 Turn the computer over and reconnect any cables you removed. 12 Turn on page 57. 2 Gently push the memory module locks outward until the memory module pops up. Getting Started Installing additional memory (optional) 61 9 Replace the expansion memory module slot cover. 10 Replace the screw and tighten...
Toshiba Online Users Guide for Satellite A70/A75
Page 64
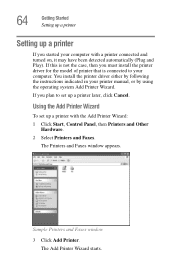
... Printers and Faxes window appears. If you plan to your computer. 64 Getting Started Setting up a printer Setting up a printer If you started your computer with the Add Printer Wizard: 1 Click Start, Control Panel, then Printers and Other Hardware. 2 Select Printers and Faxes. You install the printer driver either by following the instructions indicated in your printer manual, or by using the operating system Add Printer...
... Printers and Faxes window appears. If you plan to your computer. 64 Getting Started Setting up a printer Setting up a printer If you started your computer with the Add Printer Wizard: 1 Click Start, Control Panel, then Printers and Other Hardware. 2 Select Printers and Faxes. You install the printer driver either by following the instructions indicated in your printer manual, or by using the operating system Add Printer...
Toshiba Online Users Guide for Satellite A70/A75
Page 67
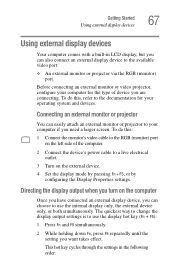
... side of device you need a larger screen. Getting Started Using external display devices 67 Using external display devices Your computer comes with a built-in the following order: To do this , refer to the documentation for the type of the computer. 2 Connect the device's power cable to the available video port: ❖ An external monitor or projector via the RGB (monitor) port. The quickest way to change the display output settings is to use the internal display only, the external device only, or...
... side of device you need a larger screen. Getting Started Using external display devices 67 Using external display devices Your computer comes with a built-in the following order: To do this , refer to the documentation for the type of the computer. 2 Connect the device's power cable to the available video port: ❖ An external monitor or projector via the RGB (monitor) port. The quickest way to change the display output settings is to use the internal display only, the external device only, or...
Toshiba Online Users Guide for Satellite A70/A75
Page 75
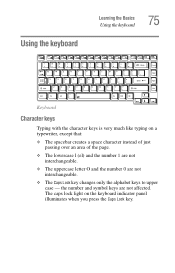
... the number 1 are not interchangeable. ❖ The uppercase letter O and the number 0 are not affected. the number and symbol keys are not interchangeable. ❖ The Caps Lock key changes only the alphabet keys to upper case - Using the keyboard Learning the Basics Using the keyboard 75 Keyboard Character keys Typing with the character keys is very much like typing on the keyboard indicator panel illuminates when you press the Caps Lock key.
... the number 1 are not interchangeable. ❖ The uppercase letter O and the number 0 are not affected. the number and symbol keys are not interchangeable. ❖ The Caps Lock key changes only the alphabet keys to upper case - Using the keyboard Learning the Basics Using the keyboard 75 Keyboard Character keys Typing with the character keys is very much like typing on the keyboard indicator panel illuminates when you press the Caps Lock key.
Toshiba Online Users Guide for Satellite A70/A75
Page 138
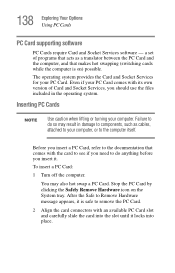
... you should use the files included in damage to Remove Hardware message appears, it . You may result in the operating system. 138 Exploring Your Options Using PC Cards PC Card supporting software PC Cards require Card and Socket Services software - a set of Card and Socket Services, you insert it is on the System tray. Failure to do so may also hot swap a PC Card. To insert a PC Card: 1 Turn off the...
... you should use the files included in damage to Remove Hardware message appears, it . You may result in the operating system. 138 Exploring Your Options Using PC Cards PC Card supporting software PC Cards require Card and Socket Services software - a set of Card and Socket Services, you insert it is on the System tray. Failure to do so may also hot swap a PC Card. To insert a PC Card: 1 Turn off the...
Toshiba Online Users Guide for Satellite A70/A75
Page 147
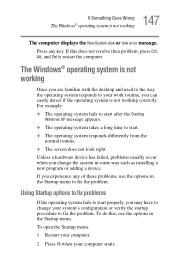
... problems, use the options in the Startup menu. If this , use the options in some way such as installing a new program or adding a device. If you may have to start after the Starting Windows XP message appears. ❖ The operating system takes a long time to change the system in the Startup menu to fix the problem. To open the Startup menu: 1 Restart your computer. 2 Press F8 when your system's configuration or verify the startup...
... problems, use the options in the Startup menu. If this , use the options in some way such as installing a new program or adding a device. If you may have to start after the Starting Windows XP message appears. ❖ The operating system takes a long time to change the system in the Startup menu to fix the problem. To open the Startup menu: 1 Restart your computer. 2 Press F8 when your system's configuration or verify the startup...
Toshiba Online Users Guide for Satellite A70/A75
Page 157
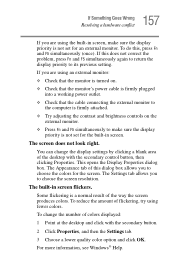
... to its previous setting. 157 If Something Goes Wrong Resolving a hardware conflict If you are using an external monitor: ❖ Check that the monitor is turned on. ❖ Check that the monitor's power cable is firmly plugged into a working power outlet. ❖ Check that the cable connecting the external monitor to the computer is firmly attached. ❖ Try adjusting the contrast and brightness controls on the external monitor. ❖ Press Fn...
... to its previous setting. 157 If Something Goes Wrong Resolving a hardware conflict If you are using an external monitor: ❖ Check that the monitor is turned on. ❖ Check that the monitor's power cable is firmly plugged into a working power outlet. ❖ Check that the cable connecting the external monitor to the computer is firmly attached. ❖ Try adjusting the contrast and brightness controls on the external monitor. ❖ Press Fn...
Toshiba Online Users Guide for Satellite A70/A75
Page 179
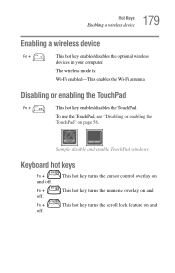
... use the TouchPad, see "Disabling or enabling the TouchPad" on and off. 179 Hot Keys Enabling a wireless device Enabling a wireless device Fn + This hot key enables/disables the optional wireless devices in your computer. Sample disable and enable TouchPad windows Keyboard hot keys F10 Fn + This hot key turns the cursor control overlay on page 56. This hot key turns the numeric overlay on and This hot key turns the scroll lock feature on and The wireless mode is: Wi-Fi enabled-This enables the Wi-Fi antenna Disabling or enabling the TouchPad Fn + This hot key enables/disables...
... use the TouchPad, see "Disabling or enabling the TouchPad" on and off. 179 Hot Keys Enabling a wireless device Enabling a wireless device Fn + This hot key enables/disables the optional wireless devices in your computer. Sample disable and enable TouchPad windows Keyboard hot keys F10 Fn + This hot key turns the cursor control overlay on page 56. This hot key turns the numeric overlay on and This hot key turns the scroll lock feature on and The wireless mode is: Wi-Fi enabled-This enables the Wi-Fi antenna Disabling or enabling the TouchPad Fn + This hot key enables/disables...
Toshiba Online Users Guide for Satellite A70/A75
Page 182
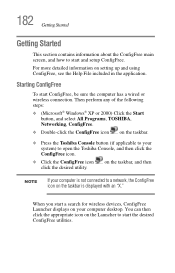
...; (Microsoft® Windows® XP or 2000) Click the Start button, and select All Programs, TOSHIBA, Networking, ConfigFree. ❖ Double-click the ConfigFree icon on the Launcher to open the Toshiba Console, and then click the ConfigFree icon. ❖ Click the ConfigFree icon click the desired utility. Starting ConfigFree To start a search for wireless devices, ConfigFree Launcher displays on setting up and using ConfigFree, see...
...; (Microsoft® Windows® XP or 2000) Click the Start button, and select All Programs, TOSHIBA, Networking, ConfigFree. ❖ Double-click the ConfigFree icon on the Launcher to open the Toshiba Console, and then click the ConfigFree icon. ❖ Click the ConfigFree icon click the desired utility. Starting ConfigFree To start a search for wireless devices, ConfigFree Launcher displays on setting up and using ConfigFree, see...
Toshiba Online Users Guide for Satellite A70/A75
Page 188
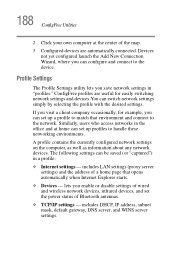
... enable or disable settings of the map. 3 Configured devices are useful for easily switching network settings and devices.You can be saved (or "captured") in a profile: ❖ Internet settings - 188 ConfigFree Utilities 2 Click your own computer at home can set up a profile to match that opens automatically when Internet Explorer starts. ❖ Devices - A profile contains the currently configured network settings on the computer, as well as information about any network devices. Similarly, users who access networks...
... enable or disable settings of the map. 3 Configured devices are useful for easily switching network settings and devices.You can be saved (or "captured") in a profile: ❖ Internet settings - 188 ConfigFree Utilities 2 Click your own computer at home can set up a profile to match that opens automatically when Internet Explorer starts. ❖ Devices - A profile contains the currently configured network settings on the computer, as well as information about any network devices. Similarly, users who access networks...
Toshiba Online Users Guide for Satellite A70/A75
Page 203
... - A 3.5-inch diskette that are removable. hot key - (1) A feature in which all open files and programs, when you turn the computer off . A small image displayed on the screen that activates a memory resident program. The keys labeled F1 through F12, typically located on the computer again, your work is usually fixed, but some computers have the operating system automatically recognize the change. A storage device composed of a rigid platter...
... - A 3.5-inch diskette that are removable. hot key - (1) A feature in which all open files and programs, when you turn the computer off . A small image displayed on the screen that activates a memory resident program. The keys labeled F1 through F12, typically located on the computer again, your work is usually fixed, but some computers have the operating system automatically recognize the change. A storage device composed of a rigid platter...
Toshiba Online Users Guide for Satellite A70/A75
Page 213
... J jack RJ-11 126 K keyboard character keys 75 Ctrl, Fn, and Alt keys 76 cursor control overlay 78 function keys 76 hot keys 179 not working 146, 156 numeric keypad overlay 77 overlay keys 77 unexpected characters 156 Windows special keys 76 keyboard, external 62 keyboard, PS/2-compatible 62 L LCD power-saver 70 lights AC power 51 battery 51, 110 hard disk drive 55 M main battery changing 114 removing 114 Media Card Reader 141 inserting a card 141 removing a card 142 memory problem solving 154 removing 61
... J jack RJ-11 126 K keyboard character keys 75 Ctrl, Fn, and Alt keys 76 cursor control overlay 78 function keys 76 hot keys 179 not working 146, 156 numeric keypad overlay 77 overlay keys 77 unexpected characters 156 Windows special keys 76 keyboard, external 62 keyboard, PS/2-compatible 62 L LCD power-saver 70 lights AC power 51 battery 51, 110 hard disk drive 55 M main battery changing 114 removing 114 Media Card Reader 141 inserting a card 141 removing a card 142 memory problem solving 154 removing 61
Toshiba Online Users Guide for Satellite A70/A75
Page 214
214 removing expansion slot cover 59 memory module inserting 60 removing 61 Memory Stick 141 Memory Stick Pro Media Card Reader 141 modem determining COM port 124 problem solving 167 resetting port to default settings 124 upgrading 124 module Wi-Fi Mini PC 128 monitor 67 connecting 67 not working 157 mouse connecting 62 moving the computer 71 MultiMediaCard Media Card Reader 141 N network accessing 127 dial-up connection 127 Dial-Up Networking Wizard 127 networking wireless 127 P password instant 173 PC Card Card and Socket Services 138 checklist...
214 removing expansion slot cover 59 memory module inserting 60 removing 61 Memory Stick 141 Memory Stick Pro Media Card Reader 141 modem determining COM port 124 problem solving 167 resetting port to default settings 124 upgrading 124 module Wi-Fi Mini PC 128 monitor 67 connecting 67 not working 157 mouse connecting 62 moving the computer 71 MultiMediaCard Media Card Reader 141 N network accessing 127 dial-up connection 127 Dial-Up Networking Wizard 127 networking wireless 127 P password instant 173 PC Card Card and Socket Services 138 checklist...


