
User Manual
Page 9
... requirements for radio equipment ETS 300 826 General EMC requirements for radio equipment. Industry Canada requires this product to be operated indoors and away from windows to 5.85 GHz bands. These radar stations can cause interference with essential test suites as primary users of the 5.25 GHz to 5.35 GHz and...
... requirements for radio equipment ETS 300 826 General EMC requirements for radio equipment. Industry Canada requires this product to be operated indoors and away from windows to 5.85 GHz bands. These radar stations can cause interference with essential test suites as primary users of the 5.25 GHz to 5.35 GHz and...
User Manual
Page 27
...a registered trademark of the Wi-Fi Alliance. Wi-Fi is a registered trademark, and SelectServ, FreedomWare, SmartMedia, and Qosmio are trademarks of Microsoft Corporation in the United States and/or other countries. All other brand and product names are registered ...trademarks of Dolby Laboratories. Secure Digital and SD are registered trademarks of Toshiba America Information Systems, Inc. DirectX, Active Desktop, Windows Media, and DirectShow are trademarks. Manufactured by Toshiba under license from Dolby Laboratories/ Dolby and the double-D symbol are trademarks, ...
...a registered trademark of the Wi-Fi Alliance. Wi-Fi is a registered trademark, and SelectServ, FreedomWare, SmartMedia, and Qosmio are trademarks of Microsoft Corporation in the United States and/or other countries. All other brand and product names are registered ...trademarks of Dolby Laboratories. Secure Digital and SD are registered trademarks of Toshiba America Information Systems, Inc. DirectX, Active Desktop, Windows Media, and DirectShow are trademarks. Manufactured by Toshiba under license from Dolby Laboratories/ Dolby and the double-D symbol are trademarks, ...

User Manual
Page 30
...keys 90 Using the overlay to type numeric data 91 Starting a program 92 Starting a program from the Start menu...........92 Starting a program from Windows® Explorer ...93 Starting a program from the Run dialog box ....94 Saving your work 95 Printing your work 97 Backing up your files...107 Powering down the computer 108 Using the Turn off command 108 Using Hibernation Mode 110 Using Stand By Mode 113 Toshiba's online resources 116 Chapter 3: Mobile Computing 117 Toshiba's energy-saver design 117 Running the computer on battery power 118 Battery Notice 118 Power management 119
...keys 90 Using the overlay to type numeric data 91 Starting a program 92 Starting a program from the Start menu...........92 Starting a program from Windows® Explorer ...93 Starting a program from the Run dialog box ....94 Saving your work 95 Printing your work 97 Backing up your files...107 Powering down the computer 108 Using the Turn off command 108 Using Hibernation Mode 110 Using Stand By Mode 113 Toshiba's online resources 116 Chapter 3: Mobile Computing 117 Toshiba's energy-saver design 117 Running the computer on battery power 118 Battery Notice 118 Power management 119
User Manual
Page 32
... Buttons 160 Playing an audio CD 160 Playing a DVD 161 Watching television 163 Connecting an External Device 164 Toshiba Qosmio Remote Control 165 Installing the QosmioPlayer Recovery media ........170 Chapter 5: Getting to Know the Windows ® XP Media Center Edition 2005 171 Media Center Setup 172 Connecting to a Television 172 Connecting the TV...
... Buttons 160 Playing an audio CD 160 Playing a DVD 161 Watching television 163 Connecting an External Device 164 Toshiba Qosmio Remote Control 165 Installing the QosmioPlayer Recovery media ........170 Chapter 5: Getting to Know the Windows ® XP Media Center Edition 2005 171 Media Center Setup 172 Connecting to a Television 172 Connecting the TV...
User Manual
Page 33
... Settings 202 Changing recording priorities 203 Watching and Recording Movies 203 Listening to Music 204 Creating Your Music Library Using Windows Media® Player 204 Adding Music from Your Hard Drive to Windows Media Player Library 205 Playing Digital Music Files 207 Finding Music Files in My Music 208 Playing a Song 209...
... Settings 202 Changing recording priorities 203 Watching and Recording Movies 203 Listening to Music 204 Creating Your Music Library Using Windows Media® Player 204 Adding Music from Your Hard Drive to Windows Media Player Library 205 Playing Digital Music Files 207 Finding Music Files in My Music 208 Playing a Song 209...
User Manual
Page 35
...or RAID-1 Utility 256 Using RAID 256 RAID-0 257 RAID-1 258 When you first start your computer 259 Creating a new RAID-0 array 261 TOSHIBA RAID Console Utility 263 Defining options for RAID-0 or RAID-1...........266 Viewing the status of an array 269 Viewing the status of a hard disk ...Problems that are easy to fix 281 Problems when you turn on the computer............283 The Windows® operating system is not working ..285 Using Startup options to fix problems 285 Internet problems 287 The Windows® XP operating system can help you 287 Resolving a hardware conflict 288 A plan...
...or RAID-1 Utility 256 Using RAID 256 RAID-0 257 RAID-1 258 When you first start your computer 259 Creating a new RAID-0 array 261 TOSHIBA RAID Console Utility 263 Defining options for RAID-0 or RAID-1...........266 Viewing the status of an array 269 Viewing the status of a hard disk ...Problems that are easy to fix 281 Problems when you turn on the computer............283 The Windows® operating system is not working ..285 Using Startup options to fix problems 285 Internet problems 287 The Windows® XP operating system can help you 287 Resolving a hardware conflict 288 A plan...
User Manual
Page 38
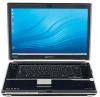
While Toshiba has made every effort at the time of publication to ensure the accuracy of powerful, portable multimedia computing. You will find your operating system, Microsoft® Windows® XP Media Center Edition 2005 (MCE), already installed on your computer,... Internet access. NOTE The product specifications and configuration information are all the features and specifications listed or illustrated. With your Toshiba notebook computer, your computer. Introduction Welcome to the world of the information provided herein, product specifications, configurations, prices, ...
While Toshiba has made every effort at the time of publication to ensure the accuracy of powerful, portable multimedia computing. You will find your operating system, Microsoft® Windows® XP Media Center Edition 2005 (MCE), already installed on your computer,... Internet access. NOTE The product specifications and configuration information are all the features and specifications listed or illustrated. With your Toshiba notebook computer, your computer. Introduction Welcome to the world of the information provided herein, product specifications, configurations, prices, ...
User Manual
Page 45
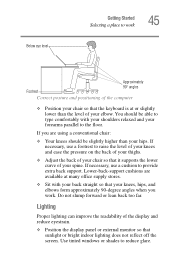
... form approximately 90-degree angles when you are available at many office supply stores. ❖ Sit with your shoulders relaxed and your spine. Use tinted windows or shades to provide extra back support. Do not slump forward or lean back too far. If necessary, use a cushion to reduce glare. Lower-back...
... form approximately 90-degree angles when you are available at many office supply stores. ❖ Sit with your shoulders relaxed and your spine. Use tinted windows or shades to provide extra back support. Do not slump forward or lean back too far. If necessary, use a cushion to reduce glare. Lower-back...
User Manual
Page 50
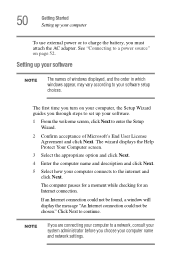
... software. 1 From the welcome screen, click Next to enter the Setup Wizard. 2 Confirm acceptance of windows displayed, and the order in which windows appear, may vary according to continue. If an Internet connection could not be found, a window will display the message "An Internet connection could not be chosen." Click Next to your...
... software. 1 From the welcome screen, click Next to enter the Setup Wizard. 2 Confirm acceptance of windows displayed, and the order in which windows appear, may vary according to continue. If an Internet connection could not be found, a window will display the message "An Internet connection could not be chosen." Click Next to your...

User Manual
Page 60
...primary (left mouse button. Disabling or enabling the TouchPad The TouchPad is appropriate. 6 Click Apply. 7 Click OK. The Control Panel window appears. 2 Click Printers and Other Hardware. 3 Click Mouse Properties. Check your program's documentation to the right mouse button. The Mouse Properties... window appears. 4 Click the TouchPAD ON/OFF tab. The TouchPad ON/OFF tab appears. 5 Select Disable or Enable, whichever is enabled ...
...primary (left mouse button. Disabling or enabling the TouchPad The TouchPad is appropriate. 6 Click Apply. 7 Click OK. The Control Panel window appears. 2 Click Printers and Other Hardware. 3 Click Mouse Properties. Check your program's documentation to the right mouse button. The Mouse Properties... window appears. 4 Click the TouchPAD ON/OFF tab. The TouchPad ON/OFF tab appears. 5 Select Disable or Enable, whichever is enabled ...

User Manual
Page 62
.../cable. 4 Close the display panel and turn the computer upside down to step 3. 1 If the computer is on, click Start, then click Turn off computer window appears. 2 Click Turn Off. 62 Getting Started Installing additional memory (optional) You need a standard Phillips no . 1 screwdriver that is on, begin at step 1; If the...
.../cable. 4 Close the display panel and turn the computer upside down to step 3. 1 If the computer is on, click Start, then click Turn off computer window appears. 2 Click Turn Off. 62 Getting Started Installing additional memory (optional) You need a standard Phillips no . 1 screwdriver that is on, begin at step 1; If the...
User Manual
Page 67
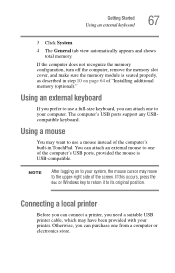
The computer's USB ports support any USBcompatible keyboard. If this occurs, press the Esc or Windows key to return it to the upper-right side of "Installing additional memory (optional)." Using a mouse You may want to use a full-size keyboard, you ...
The computer's USB ports support any USBcompatible keyboard. If this occurs, press the Esc or Windows key to return it to the upper-right side of "Installing additional memory (optional)." Using a mouse You may want to use a full-size keyboard, you ...
User Manual
Page 69
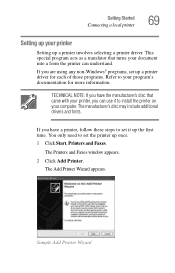
... a form the printer can use it up a printer involves selecting a printer driver. The manufacturer's disc may include additional drivers and fonts. The Printers and Faxes window appears. 2 Click Add Printer. You only need to set it to your program's documentation for more information. Sample Add Printer Wizard Getting Started Connecting a local... the first time. This special program acts as a translator that came with your printer, you can understand. TECHNICAL NOTE: If you are using any non-Windows® programs, set up once. 1 Click Start, Printers and Faxes.
... a form the printer can use it up a printer involves selecting a printer driver. The manufacturer's disc may include additional drivers and fonts. The Printers and Faxes window appears. 2 Click Add Printer. You only need to set it to your program's documentation for more information. Sample Add Printer Wizard Getting Started Connecting a local... the first time. This special program acts as a translator that came with your printer, you can understand. TECHNICAL NOTE: If you are using any non-Windows® programs, set up once. 1 Click Start, Printers and Faxes.
User Manual
Page 74
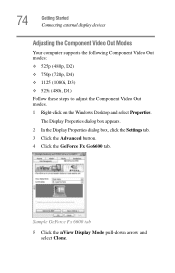
...; 750p (720p, D4) ❖ 1125 (1080i, D3) ❖ 525i (480i, D1) Follow these steps to adjust the Component Video Out modes. 1 Right-click on the Windows Desktop and select Properties.
...; 750p (720p, D4) ❖ 1125 (1080i, D3) ❖ 525i (480i, D1) Follow these steps to adjust the Component Video Out modes. 1 Right-click on the Windows Desktop and select Properties.

User Manual
Page 77
... the Screen resolution slider to the left to the external video device, modify the Display Properties as described in "Adjusting the Display Properties" on the Windows Desktop and click Properties. Getting Started Connecting external display devices 77 Out button is located above and to the right of the keyboard.) NOTE If...
... the Screen resolution slider to the left to the external video device, modify the Display Properties as described in "Adjusting the Display Properties" on the Windows Desktop and click Properties. Getting Started Connecting external display devices 77 Out button is located above and to the right of the keyboard.) NOTE If...

User Manual
Page 78
... get the desired setting. Directing the display output when you turn on the computer" on your TV. The quickest way to close the Display Properties window. See the immediately following section on your computer screen. 78 Getting Started Connecting external display devices TECHNICAL NOTE: Most televisions use the internal display only...
... get the desired setting. Directing the display output when you turn on the computer" on your TV. The quickest way to close the Display Properties window. See the immediately following section on your computer screen. 78 Getting Started Connecting external display devices TECHNICAL NOTE: Most televisions use the internal display only...
User Manual
Page 83
...Never spray cleaner directly onto the computer. Getting Started Caring for your computer 83 ❖ Use the Turn Off command if you are using the Windows® XP Media Center Edition operating system. ❖ If you left off the computer while any drive is in use and result in use... . Cleaning the computer Keep liquids, including cleaning fluid, out of data. Never use harsh or caustic chemical products to memory. Ask your Toshiba dealer for suggestions for your computer This section gives tips on the computer, you automatically return to where you have work in progress and are...
...Never spray cleaner directly onto the computer. Getting Started Caring for your computer 83 ❖ Use the Turn Off command if you are using the Windows® XP Media Center Edition operating system. ❖ If you left off the computer while any drive is in use and result in use... . Cleaning the computer Keep liquids, including cleaning fluid, out of data. Never use harsh or caustic chemical products to memory. Ask your Toshiba dealer for suggestions for your computer This section gives tips on the computer, you automatically return to where you have work in progress and are...
User Manual
Page 88
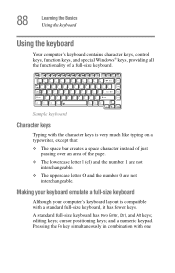
... a full-size keyboard. 88 Learning the Basics Using the keyboard Using the keyboard Your computer's keyboard contains character keys, control keys, function keys, and special Windows® keys, providing all the functionality of the page. ❖ The lowercase letter l (el) and the number 1 are not interchangeable. ❖ The uppercase letter O and...
... a full-size keyboard. 88 Learning the Basics Using the keyboard Using the keyboard Your computer's keyboard contains character keys, control keys, function keys, and special Windows® keys, providing all the functionality of the page. ❖ The lowercase letter l (el) and the number 1 are not interchangeable. ❖ The uppercase letter O and...
User Manual
Page 90
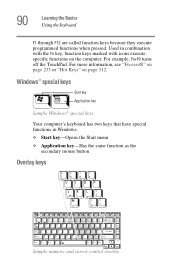
... as the secondary mouse button Overlay keys Sample numeric and cursor control overlay For example, Fn+F9 turns off the TouchPad. Windows® special keys Start key Application key Sample Windows® special keys Your computer's keyboard has two keys that have special functions in combination with the Fn key, function keys...
... as the secondary mouse button Overlay keys Sample numeric and cursor control overlay For example, Fn+F9 turns off the TouchPad. Windows® special keys Start key Application key Sample Windows® special keys Your computer's keyboard has two keys that have special functions in combination with the Fn key, function keys...
User Manual
Page 92
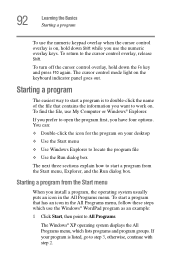
... a program is listed, go to work on. If you prefer to the cursor control overlay, release Shift. To find the file, use My Computer or Windows® Explorer. You can: ❖ Double-click the icon for the program on your program is to double-click the name of the file that... the Start menu When you install a program, the operating system usually puts an icon in the All Programs menu, follow these steps which use the Windows® WordPad program as an example: 1 Click Start, then point to start a program that contains the information you want to step 3, otherwise, continue with step...
... a program is listed, go to work on. If you prefer to the cursor control overlay, release Shift. To find the file, use My Computer or Windows® Explorer. You can: ❖ Double-click the icon for the program on your program is to double-click the name of the file that... the Start menu When you install a program, the operating system usually puts an icon in the All Programs menu, follow these steps which use the Windows® WordPad program as an example: 1 Click Start, then point to start a program that contains the information you want to step 3, otherwise, continue with step...


