User Guide
Page 31
... of factory default software with user's data 64 Recovering without changing the internal storage drive partitions 67 Recovering to a custom size partition 70 Creating recovery DVDs/media 72 Restoring from recovery DVDs/media 74 Erasing the Internal Storage Drive 76 Checking the internal storage drive operating status 78 Installing drivers and applications 78 Using the touch pad 79 Adjusting touch pad settings 82 Disabling or enabling the touch pad 82 Using external display devices 83 Selecting video cables 83 Connecting an HDMI™-compatible television or display device 83...
... of factory default software with user's data 64 Recovering without changing the internal storage drive partitions 67 Recovering to a custom size partition 70 Creating recovery DVDs/media 72 Restoring from recovery DVDs/media 74 Erasing the Internal Storage Drive 76 Checking the internal storage drive operating status 78 Installing drivers and applications 78 Using the touch pad 79 Adjusting touch pad settings 82 Disabling or enabling the touch pad 82 Using external display devices 83 Selecting video cables 83 Connecting an HDMI™-compatible television or display device 83...
User Guide
Page 34
...Camera 136 Using the Memory card reader 137 Inserting memory media 138 Removing memory media 138 Chapter 5: Utilities 140 TOSHIBA Assist 141 Connect 142 Secure 143 Protect & Fix 144 Optimize 145 TOSHIBA Application Installer 146 Setting passwords 147 Using an instant password 147 Using a supervisor password 148 Using a user password 149 TOSHIBA Face Recognition Utility 151 TOSHIBA PC Diagnostic Tool Utility 152 Mouse Utility 153 TOSHIBA Hardware Setup 154 TOSHIBA Sleep Utility 156 Starting the TOSHIBA Sleep Utility 156 USB Sleep and Charge 156 Enabling/Disabling USB Sleep...
...Camera 136 Using the Memory card reader 137 Inserting memory media 138 Removing memory media 138 Chapter 5: Utilities 140 TOSHIBA Assist 141 Connect 142 Secure 143 Protect & Fix 144 Optimize 145 TOSHIBA Application Installer 146 Setting passwords 147 Using an instant password 147 Using a supervisor password 148 Using a user password 149 TOSHIBA Face Recognition Utility 151 TOSHIBA PC Diagnostic Tool Utility 152 Mouse Utility 153 TOSHIBA Hardware Setup 154 TOSHIBA Sleep Utility 156 Starting the TOSHIBA Sleep Utility 156 USB Sleep and Charge 156 Enabling/Disabling USB Sleep...
User Guide
Page 39
... software or hardware options, visit Toshiba's Web site at the time of publication to change without notice. You can: ❖ Read the entire guide from beginning to end. ❖ Skim through and stop when a topic interests you. ❖ Use the table of the information provided herein, product specifications, configurations, prices, system/component/options availability are designed for a product Series. This guide This guide...
... software or hardware options, visit Toshiba's Web site at the time of publication to change without notice. You can: ❖ Read the entire guide from beginning to end. ❖ Skim through and stop when a topic interests you. ❖ Use the table of the information provided herein, product specifications, configurations, prices, system/component/options availability are designed for a product Series. This guide This guide...
User Guide
Page 52
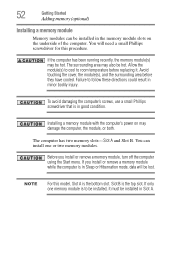
...'s power on the underside of the computer. NOTE For this procedure. The surrounding area may damage the computer, the module, or both. Slot B is in Slot A. If you install or remove a memory module, turn off the computer using the Start menu. Before you install or remove a memory module while the computer is the bottom slot. You will need a small Phillips screwdriver for this model, Slot A is in Sleep or Hibernation mode, data...
...'s power on the underside of the computer. NOTE For this procedure. The surrounding area may damage the computer, the module, or both. Slot B is in Slot A. If you install or remove a memory module, turn off the computer using the Start menu. Before you install or remove a memory module while the computer is the bottom slot. You will need a small Phillips screwdriver for this model, Slot A is in Sleep or Hibernation mode, data...

User Guide
Page 59
... the vents located at the underside of the slot. Always make sure your computer on a hard flat surface. Getting Started 59 Adding memory (optional) 3 Gently lift the memory module to a 30-degree angle and slide it using the screw. 5 Re-insert the battery. Slot B Slot A Back of computer (Sample Illustration) Removing the memory module 4 Replace the memory module slot cover and secure it out of the computer. ❖ Always operate your computer...
... the vents located at the underside of the slot. Always make sure your computer on a hard flat surface. Getting Started 59 Adding memory (optional) 3 Gently lift the memory module to a 30-degree angle and slide it using the screw. 5 Re-insert the battery. Slot B Slot A Back of computer (Sample Illustration) Removing the memory module 4 Replace the memory module slot cover and secure it out of the computer. ❖ Always operate your computer...
User Guide
Page 60
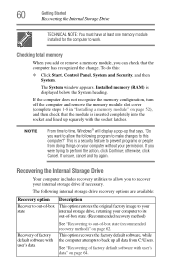
... recovery method) Recovery of factory default software with user's data See "Recovering to perform the action, click Continue; The following program to make changes to prevent programs or people from C:\Users. To do this computer?" Installed memory (RAM) is a security feature to this : ❖ Click Start, Control Panel, System and Security, and then System. If the computer does not recognize the memory configuration, turn off the computer and remove the memory module slot cover...
... recovery method) Recovery of factory default software with user's data See "Recovering to perform the action, click Continue; The following program to make changes to prevent programs or people from C:\Users. To do this computer?" Installed memory (RAM) is a security feature to this : ❖ Click Start, Control Panel, System and Security, and then System. If the computer does not recognize the memory configuration, turn off the computer and remove the memory module slot cover...
User Guide
Page 84
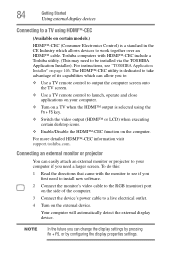
... that came with HDMI™-CEC include a Toshiba utility. (This may need to be installed via the TOSHIBA Application Installer). NOTE In the future you need to install new software. 2 Connect the monitor's video cable to the RGB (monitor) port on the side of its capabilities which can change the display settings by pressing Fn + F5, or by configuring the display properties settings. For instructions, see if you to: ❖ Use a TV remote control to output...
... that came with HDMI™-CEC include a Toshiba utility. (This may need to be installed via the TOSHIBA Application Installer). NOTE In the future you need to install new software. 2 Connect the monitor's video cable to the RGB (monitor) port on the side of its capabilities which can change the display settings by pressing Fn + F5, or by configuring the display properties settings. For instructions, see if you to: ❖ Use a TV remote control to output...
User Guide
Page 110
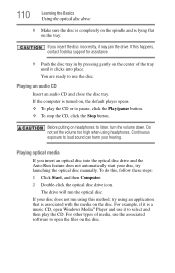
... to listen, turn the volume down. Playing an audio CD Insert an audio CD and close the disc tray. Before putting on the tray. Continuous exposure to loud sound can harm your disc, try using headphones. If this happens, contact Toshiba support for assistance. 9 Push the disc tray in by pressing gently on the center of media, use the associated software to pause, click...
... to listen, turn the volume down. Playing an audio CD Insert an audio CD and close the disc tray. Before putting on the tray. Continuous exposure to loud sound can harm your disc, try using headphones. If this happens, contact Toshiba support for assistance. 9 Push the disc tray in by pressing gently on the center of media, use the associated software to pause, click...
User Guide
Page 150
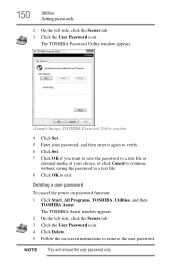
... -screen instructions to exit. NOTE This will remove the user password only. 150 Utilities Setting passwords 2 On the left side, click the Secure tab. 3 Click the User Password icon. 4 Click Delete. 5 Follow the on password function: 1 Click Start, All Programs, TOSHIBA, Utilities, and then TOSHIBA Assist. The TOSHIBA Assist window appears. 2 On the left side, click the Secure tab. 3 Click the User Password icon. The TOSHIBA Password Utility window appears. (Sample Image) TOSHIBA Password Utility window 4 Click Set. 5 Enter your password...
... -screen instructions to exit. NOTE This will remove the user password only. 150 Utilities Setting passwords 2 On the left side, click the Secure tab. 3 Click the User Password icon. 4 Click Delete. 5 Follow the on password function: 1 Click Start, All Programs, TOSHIBA, Utilities, and then TOSHIBA Assist. The TOSHIBA Assist window appears. 2 On the left side, click the Secure tab. 3 Click the User Password icon. The TOSHIBA Password Utility window appears. (Sample Image) TOSHIBA Password Utility window 4 Click Set. 5 Enter your password...
User Guide
Page 154
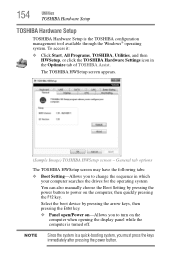
... operating system You can also manually choose the Boot Setting by pressing the arrow keys, then pressing the Enter key. ❖ Panel open/Power on-Allows you to power on the computer when opening the display panel while the computer is turned off. 154 Utilities TOSHIBA Hardware Setup TOSHIBA Hardware Setup TOSHIBA Hardware Setup is a quick-booting system, you must press the keys immediately after pressing the power button. NOTE Since the system is the TOSHIBA configuration management tool available through the Windows® operating...
... operating system You can also manually choose the Boot Setting by pressing the arrow keys, then pressing the Enter key. ❖ Panel open/Power on-Allows you to power on the computer when opening the display panel while the computer is turned off. 154 Utilities TOSHIBA Hardware Setup TOSHIBA Hardware Setup TOSHIBA Hardware Setup is a quick-booting system, you must press the keys immediately after pressing the power button. NOTE Since the system is the TOSHIBA configuration management tool available through the Windows® operating...
User Guide
Page 164
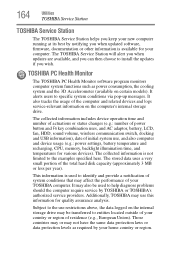
... Accelerometer (available on the computer's internal storage drive. The collected information includes device operation time and number of actuations or status changes (e.g.: number of power button and Fn key combination uses, and AC adaptor, battery, LCD, fan, HDD, sound volume, wireless communication switch, docking and USB information), date of the total hard disk capacity (approximately 3 MB or less per year). The TOSHIBA Service Station will alert you when updates are available, and you can then...
... Accelerometer (available on the computer's internal storage drive. The collected information includes device operation time and number of actuations or status changes (e.g.: number of power button and Fn key combination uses, and AC adaptor, battery, LCD, fan, HDD, sound volume, wireless communication switch, docking and USB information), date of the total hard disk capacity (approximately 3 MB or less per year). The TOSHIBA Service Station will alert you when updates are available, and you can then...

User Guide
Page 170
... options in some way such as installing a new program or adding a device. Using Startup options to fix problems If the operating system fails to start properly, you highlight each option using the arrow keys, Windows® displays information about each option at the bottom after Description. If you experience any of these options: ❖ Repair Your Computer ❖ Safe Mode ❖ Safe Mode with Networking ❖ Safe Mode with Command Prompt ❖ Enable Boot Logging ❖ Enable low-resolution video...
... options in some way such as installing a new program or adding a device. Using Startup options to fix problems If the operating system fails to start properly, you highlight each option using the arrow keys, Windows® displays information about each option at the bottom after Description. If you experience any of these options: ❖ Repair Your Computer ❖ Safe Mode ❖ Safe Mode with Networking ❖ Safe Mode with Command Prompt ❖ Enable Boot Logging ❖ Enable low-resolution video...
User Guide
Page 176
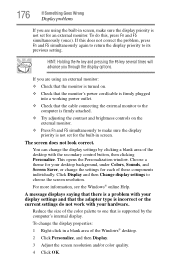
... monitor's power cord/cable is firmly plugged into a working power outlet. ❖ Check that the cable connecting the external monitor to the computer is firmly attached. ❖ Try adjusting the contrast and brightness controls on the external monitor. ❖ Press Fn and F5 simultaneously to make sure the display priority is not set for the built-in screen. A message displays saying that there is a problem with your display settings and that is supported...
... monitor's power cord/cable is firmly plugged into a working power outlet. ❖ Check that the cable connecting the external monitor to the computer is firmly attached. ❖ Try adjusting the contrast and brightness controls on the external monitor. ❖ Press Fn and F5 simultaneously to make sure the display priority is not set for the built-in screen. A message displays saying that there is a problem with your display settings and that is supported...
User Guide
Page 184
... display, select Never in the drive tray. 3 Use the DVD or Blu-ray Disc™ player software that came with your optical disc drive by clicking Start, and then Computer. The optical disc drive should appear in the list. 6 See "Checking device properties" on page 172 for instructions on the desktop and click Personalize in the menu. 2 Click Screen Saver in a format that the drive supports. 2 Ensure that the disc...
... display, select Never in the drive tray. 3 Use the DVD or Blu-ray Disc™ player software that came with your optical disc drive by clicking Start, and then Computer. The optical disc drive should appear in the list. 6 See "Checking device properties" on page 172 for instructions on the desktop and click Personalize in the menu. 2 Click Screen Saver in a format that the drive supports. 2 Ensure that the disc...
User Guide
Page 217
..., world-wide network of refreshing a computer screen, in which certain keys in combination with the Fn key can control another while using a pointing device such as the battery save mode. (2) A key or combination of your work , including all open files and programs, when you use to help improve processing speed. HDMI-CEC (HDMI Consumer Electronics Control)-One A/V component can set system options or control system parameters, such as a mouse. hot key-(1) A feature...
..., world-wide network of refreshing a computer screen, in which certain keys in combination with the Fn key can control another while using a pointing device such as the battery save mode. (2) A key or combination of your work , including all open files and programs, when you use to help improve processing speed. HDMI-CEC (HDMI Consumer Electronics Control)-One A/V component can set system options or control system parameters, such as a mouse. hot key-(1) A feature...
User Guide
Page 225
... battery indicator light 118 BIOS Setup see TOSHIBA Hardware Setup Blu-ray Disc™ using 105, 106 button 3D ON/OFF button 108 eco Utility™ 123 eject, optical disc drive 107 Illumination ON/OFF button 108 mute button 108 play/pause button 108 power 50 Shut down 53, 88 start 133 volume control buttons 108 Wireless antenna ON/OFF button 108 buttons media control buttons 108 C Call2Recycle™ battery 130 caring for your computer 96 changing battery 124 character keys 100 charging the battery...
... battery indicator light 118 BIOS Setup see TOSHIBA Hardware Setup Blu-ray Disc™ using 105, 106 button 3D ON/OFF button 108 eco Utility™ 123 eject, optical disc drive 107 Illumination ON/OFF button 108 mute button 108 play/pause button 108 power 50 Shut down 53, 88 start 133 volume control buttons 108 Wireless antenna ON/OFF button 108 buttons media control buttons 108 C Call2Recycle™ battery 130 caring for your computer 96 changing battery 124 character keys 100 charging the battery...
User Guide
Page 226
... (monitor) port 83 external display, adjusting 86 F files backing up 99, 104 restore 104 saving 103 function keys 100 H headphones using 136 Help and Support troubleshooting 171 Hibernation mode 87 configuring 91 configuring options 91 hot key 201 powering down 91 Shut down 91 starting again from 93 using 91 hot key disabling or enabling wireless devices 204 display brightness 203 Hibernation mode 201 keyboard overlays 207 Lock (Instant security) 198 optical disk drive 196 Output (Display switch) 202 power plan 199 Sleep mode 200 using to set a power plan 122 volume...
... (monitor) port 83 external display, adjusting 86 F files backing up 99, 104 restore 104 saving 103 function keys 100 H headphones using 136 Help and Support troubleshooting 171 Hibernation mode 87 configuring 91 configuring options 91 hot key 201 powering down 91 Shut down 91 starting again from 93 using 91 hot key disabling or enabling wireless devices 204 display brightness 203 Hibernation mode 201 keyboard overlays 207 Lock (Instant security) 198 optical disk drive 196 Output (Display switch) 202 power plan 199 Sleep mode 200 using to set a power plan 122 volume...
User Guide
Page 227
... button 108 using 108 volume control buttons 108 Wireless antenna ON/OFF button 108 memory adding (optional) 51 check total memory 60 removing memory module slot cover 54 Memory card reader inserting memory media 138 removing memory media 138 using 137 memory module installation 52 inserting into socket 55 removing 58, 59 microphone using 135 monitor connecting 84 monitor problems troubleshooting 176 monitoring battery power 117 mouse utility 153 moving the computer 97 N network accessing 135 connecting your computer 135 networking wireless 134 notification area 134 O online resources Toshiba...
... button 108 using 108 volume control buttons 108 Wireless antenna ON/OFF button 108 memory adding (optional) 51 check total memory 60 removing memory module slot cover 54 Memory card reader inserting memory media 138 removing memory media 138 using 137 memory module installation 52 inserting into socket 55 removing 58, 59 microphone using 135 monitor connecting 84 monitor problems troubleshooting 176 monitoring battery power 117 mouse utility 153 moving the computer 97 N network accessing 135 connecting your computer 135 networking wireless 134 notification area 134 O online resources Toshiba...
User Guide
Page 230
... light is blinking 168 Device Manager 172 Disk Defragmenter 178 display error message 176 display problems screen is blank 175 DVD Blu-ray Disc™ player 184 eject button 179 error message, warning resume failure 168 Error-checking 177 external display problems 177 external keyboard 175 external monitor 176 good computing habits 185 hard disk drive is slow 178 HD content, Blu-ray Disc™ 179 Help and Support, Windows® operating system 171 high-pitched noise 181 installing hardware/software 188 keyboard...
... light is blinking 168 Device Manager 172 Disk Defragmenter 178 display error message 176 display problems screen is blank 175 DVD Blu-ray Disc™ player 184 eject button 179 error message, warning resume failure 168 Error-checking 177 external display problems 177 external keyboard 175 external monitor 176 good computing habits 185 hard disk drive is slow 178 HD content, Blu-ray Disc™ 179 Help and Support, Windows® operating system 171 high-pitched noise 181 installing hardware/software 188 keyboard...
User Guide
Page 231
...; operating system not working 169 wireless networking 182 turning off computer 86 computer more quickly 89 options 86 turning on power 50 U USB Sleep and Charge cannot use 189 USB Wakeup function does not work 190 user password, deleting 150 user password, setting 149 using a microphone 135 computer lock 97 DVDs 105 Hibernation mode 91 hot key to set a power plan 122 Memory card reader 137 optical disc drive 105 Shut down command 88 Sleep mode 93 TOSHIBA eco power plan 123 touch pad 79 Web Camera 136 using the keyboard 99 Utilities 140 V video projector adjusting display...
...; operating system not working 169 wireless networking 182 turning off computer 86 computer more quickly 89 options 86 turning on power 50 U USB Sleep and Charge cannot use 189 USB Wakeup function does not work 190 user password, deleting 150 user password, setting 149 using a microphone 135 computer lock 97 DVDs 105 Hibernation mode 91 hot key to set a power plan 122 Memory card reader 137 optical disc drive 105 Shut down command 88 Sleep mode 93 TOSHIBA eco power plan 123 touch pad 79 Web Camera 136 using the keyboard 99 Utilities 140 V video projector adjusting display...


