User Guide 2
Page 36
... a hot key to set the Power Plan 127 Using the TOSHIBA eco power plan 128 Changing the main battery 129 Removing the battery from the computer .......129 Inserting a charged battery 131 Taking care of your battery 132 Safety precautions 132 Maintaining your battery 133 Disposing of used batteries 133 Traveling tips 135 Chapter 4: Exploring Your Computer's Features 136...
... a hot key to set the Power Plan 127 Using the TOSHIBA eco power plan 128 Changing the main battery 129 Removing the battery from the computer .......129 Inserting a charged battery 131 Taking care of your battery 132 Safety precautions 132 Maintaining your battery 133 Disposing of used batteries 133 Traveling tips 135 Chapter 4: Exploring Your Computer's Features 136...
User Guide 2
Page 46
.... You should accidentally occur, immediately: 1. Turn off the computer. 2. Keeping yourself comfortable The Toshiba Instruction Manual for setting up your computer, and never expose the computer to withstand the rigors of the computer. Exposure to the computer. Remove the battery pack. Failure to follow these eventualities should observe certain precautions to further reduce...
.... You should accidentally occur, immediately: 1. Turn off the computer. 2. Keeping yourself comfortable The Toshiba Instruction Manual for setting up your computer, and never expose the computer to withstand the rigors of the computer. Exposure to the computer. Remove the battery pack. Failure to follow these eventualities should observe certain precautions to further reduce...
User Guide 2
Page 49
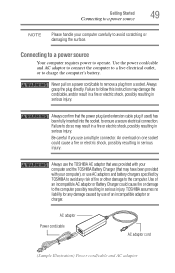
...damaging the surface. Always use the TOSHIBA AC adaptor that was provided with your computer and the TOSHIBA Battery Charger (that the power plug (...and extension cable plug if used) has been fully inserted into the socket, to operate. Use of an incompatible AC adaptor or Battery... shock, possibly resulting in serious injury. TOSHIBA assumes no liability for any damage caused by TOSHIBA to avoid any risk of fire or ... computer), or use AC adaptors and battery chargers specified by use of an incompatible adaptor or charger. An ...
...damaging the surface. Always use the TOSHIBA AC adaptor that was provided with your computer and the TOSHIBA Battery Charger (that the power plug (...and extension cable plug if used) has been fully inserted into the socket, to operate. Use of an incompatible AC adaptor or Battery... shock, possibly resulting in serious injury. TOSHIBA assumes no liability for any damage caused by TOSHIBA to avoid any risk of fire or ... computer), or use AC adaptors and battery chargers specified by use of an incompatible adaptor or charger. An ...
User Guide 2
Page 51
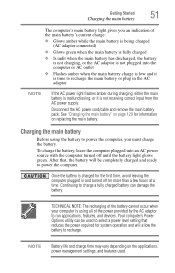
..., avoid leaving the computer plugged in the AC adaptor NOTE If the AC power light flashes amber during charging, either the main battery is malfunctioning, or it is not receiving correct input from the AC power supply. After that reduces the power required for information... 129 for system operation and will be used . Disconnect the AC power cord/cable and remove the main battery pack. See "Changing the main battery" on the applications, power management settings, and features used to run applications, features, and devices. Once the battery is using the battery to recharge.
..., avoid leaving the computer plugged in the AC adaptor NOTE If the AC power light flashes amber during charging, either the main battery is malfunctioning, or it is not receiving correct input from the AC power supply. After that reduces the power required for information... 129 for system operation and will be used . Disconnect the AC power cord/cable and remove the main battery pack. See "Changing the main battery" on the applications, power management settings, and features used to run applications, features, and devices. Once the battery is using the battery to recharge.
User Guide 2
Page 52
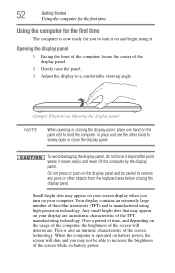
... bright dots that may appear on your screen display when you to slowly open or close the display panel. When the computer is operated on battery power, the screen will dim and you may appear on the usage of the computer, the brightness of the screen will deteriorate. Do not press... high-precision technology. Opening the display panel 1 Facing the front of the computer, locate the center of the screen while on battery power. Small bright dots may not be careful to remove any pens or other hand to turn on your computer. Over a period of time, and depending on your display are...
... bright dots that may appear on your screen display when you to slowly open or close the display panel. When the computer is operated on battery power, the screen will dim and you may appear on the usage of the computer, the brightness of the screen will deteriorate. Do not press... high-precision technology. Opening the display panel 1 Facing the front of the computer, locate the center of the screen while on battery power. Small bright dots may not be careful to remove any pens or other hand to turn on your computer. Over a period of time, and depending on your display are...
User Guide 2
Page 56
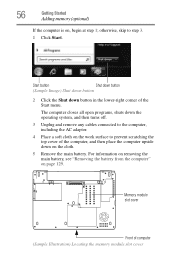
... cables connected to the computer, including the AC adaptor. 4 Place a soft cloth on the cloth. 5 Remove the main battery. For information on removing the main battery, see "Removing the battery from the computer" on , begin at step 1; Memory module slot cover Front of computer (Sample Illustration) Locating the memory module slot cover otherwise, skip to ...
... cables connected to the computer, including the AC adaptor. 4 Place a soft cloth on the cloth. 5 Remove the main battery. For information on removing the main battery, see "Removing the battery from the computer" on , begin at step 1; Memory module slot cover Front of computer (Sample Illustration) Locating the memory module slot cover otherwise, skip to ...
User Guide 2
Page 60
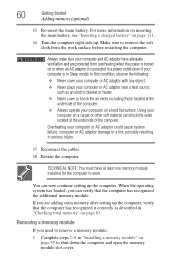
...information on inserting the main battery, see "Inserting a charged battery" on a carpet or other soft material can block the vents located at the underside of the computer. ❖ Always operate your computer on or when an AC adaptor is connected to remove the soft cloth from overheating...the additional memory module. When the operating system has loaded, you need to remove a memory module: 1 Complete steps 1-8 in "Checking total memory" on page 55 to work surface before restarting the computer. Removing a memory module If you can now continue setting up . You can verify...
...information on inserting the main battery, see "Inserting a charged battery" on a carpet or other soft material can block the vents located at the underside of the computer. ❖ Always operate your computer on or when an AC adaptor is connected to remove the soft cloth from overheating...the additional memory module. When the operating system has loaded, you need to remove a memory module: 1 Complete steps 1-8 in "Checking total memory" on page 55 to work surface before restarting the computer. Removing a memory module If you can now continue setting up . You can verify...
User Guide 2
Page 62
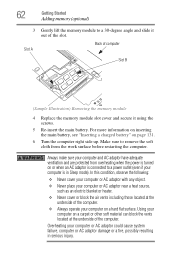
...heater. ❖ Never cover or block the air vents including those located at the underside of the computer. Back of computer Slot B (Sample Illustration) Removing the memory module 4 Replace the memory module slot cover and secure it out of the computer. ❖ Always operate your computer and AC adaptor have... Started Adding memory (optional) 3 Slot A Gently lift the memory module to a 30-degree angle and slide it using the screws. 5 Re-insert the main battery. Overheating your computer is connected to remove the soft cloth from the work surface before restarting the computer.
...heater. ❖ Never cover or block the air vents including those located at the underside of the computer. Back of computer Slot B (Sample Illustration) Removing the memory module 4 Replace the memory module slot cover and secure it out of the computer. ❖ Always operate your computer and AC adaptor have... Started Adding memory (optional) 3 Slot A Gently lift the memory module to a 30-degree angle and slide it using the screws. 5 Re-insert the main battery. Overheating your computer is connected to remove the soft cloth from the work surface before restarting the computer.
User Guide 2
Page 118
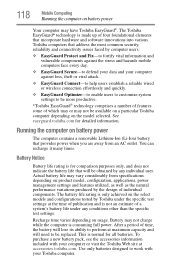
... normal for detailed information. Running the computer on battery power The computer contains a removable Lithium-Ion (Li-Ion) battery that address the most common security, reliability and connectivity issues faced by any conditions other than the specific test settings. See easyguard.toshiba.com for all batteries. Battery Notice Battery life rating is for comparison purposes only, and...
... normal for detailed information. Running the computer on battery power The computer contains a removable Lithium-Ion (Li-Ion) battery that address the most common security, reliability and connectivity issues faced by any conditions other than the specific test settings. See easyguard.toshiba.com for all batteries. Battery Notice Battery life rating is for comparison purposes only, and...
User Guide 2
Page 122
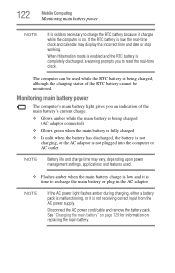
...AC outlet NOTE Battery life and charge time may display the incorrect time and date or stop working. 122 Mobile Computing Monitoring main battery power NOTE It is seldom necessary to reset the real-time clock. Disconnect the AC power cord/cable and remove the battery pack. The ...computer can be monitored. Monitoring main battery power The computer's main battery light gives you to charge the RTC battery because it is not receiving correct input from the AC power supply.
...AC outlet NOTE Battery life and charge time may display the incorrect time and date or stop working. 122 Mobile Computing Monitoring main battery power NOTE It is seldom necessary to reset the real-time clock. Disconnect the AC power cord/cable and remove the battery pack. The ...computer can be monitored. Monitoring main battery power The computer's main battery light gives you to charge the RTC battery because it is not receiving correct input from the AC power supply.

User Guide 2
Page 129
...: To avoid losing any data, save your files and then either accidentally or intentionally bringing the battery terminals in "Using and configuring Hibernation mode" on page 92. 3 Unplug and remove any cables connected to the computer, including the AC adaptor. 4 Close the display panel and turn... the computer upside down. Removing the battery from the computer To remove the battery: 1 Save your main battery has run out of power, you have two ...
...: To avoid losing any data, save your files and then either accidentally or intentionally bringing the battery terminals in "Using and configuring Hibernation mode" on page 92. 3 Unplug and remove any cables connected to the computer, including the AC adaptor. 4 Close the display panel and turn... the computer upside down. Removing the battery from the computer To remove the battery: 1 Save your main battery has run out of power, you have two ...
User Guide 2
Page 130
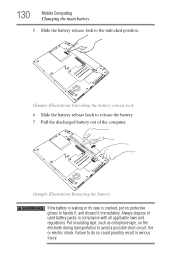
...could possibly result in compliance with all applicable laws and regulations. Always dispose of the computer. (Sample Illustration) Removing the battery If the battery is leaking or its case is cracked, put on the electrode during transportation to avoid a possible short circuit... shock. 130 Mobile Computing Changing the main battery 5 Slide the battery release lock to the unlocked position. (Sample Illustration) Unlocking the battery release lock 6 Slide the battery release latch to release the battery. 7 Pull the discharged battery out of used battery packs in serious injury.
...could possibly result in compliance with all applicable laws and regulations. Always dispose of the computer. (Sample Illustration) Removing the battery If the battery is leaking or its case is cracked, put on the electrode during transportation to avoid a possible short circuit... shock. 130 Mobile Computing Changing the main battery 5 Slide the battery release lock to the unlocked position. (Sample Illustration) Unlocking the battery release lock 6 Slide the battery release latch to release the battery. 7 Pull the discharged battery out of used battery packs in serious injury.
User Guide 2
Page 132
... can purchase through the Toshiba Web site at accessories.toshiba.com. ❖ A reverse polarity condition should hear a click when it . ❖ Avoid touching the metal terminals of your battery The following sections offer tips on page 129. 6 Restart the computer. Carefully remove the battery pack from the power socket. The battery pack could damage it is...
... can purchase through the Toshiba Web site at accessories.toshiba.com. ❖ A reverse polarity condition should hear a click when it . ❖ Avoid touching the metal terminals of your battery The following sections offer tips on page 129. 6 Restart the computer. Carefully remove the battery pack from the power socket. The battery pack could damage it is...
User Guide 2
Page 133
... five minutes of operating time, continue operating until the battery pack is some other warning to indicate a low battery, go to step 4. 3 Operate the computer on battery power for five minutes. Check the connections for more than one month, remove the battery pack. ❖ If you are not going to ...use . ❖ If you have fully recharged the battery. If the DC-IN...
... five minutes of operating time, continue operating until the battery pack is some other warning to indicate a low battery, go to step 4. 3 Operate the computer on battery power for five minutes. Check the connections for more than one month, remove the battery pack. ❖ If you are not going to ...use . ❖ If you have fully recharged the battery. If the DC-IN...
User Guide 2
Page 180
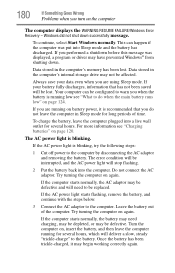
...you performed a shutdown before this message was put into Sleep mode and the battery has discharged. To charge the battery, leave the computer plugged into the computer. If the AC power light starts flashing, remove the battery, and continue with the steps below. 3 Connect the AC adaptor to ...the computer by disconnecting the AC adaptor and removing the battery. This can be interrupted, and the AC power light will need charging...
...you performed a shutdown before this message was put into Sleep mode and the battery has discharged. To charge the battery, leave the computer plugged into the computer. If the AC power light starts flashing, remove the battery, and continue with the steps below. 3 Connect the AC adaptor to ...the computer by disconnecting the AC adaptor and removing the battery. This can be interrupted, and the AC power light will need charging...
User Guide 2
Page 185
... cord/cable or from the system batteries (battery and real-time clock (RTC) battery). Here are some typical problems and how to be installed, it must have at least one memory module is seated properly. 4 Check for the error again. 5 If the error recurs, remove the memory module entirely and check... for the error again. If removing the memory module ...
... cord/cable or from the system batteries (battery and real-time clock (RTC) battery). Here are some typical problems and how to be installed, it must have at least one memory module is seated properly. 4 Check for the error again. 5 If the error recurs, remove the memory module entirely and check... for the error again. If removing the memory module ...
User Guide 2
Page 186
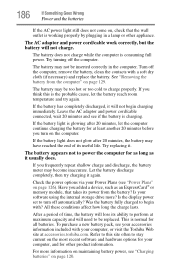
...? Turn off the computer, remove the battery, clean the contacts with your software using the internal storage drive more information on maintaining battery power, see if the battery is consuming full power. Let the battery discharge completely, then try again...toshiba.com. This is normal for as long as an ExpressCard® or memory module, that takes its ability to power the computer for all batteries. The AC adaptor and power cord/cable work correctly, but the battery will not begin with? See "Removing the battery from the battery? If the battery...
...? Turn off the computer, remove the battery, clean the contacts with your software using the internal storage drive more information on maintaining battery power, see if the battery is consuming full power. Let the battery discharge completely, then try again...toshiba.com. This is normal for as long as an ExpressCard® or memory module, that takes its ability to power the computer for all batteries. The AC adaptor and power cord/cable work correctly, but the battery will not begin with? See "Removing the battery from the battery? If the battery...
User Guide 2
Page 191
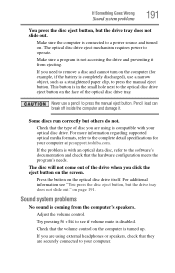
...they are using is compatible with an optical data disc, refer to your computer at pcsupport.toshiba.com. This button is with your optical disc drive. The disc will not come out ...type of the drive when you need to the complete detail specifications for example, if the battery is coming from ejecting. Adjust the volume control. If Something Goes Wrong Sound system problems 191...to press the manual eject button. For more information regarding supported optical media formats, refer to remove a disc and cannot turn on the screen. If you click the eject button on the ...
...they are using is compatible with an optical data disc, refer to your computer at pcsupport.toshiba.com. This button is with your optical disc drive. The disc will not come out ...type of the drive when you need to the complete detail specifications for example, if the battery is coming from ejecting. Adjust the volume control. If Something Goes Wrong Sound system problems 191...to press the manual eject button. For more information regarding supported optical media formats, refer to remove a disc and cannot turn on the screen. If you click the eject button on the ...
User Guide 2
Page 230
Hibernation-A feature of many Toshiba computers that saves to the same state it was when the ... cache. HDMI-CEC (HDMI Consumer Electronics Control)-One A/V component can control another while using a pointing device such as the battery save mode. (2) A key or combination of your work is refreshed. L2 (level two) cache-Memory cache installed on ...a single cable in combination with HDMI cables. I icon-A small image displayed on the motherboard to add or remove devices from a computer while the computer is slower than L1 cache and faster than analog signal. 230 Glossary ...
Hibernation-A feature of many Toshiba computers that saves to the same state it was when the ... cache. HDMI-CEC (HDMI Consumer Electronics Control)-One A/V component can control another while using a pointing device such as the battery save mode. (2) A key or combination of your work is refreshed. L2 (level two) cache-Memory cache installed on ...a single cable in combination with HDMI cables. I icon-A small image displayed on the motherboard to add or remove devices from a computer while the computer is slower than L1 cache and faster than analog signal. 230 Glossary ...
User Guide 2
Page 237
... memory (optional) 54 optional external devices 54 adequate ventilation cooling fan 48 adjusting touch pad settings 82 audio features 141 B backing up files 101, 109 battery battery life 118 Call2Recycle™ 134 care 132, 133 changing 129 charge indicator light 51 charge time 120 charger 120 charging 51, 120 charging the real... 118 monitoring power 51, 122 power management 119 power options 124 power plan 212 purchase additional 120 real-time clock (RTC) 119 recharge time 118 removing 129 RTC memory 119 running computer on battery power 118 237
... memory (optional) 54 optional external devices 54 adequate ventilation cooling fan 48 adjusting touch pad settings 82 audio features 141 B backing up files 101, 109 battery battery life 118 Call2Recycle™ 134 care 132, 133 changing 129 charge indicator light 51 charge time 120 charger 120 charging 51, 120 charging the real... 118 monitoring power 51, 122 power management 119 power options 124 power plan 212 purchase additional 120 real-time clock (RTC) 119 recharge time 118 removing 129 RTC memory 119 running computer on battery power 118 237


