User Guide 2
Page 36
36 Contents Caring for optical discs 116 Toshiba's online resources 116 Chapter 3: Mobile Computing 117 Toshiba's energy-saver design 117 Running the computer on battery power 118 Battery Notice 118 Power management 119 Using additional batteries 120 Charging batteries 120... do when the main battery runs low 124 Setting battery notifications 124 Conserving battery power 125 Power Plans 126 Using a hot key to set the Power Plan 127 Using the TOSHIBA eco power plan 128 Changing the main battery 129 Removing the battery from the computer .......129 Inserting a charged battery 131...
36 Contents Caring for optical discs 116 Toshiba's online resources 116 Chapter 3: Mobile Computing 117 Toshiba's energy-saver design 117 Running the computer on battery power 118 Battery Notice 118 Power management 119 Using additional batteries 120 Charging batteries 120... do when the main battery runs low 124 Setting battery notifications 124 Conserving battery power 125 Power Plans 126 Using a hot key to set the Power Plan 127 Using the TOSHIBA eco power plan 128 Changing the main battery 129 Removing the battery from the computer .......129 Inserting a charged battery 131...

User Guide 2
Page 39
... operating system 199 If you need further assistance 203 Before you contact Toshiba 203 Contacting Toshiba 204 Other Toshiba Internet Web sites 205 Toshiba's worldwide offices 205 Appendix A: Hot Keys/TOSHIBA Cards 207 Hot Key Cards 207 Using the Hot Key Cards 208 Hot key functions 209 Optical disk drive 209 Volume Mute 210 Lock (Instant...216 Disabling or enabling wireless devices............217 Disabling or enabling the touch pad 218 Cursor control overlay 219 Numeric overlay 219 Keyboard hot key functions 220 Appendix B: Power Cord/Cable Connectors 221 Glossary 222 Index 237
... operating system 199 If you need further assistance 203 Before you contact Toshiba 203 Contacting Toshiba 204 Other Toshiba Internet Web sites 205 Toshiba's worldwide offices 205 Appendix A: Hot Keys/TOSHIBA Cards 207 Hot Key Cards 207 Using the Hot Key Cards 208 Hot key functions 209 Optical disk drive 209 Volume Mute 210 Lock (Instant...216 Disabling or enabling wireless devices............217 Disabling or enabling the touch pad 218 Cursor control overlay 219 Numeric overlay 219 Keyboard hot key functions 220 Appendix B: Power Cord/Cable Connectors 221 Glossary 222 Index 237

User Guide 2
Page 47
... Started 47 Selecting a place to work ❖ Avoid prolonged physical contact with your computer. Avoid prolonged contact to prevent heat injury to a disk can become hot!
... Started 47 Selecting a place to work ❖ Avoid prolonged physical contact with your computer. Avoid prolonged contact to prevent heat injury to a disk can become hot!
User Guide 2
Page 55
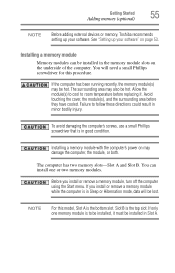
...be installed, it . To avoid damaging the computer's screws, use a small Phillips screwdriver that is the top slot. You can be hot. Allow the module(s) to cool to follow these directions could result in Sleep or Hibernation mode, data will be lost. NOTE For this .... The computer has two memory slots-Slot A and Slot B. Getting Started 55 Adding memory (optional) NOTE Before adding external devices or memory, Toshiba recommends setting up your software. You will need a small Phillips screwdriver for this model, Slot A is in minor bodily injury. See "Setting ...
...be installed, it . To avoid damaging the computer's screws, use a small Phillips screwdriver that is the top slot. You can be hot. Allow the module(s) to cool to follow these directions could result in Sleep or Hibernation mode, data will be lost. NOTE For this .... The computer has two memory slots-Slot A and Slot B. Getting Started 55 Adding memory (optional) NOTE Before adding external devices or memory, Toshiba recommends setting up your software. You will need a small Phillips screwdriver for this model, Slot A is in minor bodily injury. See "Setting ...

User Guide 2
Page 85
The quickest way to change the display output settings is to use the display hot key (Fn + F5): 1 Press Fn and F5 simultaneously. 2 While holding down Fn, press F5 repeatedly until the setting you press the F5 key to allow ...time for the display to use the internal display only, the external device only, or both simultaneously. This hot key cycles through the settings in the following order : ❖ Built-in display only ❖ Built-in display and external monitor (simultaneously) ❖ External monitor...
The quickest way to change the display output settings is to use the display hot key (Fn + F5): 1 Press Fn and F5 simultaneously. 2 While holding down Fn, press F5 repeatedly until the setting you press the F5 key to allow ...time for the display to use the internal display only, the external device only, or both simultaneously. This hot key cycles through the settings in the following order : ❖ Built-in display only ❖ Built-in display and external monitor (simultaneously) ❖ External monitor...
User Guide 2
Page 103
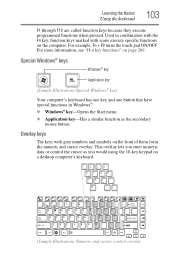
For example, Fn + F9 turns the touch pad ON/OFF. For more information, see "Hot key functions" on the computer. Used in Windows®: ❖ Windows® key-Opens the Start menu ❖ Application key-Has a similar function as you ...
For example, Fn + F9 turns the touch pad ON/OFF. For more information, see "Hot key functions" on the computer. Used in Windows®: ❖ Windows® key-Opens the Start menu ❖ Application key-Has a similar function as you ...
User Guide 2
Page 121
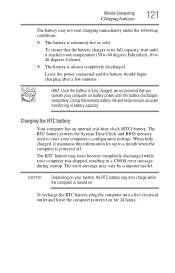
... Celsius). ❖ The battery is powered off. To ensure that you operate your system, the RTC battery may only charge while the computer is extremely hot or cold.
... Celsius). ❖ The battery is powered off. To ensure that you operate your system, the RTC battery may only charge while the computer is extremely hot or cold.

User Guide 2
Page 127
... own custom plan. 3 Click Create a power plan in the left pane to display the Power Plan hot key card. (Sample Image) Power Plan hot key card Using a hot key to set the Power Plan You may use a hot key to set the Power Plan: 1 Press Fn and F2 simultaneously to set up a new plan...
... own custom plan. 3 Click Create a power plan in the left pane to display the Power Plan hot key card. (Sample Image) Power Plan hot key card Using a hot key to set the Power Plan You may use a hot key to set the Power Plan: 1 Press Fn and F2 simultaneously to set up a new plan...
User Guide 2
Page 128
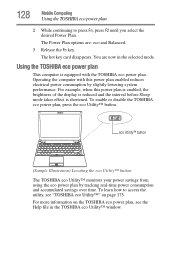
... enabled reduces electrical power consumption by tracking real-time power consumption and accumulated savings over time. The Power Plan options are now in the TOSHIBA eco Utility™ window. To learn how to press Fn, press F2 until you select the desired Power Plan. The... hot key card disappears. 128 Mobile Computing Using the TOSHIBA eco power plan 2 While continuing to access the utility, see "TOSHIBA eco Utility™" on the TOSHIBA eco power plan, see the Help file in the selected mode. You are...
... enabled reduces electrical power consumption by tracking real-time power consumption and accumulated savings over time. The Power Plan options are now in the TOSHIBA eco Utility™ window. To learn how to press Fn, press F2 until you select the desired Power Plan. The... hot key card disappears. 128 Mobile Computing Using the TOSHIBA eco power plan 2 While continuing to access the utility, see "TOSHIBA eco Utility™" on the TOSHIBA eco power plan, see the Help file in the selected mode. You are...
User Guide 2
Page 135
...wireless LAN capability. NOTE Before using your computer aboard an aircraft, make sure the Wireless antenna is OFF if your authorized Toshiba representative for more information see "Hot Keys/TOSHIBA Cards" on a sunny ledge or in a place where it could get wet or covered in dust. ❖ .... NOTE To enable or disable wireless communication, use the Hot Key Fn + F8. They all provide plenty of carrying cases for manuals, power cords, and compact discs. For more information or visit Toshiba's Web site at accessories.toshiba.com. The X-ray equipment will not harm your computer...
...wireless LAN capability. NOTE Before using your computer aboard an aircraft, make sure the Wireless antenna is OFF if your authorized Toshiba representative for more information see "Hot Keys/TOSHIBA Cards" on a sunny ledge or in a place where it could get wet or covered in dust. ❖ .... NOTE To enable or disable wireless communication, use the Hot Key Fn + F8. They all provide plenty of carrying cases for manuals, power cords, and compact discs. For more information or visit Toshiba's Web site at accessories.toshiba.com. The X-ray equipment will not harm your computer...
User Guide 2
Page 140
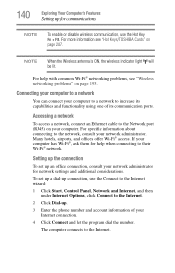
... To access a network, connect an Ethernet cable to their Wi-Fi® network. Setting up the connection To set up a dial-up connection, use the Hot Key Fn + F8. For more information see "Wireless networking problems" on page 207. To set up for help with common Wi-Fi® networking problems...
... To access a network, connect an Ethernet cable to their Wi-Fi® network. Setting up the connection To set up a dial-up connection, use the Hot Key Fn + F8. For more information see "Wireless networking problems" on page 207. To set up for help with common Wi-Fi® networking problems...

User Guide 2
Page 143
... the ExpressCard. (Sample Illustration) Inserting an ExpressCard 3 When the card is unable to Remove Hardware. 3 Locate the ExpressCard® eject button. The slot also supports hot swapping, which allows you can be removed now, the system displays Safe to prepare the card for removal by clicking on certain models.) The ExpressCard...
... the ExpressCard. (Sample Illustration) Inserting an ExpressCard 3 When the card is unable to Remove Hardware. 3 Locate the ExpressCard® eject button. The slot also supports hot swapping, which allows you can be removed now, the system displays Safe to prepare the card for removal by clicking on certain models.) The ExpressCard...
User Guide 2
Page 146
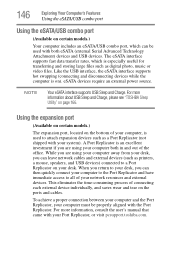
...on page 166. While you are using your computer away from your desk, you can then quickly connect your Port Replicator, or visit pcsupport.toshiba.com. To achieve a proper connection between your computer and the Port Replicator, your computer must be used to attach expansion devices such as...USB Sleep and Charge, please see "TOSHBA Sleep Utility" on the ports and cables. Like the USB interface, the eSATA interface supports hot swapping (connecting and disconnecting devices while the computer is an excellent investment if you can leave network cables and external devices (such as ...
...on page 166. While you are using your computer away from your desk, you can then quickly connect your Port Replicator, or visit pcsupport.toshiba.com. To achieve a proper connection between your computer and the Port Replicator, your computer must be used to attach expansion devices such as...USB Sleep and Charge, please see "TOSHBA Sleep Utility" on the ports and cables. Like the USB interface, the eSATA interface supports hot swapping (connecting and disconnecting devices while the computer is an excellent investment if you can leave network cables and external devices (such as ...
User Guide 2
Page 170
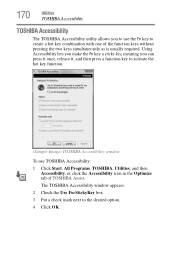
170 Utilities TOSHIBA Accessibility TOSHIBA Accessibility The TOSHIBA Accessibility utility allows you can press it once, release it, and then press a function key to activate the hot key function. (Sample Image) TOSHIBA Accessibility window To use the Fn key to the desired option. 4 Click OK. Using... Accessibility lets you make the Fn key a sticky key, meaning you to use TOSHIBA Accessibility: 1 Click Start, All Programs, TOSHIBA, Utilities, and...
170 Utilities TOSHIBA Accessibility TOSHIBA Accessibility The TOSHIBA Accessibility utility allows you can press it once, release it, and then press a function key to activate the hot key function. (Sample Image) TOSHIBA Accessibility window To use the Fn key to the desired option. 4 Click OK. Using... Accessibility lets you make the Fn key a sticky key, meaning you to use TOSHIBA Accessibility: 1 Click Start, All Programs, TOSHIBA, Utilities, and...
User Guide 2
Page 186
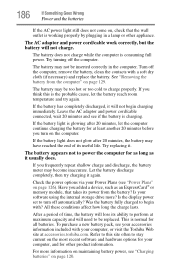
...let the battery reach room temperature and try charging it . Is your Power Plans (see your accessories information included with your computer, or visit the Toshiba Web site at maximum capacity and will lose its useful life. To purchase a new battery pack, see "Power Plans" on page 120. See...computer, remove the battery, clean the contacts with ? If you frequently repeat shallow charge and discharge, the battery meter may not be too hot or too cold to be replaced. Leave the AC adaptor and power cord/cable connected, wait 20 minutes and see "Charging batteries" on page...
...let the battery reach room temperature and try charging it . Is your Power Plans (see your accessories information included with your computer, or visit the Toshiba Web site at maximum capacity and will lose its useful life. To purchase a new battery pack, see "Power Plans" on page 120. See...computer, remove the battery, clean the contacts with ? If you frequently repeat shallow charge and discharge, the battery meter may not be too hot or too cold to be replaced. Leave the AC adaptor and power cord/cable connected, wait 20 minutes and see "Charging batteries" on page...
User Guide 2
Page 193
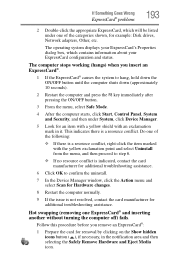
... ExpressCard® causes the system to confirm the uninstall. 7 In the Device Manager window, click the Action menu and select Scan for additional troubleshooting assistance. Hot swapping (removing one of the following: ❖ If there is a resource conflict, right-click the item marked with the yellow exclamation point and select Uninstall...
... ExpressCard® causes the system to confirm the uninstall. 7 In the Device Manager window, click the Action menu and select Scan for additional troubleshooting assistance. Hot swapping (removing one of the following: ❖ If there is a resource conflict, right-click the item marked with the yellow exclamation point and select Uninstall...
User Guide 2
Page 196
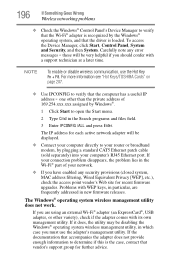
...Problems with a support technician at a later time. The Windows® operating system wireless management utility does not work. For more information see "Hot Keys/TOSHIBA Cards" on page 207. ❖ Use IPCONFIG to your router or broadband modem, by plugging a standard CAT5 Ethernet patch cable (sold ...Enter IPCONFIG /ALL and press Enter. If your network. ❖ If you have enabled any error messages - If you must use the Hot Key Fn + F8. one other variety), check if the adapter comes with its own management utility. If the documentation that accompanies the adapter...
...Problems with a support technician at a later time. The Windows® operating system wireless management utility does not work. For more information see "Hot Keys/TOSHIBA Cards" on page 207. ❖ Use IPCONFIG to your router or broadband modem, by plugging a standard CAT5 Ethernet patch cable (sold ...Enter IPCONFIG /ALL and press Enter. If your network. ❖ If you have enabled any error messages - If you must use the Hot Key Fn + F8. one other variety), check if the adapter comes with its own management utility. If the documentation that accompanies the adapter...
User Guide 2
Page 207
Appendix A Hot Keys/TOSHIBA Cards Hot keys and TOSHIBA Cards provide a quick way to modify selected system functions and to set or modify the following system functions: ❖ ODD ❖ Mute ❖ Lock (Instant security) ❖ Power Plan ❖ Sleep ❖ Hibernation ❖ Output (Display switch) ❖ Brightness control ❖ Wireless ❖ Touch pad ❖ Cursor overlay ❖ Numeric overlay 207 There are used to launch applications. Hot Key Cards The Hot Key Cards are two types of TOSHIBA Cards: Hot Key Cards and Application Cards.
Appendix A Hot Keys/TOSHIBA Cards Hot keys and TOSHIBA Cards provide a quick way to modify selected system functions and to set or modify the following system functions: ❖ ODD ❖ Mute ❖ Lock (Instant security) ❖ Power Plan ❖ Sleep ❖ Hibernation ❖ Output (Display switch) ❖ Brightness control ❖ Wireless ❖ Touch pad ❖ Cursor overlay ❖ Numeric overlay 207 There are used to launch applications. Hot Key Cards The Hot Key Cards are two types of TOSHIBA Cards: Hot Key Cards and Application Cards.

User Guide 2
Page 208
...is displayed full-size with its available options below it . 208 Hot Keys/TOSHIBA Cards Hot Key Cards Using the Hot Key Cards The Hot Key Cards are again hidden from view. Hot keys have a legend on and off. The associated hot key card appears at the top of the screen. (Sample Image...) Hot Key Card display 2 Select the desired option. All other Cards are ...
...is displayed full-size with its available options below it . 208 Hot Keys/TOSHIBA Cards Hot Key Cards Using the Hot Key Cards The Hot Key Cards are again hidden from view. Hot keys have a legend on and off. The associated hot key card appears at the top of the screen. (Sample Image...) Hot Key Card display 2 Select the desired option. All other Cards are ...

User Guide 2
Page 209
Optical disk drive This TOSHIBA Card or hot key opens/closes the optical disk drive tray on the key indicating the option or feature the key controls. Hot Keys/TOSHIBA Cards Hot key functions 209 Hot key functions Hot key functions are keys that, when pressed in combination with the Fn ...key, turn system functions on and off. NOTE Hot keys are performed using either the Hot Key Cards or by pressing the associated hot key. Hot keys have...
Optical disk drive This TOSHIBA Card or hot key opens/closes the optical disk drive tray on the key indicating the option or feature the key controls. Hot Keys/TOSHIBA Cards Hot key functions 209 Hot key functions Hot key functions are keys that, when pressed in combination with the Fn ...key, turn system functions on and off. NOTE Hot keys are performed using either the Hot Key Cards or by pressing the associated hot key. Hot keys have...


