
Owner's Manual - English
Page 4
... a sign of time, the image can accidentally touch overhead power lines. Antenna lead-in wire Ground clamp Antenna discharge unit (NEC Section 810-20) Electric service equipment Grounding conductors (NEC Section 810-21) Ground clamps Power service grounding electrode system (NEC Art 250 Part H) 26) DANGER: RISK OF SERIOUS PERSONAL INJURY OR DEATH! • Use extreme care to PIP/POP windows, closed captions, video game patterns, TV...
... a sign of time, the image can accidentally touch overhead power lines. Antenna lead-in wire Ground clamp Antenna discharge unit (NEC Section 810-20) Electric service equipment Grounding conductors (NEC Section 810-21) Ground clamps Power service grounding electrode system (NEC Art 250 Part H) 26) DANGER: RISK OF SERIOUS PERSONAL INJURY OR DEATH! • Use extreme care to PIP/POP windows, closed captions, video game patterns, TV...

Owner's Manual - English
Page 6
... HDMI™ audio mode 55 Setting the time and date 55 Viewing the CableCARD™ menu 56 Viewing the digital signal meter 56 Viewing the system status 57 Restore Factory Defaults 57 Chapter 7: Using the TV Guide On Screen™ interactive program guide 58 Setting up the TV Guide On Screen™ system 58 Navigating the TV Guide On Screen™ system 59 TV Guide On Screen™ remote control functions ........ 59 Video Window 60 Panel Menus 60 Info Box...
... HDMI™ audio mode 55 Setting the time and date 55 Viewing the CableCARD™ menu 56 Viewing the digital signal meter 56 Viewing the system status 57 Restore Factory Defaults 57 Chapter 7: Using the TV Guide On Screen™ interactive program guide 58 Setting up the TV Guide On Screen™ system 58 Navigating the TV Guide On Screen™ system 59 TV Guide On Screen™ remote control functions ........ 59 Video Window 60 Panel Menus 60 Info Box...
Owner's Manual - English
Page 9
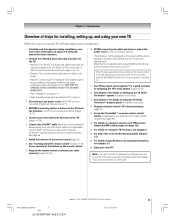
... (page 47). 15. BEFORE connecting cables or devices to the Troubleshooting Guide (Chapter 12). 19. See "Learning about your Plasma TV" on using the TV Guide On Screen™ program guide (if available in the power cords for your other devices. "Now Booting..." See Chapter 5 for details on -screen device control feature (if applicable to your area). 13. Program channels into standby mode. Set up the TheaterNet™ on...
... (page 47). 15. BEFORE connecting cables or devices to the Troubleshooting Guide (Chapter 12). 19. See "Learning about your Plasma TV" on using the TV Guide On Screen™ program guide (if available in the power cords for your other devices. "Now Booting..." See Chapter 5 for details on -screen device control feature (if applicable to your area). 13. Program channels into standby mode. Set up the TheaterNet™ on...

Owner's Manual - English
Page 21
... CONNECT A PC USING THE HDMI PORT. HDMI device VIDEO AUDIO L R IN HDMI OUT L R OUT TV back panel 1] HDMI = High-Definition Multimedia Interface. [2] DVI = Digital Video Interface. [3] HDCP = High-bandwidth Digital Content Protection. [4] EIA/CEA-861/861B compliance covers the transmission of uncompressed digital video with 720p signals but will also accept and display 1080i, 480i, and 480p signals. To connect an HDMI device, you will need : • one HDMI-to-DVI adapter cable (HDMI type A connector) per HDMI...
... CONNECT A PC USING THE HDMI PORT. HDMI device VIDEO AUDIO L R IN HDMI OUT L R OUT TV back panel 1] HDMI = High-Definition Multimedia Interface. [2] DVI = Digital Video Interface. [3] HDCP = High-bandwidth Digital Content Protection. [4] EIA/CEA-861/861B compliance covers the transmission of uncompressed digital video with 720p signals but will also accept and display 1080i, 480i, and 480p signals. To connect an HDMI device, you will need : • one HDMI-to-DVI adapter cable (HDMI type A connector) per HDMI...

Owner's Manual - English
Page 27
...'s memory if you want to allow compatibility of Installation menu icons will interfere with your TV Connecting IEEE1394 video devices (continued) IEEE1394 device management The IEEE1394 device information is an IEEE1394A device. Setup Installation Sleep Timer On/Off Timer PC Settings HDMI 1 Audio HDMI 2 Audio Slide Show Interval Auto Auto 2 Sec Navigate Select CH RTN Back EXIT Exit 3. Follow the on -screen, as shown in the chain...
...'s memory if you want to allow compatibility of Installation menu icons will interfere with your TV Connecting IEEE1394 video devices (continued) IEEE1394 device management The IEEE1394 device information is an IEEE1394A device. Setup Installation Sleep Timer On/Off Timer PC Settings HDMI 1 Audio HDMI 2 Audio Slide Show Interval Auto Auto 2 Sec Navigate Select CH RTN Back EXIT Exit 3. Follow the on -screen, as shown in the chain...

Owner's Manual - English
Page 45
... Guide On Screen™ system. All rights reserved. #01E_042-045_4250HPX95 45 Black (E) 42/50HPX95 *web 213:276 05.9.12, 10:18 PM 45 Screen 1 appears. You have a VCR connected, turn off the TV Guide On Screen™ automatic display feature After you have a Cable box connected, leave it may be prompted to select which Cable system's program data to 24 hours with the TV in standby mode (power cord plugged...
... Guide On Screen™ system. All rights reserved. #01E_042-045_4250HPX95 45 Black (E) 42/50HPX95 *web 213:276 05.9.12, 10:18 PM 45 Screen 1 appears. You have a VCR connected, turn off the TV Guide On Screen™ automatic display feature After you have a Cable box connected, leave it may be prompted to select which Cable system's program data to 24 hours with the TV in standby mode (power cord plugged...

Owner's Manual - English
Page 47
... remote control or TV side panel, your TV will stop only on the remote control. • Programming channels for an antenna input configured for CABLE will automatically cycle through the channels, the message "Scanning channels, please wait" appears (as shown above). 6. Press MENU and open the Setup menu. 3. Open the Terrestrial menu, highlight Channel Program, and press ENTER. 5. TV side panel Channel Numbers CHANNEL y CHANNEL z MENU (ENTER) CHANNEL yz Setup Installation Sleep Timer On/Off Timer PC Settings HDMI 1 Audio HDMI 2 Audio Slide Show Interval Auto Auto...
... remote control or TV side panel, your TV will stop only on the remote control. • Programming channels for an antenna input configured for CABLE will automatically cycle through the channels, the message "Scanning channels, please wait" appears (as shown above). 6. Press MENU and open the Setup menu. 3. Open the Terrestrial menu, highlight Channel Program, and press ENTER. 5. TV side panel Channel Numbers CHANNEL y CHANNEL z MENU (ENTER) CHANNEL yz Setup Installation Sleep Timer On/Off Timer PC Settings HDMI 1 Audio HDMI 2 Audio Slide Show Interval Auto Auto...

Owner's Manual - English
Page 48
... then press ENTER. Terrestrial Input Configuration Channel Program Channel Add/Delete Signal Meter Navigate Select CH RTN Back EXIT Exit 4. Note: "Cable Box" will appear on the remote control to the current antenna input only. To manually add digital subchannels on a physical channel: Use the Channel Numbers and the Dash (-/100) on -screen, as shown in the channel memory: 1. To remove a channel from the channel memory: Highlight Reset and press ENTER, and then...
... then press ENTER. Terrestrial Input Configuration Channel Program Channel Add/Delete Signal Meter Navigate Select CH RTN Back EXIT Exit 4. Note: "Cable Box" will appear on the remote control to the current antenna input only. To manually add digital subchannels on a physical channel: Use the Channel Numbers and the Dash (-/100) on -screen, as shown in the channel memory: 1. To remove a channel from the channel memory: Highlight Reset and press ENTER, and then...

Owner's Manual - English
Page 49
... Channels Closed Caption Mode Off Closed Caption Advanced Input Labeling Menu Language English Home CH Setup Navigate Select CH RTN Back EXIT Exit Favorite Channels Empty Empty Empty Empty Empty Empty Empty Empty Empty ANT 1 ANT 1 ANT 2 Cable Box Edit Done To add a channel to the selected Favorite Channel set: Use the yz buttons to highlight an unchecked box next to select your TV. "Cable Box" will not change the favorite channel settings...
... Channels Closed Caption Mode Off Closed Caption Advanced Input Labeling Menu Language English Home CH Setup Navigate Select CH RTN Back EXIT Exit Favorite Channels Empty Empty Empty Empty Empty Empty Empty Empty Empty ANT 1 ANT 1 ANT 2 Cable Box Edit Done To add a channel to the selected Favorite Channel set: Use the yz buttons to highlight an unchecked box next to select your TV. "Cable Box" will not change the favorite channel settings...

Owner's Manual - English
Page 50
... device, use the Channel Number buttons to operate your device in the onscreen list or in the list, press z and use the device's remote control or the controls on -screen control icons and the TV's remote control. All compatible IEEE1394 devices are unable to program the TheaterNet feature to enter the device IR code. Press MENU and open the Setup menu. 3. Highlight Installation and press ENTER. (A new set to setup TheaterNet device control. Press...
... device, use the Channel Number buttons to operate your device in the onscreen list or in the list, press z and use the device's remote control or the controls on -screen control icons and the TV's remote control. All compatible IEEE1394 devices are unable to program the TheaterNet feature to enter the device IR code. Press MENU and open the Setup menu. 3. Highlight Installation and press ENTER. (A new set to setup TheaterNet device control. Press...

Owner's Manual - English
Page 55
... remote control keys (Live, STOP, REW, PAUSE, PLAY, etc.) are automatically activated to allow pausing of live TV (pause/rewind/ etc.). To set the time, highlight TV Guide On Screen™ and press ENTER. All rights reserved. #01E_049-057_4250HPX95 55 Black (E) 42/50HPX95 *web 213:276 05.9.12, 10:19 PM 55 Press y or z to select the HDMI audio mode (Auto, Digital, or PC Settings HDMI 1 Audio HDMI 2 Audio...
... remote control keys (Live, STOP, REW, PAUSE, PLAY, etc.) are automatically activated to allow pausing of live TV (pause/rewind/ etc.). To set the time, highlight TV Guide On Screen™ and press ENTER. All rights reserved. #01E_049-057_4250HPX95 55 Black (E) 42/50HPX95 *web 213:276 05.9.12, 10:19 PM 55 Press y or z to select the HDMI audio mode (Auto, Digital, or PC Settings HDMI 1 Audio HDMI 2 Audio...

Owner's Manual - English
Page 59
... the remote control (yzx •) to highlight any show in the Video Window. • For direct channel tuning, priority ordering, and channel editing. • For entering digital channel numbers. • Displays the panel menu, in which you press TV GUIDE from the TV Guide On Screen™ service to change when updates are for the currently highlighted program or tile, including setting recordings and reminders. • To access another Service screen...
... the remote control (yzx •) to highlight any show in the Video Window. • For direct channel tuning, priority ordering, and channel editing. • For entering digital channel numbers. • Displays the panel menu, in which you press TV GUIDE from the TV Guide On Screen™ service to change when updates are for the currently highlighted program or tile, including setting recordings and reminders. • To access another Service screen...

Owner's Manual - English
Page 79
... HDMI input. Press INPUT on the remote control or TV/VIDEO on the TV to +20. Press MENU and open the Video menu. 2. Video Picture Settings Advanced Picture Settings Theater Settings Navigate Select CH RTN Back EXIT Exit 3. To revert to , PIP/POP windows, closed captions, video game patterns, TV station logos, stock tickers, and websites) and special formats that do not use the entire screen, can set separate scroll settings for the TheaterWide 2 and TheaterWide 3 modes...
... HDMI input. Press INPUT on the remote control or TV/VIDEO on the TV to +20. Press MENU and open the Video menu. 2. Video Picture Settings Advanced Picture Settings Theater Settings Navigate Select CH RTN Back EXIT Exit 3. To revert to , PIP/POP windows, closed captions, video game patterns, TV station logos, stock tickers, and websites) and special formats that do not use the entire screen, can set separate scroll settings for the TheaterWide 2 and TheaterWide 3 modes...

Owner's Manual - English
Page 121
... power cord is set -top box, etc.) always try to use the ColorStream video jacks (and corresponding audio jacks) or the HDMI input (if available) for a possible cause of the ColorStream® connections. All rights reserved. #01E_121-128_4250HPX95 121 Black (E) 42/50HPX95 *web 213:276 05.9.12, 10:23 PM 121 Cannot view external signals or channel 3 or 4 • If you can try the side panel buttons. 12 Troubleshooting...
... power cord is set -top box, etc.) always try to use the ColorStream video jacks (and corresponding audio jacks) or the HDMI input (if available) for a possible cause of the ColorStream® connections. All rights reserved. #01E_121-128_4250HPX95 121 Black (E) 42/50HPX95 *web 213:276 05.9.12, 10:23 PM 121 Cannot view external signals or channel 3 or 4 • If you can try the side panel buttons. 12 Troubleshooting...

Owner's Manual - English
Page 125
... or reminder did not work. • The time and date in the TV. Chapter 12: Troubleshooting Home network troubleshooting (continued) Home server setup problems PC (Home Server) name is not displayed • Ethernet cables are not connected. • DNS is not set up correctly. User-names and passwords are generally case-sensitive. All rights reserved. #01E_121-128_4250HPX95 125 Black (E) 42/50HPX95 *web 213:276 05...
... or reminder did not work. • The time and date in the TV. Chapter 12: Troubleshooting Home network troubleshooting (continued) Home server setup problems PC (Home Server) name is not displayed • Ethernet cables are not connected. • DNS is not set up correctly. User-names and passwords are generally case-sensitive. All rights reserved. #01E_121-128_4250HPX95 125 Black (E) 42/50HPX95 *web 213:276 05...

Owner's Manual - English
Page 127
... Number buttons to 4 stars (****). Press SPLIT to select Change Channel Display. Q: Can I was not available during the scheduled download cycle. b) After completing the initial setup, the first data download of time and the TV Guide On Screen™ system was interrupted by the TV Guide On Screen™ system). If the connection includes stereo cables with cable box to receive program listings during the last TV Guide On Screen™ system information update (download...
... Number buttons to 4 stars (****). Press SPLIT to select Change Channel Display. Q: Can I was not available during the scheduled download cycle. b) After completing the initial setup, the first data download of time and the TV Guide On Screen™ system was interrupted by the TV Guide On Screen™ system). If the connection includes stereo cables with cable box to receive program listings during the last TV Guide On Screen™ system information update (download...

Owner's Manual - English
Page 128
... and is snow or a blue screen. Q: If a program is also available in a panel menu. Titles will not change channels with a cable box): a) The VCR is set up incorrectly. b) The VCR and/or cable box are several possibilities (without a cable box): a) The recording unit was not connected or set by category (HDTV, Movies, Sports, Children, Educational, News, Variety, Series). 32. Q: What do I set on the remote control. A: Once-records/reminds the show...
... and is snow or a blue screen. Q: If a program is also available in a panel menu. Titles will not change channels with a cable box): a) The VCR is set up incorrectly. b) The VCR and/or cable box are several possibilities (without a cable box): a) The recording unit was not connected or set by category (HDTV, Movies, Sports, Children, Educational, News, Variety, Series). 32. Q: What do I set on the remote control. A: Once-records/reminds the show...

Owner's Manual - English
Page 130
... unlikely event a safety notification is required. By registering your Plasma Television you will come to your needs and help us to any Plasma Television or parts that have been modified or had the serial number removed, altered, defaced, or rendered illegible. Reception problems caused by inadequate antenna systems, misaligned satellite dishes, cable television distribution, VCRs, DVD players/recorders, personal computer level IEEE1394 devices, and any state...
... unlikely event a safety notification is required. By registering your Plasma Television you will come to your needs and help us to any Plasma Television or parts that have been modified or had the serial number removed, altered, defaced, or rendered illegible. Reception problems caused by inadequate antenna systems, misaligned satellite dishes, cable television distribution, VCRs, DVD players/recorders, personal computer level IEEE1394 devices, and any state...

Owner's Manual - English
Page 131
... REPLACE A DEFECTIVE PART WITH A NEW OR REFURBISHED PART WITHOUT CHARGE TO YOU. How to your Plasma Television online at www.toshiba.ca as soon as lightning or fluctuations in electric power), improper installation, improper maintenance, or use of this Plasma Television and its parts against defects in materials or workmanship for set installation, setup, adjustment of customer controls, and installation or repair of antenna systems are effective only if this Plasma Television...
... REPLACE A DEFECTIVE PART WITH A NEW OR REFURBISHED PART WITHOUT CHARGE TO YOU. How to your Plasma Television online at www.toshiba.ca as soon as lightning or fluctuations in electric power), improper installation, improper maintenance, or use of this Plasma Television and its parts against defects in materials or workmanship for set installation, setup, adjustment of customer controls, and installation or repair of antenna systems are effective only if this Plasma Television...

Owner's Manual - English
Page 137
... MUTE button 90 Network address setting 108 O P S Safety, care, installation, and service 2-4 SAP sound 90 Satellite receiver connection 17 Scrolling the TheaterWide® picture 79 SD (Secure Digital™) memory cards 103, 104 Service ...4 Setup, TV 40, 46 Setup, TV Guide On Screen™ system 42 On/Off timer 94 Optical audio cable 13 Optical audio output format 93 Panel lock 101 Password 117 PC connection 29 PC setting 95 Picture adjustments: CableClear®/DNR (digital noise reduction 86 Color management 85 Color temperature...
... MUTE button 90 Network address setting 108 O P S Safety, care, installation, and service 2-4 SAP sound 90 Satellite receiver connection 17 Scrolling the TheaterWide® picture 79 SD (Secure Digital™) memory cards 103, 104 Service ...4 Setup, TV 40, 46 Setup, TV Guide On Screen™ system 42 On/Off timer 94 Optical audio cable 13 Optical audio output format 93 Panel lock 101 Password 117 PC connection 29 PC setting 95 Picture adjustments: CableClear®/DNR (digital noise reduction 86 Color management 85 Color temperature...


