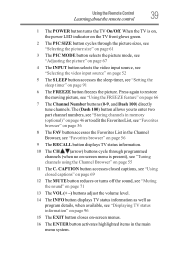
Toshiba 39L2300U Settings

Related Manual Pages


Similar Questions

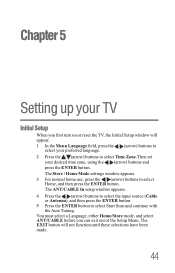
Clock Setting
How do I set the clock on my new Toshiba 32DT2U HD TV?
How do I set the clock on my new Toshiba 32DT2U HD TV?
(Posted by neilupchurch 11 years ago)

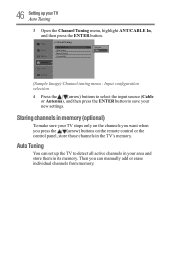
How To Set A Default Picture Size.
I have to set the picture size everytime I turn on the tv. How can I set it so that it doesn't rever...
I have to set the picture size everytime I turn on the tv. How can I set it so that it doesn't rever...
(Posted by lbi4shore99 12 years ago)

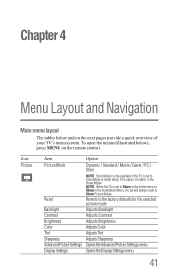
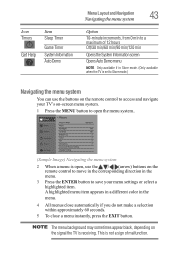
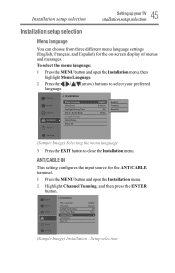
Set Up Menu Has No Text
I was setting up the TV for cable. After selecting "Cable", all of the menu text disappeared. There ...
I was setting up the TV for cable. After selecting "Cable", all of the menu text disappeared. There ...
(Posted by brawson 13 years ago)
Related Terms
The following terms were also used when searching for Toshiba 39L2300U Settings:- toshiba 39l2300u price
- model 39l2300u
- toshiba 39l2300u
- toshiba 39l2300u 39
- toshiba 39l2300u 39 led
- toshiba 39l2300u 39 manual
- toshiba 39l2300u 39-inch
- toshiba 39l2300u 3d
- toshiba 39l2300u best buy
- toshiba 39l2300u calibration
- toshiba 39l2300u contrast ratio
- toshiba 39l2300u led hdtv
- toshiba 39l2300u manual
- toshiba 39l2300u picture settings
- 39l2300u user manual
- toshiba 39l2300u product manual
- toshiba 39l2300u review
- toshiba 39l2300u reviews
- toshiba 39l2300u settings
- toshiba 39l2300u specifications
- toshiba 39l2300u specs
- toshiba 39l2300u tv
- toshiba 39l2300u tv set
- toshiba 39l2300u user manual
- toshiba model 39l2300u
- toshiba tv 39l2300u
- toshiba tv model 39l2300u
- tv model 39l2300u
- 39l2300u manual
- 39l2300u 39
- 39l2300u 39 led
- 39l2300u 39 manual
- 39l2300u 39-inch
- 39l2300u 3d
- 39l2300u best buy
- 39l2300u calibration
- 39l2300u calibration settings
- 39l2300u contrast ratio
- 39l2300u dimensions
- 39l2300u hdtv
- 39l2300u how to release retail lock
- 39l2300u led hdtv
- 39l2300u
- 39l2300u picture settings
- 39l2300u price
- 39l2300u product manual
- 39l2300u remote
- 39l2300u review
- 39l2300u reviews
- 39l2300u settings
- 39l2300u specifications
- 39l2300u specs
- 39l2300u toshiba
- 39l2300u toshiba tv
- 39l2300u tv
- 39l2300u tv set