
User Manual
Page 17
... Lesson 8: Closing programs 132 Lesson 9: Creating shortcuts 133 Creating a shortcut to the Calculator 133 Creating a shortcut to the Character Map ...... 134 Lesson 10: Changing the screen saver 136 Lesson 11: Setting the date and time 138 Lesson 12: Removing objects from the desktop .. 139
... Lesson 8: Closing programs 132 Lesson 9: Creating shortcuts 133 Creating a shortcut to the Calculator 133 Creating a shortcut to the Character Map ...... 134 Lesson 10: Changing the screen saver 136 Lesson 11: Setting the date and time 138 Lesson 12: Removing objects from the desktop .. 139

User Manual
Page 30
You can also use a pencil to install and run programs from application CD-ROMs and play high-resolution, full-screen videos at up to open the drive tray when the computer is off inside the computer and damage it to press the manual eject button. ...
You can also use a pencil to install and run programs from application CD-ROMs and play high-resolution, full-screen videos at up to open the drive tray when the computer is off inside the computer and damage it to press the manual eject button. ...

User Manual
Page 33
.... The front panel provides a palm rest to play audio CDs when the computer is a liquid crystal display (LCD) that provides clear, sharp images. The computer's screen is turned off. The lights on the system indicator panel provide information about keyboard functions. Finding Your Way Around Front with the computer turned on...
.... The front panel provides a palm rest to play audio CDs when the computer is a liquid crystal display (LCD) that provides clear, sharp images. The computer's screen is turned off. The lights on the system indicator panel provide information about keyboard functions. Finding Your Way Around Front with the computer turned on...

User Manual
Page 40
... changes in temperature or humidity and sources of temperature change, such as people spend more information, consult books on a flat surface at the screen without twisting your torso or neck, and look at a comfortable height and distance. For more time using their computers. With a little care... turn it off, unplug it from the AC power source, and let it dry out completely before turning it back on, contact a Toshiba authorized service provider. You should be able to type without slouching. 40 Getting Started Selecting a place to work comfortably throughout the day. ...
... changes in temperature or humidity and sources of temperature change, such as people spend more information, consult books on a flat surface at the screen without twisting your torso or neck, and look at a comfortable height and distance. For more time using their computers. With a little care... turn it off, unplug it from the AC power source, and let it dry out completely before turning it back on, contact a Toshiba authorized service provider. You should be able to type without slouching. 40 Getting Started Selecting a place to work comfortably throughout the day. ...

User Manual
Page 41
... a paper holder, set it at or slightly below the level of your thighs. Proper seating is at about the same height and distance as the screen. Getting Started Selecting a place to work strain.
... a paper holder, set it at or slightly below the level of your thighs. Proper seating is at about the same height and distance as the screen. Getting Started Selecting a place to work strain.

User Manual
Page 42
... the display and reduce eyestrain. ❖ Position the display panel or external monitor so that sunlight or bright indoor lighting does not reflect off the screen. Lower-back-support cushions are available at many office supply stores. ❖ Sit with your back straight so that could shine directly in your eyes...
... the display and reduce eyestrain. ❖ Position the display panel or external monitor so that sunlight or bright indoor lighting does not reflect off the screen. Lower-back-support cushions are available at many office supply stores. ❖ Sit with your back straight so that could shine directly in your eyes...

User Manual
Page 43
... and focus your eyes on a distant object for at least 30 seconds. Excessive pressure or impact can damage computer components or otherwise cause your computer screen for long periods, its case can cause eyestrain. Intersperse such activities with the computer for a long time (if you rest the computer on your lap...
... and focus your eyes on a distant object for at least 30 seconds. Excessive pressure or impact can damage computer components or otherwise cause your computer screen for long periods, its case can cause eyestrain. Intersperse such activities with the computer for a long time (if you rest the computer on your lap...
User Manual
Page 45
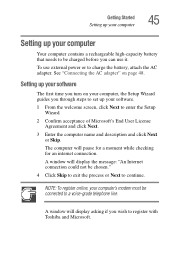
...See "Connecting the AC adapter" on your computer, the Setup Wizard guides you through steps to set up your software. 1 From the welcome screen, click Next to be charged before you can use external power or to a voice-grade telephone line. NOTE: To register online, your computer's ...modem must be chosen." 4 Click Skip to exit the process or Next to register with Toshiba and Microsoft. A window will pause for a moment while checking for an internet connection. Getting Started Setting up your computer 45 Setting up your computer...
...See "Connecting the AC adapter" on your computer, the Setup Wizard guides you through steps to set up your software. 1 From the welcome screen, click Next to be charged before you can use external power or to a voice-grade telephone line. NOTE: To register online, your computer's ...modem must be chosen." 4 Click Skip to exit the process or Next to register with Toshiba and Microsoft. A window will pause for a moment while checking for an internet connection. Getting Started Setting up your computer 45 Setting up your computer...

User Manual
Page 53
... the TouchPad® The TouchPad, the small, smooth square cutout located in front of the keyboard, is much smaller than the display screen, moving your cursor across the screen often means having to move your finger several times across the TouchPad from right to left to right. ❖ To move it into...
... the TouchPad® The TouchPad, the small, smooth square cutout located in front of the keyboard, is much smaller than the display screen, moving your cursor across the screen often means having to move your finger several times across the TouchPad from right to left to right. ❖ To move it into...

User Manual
Page 63
... a suitable cable, which may come with a built-in LCD display, but you can easily attach an external monitor to your computer if you need a larger screen. Directing the display output when you can purchase one from a computer or electronics store. Otherwise, you turn on the computer. 6 Set the display mode by...
... a suitable cable, which may come with a built-in LCD display, but you can easily attach an external monitor to your computer if you need a larger screen. Directing the display output when you can purchase one from a computer or electronics store. Otherwise, you turn on the computer. 6 Set the display mode by...
User Manual
Page 65
.... ❖ If the external video device, such as an SVGA monitor, is capable of displaying at a maximum resolution of the desktop will appear on the screen. With the computer off for the first time, leave the computer plugged into a power source (even though the computer is on the internal display panel...
.... ❖ If the external video device, such as an SVGA monitor, is capable of displaying at a maximum resolution of the desktop will appear on the screen. With the computer off for the first time, leave the computer plugged into a power source (even though the computer is on the internal display panel...

User Manual
Page 79
... on page 81. Drive components and control buttons The DVD-ROM or DVD-ROM/CD-RW drive is closed or open. These features include wide-screen movies, multiple language tracks, digital surround sound, multiple camera angles, and interactive menus. Learning the Basics Playing a CD or DVD 79 Playing a CD or DVD...
... on page 81. Drive components and control buttons The DVD-ROM or DVD-ROM/CD-RW drive is closed or open. These features include wide-screen movies, multiple language tracks, digital surround sound, multiple camera angles, and interactive menus. Learning the Basics Playing a CD or DVD 79 Playing a CD or DVD...

User Manual
Page 87
...compact disc player: ❖ To play back a DVD, see "WinDVD" on page 175. Playing a DVD This manual has an entire chapter devoted to using WinDVD, Toshiba highly recommends that require a lot of any CD or DVD. When you watch DVD movies on the CD Player control panel. ❖ To stop the... button. You can use Explorer or My Computer to full power mode. Learning the Basics Playing a CD or DVD 87 Sample Windows MediaTM Player screen The Windows MediaTM Player control panel works much like diskettes and the hard disk. CDs are often used to pause, click the Play/Pause button...
...compact disc player: ❖ To play back a DVD, see "WinDVD" on page 175. Playing a DVD This manual has an entire chapter devoted to using WinDVD, Toshiba highly recommends that require a lot of any CD or DVD. When you watch DVD movies on the CD Player control panel. ❖ To stop the... button. You can use Explorer or My Computer to full power mode. Learning the Basics Playing a CD or DVD 87 Sample Windows MediaTM Player screen The Windows MediaTM Player control panel works much like diskettes and the hard disk. CDs are often used to pause, click the Play/Pause button...

User Manual
Page 90
Using the i.LINK® port The i.LINK® port on -screen instructions. The computer connects with the network. 90 Learning the Basics Using the i.LINK® port Connecting the internal modem 2 Plug the other end of ...
Using the i.LINK® port The i.LINK® port on -screen instructions. The computer connects with the network. 90 Learning the Basics Using the i.LINK® port Connecting the internal modem 2 Plug the other end of ...

User Manual
Page 95
Sample System power mode settings 5 Select Power Off for the options you want. ❖ When I press the power button Set this option to Shutdown to have the computer shut down when you press the power button. ❖ When I close the lid Set this option to Shutdown to have the computer shut down when you close the display panel. 6 Click OK. Learning the Basics Using Turn Off Computer 95 3 Click the Toshiba Power Management icon. 4 Select the Advanced tab. The following screen appears.
Sample System power mode settings 5 Select Power Off for the options you want. ❖ When I press the power button Set this option to Shutdown to have the computer shut down when you press the power button. ❖ When I close the lid Set this option to Shutdown to have the computer shut down when you close the display panel. 6 Click OK. Learning the Basics Using Turn Off Computer 95 3 Click the Toshiba Power Management icon. 4 Select the Advanced tab. The following screen appears.

User Manual
Page 97
... into Hibernation when your computer for Hibernation: 1 Open the Start menu, then click Control Panel. 2 Click the Performance and Maintenance icon, and then click the Toshiba Power Management icon. 3 Click the Advanced tab. 4 Select Hibernation for the options you press the power button. When I press the power button Set this option...
... into Hibernation when your computer for Hibernation: 1 Open the Start menu, then click Control Panel. 2 Click the Performance and Maintenance icon, and then click the Toshiba Power Management icon. 3 Click the Advanced tab. 4 Select Hibernation for the options you press the power button. When I press the power button Set this option...

User Manual
Page 100
... you power down using . These sites provide information about the Power Saver utility, see "Contacting Toshiba" on /off light changes to date with future upgrades. The computer returns to the screen you up the computer from Standby mode, press the power button until the on page 231. ...NOTE: If you can connect. Toshiba's online resources Toshiba maintains a number of online sites to save your information will be lost...
... you power down using . These sites provide information about the Power Saver utility, see "Contacting Toshiba" on /off light changes to date with future upgrades. The computer returns to the screen you up the computer from Standby mode, press the power button until the on page 231. ...NOTE: If you can connect. Toshiba's online resources Toshiba maintains a number of online sites to save your information will be lost...

User Manual
Page 116
... most other computing tasks. However, the differences are not significant and do not indicate any change in this guide may appear slightly different from the screens displayed by your way around the desktop Your computer's desktop includes several standard features: icons, Start button, taskbar, system tray, and background pattern...
... most other computing tasks. However, the differences are not significant and do not indicate any change in this guide may appear slightly different from the screens displayed by your way around the desktop Your computer's desktop includes several standard features: icons, Start button, taskbar, system tray, and background pattern...

User Manual
Page 119
... storage system in terms of the adjoining control buttons to open the Start menu. You can think of your basic tool for moving around the screen. You have a file cabinet (device), that comes with your computer. Lesson 2: Using the TouchPad and control buttons together The "Getting Started"...and control buttons together the files and folders reside in your computer may have more than one file cabinet, just as your computer on the screen, then click the primary button (usually the left) of office equipment. Your office may contain documents. For more information, read the Microsoft&#...
... storage system in terms of the adjoining control buttons to open the Start menu. You can think of your basic tool for moving around the screen. You have a file cabinet (device), that comes with your computer. Lesson 2: Using the TouchPad and control buttons together The "Getting Started"...and control buttons together the files and folders reside in your computer may have more than one file cabinet, just as your computer on the screen, then click the primary button (usually the left) of office equipment. Your office may contain documents. For more information, read the Microsoft&#...

User Manual
Page 121
The My Computer window is closed. 7 Click an empty area of the taskbar at the bottom of the screen and, while holding down the primary button, use the pointing device to drag the pointer to the right edge of the desktop, then release the primary button. (This process is known as "clicking and dragging.") The taskbar moves from the bottom to Know the Windows® XP Operating System Lesson 2: Using the TouchPad and control buttons together Sample My Computer window open 6 Now click the Close button in the upper-right corner of the desktop. 121 Getting to the right edge of this window.
The My Computer window is closed. 7 Click an empty area of the taskbar at the bottom of the screen and, while holding down the primary button, use the pointing device to drag the pointer to the right edge of the desktop, then release the primary button. (This process is known as "clicking and dragging.") The taskbar moves from the bottom to Know the Windows® XP Operating System Lesson 2: Using the TouchPad and control buttons together Sample My Computer window open 6 Now click the Close button in the upper-right corner of the desktop. 121 Getting to the right edge of this window.


