User Manual
Page 1
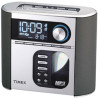
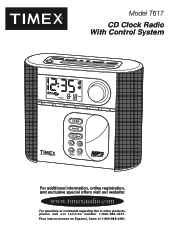
Para instruccionese en Espanol, llame al 1-800-888-4491. Model T617 CD Clock Radio With Control System 1 2 3 4 5 6 CD RADIO SOUNDS WAKE-TO AM/FM PLAY MODE MP3 LINE-IN For additional information, online registration, and exclusive special offers visit our website: www.timexaudio.com For questions or comments regarding this or other products, please call our toll-free number 1-800-888-4491.
Para instruccionese en Espanol, llame al 1-800-888-4491. Model T617 CD Clock Radio With Control System 1 2 3 4 5 6 CD RADIO SOUNDS WAKE-TO AM/FM PLAY MODE MP3 LINE-IN For additional information, online registration, and exclusive special offers visit our website: www.timexaudio.com For questions or comments regarding this or other products, please call our toll-free number 1-800-888-4491.
User Manual
Page 2
... with arrowhead in the literature accompanying the appliance. The lightning flash with part 15 of important operating and maintenance (servicing) instructions in an equilateral triangle is intended to alert the user of the presence of uninsulated "dangerous voltage" within an equilateral triangle is subject to operate the equipment. 2 Operation is intended to constitute a risk of electric shock. DO NOT...
... with arrowhead in the literature accompanying the appliance. The lightning flash with part 15 of important operating and maintenance (servicing) instructions in an equilateral triangle is intended to alert the user of the presence of uninsulated "dangerous voltage" within an equilateral triangle is subject to operate the equipment. 2 Operation is intended to constitute a risk of electric shock. DO NOT...
User Manual
Page 3
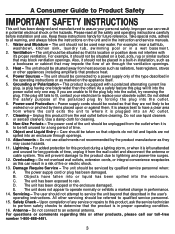
... not use . Servicing - Take special note, adhere to all the safety and operating instructions carefully before cleaning. The unit should not be connected to a power supply only of fire or electric shock. 13. Unplug this plug will prevent damage to the product due to lightning and power-line surges. 12. Attachments - Objects have a clear area from the wall outlet before installation and use...
... not use . Servicing - Take special note, adhere to all the safety and operating instructions carefully before cleaning. The unit should not be connected to a power supply only of fire or electric shock. 13. Unplug this plug will prevent damage to the product due to lightning and power-line surges. 12. Attachments - Objects have a clear area from the wall outlet before installation and use...
User Manual
Page 4
... excessive heat; (iii) damage to tape cassettes (if applicable); (iv) the cost of this product to the Factory Service Center and its discretion, replace this product to the Factory Service Center listed below : Consumer Repair Department SDI Technologies Inc. TIMEX is subject to verification of the defect or malfunction upon delivery of shipping this product without proof of problems encountered.
... excessive heat; (iii) damage to tape cassettes (if applicable); (iv) the cost of this product to the Factory Service Center and its discretion, replace this product to the Factory Service Center listed below : Consumer Repair Department SDI Technologies Inc. TIMEX is subject to verification of the defect or malfunction upon delivery of shipping this product without proof of problems encountered.
User Manual
Page 5
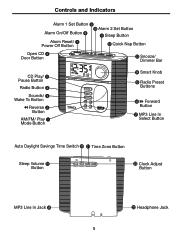
... Alarm 2 Set Button Alarm On/Off Button ᕨ ¸ Sleep Button Alarm Reset/ ᕧ Power Off Button ¹ Quick Nap Button Open CD ᕦ Door Button Ƹ Snooze/ Dimmer Bar CD Play/ ᕥ Pause Button Radio Button ᕤ Sounds/ ᕣ Wake To Button Reverse ᕢ Button AM/FM/ Play ᕡ Mode Button 1 2 3 4 5 6 CD RADIO SOUNDS WAKE-TO AM/FM PLAY MODE MP3 LINE-IN ƹ Smart Knob ƺ Radio Preset Buttons ƻ Forward Button Ƽ MP3 Line In Select Button Auto Daylight Savings Time Switch ƿ Time Zone Button Sleep Volume ƾ Button ON OFF SLEEP...
... Alarm 2 Set Button Alarm On/Off Button ᕨ ¸ Sleep Button Alarm Reset/ ᕧ Power Off Button ¹ Quick Nap Button Open CD ᕦ Door Button Ƹ Snooze/ Dimmer Bar CD Play/ ᕥ Pause Button Radio Button ᕤ Sounds/ ᕣ Wake To Button Reverse ᕢ Button AM/FM/ Play ᕡ Mode Button 1 2 3 4 5 6 CD RADIO SOUNDS WAKE-TO AM/FM PLAY MODE MP3 LINE-IN ƹ Smart Knob ƺ Radio Preset Buttons ƻ Forward Button Ƽ MP3 Line In Select Button Auto Daylight Savings Time Switch ƿ Time Zone Button Sleep Volume ƾ Button ON OFF SLEEP...
User Manual
Page 6
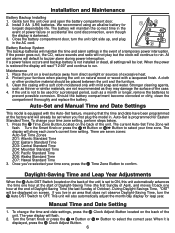
.... 2. Gently turn the unit right side up, and plug in the event of the unit. Maintenance 1. Protect your time zone. Auto-Set is programmed for leap year. Press the Time Zone Button,located on screen. During Daylight Savings Time, "DST" will maintain the time and alarm settings in the AC cord. ᕄ Battery Backup System The backup batteries will be displayed on the back of a temporary power interruption. This unit will already be used for...
.... 2. Gently turn the unit right side up, and plug in the event of the unit. Maintenance 1. Protect your time zone. Auto-Set is programmed for leap year. Press the Time Zone Button,located on screen. During Daylight Savings Time, "DST" will maintain the time and alarm settings in the AC cord. ᕄ Battery Backup System The backup batteries will be displayed on the back of a temporary power interruption. This unit will already be used for...
User Manual
Page 7
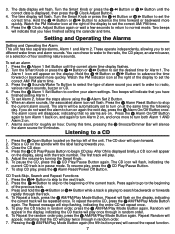
... track number. After ON is playing to set the correct AM/ PM time. 5. The Repeat message will stop flashing, indicating the entire CD will play , press the ᕧ Alarm Reset/Power Off Button. Watch the PM Indicator icon at the same time the following day. You can chose to wake to the radio, the CD player, an alarm buzzer, or a selection of the display to turn both Alarm 1 AND Alarm 2 on the display, along...
... track number. After ON is playing to set the correct AM/ PM time. 5. The Repeat message will stop flashing, indicating the entire CD will play , press the ᕧ Alarm Reset/Power Off Button. Watch the PM Indicator icon at the same time the following day. You can chose to wake to the radio, the CD player, an alarm buzzer, or a selection of the display to turn both Alarm 1 AND Alarm 2 on the display, along...
User Manual
Page 8
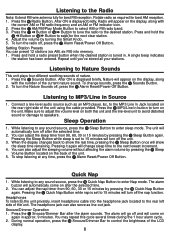
...; Alarm Reset/Power Off Button. Pressing it again will automatically turn off the nap function. During normal operation, press the Ƹ Snooze/Dimmer Bar to Nature Sounds This unit plays four different soothing sounds of the LCD display. 8 To turn on the display, along with the current AM or FM radio frequency and an AM or FM indicator icon. 2. Listening to control the brightness of nature. 1. To change sleep time to the unit privately, insert headphone cable...
...; Alarm Reset/Power Off Button. Pressing it again will automatically turn off the nap function. During normal operation, press the Ƹ Snooze/Dimmer Bar to Nature Sounds This unit plays four different soothing sounds of the LCD display. 8 To turn on the display, along with the current AM or FM radio frequency and an AM or FM indicator icon. 2. Listening to control the brightness of nature. 1. To change sleep time to the unit privately, insert headphone cable...


