User Guide
Page 1
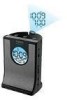
Model T436 Projection Alarm Clock Radio With Nature Sounds For additional information, online registration, and exclusive special offers visit our website: www.timexaudio.com For questions or comments regarding this or other products, please call our toll-free number 1-800-888-4491.
Model T436 Projection Alarm Clock Radio With Nature Sounds For additional information, online registration, and exclusive special offers visit our website: www.timexaudio.com For questions or comments regarding this or other products, please call our toll-free number 1-800-888-4491.
User Guide
Page 2
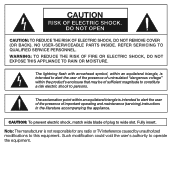
... important operating and maintenance (servicing) instructions in the literature accompanying the appliance. Such modification could void the user's authority to alert the user of the presence of plug to this equipment. Fully insert. CAUTION RISK OF ELECTRIC SHOCK. DO NOT OPEN CAUTION: TO REDUCE THE RISK OF ELECTRIC SHOCK, DO NOT REMOVE COVER (OR BACK). NO USER-SERVICEABLE PARTS...
... important operating and maintenance (servicing) instructions in the literature accompanying the appliance. Such modification could void the user's authority to alert the user of the presence of plug to this equipment. Fully insert. CAUTION RISK OF ELECTRIC SHOCK. DO NOT OPEN CAUTION: TO REDUCE THE RISK OF ELECTRIC SHOCK, DO NOT REMOVE COVER (OR BACK). NO USER-SERVICEABLE PARTS...
User Guide
Page 3
...for Use ...3 Clock Backup Battery Installtion Battery Low Indicator Controls and Indicators...4 Display with Indicators...5 Maintenance ...6 Daylight-Saving Time ...6 Setting Time and Date ...6 Alarm Operation ...7 Listening to the condition that this device does not cause harmful interference. Operation is operating properly. These limits provide reasonable protection against radio and TV interference in Part 15 of FCC Rules. Consult your FCC authorization to operate it is subject to Radio, Nature Sound or AUX device ...8 Sleep Operation...8 Back Light Dimmer...9 Snooze Operation...
...for Use ...3 Clock Backup Battery Installtion Battery Low Indicator Controls and Indicators...4 Display with Indicators...5 Maintenance ...6 Daylight-Saving Time ...6 Setting Time and Date ...6 Alarm Operation ...7 Listening to the condition that this device does not cause harmful interference. Operation is operating properly. These limits provide reasonable protection against radio and TV interference in Part 15 of FCC Rules. Consult your FCC authorization to operate it is subject to Radio, Nature Sound or AUX device ...8 Sleep Operation...8 Back Light Dimmer...9 Snooze Operation...

User Guide
Page 4
... and power-line surges. 13. Take special note, adhere to all safety and operating instructions carefully before installation and use liquid cleaners or aerosol cleaners. Power Sources - Do not overload wall outlets, extension cords, or integral convenience receptacles as a bookcase or cabinet that may cause hazards. 12. The unit has been dropped or the enclosure damaged. Timex Audio Products Division Customer Service, 1-800...
... and power-line surges. 13. Take special note, adhere to all safety and operating instructions carefully before installation and use liquid cleaners or aerosol cleaners. Power Sources - Do not overload wall outlets, extension cords, or integral convenience receptacles as a bookcase or cabinet that may cause hazards. 12. The unit has been dropped or the enclosure damaged. Timex Audio Products Division Customer Service, 1-800...
User Guide
Page 5
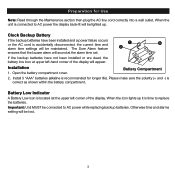
... for Use Note: Read through the Maintenance section then plug the AC line cord correctly into a wall outlet. Otherwise time and alarms setting will be maintained. Installation 1. Battery Compartment 2. Important: Unit MUST be connected to AC power the display back-lit will appear. Please make sure the polarity (+ and -) is time to replace the batteries. The Sure Alarm feature ᕡ ᕢ ᕣ ensures that the buzzer alarm will sound at...
... for Use Note: Read through the Maintenance section then plug the AC line cord correctly into a wall outlet. Otherwise time and alarms setting will be maintained. Installation 1. Battery Compartment 2. Important: Unit MUST be connected to AC power the display back-lit will appear. Please make sure the polarity (+ and -) is time to replace the batteries. The Sure Alarm feature ᕡ ᕢ ᕣ ensures that the buzzer alarm will sound at...
User Guide
Page 6
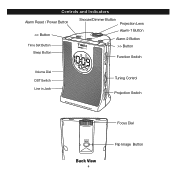
Controls and Indicators Alarm Reset / Power Button > Button Function Switch Volume Dial DST Switch Line in Jack Tuning Control Projection Switch Focus Dial Back View 4 Flip Image Button
Controls and Indicators Alarm Reset / Power Button > Button Function Switch Volume Dial DST Switch Line in Jack Tuning Control Projection Switch Focus Dial Back View 4 Flip Image Button
User Guide
Page 7
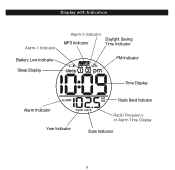
Display with Indicators Alarm-1 Indicator Battery Low Indicator Sleep Display Alarm-2 Indicator Daylight Saving MP3 Indicator Time Indicator PM Indicator Time Display Alarm Indicator Year Indicator Radio Band Indicator Radio Frequency or Alarm Time Display Date Indicator 5
Display with Indicators Alarm-1 Indicator Battery Low Indicator Sleep Display Alarm-2 Indicator Daylight Saving MP3 Indicator Time Indicator PM Indicator Time Display Alarm Indicator Year Indicator Radio Band Indicator Radio Frequency or Alarm Time Display Date Indicator 5
User Guide
Page 8
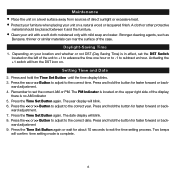
... the case. Daylight-Saving Time 1. Press the Time Set Button again. Two beeps will turn the DST icon on. Stronger cleaning agents, such as Benzene, thinner or similar materials can mar the surface of the display; The year display will blink. 8. ward adjustment. 7. Press and hold the button for faster forward or back- Press the > Button to adjust to the correct date. The date display will blink. 6. Maintenance •...
... the case. Daylight-Saving Time 1. Press the Time Set Button again. Two beeps will turn the DST icon on. Stronger cleaning agents, such as Benzene, thinner or similar materials can mar the surface of the display; The year display will blink. 8. ward adjustment. 7. Press and hold the button for faster forward or back- Press the > Button to adjust to the correct date. The date display will blink. 6. Maintenance •...
User Guide
Page 9
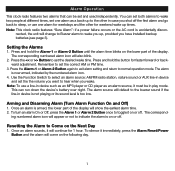
... different times, set and used independently. The alarm source will default to set the the volume you want to wake you up to the other in case you shut off the first alarm and go back to normal operation mode. ing numbered alarm icon will change to Buzzer alarm to hear when you have installed backup batteries (see page 3). Use the Function Switch to select an alarm source: AM/FM radio station, nature sound or AUX line-in...
... different times, set and used independently. The alarm source will default to set the the volume you want to wake you up to the other in case you shut off the first alarm and go back to normal operation mode. ing numbered alarm icon will change to Buzzer alarm to hear when you have installed backup batteries (see page 3). Use the Function Switch to select an alarm source: AM/FM radio station, nature sound or AUX line-in...
User Guide
Page 10
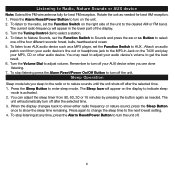
... sleep mode. Turn the Volume Dial to nature sounds until the unit shuts off after the selected time. 3. Sleep Operation Sleep mode lets you are done listening. 7. You can adjust the sleep timer from your audio device's line out or headphone jack to select a station. 4. To listen to the radio, set the Function Switch on the display to turn the unit off. 8 To listen to an AUX audio device such as needed . To stop listening at any time, press the Alarm Reset/Power Button...
... sleep mode. Turn the Volume Dial to nature sounds until the unit shuts off after the selected time. 3. Sleep Operation Sleep mode lets you are done listening. 7. You can adjust the sleep timer from your audio device's line out or headphone jack to select a station. 4. To listen to the radio, set the Function Switch on the display to turn the unit off. 8 To listen to an AUX audio device such as needed . To stop listening at any time, press the Alarm Reset/Power Button...
User Guide
Page 11
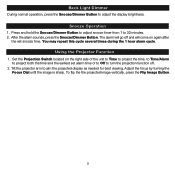
... time, to Time/Alarm to 30 minutes. 2. Set the Projection Switch located on again after the set alarm time or to Off to turn the projection function off. 2. Back Light Dimmer During normal operation, press the Snooze/Dimmer Button to aim the projected display as needed for best viewing. After the alarm sounds, press the Snooze/Dimmer Button. Using the Projector Function 1. Adjust the focus by turning the Focus Dial until the image is sharp. Press and hold the Snooze/Dimmer Button to adjust snooze timer...
... time, to Time/Alarm to 30 minutes. 2. Set the Projection Switch located on again after the set alarm time or to Off to turn the projection function off. 2. Back Light Dimmer During normal operation, press the Snooze/Dimmer Button to aim the projected display as needed for best viewing. After the alarm sounds, press the Snooze/Dimmer Button. Using the Projector Function 1. Adjust the focus by turning the Focus Dial until the image is sharp. Press and hold the Snooze/Dimmer Button to adjust snooze timer...
User Guide
Page 12
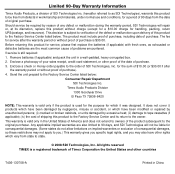
...-Day Warranty Information Timex Audio Products, a division of SDI Technologies Inc. (hereafter referred to as exhausted or defective batteries are also limited to 90 days, and SDI Technologies will repair or, at its return to the owner. This decision is still required: 1. Remove batteries (if applicable) and pack the unit in workmanship and materials, under normal use and conditions, for service...
...-Day Warranty Information Timex Audio Products, a division of SDI Technologies Inc. (hereafter referred to as exhausted or defective batteries are also limited to 90 days, and SDI Technologies will repair or, at its return to the owner. This decision is still required: 1. Remove batteries (if applicable) and pack the unit in workmanship and materials, under normal use and conditions, for service...


