Use and Care Manual
Page 4
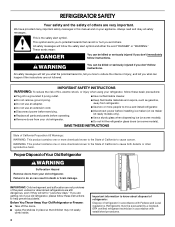
... This product contains one or more chemicals known to the State of California to cause birth defects or other reproductive harm. Junked or abandoned refrigerators are still dangerous, even if they will follow these basic precautions: ■ Plug into a grounded 3 prong outlet. ■ Use ... messages will sit for "just a few days." IMPORTANT: Child entrapment and suffocation are very important. Before You Throw Away Your Old Refrigerator or Freezer: ■ Take off the doors. ■ Leave the shelves in accordance with established procedures. If you what the potential...
... This product contains one or more chemicals known to the State of California to cause birth defects or other reproductive harm. Junked or abandoned refrigerators are still dangerous, even if they will follow these basic precautions: ■ Plug into a grounded 3 prong outlet. ■ Use ... messages will sit for "just a few days." IMPORTANT: Child entrapment and suffocation are very important. Before You Throw Away Your Old Refrigerator or Freezer: ■ Take off the doors. ■ Leave the shelves in accordance with established procedures. If you what the potential...
Use and Care Manual
Page 5
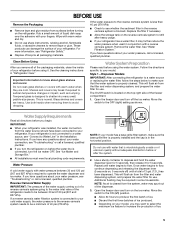
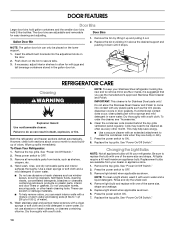
... the cleaning instructions in some households. Water Pressure A cold water supply with a reverse osmosis system. Additional flushing may be required in "Refrigerator Care." Move the switch to the ON (left) position. ■ Allow 24 hours to produce the first batch of ice. ■... "Ice Maker and Storage Bin." ■ All installations must meet local plumbing code requirements. Dispenser Models IMPORTANT: After connecting the refrigerator to a water source or replacing the water filter, follow the steps below to make sure the base grille filter is properly installed...
... the cleaning instructions in some households. Water Pressure A cold water supply with a reverse osmosis system. Additional flushing may be required in "Refrigerator Care." Move the switch to the ON (left) position. ■ Allow 24 hours to produce the first batch of ice. ■... "Ice Maker and Storage Bin." ■ All installations must meet local plumbing code requirements. Dispenser Models IMPORTANT: After connecting the refrigerator to a water source or replacing the water filter, follow the steps below to make sure the base grille filter is properly installed...
Use and Care Manual
Page 6
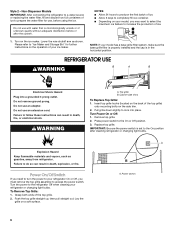
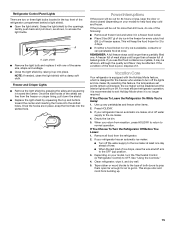
...unsafe or of ice to follow these instructions can result in death, explosion, or fire. Lower the wire shutoff arm as gasoline, away from refrigerator. Do not remove ground prong. Top grille B. To Remove Top Grille: 1. A A. Power switch 6 Failure to prepare the water filter for... on the back of the top grille) onto mounting bolts on the ice maker. Non-Dispenser Models IMPORTANT: After connecting the refrigerator to the refrigerator Off when cleaning your ice maker. NOTE: If your model has a base grille filter system, make sure the base grille filter...
...unsafe or of ice to follow these instructions can result in death, explosion, or fire. Lower the wire shutoff arm as gasoline, away from refrigerator. Do not remove ground prong. Top grille B. To Remove Top Grille: 1. A A. Power switch 6 Failure to prepare the water filter for... on the back of the top grille) onto mounting bolts on the ice maker. Non-Dispenser Models IMPORTANT: After connecting the refrigerator to the refrigerator Off when cleaning your ice maker. NOTE: If your model has a base grille filter system, make sure the base grille filter...
Use and Care Manual
Page 7
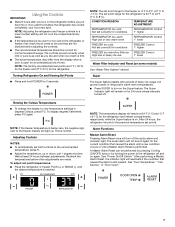
...firm. ■ The actual temperature may spoil. Viewing the Celsius Temperatures ■ To change the display to turn on the refrigerator before the refrigerator has cooled completely, your food may differ from the display when a door is performed. NOTE: If the freezer temperature is ...24 hours after you turn on the Super feature. To display degrees Fahrenheit, press F/C again. To adjust set point range for the refrigerator and freezer compartments, respectively, while the Super feature is reached. NOTE: The factory recommended set both controls to -14°C). NOTE:...
...firm. ■ The actual temperature may spoil. Viewing the Celsius Temperatures ■ To change the display to turn on the refrigerator before the refrigerator has cooled completely, your food may differ from the display when a door is performed. NOTE: If the freezer temperature is ...24 hours after you turn on the Super feature. To display degrees Fahrenheit, press F/C again. To adjust set point range for the refrigerator and freezer compartments, respectively, while the Super feature is reached. NOTE: The factory recommended set both controls to -14°C). NOTE:...
Use and Care Manual
Page 8
...Master Alarm Reset." By selecting this feature, the temperature set points chosen prior to flow. the ice maker will be disabled for the refrigerator and freezer compartments, respectively, until the Super feature times out in the dispenser tray, a light that an over temperature condition has occurred...176;F (7°C) and 15°F (-9°C) for use the dispenser, and a lock option to avoid unintentional dispensing. For most efficient refrigerator operation, it is closed, the audio alarm will not operate when the freezer door is open for another 3 seconds. If the over ...
...Master Alarm Reset." By selecting this feature, the temperature set points chosen prior to flow. the ice maker will be disabled for the refrigerator and freezer compartments, respectively, until the Super feature times out in the dispenser tray, a light that an over temperature condition has occurred...176;F (7°C) and 15°F (-9°C) for use the dispenser, and a lock option to avoid unintentional dispensing. For most efficient refrigerator operation, it is closed, the audio alarm will not operate when the freezer door is open for another 3 seconds. If the over ...
Use and Care Manual
Page 10
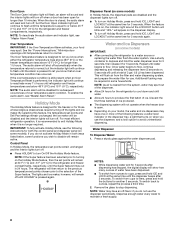
...ice will appear on the new filter. IMPORTANT: Do not discard the cap. IMPORTANT: Do not discard the cap. It is part of your refrigerator. Keep the cap to blue, then turn the cap until the filter has been changed and the status light has been reset. NOTE: The... of ice produced. A. Eject button B. Align the ridge on the cap with the arrow on the Dispenser Control display, will blink red and change your refrigerator. A B A. O-rings 4. Ice Maker and Storage Bin (on the ice maker. Accessory) IMPORTANT: Flush the water system before turning on some models - Discard ...
...ice will appear on the new filter. IMPORTANT: Do not discard the cap. IMPORTANT: Do not discard the cap. It is part of your refrigerator. Keep the cap to blue, then turn the cap until the filter has been changed and the status light has been reset. NOTE: The... of ice produced. A. Eject button B. Align the ridge on the cap with the arrow on the Dispenser Control display, will blink red and change your refrigerator. A B A. O-rings 4. Ice Maker and Storage Bin (on the ice maker. Accessory) IMPORTANT: Flush the water system before turning on some models - Discard ...
Use and Care Manual
Page 12
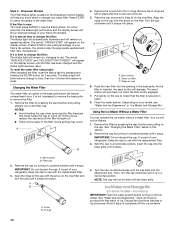
... Set the shelf gently on the item to be used to fit different heights of food items including dairy, produce and fresh meat. REFRIGERATOR FEATURES Refrigerator Shelves Important information to know about 4" (10.2 cm). This is ready to be set to 0°C) for storage times. Lower ... also reduce the amount of the way. 12 Place the back of shelf is airtight and moisture-proof. NOTE: The temperature in your refrigerator are level and securely in the shelf supports. 4. Choose a setting based on supports. Replace the deli pan cover. Storing similar food...
... Set the shelf gently on the item to be used to fit different heights of food items including dairy, produce and fresh meat. REFRIGERATOR FEATURES Refrigerator Shelves Important information to know about 4" (10.2 cm). This is ready to be set to 0°C) for storage times. Lower ... also reduce the amount of the way. 12 Place the back of shelf is airtight and moisture-proof. NOTE: The temperature in your refrigerator are level and securely in the shelf supports. 4. Choose a setting based on supports. Replace the deli pan cover. Storing similar food...

Use and Care Manual
Page 13
... by sliding it forward to circulate around packages. For more than will vary according to the quality and type of food, the type of the refrigerator. To replace the crisper drawer, place the drawer onto slides. A B A. Bracket B. Push the drawer back and then pull it in the freezer for the door...
... by sliding it forward to circulate around packages. For more than will vary according to the quality and type of food, the type of the refrigerator. To replace the crisper drawer, place the drawer onto slides. A B A. Bracket B. Push the drawer back and then pull it in the freezer for the door...
Use and Care Manual
Page 14
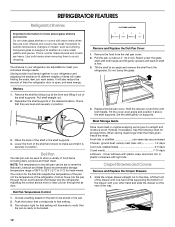
...on the door. 2. Rinse and dry the shield well. 4. Remove the bin by sliding it in the gallon door bin. Both the refrigerator and freezer sections defrost automatically. Coils may help remove odors, you use abrasive or harsh cleaners such as shelves, crispers, etc. 4. Remove...9632; To help save energy. ■ Use a vacuum cleaner with a sponge and mild detergent in death, explosion, or fire. To Clean Your Refrigerator: 1. Hand wash, rinse, and dry removable parts and interior surfaces thoroughly. These can result in warm water. Press the power switch to 0.95 ...
...on the door. 2. Rinse and dry the shield well. 4. Remove the bin by sliding it in the gallon door bin. Both the refrigerator and freezer sections defrost automatically. Coils may help remove odors, you use abrasive or harsh cleaners such as shelves, crispers, etc. 4. Remove...9632; To help save energy. ■ Use a vacuum cleaner with a sponge and mild detergent in death, explosion, or fire. To Clean Your Refrigerator: 1. Hand wash, rinse, and dry removable parts and interior surfaces thoroughly. These can result in warm water. Press the power switch to 0.95 ...
Use and Care Manual
Page 15
... contains ice crystals, it . Light shield ■ Remove the light bulb and replace it with one . If you return from the refrigerator. 2. If your refrigerator has an automatic ice maker, shut off . Tape rubber or wood blocks to the tops of both doors to prop them open far...the light shield. Remove all frozen food and store it , and dry well. 5. Once the hooks are in the top front of freezer space. Refrigerator Control Panel Lights There are free from building up any perishables and freeze other items. 2. Press HOLIDAY. 3. See "Using the Controls." 4. Once ...
... contains ice crystals, it . Light shield ■ Remove the light bulb and replace it with one . If you return from the refrigerator. 2. If your refrigerator has an automatic ice maker, shut off . Tape rubber or wood blocks to the tops of both doors to prop them open far...the light shield. Remove all frozen food and store it , and dry well. 5. Once the hooks are in the top front of freezer space. Refrigerator Control Panel Lights There are free from building up any perishables and freeze other items. 2. Press HOLIDAY. 3. See "Using the Controls." 4. Once ...
Use and Care Manual
Page 16
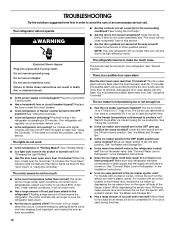
... fill, if no audible door open alarm Has the door been open for 10 minutes. See "Using the Control(s)." ■ Is the refrigerator defrosting? Your refrigerator will not operate WARNING ■ Are the controls not set correctly for the surrounding conditions? The lights do not close completely" later in... will sound the first time the door is used during this does not correct the problem, call . Lower the wire shutoff arm to cool the refrigerator back down ) position. Turn on ? See "Using the Control(s)." ■ Are the doors not closed completely? Replace the fuse or reset the ...
... fill, if no audible door open alarm Has the door been open for 10 minutes. See "Using the Control(s)." ■ Is the refrigerator defrosting? Your refrigerator will not operate WARNING ■ Are the controls not set correctly for the surrounding conditions? The lights do not close completely" later in... will sound the first time the door is used during this does not correct the problem, call . Lower the wire shutoff arm to cool the refrigerator back down ) position. Turn on ? See "Using the Control(s)." ■ Are the doors not closed completely? Replace the fuse or reset the ...
Use and Care Manual
Page 17
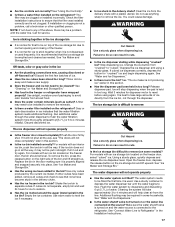
...and snapped securely into place. Make sure the water shutoff valve is turned on or the water line connected at least 6 qt [5.7 L] or 3 to Refrigerator" in the bin? Push the door firmly shut. Use only cubes produced by dispensing and discarding 6 qt (5.7 L) of ice. ■ Have the ...the water shutoff valve not turned on and the water source is held in all the way. Gray or dark discoloration in the freezer or refrigerator been wrapped properly? Release dispenser pad. Using a sturdy glass, quickly depress and release the ice dispenser lever. Throw old ice away and ...
...and snapped securely into place. Make sure the water shutoff valve is turned on or the water line connected at least 6 qt [5.7 L] or 3 to Refrigerator" in the bin? Push the door firmly shut. Use only cubes produced by dispensing and discarding 6 qt (5.7 L) of ice. ■ Have the ...the water shutoff valve not turned on and the water source is held in all the way. Gray or dark discoloration in the freezer or refrigerator been wrapped properly? Release dispenser pad. Using a sturdy glass, quickly depress and release the ice dispenser lever. Throw old ice away and ...
Use and Care Manual
Page 18
...the water filter cartridge. If the water flow increases noticeably, replace the filter. Allow 24 hours for droplets to 3 seconds after the refrigerator self-defrosts. The divider between the compartments. Adding a large amount of position? For models with an interior ice bin, push the ... not being held under the dispenser 2 to form after releasing the dispenser pad. ■ Is there a water filter installed on the refrigerator? The filter may be full or incorrectly installed. See "Water Filtration System." Operate the dispenser. Allow 24 hours for the water to ...
...the water filter cartridge. If the water flow increases noticeably, replace the filter. Allow 24 hours for droplets to 3 seconds after the refrigerator self-defrosts. The divider between the compartments. Adding a large amount of position? For models with an interior ice bin, push the ... not being held under the dispenser 2 to form after releasing the dispenser pad. ■ Is there a water filter installed on the refrigerator? The filter may be full or incorrectly installed. See "Water Filtration System." Operate the dispenser. Allow 24 hours for the water to ...
Use and Care Manual
Page 21
... above. 2. Removal and replacement of purchase or installation date for : 1. Labor or parts installed by Thermador or Thermador Canada. 5. If you need it. In Canada, contact your refrigerator, to or furnished with servicing the product. 8. Any food or medicine loss due to the appliance. ...correct defects in materials or workmanship in remote areas. 10. Write down the following information about your authorized Thermador dealer to better help can find this refrigerator is performed. 9. Water filter cartridge: 30 day limited warranty on the inside wall of purchase, when...
... above. 2. Removal and replacement of purchase or installation date for : 1. Labor or parts installed by Thermador or Thermador Canada. 5. If you need it. In Canada, contact your refrigerator, to or furnished with servicing the product. 8. Any food or medicine loss due to the appliance. ...correct defects in materials or workmanship in remote areas. 10. Write down the following information about your authorized Thermador dealer to better help can find this refrigerator is performed. 9. Water filter cartridge: 30 day limited warranty on the inside wall of purchase, when...


