
Online Help Center
Page 7
Opening the com puter Front panel 1 Stereo speakers (built-in) The stereo speakers provide sound for software, audio and video CDs. 2 Liquid Crystal Display (LCD) screen The attached LCD screen provides on-screen visual output to your VAIO® computer is in stereo speakers and indicator lights. About the Front Panel The front panel of your computer's functional capabilities. 3 Memory Stick® media access indicator Light is amber when the Memory Stick media slot is equipped with built-in use. Page 7
Opening the com puter Front panel 1 Stereo speakers (built-in) The stereo speakers provide sound for software, audio and video CDs. 2 Liquid Crystal Display (LCD) screen The attached LCD screen provides on-screen visual output to your VAIO® computer is in stereo speakers and indicator lights. About the Front Panel The front panel of your computer's functional capabilities. 3 Memory Stick® media access indicator Light is amber when the Memory Stick media slot is equipped with built-in use. Page 7

Online Help Center
Page 10
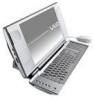
...-in LCD monitor. 2 Volume control dial Increases or decreases the speaker volume. Connections for i.LINK compatible digital devices (IEEE 1394). 7 CD-RW/DVD combo drive eject button Ejects a disc from the combo drive. 8 Ethernet port Connection for a 10BASE-T/100BASE-TX Ethernet. (The port marked with (Network) is for LAN connections only.) 9 Universal Serial Bus (USB 2.0) ports (3) Connections for compatible high/full/low-speed USB devices. 10 CD-RW/DVD combo drive Reads data from compatible CD or DVD media.
...-in LCD monitor. 2 Volume control dial Increases or decreases the speaker volume. Connections for i.LINK compatible digital devices (IEEE 1394). 7 CD-RW/DVD combo drive eject button Ejects a disc from the combo drive. 8 Ethernet port Connection for a 10BASE-T/100BASE-TX Ethernet. (The port marked with (Network) is for LAN connections only.) 9 Universal Serial Bus (USB 2.0) ports (3) Connections for compatible high/full/low-speed USB devices. 10 CD-RW/DVD combo drive Reads data from compatible CD or DVD media.

Online Help Center
Page 13
Plug the USB optical mouse connector into the USB mouse port, located on an appropriate surface to enable precision tracking. Place the optical mouse on the right panel of your computer. 2. To connect a USB m ouse Page 13 Connecting a USB Optical Mouse 1.
Plug the USB optical mouse connector into the USB mouse port, located on an appropriate surface to enable precision tracking. Place the optical mouse on the right panel of your computer. 2. To connect a USB m ouse Page 13 Connecting a USB Optical Mouse 1.

Online Help Center
Page 22
Respond to any peripheral devices connected to your computer. Page 22 If you may want to use Stand by mode instead. Wait for a short period of time, you plan to turn off automatically-the power indicator light turns off. 4. Click Start in the Windows taskbar, then select Turn Off Computer. Select the Turn Off option. To turn off your computer to turn off your documents. 3. Turn off any prompts about saving your computer for your computer 1. The Turn Off Computer dialog box appears. 2.
Respond to any peripheral devices connected to your computer. Page 22 If you may want to use Stand by mode instead. Wait for a short period of time, you plan to turn off automatically-the power indicator light turns off. 4. Click Start in the Windows taskbar, then select Turn Off Computer. Select the Turn Off option. To turn off your computer to turn off your documents. 3. Turn off any prompts about saving your computer for your computer 1. The Turn Off Computer dialog box appears. 2.

Online Help Center
Page 24
Configuring Your VAIO Computer This section provides basic information about managing your computer's hard disk drive performance, using i.LINK devices, Memory Stick media, PC Cards, and changing default settings. About Your Hard Disk Drive About i.LINK Compatibility About the Memory Stick Media Slot About the PC Card Slot VAIO Action Setup Page 24
Configuring Your VAIO Computer This section provides basic information about managing your computer's hard disk drive performance, using i.LINK devices, Memory Stick media, PC Cards, and changing default settings. About Your Hard Disk Drive About i.LINK Compatibility About the Memory Stick Media Slot About the PC Card Slot VAIO Action Setup Page 24

Online Help Center
Page 27
... hard disk drive, confirm their operating system compatibility and required operating conditions. A 4-pin i.LINK port does not supply power to your digital devices. The i.LINK connection may not communicate with your compatible i.LINK device for use with each other. The following i.LINK 400 Mbps cables are available and recommended for information on the software applications, operating system and compatible i.LINK devices. Page 27 Before connecting compatible i.LINK devices to a connected device...
... hard disk drive, confirm their operating system compatibility and required operating conditions. A 4-pin i.LINK port does not supply power to your digital devices. The i.LINK connection may not communicate with your compatible i.LINK device for use with each other. The following i.LINK 400 Mbps cables are available and recommended for information on the software applications, operating system and compatible i.LINK devices. Page 27 Before connecting compatible i.LINK devices to a connected device...

Online Help Center
Page 28
Connecting an i.LINK (IEEE 1394) device 1. See the instructions that came with your i.LINK device for more information on your computer. Plug the other end of the cable into this port. 2. To connect a 4- Use the symbol to locate the i.LINK port on your computer. pin i.LINK dev ice Page 28 Plug the i.LINK cable connector into the corresponding 4-pin i.LINK port on your compatible i.LINK device and on installation and use.
Connecting an i.LINK (IEEE 1394) device 1. See the instructions that came with your i.LINK device for more information on your computer. Plug the other end of the cable into this port. 2. To connect a 4- Use the symbol to locate the i.LINK port on your computer. pin i.LINK dev ice Page 28 Plug the i.LINK cable connector into the corresponding 4-pin i.LINK port on your compatible i.LINK device and on installation and use.

Online Help Center
Page 50
... driver installation and click Update Driver from the shortcut menu. The Hardware Update Wizard appears. 5. Follow the on-screen instructions to select the unknown device1 or the device that has a driver problem is identified by a yellow exc lamation mark. Click Start in the next section to reinstall the device driver(s) using the Application Recovery CD(s). 1. Page 50 Click Properties. Right-click to locate the device and reinstall the appropriate device driver...
... driver installation and click Update Driver from the shortcut menu. The Hardware Update Wizard appears. 5. Follow the on-screen instructions to select the unknown device1 or the device that has a driver problem is identified by a yellow exc lamation mark. Click Start in the next section to reinstall the device driver(s) using the Application Recovery CD(s). 1. Page 50 Click Properties. Right-click to locate the device and reinstall the appropriate device driver...
Online Help Center
Page 51
... to the Windows® desktop. 2. A shortcut menu appears. 4. Click to select the unknown device or the device that requires the driver installation and click Update Driver from the optical drive. 15. The Browse for Include this location in the Windows taskbar, select Turn Off Computer. Click OK to return to cancel the option, Search removable media (floppy, CD-ROM...). 9. Select the device folder, and click Next. The VAIO welcome window appears...
... to the Windows® desktop. 2. A shortcut menu appears. 4. Click to select the unknown device or the device that requires the driver installation and click Update Driver from the optical drive. 15. The Browse for Include this location in the Windows taskbar, select Turn Off Computer. Click OK to return to cancel the option, Search removable media (floppy, CD-ROM...). 9. Select the device folder, and click Next. The VAIO welcome window appears...

Online Help Center
Page 52
To view the specific configuration for your computer. Troubleshooting This section describes how to troubleshoot common problems you may encounter when using Support Resources. Many problems have simple solutions, so try these suggestions before using your computer, see the online specifications sheet. About VAIO Computer Functions About Software About Using the Optical Disc Drive(s) About the Mouse and Keyboard About the Modem About the Speakers About Using a Microphone About Using Peripheral Equipment Page 52
To view the specific configuration for your computer. Troubleshooting This section describes how to troubleshoot common problems you may encounter when using Support Resources. Many problems have simple solutions, so try these suggestions before using your computer, see the online specifications sheet. About VAIO Computer Functions About Software About Using the Optical Disc Drive(s) About the Mouse and Keyboard About the Modem About the Speakers About Using a Microphone About Using Peripheral Equipment Page 52

Online Help Center
Page 60
...), EPP, ECP, and ECP+EPP options using the System Setup utility (CMOS Setup Utility). Use the arrow keys to ECP, EPP, or bi-directional? To access System Setup: 1. You can change the parallel port type to highlight Parallel Port Mode and press Enter. See the online s pec ific ations s heet for details on your c omputer's hardware c onfiguration. Click Start in the Windows taskbar and select Turn Off Computer. Select I/O Device Configuration and press...
...), EPP, ECP, and ECP+EPP options using the System Setup utility (CMOS Setup Utility). Use the arrow keys to ECP, EPP, or bi-directional? To access System Setup: 1. You can change the parallel port type to highlight Parallel Port Mode and press Enter. See the online s pec ific ations s heet for details on your c omputer's hardware c onfiguration. Click Start in the Windows taskbar and select Turn Off Computer. Select I/O Device Configuration and press...

Online Help Center
Page 63
... to compatible digital music devices. Click Start in the Windows taskbar, and click All Programs. 2. How do I create an audio CD with digital music from audio CDs and from the Internet. SonicStage software employs OpenMG copyright protection technology and advanced ATRAC3 audio file format to allow you work with preinstalled Sony software? SonicStage is a digital music management software that enables you to SonicStage, and...
... to compatible digital music devices. Click Start in the Windows taskbar, and click All Programs. 2. How do I create an audio CD with digital music from audio CDs and from the Internet. SonicStage software employs OpenMG copyright protection technology and advanced ATRAC3 audio file format to allow you work with preinstalled Sony software? SonicStage is a digital music management software that enables you to SonicStage, and...

Online Help Center
Page 71
... Properties dialog box appears. 3. Select the Hardware tab and then select the Device Manager button to the desired levels. 5. To improve video resolution, verify that can play the disc. Select Appearance and Themes, then select Change the screen resolution. 3. Change the Screen resolution and Color quality to view installed drivers. Click Start in the Windows taskbar and then select Control Panel. 2. Page 71 Unless a "1" or "ALL...
... Properties dialog box appears. 3. Select the Hardware tab and then select the Device Manager button to the desired levels. 5. To improve video resolution, verify that can play the disc. Select Appearance and Themes, then select Change the screen resolution. 3. Change the Screen resolution and Color quality to view installed drivers. Click Start in the Windows taskbar and then select Control Panel. 2. Page 71 Unless a "1" or "ALL...
Online Help Center
Page 74
... your optical mouse. Page 74 See Reinstalling device drivers using an optical mouse, use an appropriate surface to the socket, and replace the mouse ball cover. Dirt or damage may be dust or dirt inside the mouse ball socket. Return the mouse ball to ensure proper mouse tracking. About the Mouse and Keyboard Why doesn't my mouse work properly? Confirm that the mouse is plugged securely into the appropriate USB port...
... your optical mouse. Page 74 See Reinstalling device drivers using an optical mouse, use an appropriate surface to the socket, and replace the mouse ball cover. Dirt or damage may be dust or dirt inside the mouse ball socket. Return the mouse ball to ensure proper mouse tracking. About the Mouse and Keyboard Why doesn't my mouse work properly? Confirm that the mouse is plugged securely into the appropriate USB port...

Online Help Center
Page 75
... or soil your optical mouse. If you are using a USB mouse, verify that the mouse is plugged securely into the appropriate USB port. Save and close all open applications. About the Mouse and Keyboard Why doesn't my mouse work properly? Confirm that the mouse is plugged securely into your hand. Using a piece of tape, remove any dust or dirt on the mouse ball and inside the mouse mechanism.
... or soil your optical mouse. If you are using a USB mouse, verify that the mouse is plugged securely into the appropriate USB port. Save and close all open applications. About the Mouse and Keyboard Why doesn't my mouse work properly? Confirm that the mouse is plugged securely into your hand. Using a piece of tape, remove any dust or dirt on the mouse ball and inside the mouse mechanism.

Online Help Center
Page 82
..., then select Control Panel. 2. See Reinstalling device drivers using has its own volume control, check that the Mute check box is turned up. Check the volume controls in the Windows® operating system using these steps: 1. Select Sounds, Speech, and Audio Devices, then click Adjust the system volume. If you are connected? How can I use optional headphones instead of the supplied speakers, adjust the volume control dial, located on the...
..., then select Control Panel. 2. See Reinstalling device drivers using has its own volume control, check that the Mute check box is turned up. Check the volume controls in the Windows® operating system using these steps: 1. Select Sounds, Speech, and Audio Devices, then click Adjust the system volume. If you are connected? How can I use optional headphones instead of the supplied speakers, adjust the volume control dial, located on the...

Online Help Center
Page 86
... click Control Panel. 2. Refer to the manual that came with installation. Select Local Printer, then click Next. Select the appropriate printer manufacturer and model. 7. Page 86 About Using Peripheral Equipment How do not function properly without the updated drivers for specific operating systems. To install your computer's front, back or side panels1. If your printer has a USB, IEEE 1394, or infrared connection...
... click Control Panel. 2. Refer to the manual that came with installation. Select Local Printer, then click Next. Select the appropriate printer manufacturer and model. 7. Page 86 About Using Peripheral Equipment How do not function properly without the updated drivers for specific operating systems. To install your computer's front, back or side panels1. If your printer has a USB, IEEE 1394, or infrared connection...
Online Help Center
Page 87
... or updates that your printer may emulate. Click Printers and Other Hardware, then click Add a Printer. 3. From the Add Printer Wizard, click Next. 4. Click Start in the list and the printer manufacturer included a disk with Plug and Play capability. 5. Follow the on-screen instructions to the appropriate port on the list and no drivers are installing a recently manufactured printer with a Windows XP Printer driver, choose Have Disk, enter...
... or updates that your printer may emulate. Click Printers and Other Hardware, then click Add a Printer. 3. From the Add Printer Wizard, click Next. 4. Click Start in the list and the printer manufacturer included a disk with Plug and Play capability. 5. Follow the on-screen instructions to the appropriate port on the list and no drivers are installing a recently manufactured printer with a Windows XP Printer driver, choose Have Disk, enter...
Online Help Center
Page 90
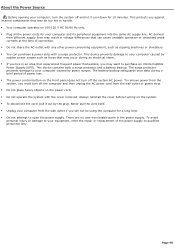
...Plug all the power cords for 10 minutes. There are no user-serviceable parts in voltage differences that may want to handle. Your computer operates on the system. To disconnect the cord, pull it cool down for your equipment, refer the repair or replacement of connection. Do not share the AC outlet with the cover removed. This device... AC supply line. The battery backup safeguards your computer from the wall outlet or power strip. Do not place heavy objects on the front panel does not turn off the computer and then unplug the AC power cord ...
...Plug all the power cords for 10 minutes. There are no user-serviceable parts in voltage differences that may want to handle. Your computer operates on the system. To disconnect the cord, pull it cool down for your equipment, refer the repair or replacement of connection. Do not share the AC outlet with the cover removed. This device... AC supply line. The battery backup safeguards your computer from the wall outlet or power strip. Do not place heavy objects on the front panel does not turn off the computer and then unplug the AC power cord ...

Online Help Center
Page 99
... Windows® taskbar, then click VAIO Help and Support. 2. From the VAIO Help and Support Center menu, click VAIO User Guide. 3. Click the Welcome link. Click Start in the text, "View the VAIO® Computer Specifications..." 4. From the menu bar, click Help. In these support options: VAIO® Computer Quick Start - The Quick Start can also provide troubleshooting support, if problems occur. VAIO® Computer User Guide - Preinstalled software Help files - To access the online manual: 1. Locate...
... Windows® taskbar, then click VAIO Help and Support. 2. From the VAIO Help and Support Center menu, click VAIO User Guide. 3. Click the Welcome link. Click Start in the text, "View the VAIO® Computer Specifications..." 4. From the menu bar, click Help. In these support options: VAIO® Computer Quick Start - The Quick Start can also provide troubleshooting support, if problems occur. VAIO® Computer User Guide - Preinstalled software Help files - To access the online manual: 1. Locate...


