α Handbook
Page 34
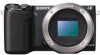
...LCD screen. Main Settings Menu start Function Menu Settings MOVIE Button Custom Key Settings Touch Operation (NEX-5R only) Beep Language Date/Time Setup Area Setting Help Guide Display Power Save Power Saving Start Time LCD Brightness Viewfinder Bright. Display Color Wide Image Playback ...Display HDMI Resolution CTRL FOR HDMI USB Connection Cleaning Mode Calibration (NEX-5R only) Version Demo Mode Initialize Memory Card ...
...LCD screen. Main Settings Menu start Function Menu Settings MOVIE Button Custom Key Settings Touch Operation (NEX-5R only) Beep Language Date/Time Setup Area Setting Help Guide Display Power Save Power Saving Start Time LCD Brightness Viewfinder Bright. Display Color Wide Image Playback ...Display HDMI Resolution CTRL FOR HDMI USB Connection Cleaning Mode Calibration (NEX-5R only) Version Demo Mode Initialize Memory Card ...
α Handbook
Page 36
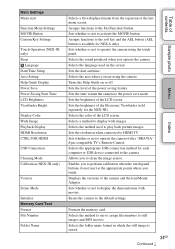
... conditions and allows you to the situation, and adjusts the settings. 1 Adjust the LCD screen angle, and hold the camera (NEX-6 only). Or look through the viewfinder and hold the camera. To record movies, press the MOVIE button to stop recording. Notes...Night Portrait), (Backlight), (Backlight Portrait), (Portrait), (Landscape), (Macro), (Spotlight), (Low Brightness), or (Baby), and displays the corresponding icon and guide on the LCD screen when the scene is automatically trimmed into a suitable composition. The Scene Recognition function begins to work. 2 To take still images, ...
... conditions and allows you to the situation, and adjusts the settings. 1 Adjust the LCD screen angle, and hold the camera (NEX-6 only). Or look through the viewfinder and hold the camera. To record movies, press the MOVIE button to stop recording. Notes...Night Portrait), (Backlight), (Backlight Portrait), (Portrait), (Landscape), (Macro), (Spotlight), (Low Brightness), or (Baby), and displays the corresponding icon and guide on the LCD screen when the scene is automatically trimmed into a suitable composition. The Scene Recognition function begins to work. 2 To take still images, ...
α Handbook
Page 90
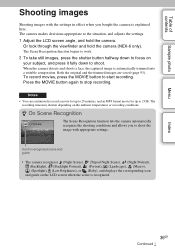
The face may not be registered correctly if it is set to 8, select it using the control wheel (NEX-5R only). To delete the data for registered face will remain in the camera. The smaller the number of faces previously registered. Delete Deletes ... Faces)]. 1 MENU t [Camera] t [Face Registration] t desired mode. Select a face and press OK. New Registration 1 MENU t [Camera] t [Face Registration] t [New Registration]. 2 Align the guide frame with the face to 8 faces can detect the registered face as a priority when [Face Detection] is obscured by touching the screen. If you want...
The face may not be registered correctly if it is set to 8, select it using the control wheel (NEX-5R only). To delete the data for registered face will remain in the camera. The smaller the number of faces previously registered. Delete Deletes ... Faces)]. 1 MENU t [Camera] t [Face Registration] t desired mode. Select a face and press OK. New Registration 1 MENU t [Camera] t [Face Registration] t [New Registration]. 2 Align the guide frame with the face to 8 faces can detect the registered face as a priority when [Face Detection] is obscured by touching the screen. If you want...

α Handbook
Page 171
On Displays the help guide. Off Does not display the help guide. Table of contents Help Guide Display You can set whether to display the help guide when you operate the camera. 1 MENU t [Setup] t [Help Guide Display] t desired setting. Sample photo Menu Index 171GB
On Displays the help guide. Off Does not display the help guide. Table of contents Help Guide Display You can set whether to display the help guide when you operate the camera. 1 MENU t [Setup] t [Help Guide Display] t desired setting. Sample photo Menu Index 171GB

α Handbook
Page 208
... on the screen. • When the restarting confirmation message appears, restart the computer following software is complete. "Image Data Converter" "PlayMemories Home" "PlayMemories Home Help Guide" Notes • If "PMB" (Picture Motion Browser) supplied with the installation. 2 Connect the camera to the computer (page 211). 3 Click [Install]. Installing the software (Mac...
... on the screen. • When the restarting confirmation message appears, restart the computer following software is complete. "Image Data Converter" "PlayMemories Home" "PlayMemories Home Help Guide" Notes • If "PMB" (Picture Motion Browser) supplied with the installation. 2 Connect the camera to the computer (page 211). 3 Click [Install]. Installing the software (Mac...
α Handbook
Page 210
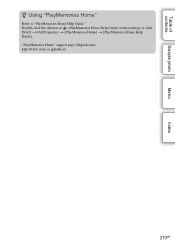
Table of (PlayMemories Home Help Guide) on the desktop, or click [Start] t [All Programs] t [PlayMemories Home] t [PlayMemories Home Help Guide]. "PlayMemories Home" support page (English only) http://www.sony.co.jp/pmh-se/ 210GB Double-click the shortcut of contents Sample photo Menu Index z Using "PlayMemories Home" Refer to "PlayMemories Home Help Guide."
Table of (PlayMemories Home Help Guide) on the desktop, or click [Start] t [All Programs] t [PlayMemories Home] t [PlayMemories Home Help Guide]. "PlayMemories Home" support page (English only) http://www.sony.co.jp/pmh-se/ 210GB Double-click the shortcut of contents Sample photo Menu Index z Using "PlayMemories Home" Refer to "PlayMemories Home Help Guide."
α Handbook
Page 211
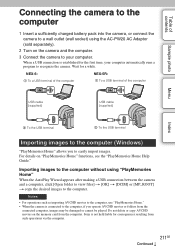
Wait for consequences resulting from such operations via the computer. 211GB Continued r Sony is not held liable for a while. Notes • For operations such as importing AVCHD movies to the computer, use "PlayMemories Home." • When the ... may be damaged or cannot be played. For details on "PlayMemories Home" functions, see the "PlayMemories Home Help Guide." When a USB connection is connected to the computer, if you to easily import images. NEX-6: NEX-5R: 1 To a USB terminal of the computer 1 To a USB terminal of contents Sample photo Connecting the camera to ...
Wait for consequences resulting from such operations via the computer. 211GB Continued r Sony is not held liable for a while. Notes • For operations such as importing AVCHD movies to the computer, use "PlayMemories Home." • When the ... may be damaged or cannot be played. For details on "PlayMemories Home" functions, see the "PlayMemories Home Help Guide." When a USB connection is connected to the computer, if you to easily import images. NEX-6: NEX-5R: 1 To a USB terminal of the computer 1 To a USB terminal of contents Sample photo Connecting the camera to ...
α Handbook
Page 215
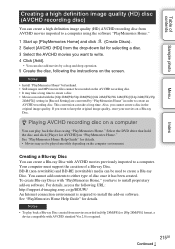
... by a drag and drop operation. 5 Create the disc, following URL: http://support.d-imaging.sony.co.jp/BDUW/ An Internet connection environment is required. 215GB Continued r See "PlayMemories Home Help Guide" for selecting a disc. 3 Select the AVCHD movies you want to keep the original image... using "PlayMemories Home." This conversion can also add movies by "PlayMemories Home" in order to a computer. See "PlayMemories Home Help Guide" for AVCHD] on the computer environment. For details, access the following the instructions on software. Notes • To play back the...
... by a drag and drop operation. 5 Create the disc, following URL: http://support.d-imaging.sony.co.jp/BDUW/ An Internet connection environment is required. 215GB Continued r See "PlayMemories Home Help Guide" for selecting a disc. 3 Select the AVCHD movies you want to keep the original image... using "PlayMemories Home." This conversion can also add movies by "PlayMemories Home" in order to a computer. See "PlayMemories Home Help Guide" for AVCHD] on the computer environment. For details, access the following the instructions on software. Notes • To play back the...
α Handbook
Page 217
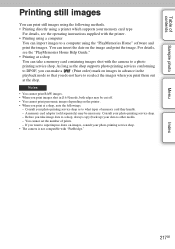
... can make a (Print order) mark on images, consult your photo printing service shop. - Consult your memory card type For details, see the "PlayMemories Home Help Guide." • Printing at a shop, note the followings. - A memory card adaptor (sold separately) may be necessary. Consult your photo printing service shop. • The camera is...
... can make a (Print order) mark on images, consult your photo printing service shop. - Consult your memory card type For details, see the "PlayMemories Home Help Guide." • Printing at a shop, note the followings. - A memory card adaptor (sold separately) may be necessary. Consult your photo printing service shop. • The camera is...

α Handbook
Page 226
... computer. • Connect the camera directly to your camera. Cannot record on a computer. • You are using "PlayMemories Home," refer to the "PlayMemories Home Help Guide." • Consult the computer or software manufacturer. Formatted the memory card by mistake. • All the data on . • When the battery level is compatible...
... computer. • Connect the camera directly to your camera. Cannot record on a computer. • You are using "PlayMemories Home," refer to the "PlayMemories Home Help Guide." • Consult the computer or software manufacturer. Formatted the memory card by mistake. • All the data on . • When the battery level is compatible...

α Handbook
Page 235
... for communicating information related to your camera, and displays the remaining battery time in low temperature environments. So in extremely hot places, such as a rough guide only. "Battery exhausted." The "InfoLITHIUM" battery pack calculates the power consumption according to warm it up, and insert it . On charging the battery pack We...
... for communicating information related to your camera, and displays the remaining battery time in low temperature environments. So in extremely hot places, such as a rough guide only. "Battery exhausted." The "InfoLITHIUM" battery pack calculates the power consumption according to warm it up, and insert it . On charging the battery pack We...

α Handbook
Page 244
... 62 Folder Name 189 Format 187 Front Curtain Shutter 149 Function Menu Settings 161 G Grid Line 136 H Hand-held Twilight 69 HDMI Resolution 179 Help Guide Display 171 High ISO NR 151 I Icons 20 Identifying parts 13 Image Data Converter 209 Image Index 61, 124 Image Size 98 "InfoLITHIUM" battery pack...
... 62 Folder Name 189 Format 187 Front Curtain Shutter 149 Function Menu Settings 161 G Grid Line 136 H Hand-held Twilight 69 HDMI Resolution 179 Help Guide Display 171 High ISO NR 151 I Icons 20 Identifying parts 13 Image Data Converter 209 Image Index 61, 124 Image Size 98 "InfoLITHIUM" battery pack...

Instruction Manual
Page 8
... 28 Mastering the basic operation Shooting still images 30 Recording movies 32 Playing back images 33 Deleting images 35 Operating the camera 36 Using the guide function of the camera 40 Using the recording functions Setting the function using [Photo Creativity 41 Adjusting the brightness of still images (Exposure compensation 44...
... 28 Mastering the basic operation Shooting still images 30 Recording movies 32 Playing back images 33 Deleting images 35 Operating the camera 36 Using the guide function of the camera 40 Using the recording functions Setting the function using [Photo Creativity 41 Adjusting the brightness of still images (Exposure compensation 44...

Instruction Manual
Page 29
... date and time setting This camera has an internal rechargeable battery for more details (page 73). Preparing the camera 5 Repeat step 4 to "PlayMemories Home Help Guide" for maintaining the date and time and other items, and then press the center of whether the power is on the CD-ROM (supplied), you...
... date and time setting This camera has an internal rechargeable battery for more details (page 73). Preparing the camera 5 Repeat step 4 to "PlayMemories Home Help Guide" for maintaining the date and time and other items, and then press the center of whether the power is on the CD-ROM (supplied), you...

Instruction Manual
Page 30
... when the magnification scale is greater than that of the optical zoom (page 53). When the camera recognizes the scene, the Scene Recognition icon and guide appear on the LCD screen: (Night Scene), (Tripod Night Scene), (Night Portrait), (Backlight), (Backlight Scene Recognition icon and...
... when the magnification scale is greater than that of the optical zoom (page 53). When the camera recognizes the scene, the Scene Recognition icon and guide appear on the LCD screen: (Night Scene), (Tripod Night Scene), (Night Portrait), (Backlight), (Backlight Scene Recognition icon and...

Instruction Manual
Page 40
... panel: - Using a pointed object, such as a pencil, ball-point pen, or the tip of the camera The camera provides various "Help Guides" which explain the functions, and "Shooting tips" which introduce tips for better shooting from [Table of contents] by selecting MENU t [Setup] t [Help... Guide Display] t [Off]. GB 40 Use these guides to explain the selected function, when you change the setting, etc. x Help Guides The camera displays the Help Guides to make better use of the camera. Tips] to the soft key B. However...
... panel: - Using a pointed object, such as a pencil, ball-point pen, or the tip of the camera The camera provides various "Help Guides" which explain the functions, and "Shooting tips" which introduce tips for better shooting from [Table of contents] by selecting MENU t [Setup] t [Help... Guide Display] t [Off]. GB 40 Use these guides to explain the selected function, when you change the setting, etc. x Help Guides The camera displays the Help Guides to make better use of the camera. Tips] to the soft key B. However...

Instruction Manual
Page 46
No Disp. Histogram: Displays the luminance distribution graphically. Level: Displays an indicator guide showing the angle of inclination of the camera to recording information. For viewfinder: Shows only shooting information on the control wheel. 2 Press DISP repeatedly to [...
No Disp. Histogram: Displays the luminance distribution graphically. Level: Displays an indicator guide showing the angle of inclination of the camera to recording information. For viewfinder: Shows only shooting information on the control wheel. 2 Press DISP repeatedly to [...

Instruction Manual
Page 67
Help Guide Display Power Save Power Saving Start Time LCD Brightness Viewfinder Bright. Sets whether or not to display the demonstration with a "BRAVIA" Sync-compliant TV's Remote ... the lens. Display Color Wide Image Playback Display HDMI Resolution CTRL FOR HDMI USB Connection Cleaning Mode Calibration Version Demo Mode Initialize Turns the Help Guide on or off. (On/Off) Sets the level of the power saving feature. (Max/Standard) Sets the time to turn the camera to the camera...
Help Guide Display Power Save Power Saving Start Time LCD Brightness Viewfinder Bright. Sets whether or not to display the demonstration with a "BRAVIA" Sync-compliant TV's Remote ... the lens. Display Color Wide Image Playback Display HDMI Resolution CTRL FOR HDMI USB Connection Cleaning Mode Calibration Version Demo Mode Initialize Turns the Help Guide on or off. (On/Off) Sets the level of the power saving feature. (Max/Standard) Sets the time to turn the camera to the camera...

Instruction Manual
Page 72
... the screen. • When the restarting confirmation message appears, restart the computer following computer environment is recommended. "Image Data Converter" "PlayMemories Home" "PlayMemories Home Help Guide" x Mac The following the instructions on the screen. • DirectX may be installed depending on the system environment of your computer. 4 Remove the CD-ROM...
... the screen. • When the restarting confirmation message appears, restart the computer following computer environment is recommended. "Image Data Converter" "PlayMemories Home" "PlayMemories Home Help Guide" x Mac The following the instructions on the screen. • DirectX may be installed depending on the system environment of your computer. 4 Remove the CD-ROM...

Instruction Manual
Page 73
...-ray Disc/DVD disc is created for the first time.) For details on the desktop, or click [Start] t [All Programs] t [PlayMemories Home] t [PlayMemories Home Help Guide]. "PlayMemories Home" support page (English only) http://www.sony.co.jp/pmh-se/ GB 73 Importing images to "PlayMemories Home Help...
...-ray Disc/DVD disc is created for the first time.) For details on the desktop, or click [Start] t [All Programs] t [PlayMemories Home] t [PlayMemories Home Help Guide]. "PlayMemories Home" support page (English only) http://www.sony.co.jp/pmh-se/ GB 73 Importing images to "PlayMemories Home Help...

