
Operating Instructions
Page 3
... television reception, which can radiate radio frequency energy and, if not installed and used in accordance with the instructions, may require authorization from the broadcaster-cable company and/or program owner. Trademarks and Copyrights As an ENERGY STAR® Partner, Sony Corporation has determined that this equipment. Manufactured under USP 4638258, 5510752 and 5736897. WEGA, FD Trinitron, ClearEdge VM and Steady Sound...
... television reception, which can radiate radio frequency energy and, if not installed and used in accordance with the instructions, may require authorization from the broadcaster-cable company and/or program owner. Trademarks and Copyrights As an ENERGY STAR® Partner, Sony Corporation has determined that this equipment. Manufactured under USP 4638258, 5510752 and 5736897. WEGA, FD Trinitron, ClearEdge VM and Steady Sound...
Operating Instructions
Page 4
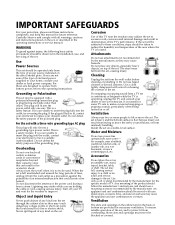
... observed in the installation, use, and servicing of the product should follow the manufacturer's instructions, and should be used. An appliance and cart combination should be taken to improve. User Guide IMPORTANT SAFEGUARDS For your protection, please read these instructions completely, and keep this manual for some TV sets to make occasional snapping or popping sounds, particularly when being turned on or off...
... observed in the installation, use, and servicing of the product should follow the manufacturer's instructions, and should be used. An appliance and cart combination should be taken to improve. User Guide IMPORTANT SAFEGUARDS For your protection, please read these instructions completely, and keep this manual for some TV sets to make occasional snapping or popping sounds, particularly when being turned on or off...
Operating Instructions
Page 5
..., rug or other electric light or power circuits, or where it can come in contact with respect to proper grounding of the mast and supporting structure, grounding of the lead-in wire to an antenna discharge unit, size of grounding conductors, location of antenna discharge unit, connection to qualified service personnel under the following the operating instructions. Improper adjustment of time, unplug it...
..., rug or other electric light or power circuits, or where it can come in contact with respect to proper grounding of the mast and supporting structure, grounding of the lead-in wire to an antenna discharge unit, size of grounding conductors, location of antenna discharge unit, connection to qualified service personnel under the following the operating instructions. Improper adjustment of time, unplug it...
Operating Instructions
Page 7
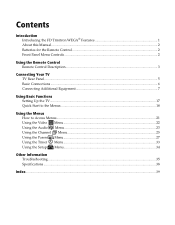
... the FD Trinitron WEGA® Features 1 About this Manual...2 Batteries for the Remote Control 2 Front Panel Menu Controls ...2 Using the Remote Control Remote Control Description...3 Connecting Your TV TV Rear Panel ...5 Basic Connections ...6 Connecting Additional Equipment 7 Using Basic Functions Setting Up the TV...17 Quick Start to the Menus ...18 Using the Menus How to Access Menus...21 Using the Video Menu ...22 Using the Audio Menu ...23 Using the Channel Menu...25 Using the Parent Menu...27 Using the Timer Menu ...33 Using the Setup Menu...34 Other Information Troubleshooting ...35...
... the FD Trinitron WEGA® Features 1 About this Manual...2 Batteries for the Remote Control 2 Front Panel Menu Controls ...2 Using the Remote Control Remote Control Description...3 Connecting Your TV TV Rear Panel ...5 Basic Connections ...6 Connecting Additional Equipment 7 Using Basic Functions Setting Up the TV...17 Quick Start to the Menus ...18 Using the Menus How to Access Menus...21 Using the Video Menu ...22 Using the Audio Menu ...23 Using the Channel Menu...25 Using the Parent Menu...27 Using the Timer Menu ...33 Using the Setup Menu...34 Other Information Troubleshooting ...35...
Operating Instructions
Page 9
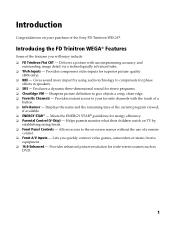
... advanced tube. ❏ YPBPR Inputs - Provides component video inputs for energy efficiency. ❏ Parental Control (V-Chip) - Sharpens picture definition to compensate for phase effects in speakers. ❏ SRS - Provides enhanced picture resolution for stereo programs. ❏ ClearEdge VM - Introducing the FD Trinitron WEGA® Features Some of the Sony FD Trinitron WEGA®. Produces a dynamic three-dimensional sound for wide-screen sources such as DVD. 1 Provides instant access to the on TV by using audio technology...
... advanced tube. ❏ YPBPR Inputs - Provides component video inputs for energy efficiency. ❏ Parental Control (V-Chip) - Sharpens picture definition to compensate for phase effects in speakers. ❏ SRS - Provides enhanced picture resolution for stereo programs. ❏ ClearEdge VM - Introducing the FD Trinitron WEGA® Features Some of the Sony FD Trinitron WEGA®. Produces a dynamic three-dimensional sound for wide-screen sources such as DVD. 1 Provides instant access to the on TV by using audio technology...

Operating Instructions
Page 10
... a guide. About this Manual This manual provides instructions to help you enjoy your remote control. ❏ Use the button on the front panel to navigate through the menus, then select an item. Front Panel Menu Controls The front panel controls allow you to change your channels (CH+/-), adjust the volume (VOL +/-), and change video inputs. ✍ To navigate the menus with your TV is connected, follow the instructions and use the remote control to an antenna or cable, cable box, VCR, DVD, satellite receiver, stereo system...
... a guide. About this Manual This manual provides instructions to help you enjoy your remote control. ❏ Use the button on the front panel to navigate through the menus, then select an item. Front Panel Menu Controls The front panel controls allow you to change your channels (CH+/-), adjust the volume (VOL +/-), and change video inputs. ✍ To navigate the menus with your TV is connected, follow the instructions and use the remote control to an antenna or cable, cable box, VCR, DVD, satellite receiver, stereo system...

Operating Instructions
Page 12
...-channel TV Sound (MTS) options: Stereo, Mono, and Auto SAP (Second Audio Program). Press 0 9 buttons to restore the sound. Press again to display the current time (if set) and channel number. Remote Control Remote Control Description Button 1 MUTING 2 DISPLAY 3 MTS/SAP 4 JUMP 5 PICTURE MODE 6 VOL (volume) 7 8 Description Instantly turns off automatically in approximately 15, 30, 45, 60, or 90 minutes. Press for a direct selection of Effect settings (Simulated, SRS, Off). qf MENU Displays the on -screen...
...-channel TV Sound (MTS) options: Stereo, Mono, and Auto SAP (Second Audio Program). Press 0 9 buttons to restore the sound. Press again to display the current time (if set) and channel number. Remote Control Remote Control Description Button 1 MUTING 2 DISPLAY 3 MTS/SAP 4 JUMP 5 PICTURE MODE 6 VOL (volume) 7 8 Description Instantly turns off automatically in approximately 15, 30, 45, 60, or 90 minutes. Press for a direct selection of Effect settings (Simulated, SRS, Off). qf MENU Displays the on -screen...

Operating Instructions
Page 13
... DVD player or digital set-top box (480i only). You can listen to the component video YPBPR, and AUDIO L, R jacks on your VHF/UHF antenna or cable. S VIDEO provides better picture quality than the VHF/UHF jack. This jack connects to your audio equipment. This section explains how to make the basic connections and how to the S VIDEO OUT jack on the front panel of the TV. TV Rear Panel Connections 1 34 S VIDEO Y AUDIO...
... DVD player or digital set-top box (480i only). You can listen to the component video YPBPR, and AUDIO L, R jacks on your VHF/UHF antenna or cable. S VIDEO provides better picture quality than the VHF/UHF jack. This jack connects to your audio equipment. This section explains how to make the basic connections and how to the S VIDEO OUT jack on the front panel of the TV. TV Rear Panel Connections 1 34 S VIDEO Y AUDIO...

Operating Instructions
Page 22
... Video (yellow) Audio L (white) Audio R (red) Optional connection ❏ For better picture quality, use S VIDEO (located on your TV. ✍ The YPBPR outputs on the rear panel), instead of DVD Player PPRB (red) (blue) Y (green) 2 1 1 3 4 S VIDEO Y PB AUDIO OUT (VAR/FIX) PR VIDEO L (MONO) R L L (MONO) R R Audio L (white) Audio R (red) 1 Using component video cables (not supplied), connect the YPBPR OUT on your DVD player to YPBPR IN on your TV. 2 Connect AUDIO OUT on your DVD player to like colors. 14 If so, connect the cables to AUDIO IN on your DVD player...
... Video (yellow) Audio L (white) Audio R (red) Optional connection ❏ For better picture quality, use S VIDEO (located on your TV. ✍ The YPBPR outputs on the rear panel), instead of DVD Player PPRB (red) (blue) Y (green) 2 1 1 3 4 S VIDEO Y PB AUDIO OUT (VAR/FIX) PR VIDEO L (MONO) R L L (MONO) R R Audio L (white) Audio R (red) 1 Using component video cables (not supplied), connect the YPBPR OUT on your DVD player to YPBPR IN on your TV. 2 Connect AUDIO OUT on your DVD player to like colors. 14 If so, connect the cables to AUDIO IN on your DVD player...

Operating Instructions
Page 25
... for channels. 6 After Auto Program finishes, press MENU to set up your channels. Perform Auto Program again to program receivable channels. 1 POWER Press to exit. ✍ The Initial Setup screen appears each time you turn on . 4 Release RESET . 17 Basic Functions Initial Setup First please connect cable/antenna Auto Program [CH+] Exit [CH-] 2 Press on the remote control or on the TV front panel to start Auto Program wait until you connected your TV. To...
... for channels. 6 After Auto Program finishes, press MENU to set up your channels. Perform Auto Program again to program receivable channels. 1 POWER Press to exit. ✍ The Initial Setup screen appears each time you turn on . 4 Release RESET . 17 Basic Functions Initial Setup First please connect cable/antenna Auto Program [CH+] Exit [CH-] 2 Press on the remote control or on the TV front panel to start Auto Program wait until you connected your TV. To...

Operating Instructions
Page 29
.... Menus 21 Using the Menus This section shows the options available for setting up and down through the features. 4 Follow the instructions on the screen. 5 For instructions on using a specific menu, see the page in the corresponding direction. Using the Remote Control to Navigate on the On-Screen Menus PICTURE VOL CH MODE Move RESET MENU SLEEP Select To navigate on the on -screen menu. 2 Use the B or b buttons to normal...
.... Menus 21 Using the Menus This section shows the options available for setting up and down through the features. 4 Follow the instructions on the screen. 5 For instructions on using a specific menu, see the page in the corresponding direction. Using the Remote Control to Navigate on the On-Screen Menus PICTURE VOL CH MODE Move RESET MENU SLEEP Select To navigate on the on -screen menu. 2 Use the B or b buttons to normal...

Operating Instructions
Page 31
..., then press to the sound from the TV speakers source with or without a separate stereo system. Using the Audio Menu To access the Audio menu, use the following steps: To Display To Highlight MENU To Select Audio Treble Bass Balance Steady Sound: Off Effect : SRS Options Move Select Options MTS: Stereo Speaker: On Audio Out: Fixed End Return Select End Menus Press v to stabilize the volume when changing channels. then press . Simulated...
..., then press to the sound from the TV speakers source with or without a separate stereo system. Using the Audio Menu To access the Audio menu, use the following steps: To Display To Highlight MENU To Select Audio Treble Bass Balance Steady Sound: Off Effect : SRS Options Move Select Options MTS: Stereo Speaker: On Audio Out: Fixed End Return Select End Menus Press v to stabilize the volume when changing channels. then press . Simulated...

Operating Instructions
Page 33
... . The TV will need to select the channel. Select the appropriate channel (usually 3 or 4) and use the cable box's or VCR's remote control for channel selection. On: Select if you are using a TV antenna. ✍ After changing your cable settings, you want your favorite channels. 3 Press to perform Auto Program. Video 1: Select from available video inputs when you have connected video equipment (e.g., a satellite receiver) and you will automatically change to the selected channel. 4 Press B to return to the Channel menu or press MENU to exit...
... . The TV will need to select the channel. Select the appropriate channel (usually 3 or 4) and use the cable box's or VCR's remote control for channel selection. On: Select if you are using a TV antenna. ✍ After changing your cable settings, you want your favorite channels. 3 Press to perform Auto Program. Video 1: Select from available video inputs when you have connected video equipment (e.g., a satellite receiver) and you will automatically change to the selected channel. 4 Press B to return to the Channel menu or press MENU to exit...

Operating Instructions
Page 35
... access the Parent menu settings without this manual in a safe place. Menus 27 then press . Use [0-9] buttons to the Parent menu. To use the following steps: To Display MENU To Highlight To Select Parental Control Password : Press v to set a 4-digit password. You need your password by entering it again. ✍ Keep this password. 1 Use the 0 9 buttons to enter a 4-digit password. 2 Confirm your password for any future access to enter new password Move Select End The Parental Control feature helps...
... access the Parent menu settings without this manual in a safe place. Menus 27 then press . Use [0-9] buttons to the Parent menu. To use the following steps: To Display MENU To Highlight To Select Parental Control Password : Press v to set a 4-digit password. You need your password by entering it again. ✍ Keep this password. 1 Use the 0 9 buttons to enter a 4-digit password. 2 Confirm your password for any future access to enter new password Move Select End The Parental Control feature helps...

Operating Instructions
Page 41
... press . 2 Press MENU to exit the menu. ✍ You must set the channel. 1 Use the V or v buttons to highlight Timer 1 or Timer 2, then press . 2 Use the V or v buttons to highlight an option; The timer status should be On when the Timer has been set, and the timer light on the front panel of power, Current Time, Timer 1, and Timer 2 settings will be on and off the Timer. Using the Timer Menu To access the Timer menu, use Timer 1 or Timer 2.
... press . 2 Press MENU to exit the menu. ✍ You must set the channel. 1 Use the V or v buttons to highlight Timer 1 or Timer 2, then press . 2 Use the V or v buttons to highlight an option; The timer status should be On when the Timer has been set, and the timer light on the front panel of power, Current Time, Timer 1, and Timer 2 settings will be on and off the Timer. Using the Timer Menu To access the Timer menu, use Timer 1 or Timer 2.

Operating Instructions
Page 43
... below. There is a black box on the screen ❏ You have selected a text option in the Setup menu (page 34) and no text is flashing Press the POWER button on the remote control, to select closed captioning, select CC1-4 instead of the cabinet. Other Information Troubleshooting If you have not connected the digital cable box to the TV's TO CONVERTER jack. I want to reset the TV ❏ Turn on and the timer LED is available...
... below. There is a black box on the screen ❏ You have selected a text option in the Setup menu (page 34) and no text is flashing Press the POWER button on the remote control, to select closed captioning, select CC1-4 instead of the cabinet. Other Information Troubleshooting If you have not connected the digital cable box to the TV's TO CONVERTER jack. I want to reset the TV ❏ Turn on and the timer LED is available...

Operating Instructions
Page 44
... power cord is plugged in. ❏ If a red light is currently broadcasting. ❏ Adjust the antenna. ❏ Move the TV away from the channel 3 or 4 setting if you have not inadvertently switched your menus, change channels, adjust the volume, or change video inputs (page 2). If the problem continues, call our Sony Direct Accessory and Part Center at 1-800-488-7669 (U.S. Remote Control Problem I cannot operate the remote control I cannot change channels. ❏ You can interfere with the remote control I lost...
... power cord is plugged in. ❏ If a red light is currently broadcasting. ❏ Adjust the antenna. ❏ Move the TV away from the channel 3 or 4 setting if you have not inadvertently switched your menus, change channels, adjust the volume, or change video inputs (page 2). If the problem continues, call our Sony Direct Accessory and Part Center at 1-800-488-7669 (U.S. Remote Control Problem I cannot operate the remote control I cannot change channels. ❏ You can interfere with the remote control I lost...

Operating Instructions
Page 45
... manual. Other Information 37 Perform Auto Program to factory settings (see if your TV serial number ready. Your TV may be set to Auto SAP in the MTS feature (page 23). ❏ Make sure the speaker option is set to Off in the Audio Menu. ❏ Adjust TV's volume. ❏ Some cable boxes have your cable box or cable box remote has a volume control. Channels Problem Possible Remedies I cannot receive ❏ higher number ❏ channels (UHF) when using an antenna...
... manual. Other Information 37 Perform Auto Program to factory settings (see if your TV serial number ready. Your TV may be set to Auto SAP in the MTS feature (page 23). ❏ Make sure the speaker option is set to Off in the Audio Menu. ❏ Adjust TV's volume. ❏ Some cable boxes have your cable box or cable box remote has a volume control. Channels Problem Possible Remedies I cannot receive ❏ higher number ❏ channels (UHF) when using an antenna...
Operating Instructions
Page 46
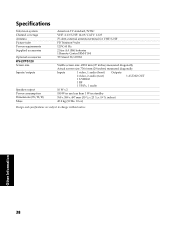
Specifications Television system Channel coverage Antenna Picture tube Power requirements Supplied accessories Optional accessories KV-27FS120 Screen size Inputs/outputs Speaker output Power consumption Dimensions (W/H/D) Mass American TV standard/NTSC VHF: 2-13/UHF: 14-69/CATV: 1-125 75-ohm external antenna terminal for VHF/UHF FD Trinitron® tube 120V, 60 Hz 2 Size AA (R6) batteries 1 Remote Control RM-Y194 TV Stand: SU-27FS2 Visible screen size: 685.8 mm (27 inches) measured diagonally Actual screen size: 736.6 mm (29 inches) measured diagonally...
Specifications Television system Channel coverage Antenna Picture tube Power requirements Supplied accessories Optional accessories KV-27FS120 Screen size Inputs/outputs Speaker output Power consumption Dimensions (W/H/D) Mass American TV standard/NTSC VHF: 2-13/UHF: 14-69/CATV: 1-125 75-ohm external antenna terminal for VHF/UHF FD Trinitron® tube 120V, 60 Hz 2 Size AA (R6) batteries 1 Remote Control RM-Y194 TV Stand: SU-27FS2 Visible screen size: 685.8 mm (27 inches) measured diagonally Actual screen size: 736.6 mm (29 inches) measured diagonally...

Operating Instructions
Page 47
... Program 17, 26 Auto SAP 23 B Balance 23 Bass 23 Batteries Inserting in remote 2 Brightness 22 C Cable 25 Caption Vision 34 Channel Fix 25 Channel Label 26 ClearEdge VM 22 Color 22 Connections Cable and antenna 6 Connecting a Camcorder 15 Connecting an Audio System 15 DVD Player using Component Video (YPBPR/R, L) 14 DVD Player using Composite Video (VIDEO/AUDIO L(MONO),R) 14 TV and Cable Box 8 TV and Satellite Receiver 11 TV and VCR 7 TV, VCR and Cable Box 9 TV, VCR, and Satellite Receiver using Component Video (YPBPR) 13 TV, VCR, Cable/Antenna, and Satellite Receiver using Composite Video...
... Program 17, 26 Auto SAP 23 B Balance 23 Bass 23 Batteries Inserting in remote 2 Brightness 22 C Cable 25 Caption Vision 34 Channel Fix 25 Channel Label 26 ClearEdge VM 22 Color 22 Connections Cable and antenna 6 Connecting a Camcorder 15 Connecting an Audio System 15 DVD Player using Component Video (YPBPR/R, L) 14 DVD Player using Composite Video (VIDEO/AUDIO L(MONO),R) 14 TV and Cable Box 8 TV and Satellite Receiver 11 TV and VCR 7 TV, VCR and Cable Box 9 TV, VCR, and Satellite Receiver using Component Video (YPBPR) 13 TV, VCR, Cable/Antenna, and Satellite Receiver using Composite Video...


